I melt for this pasta. I always have.
As a kid I grew up on heavy, roux laden Fettuccini Alfredo. It was the rigor of the day and it was served everywhere and with everything mixed into the noodles, from shrimp to broccoli. Unfortunately, and even though it was a childhood favorite, cream based pastas in the Midwest were bad, no, they were awful.
Fettucini Alfredo in the Midwest became a Parmesan cream with noodles. Sometimes more soup then pasta. The Italian heritage of the dish suddenly was nowhere to be found. Alfredo in Italy is simply a pasta of butter and Parmesan cheese much like carbonara but without using egg yolks as an emulsifier. When the noodles are hot out of the cooking water butter and parmesan are tossed with the pasta and melt into a beautiful, silky coat for each noodle. Fettuccini Alfredo in its Italian form has nothing to do with buckets of cream reduced or thickened with a flour and butter roux.
In the same breath, Carbonara had its day too but it also comes with its own set of problems. Eggs used to enrich the bacon lardon and Parmesan base often become gloppy and sometimes make the pasta more dry then wet while at other times, because to much egg is used, the dish ends up with the noodles stuck together in a pasta pancake better cut with a knife then twirled onto a fork. When made right carbonara can be sublime but when done wrong it can be one of the worst pastas in the world. Making carbonara involves proper technique and quality ingredients if the finished pasta is to be anywhere close to extraordinary.
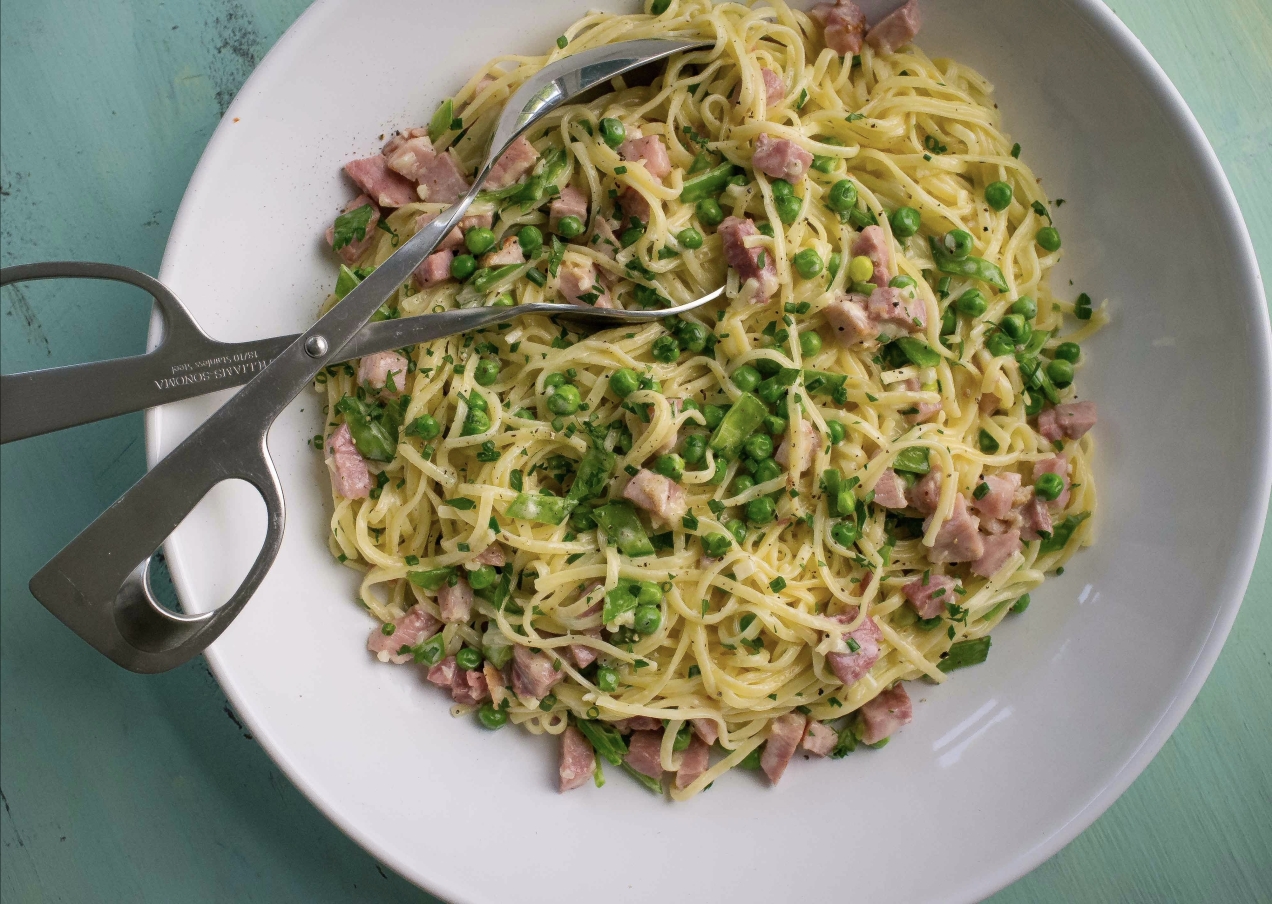
This pasta is not a carbonara but neither is it an Alfredo. It is what I like to think of as a Midwestern hybrid. Something we do really well here in the middle states, for better or worse, we make dishes to our liking. For me, I like several things about this pasta. To begin, I like the use of ham instead of bacon. There is no rendering of any fat and yet the typical Midwestern farm ham, piquant with its rosy cure, matches perfectly with the peas, garlic, and pasta. While the recipe calls for cream it uses far less then one might imagine and the use of starch heavy pasta water to thicken the sauce is a perfect alternative to a classic roux or eggs. While they might look like an unnecessary garnish, the parsley and chives are important in flavoring the final dish and should be added in the last minutes of cooking.

©Tom Hirschfeld 2016 all rights reseerved
Midwest Carbonara (Serves 4)
1 tablespoon unsalted butter (55g)
1 tablespoon garlic
8 oz. ham, small dice (225g)
1/2 cup heavy cream (110g)
1/2 cup pasta water (110g)
3/4 cup frozen peas (170g)
1/2 cup sugar snap peas (110g)
1 tablespoon parsley, minced
1 tablespoon chive, minced
kosher salt
fresh ground white pepper
1/2 cup Parmesan cheese, grated (110g)
1 pound vermicelli pasta (450g)
- Place a 6 quart (5.51l) pot, filled with 4 quarts (4l) of water, onto the stove. Add 2 tablespoons kosher salt and bring the water to a boil.
- While you are waiting for the water to boil heat a 14” inch (35.5cm) over medium heat. Add unsalted butter and let it melt. Add ham, stir then add garlic.
- When the garlic becomes fragrant but not brown add cream. Bring the cream to a boil and turn off the heat.
- This is about timing. The vermicelli only takes minutes to cook but if you are using a different noodle that takes longer adjust you timing.
- Add the vermicelli to the boiling water and cook according to the package instructions.
- Place the cream back onto the stove top and turn the heat to medium high. Bring the cream to a boil, add peas, season with white pepper.
- If the cream reduces to fast add pasta water by the 1/4 cup. Use pasta water because the starch will thicken the sauce.
- Drain the noodles when the finish cooking. Add noodles to sauté pan, carefully toss them with the cream. Add half the cheese and carefully toss the noodles with the cream. Taste, add salt if necessary, and a few grinds of fresh ground white pepper, half the chives and parsley. Carefully toss again taking note that it will be hard to get the peas and ham to mix into the pasta. This is okay.
- Pay attention in order to keep the pasta from scorching on the bottom of the pan.
- When everything is hot, use you tongs to place the pasta onto a large platter. Top the pasta with remaining peas and ham. Sprinkle on the remaining cheese, and top with remaining chives and parsley. Serve.