Cooking School, dog-eared, Side Dishes, Thanksgiving, Vegetables

Day Two: Green Bean Casserole

I don’t make anything fancy for Thanksgiving.  I like, and my family likes, a good homey kind of Thanksgiving.   One that we have eaten in some iteration for as long as I can remember.

I figured out a long time ago my food is far better when I don’t try to hide behind fancy.  Don’t get me wrong I like fancy and I enjoy cooking gourmet meals but in my early days of cooking I would hide behind fancy instead of doing the hard work of using good culinary methods and sourcing quality ingredients.  If you do the later homey becomes fancy and incredibly delicious.

My definition of quality ingredients has varied over the years but I think I have finally landed squarely in the Jacques Pépin camp.  What I like about Chef Pépin is he uses what is best in the moment.  Summer fruits in winter? To which I am quite certain he would say,  don’t be afraid to use frozen because they more than likely taste far better than anything in the fresh produce department.  I feel the same way about green beans.  I didn’t always, but a well sourced bag of frozen Frenched green beans far out ways the hassle of blanching fresh beans and frozen is worlds ahead of canned.

I provide the usual suspects at my Thanksgiving table, like this casserole, but I choose my ingredients and cooking methods carefully so as to get the best out of each dish.  In the recipe I call for making a velouté, a mother sauce in the culinary world.  (For folks around Indianapolis of the right age and if you ever ate at the LS Ayres tea room you will more than likely know this sauce as Chicken Velvet Soup.  There, the secret is out, I just taught you how to make chicken velvet soup using this green bean casserole recipe, simply leave out vegetables and you have it or, for that matter, leave in the onion, carrots, and celery.)

For Thanksgiving, this is a dish where I would have all the ingredients ready in advance.  If I felt the need I would get it into the casserole dish on Wednesday but I would leave off the potato chips or onions, until right before I am going to bake it in the oven.

2 TBS. unsalted butter

2 ½  TBS. all purpose flour

⅔ C. yellow onion, minced

½ C. celery, minced

1 ½ C. chicken broth, unsalted (or turkey stock-hint, hint)

2 TBS. heavy cream

1 pound frozen Frenched green beans, thawed in a colander to drain excess water

Salt and fresh ground black pepper

2 oz. potato chips, crumbled (you can use crispy onions here too)


  1. Place a medium sized heavy bottomed sauce pan over medium heat.  Add butter and let it melt.
  2. When the butter has melted add the flour and stir with a wooden spoon to make a roux/paste.   Stir constantly but gently until the butter/flour mixture smells like popcorn and turns from yellow to golden.
  3. Add onions and celery.   The roux will clump up around the vegetables.   Cook the vegetables for 3 minutes.
  4. Add the broth to the pot, turn the heat to high, and stir continuously until the liquid comes to a boil and thickens.   
  5. Reduce the heat to low and allow the sauce to cook and thicken.   Taste, add pepper and salt, stir, and taste again.
  6. Combine the sauce with the beans and spread into a buttered gratin.   Spread the crumbled chips over the top and bake at 375F for 35 minutes or until bubbly and brown.
  7. Let cool for 5 minutes before serving.


Standard
dog-eared, Gluten-free, pressure cooking, Salad, Seafood, Side Dishes

I like the unexpected.  Especially when it is something new to me, or it tastes and sounds exotic but in reality it has a longstanding history—a marriage of flavors that is natural. Flavors tried and tested over time, in this case,  in towns all across Portugal.

Octopus is a food that falls into a category that not to many foods do—it is either flash cooked very quickly or it is stewed for a very long time. Both methods intended to render the octopus meltingly tender.  I have tried flash cooking octopus several times and either I am an idiot and just can’t get it right or my definition of tender is radically different from everyone else who uses the flash cooked method. Continue reading

Octopus and Potato Salad with a Tomato Vinaigrette

Aside
Braised, dog-eared, Easy, Gluten-free, Paleo, Side Dishes, vegetablees

Middle Eastern Braised Green Beans

I don’t know when it came to be that chefs and cooks decided that your veggies needed to be cooked al dente. While I know they retain more of their vitamins when cooked a minimal amount I also know it’s not like the vitamins just vaporize into thin air but instead I am pretty sure, and take note I am not a scientist, that they wind up in the cooking broth.

Either way and no matter how you slice it I like veggies that can stand up to multiple cooking methods giving me choices as how best to enjoy them. I like green beans blanched then sautéed al dente but then I also like them long cooked. That doesn’t mean I want mush because I want something that still has character and a bite.

So after cooking green beans and eating green beans pretty much all my life with potatoes or onions, and even bacon and onions I was looking for a change. This last summer I found a wonderful recipe for okra that was stewed and I liked the recipe so much I made it two or three times.

The other night I was thinking how good that recipe would be with green beans and, actually even easier and less time consuming then the okra. So here is a link to the original article and recipe from the New York Times’ Recipes for Health by Martha Rose Shulman http://tinyurl.com/7ebxpk3 just in case you have any interest in the original okra recipe which I will make again this coming summer.

Middle Eastern Braised Green Beans  (Serves 6)

1/4 cup extra virgin olive oil
2 cups onion, thinly sliced
3 cloves garlic, minced
1 teaspoon all spice
1/2 teaspoon sugar
1 1/2 pounds green beans, clipped and cleaned
1 teaspoon pomegranate molasses
juice of half a lemon
14 oz chopped tomatoes
2 teaspoons tomato paste
kosher salt and fresh ground black pepper

  1. Place a large heavy bottomed pot over medium heat. Add the olive oil and once it is hot add the onions. Season the onions with a pinch of salt and some pepper. Sweat the onions until they begin to soften trying not to brown them.
  2. Add the garlic and once it becomes fragrant add the all spice and sugar. Then add the beans and stir them to coat with the oil.
  3. Now add the rest of the ingredients and stir to combine. Cook on medium until you hear the pot sizzling then reduce the heat to low, cover, and cook for an hour remembering to stir about every twenty minutes. They may take longer the an hour but not much.
  4. Taste, adjust the salt and pepper and serve.
Standard
dog-eared, Easy, Gluten-free, Grains and Legumes, op-ed, pressure cooking, Side Dishes, Vegetables, Vegetarian

The Best Corn on the Cob in the World

foodquarterlySomething as simple as good corn on the cob shouldn’t be elusive.  There shouldn’t be any big secrets but there is and it is this, the best corn on the cob in the world is cooked in a pressure cooker.   It couldn’t be simpler to do  and the results are divine.

I live in corn country.  If there was a vortex for the center of a corn universe I am at ground zero.  And if not the exact center I am still close enough that if it shook in the middle of the night it would knock me out of bed.  What I am saying is in the Midwest we know corn, and all you have to do is visit any state fair to know I am telling you the truth.

We roast it, boil it, we scrap it off the cob, we make it into pudding, make chowder out of it, we slather ears of it with mayonnaise and sprinkle it with any number of spices, and we even deep fry it like it is a corn dog.

But when a real treat is in order, in the heat of late-summer,  we set up a table under the shade tree, even put a table cloth on it along with plates and silverware.  Then we grill some thick cut pork chops, cut thick slabs of ripe homegrown tomatoes and lightly salt them, maybe a green salad with a sugary vinegar and oil dressing, and  we steam perfectly rip ears of sweet corn under pressure, slip the ear out of the husk from the stalk end and roll the perfectly steamed ears through sun softened sticks of butter.

Pressure cooking an ear of corn does something magnificent.  It gives the kernels a snap, and by leaving the husk on the ears develop a robust corn flavor, much like wrapping tamales in a dried husk.  It tastes like corn should, pure and simple.

This slideshow requires JavaScript.

The Best Corn on the Cob in the World

(serves 6 to 8 people)

When buying ears of corn look for husk that are vibrant and fresh.  It is also always best to cook sweet corn the same day you buy it.

8 ears of sweet corn still in the husk (buy ears that fit your cooker)

1 cup water

1 stick of unsalted butter

sea salt

fresh ground black pepper

Equipment: a 6 or 8 quart pressure cooker with a steamer basket

1. Set an ear of corn onto a cutting board.  Using a good chef’s knife trim the stalk end back so that there is no stalk showing just kernels, about a 2-inch piece.  Repeat with all the ears of corn.

2. Place each ear of corn cut end down into the steamer basket.

3. Place the cooker over medium-high heat.  Add 1 cup of water and bring it to a boil.  Slip the steamer basket with the corn into the pot.

4. When the water returns to a boil, lock on the lid, and bring the pressure to level 2, or high.  Once pressure is reached lower the heat while maintaining pressure.

5. Set a timer for 6 minutes.  When the timer sounds perform a quick or cold water release.

6. Remove the lid and use a pair of tongs to lift out the steamer basket.

7. Using a dry and clean kitchen towel grab and ear of corn by the silk and push the ear out of the husk toward the stalk end.  The silks should come along with husk and the ear should be clear of silk.  Repeat for all the ears.  Serve immediately with lots of butter, salt, and fresh ground pepper.

(A tangent: If you own a pressure cooker you are in luck, if you don’t then you are going to want one. So go buy one, I am serious, and I don’t peddle stuff on here.  Not only do pressure cookers cook things well they are going to help save the planet one meal at a time by conserving energy, water, and time.  If you like that sort of stuff, conservation, then you have to get one.  A 6 or 8 quart stove top cooker will feed your family delicious meals for years to come.)


Standard
Chicken/Poultry, Easy, Eggs/Dairy, Gluten-free, lunch, Salad, Side Dishes

With What Remains of Summer: Two Salad Dressings

Something like you find at a pizza shop, made of Romaine and iceberg  lettuce cut into chunks, mini-wedges meant to soak up a heady dressing and topped with everything but the kitchen sink, this salad is a simple summer salad.

It doubles as a full on dinner salad or as a side.  It is laced with shredded red cabbage and carrots added every bit as much for taste as color.  It is topped with your hearts desire, in this case crisp cucumbers, muddy black olives, protein rich eggs,  raisiny grape tomatoes, and sharp red onions.  I even threw in a little bit of last nights roast chicken but chopped ham, bacon bits, or whatever you have on hand works good too.

Sometimes I like it dressed with Thousand Island, other times Ranch, and occasionally Catalina but whatever I use it is always homemade.  Today I made a Blue Cheese Vinaigrette.  Feel free to use whatever dressing you like but I am begging you with what remains of summer to make them homemade.

DSC_0179

Blue Cheese Vinaigrette (makes 1/2 cup)

1 TBS. shallot, peeled and grated on a micro-planer

1 tsp. garlic, grated on a micro-planer

1/2 tsp dried oregano

3 TBS. red wind vinegar

1/2 cup extra-virgin olive oil

1/4 cup blue cheese, crumbled (don’t like blue cheese, use goat cheese)

1/8 tsp fresh ground black pepper

a pinch of kosher salt

1. Combine all the ingredients in a pint Ball Mason jar.  Screw the lid on tightly and shake like hell.

note: this dressing is best if made in advance.  An hour will suffice but as it ages it gets better and better.


Thousand Island Dressing (make 1 cup)

2/3 cup mayonnaise

3 TBS. ketchup

2 TBS. bread and butter pickles, minced

1 TBS. shallot, peeled and minced

2 tsp. pickle juice

pinch of kosher salt

1/8 tsp fresh ground black pepper

1. Place everything into a mixing bowl.  Combine with a whisk.  Store in the refrigerator in a tightly sealed glass jar.


Garden Salad (serves 4 as a side salad or 2 as an entree)

1/2 large head iceberg lettuce, cored and cut into 1-inch (2.5cm) chunks (about 2 cups)

1 romaine heart, outer leaves removed, core discarded, and cut into 1-inch (2.5cm) chunks

1/3 cucumber, peeled and thinly sliced (8 rounds)

1 medium carrot, peeled and grated on the large wholes of a grater (about 1/4 cup)

1/2 cup shredded red cabbage

10 California black olives

8 grape tomatoes, halved

8 thinly sliced rings of red onion, minus any paper skin

2 hard boiled eggs, shelled and quartered

1. Place the greens in a large salad bow.

2. Attractively arrange the vegetables over the top of the greens.  Dollop with 1/3 to 1/2 cup of dressing.  At the table mix the dressing into the greens and vegetables using a pair of salad tongs.  Serve.


Standard
Dinner, Gluten-free, Grill, Grilling, Main Dishes, Meatless Monday, Side Dishes, Vegetables, Vegetarian

A Real Winner: Seared Cauliflower Steaks with Salsa Verde and Almonds

DSCF6527-1

Some people collect cars, for others it is playing golf, for me, it’s barbecues. I don’t collect them per se but rather I cook with them. Their value isn’t termed by condition but in hours of use. Much like a cast iron skillet I can gauge the worth of a good smoker by the black patina that coats its inside. While many men might spend their weekends under a car, I prefer to smell like hickory rather then gasoline and motor oil. It’s how I get my kicks.

So you can imagine my excitement to I discover I won a Big Green Egg! Yea, I won. I never win anything but Debra Smith at SmithBites pulls my name from a hat of entrants and I win, I never win.  Nevertheless, it is like getting the Most Improved trophy in grade school.  I sort of treat it like that, it sort of looks like that and I couldn’t be any happier then to be a proud owner of one.  Hell, I park it in the garage if that tells you anything. I don’t even put my car in the garage, the garage is for my tractor, and now the grill.

Cauliflower SteaksThe whole time I am assembling my grill I think about what I am going to cook first.  A steak, a brisket, venison, burgers, pork chops, butt steak, I go through all the possibilities and my head spins in anticipation.  The dogs look on with concern for my well being,  TrixieB even comes over and gives me a lick on the face and some big sad eyes of worry.

As I said, I don’t collect grills.  I have three.  One is a smoker, that is all it does, it smokes meat, charcuterie and hams at low temperatures.  My other grill I hand made.  It is a street food kind of contraption meant to cook fast and furious.  It is for meat on a stick, small stuff that cooks through quickly.  Both serve their purpose.  So maybe I don’t consider my self an aficionado but I do consider myself an expert.  It was my station each day at the restaurant.  I worked the grill day-in and day-out for seven years.  I can cook a steak, a boneless chicken breast and any kind of fish you can imagine but, like professional ball players who sometimes hit a foul ball, I do sometimes miss the mark but rarely, and I mean rarely, do I over cook a steak.

My point being, I am excited to try what many consider to be the Mercedes of grills, the Big Green Egg but I am a little apprehensive having never used one.  Don’t think I wasn’t a little more then cautious too,  I bought a high end Wolfe stove and it’s a piece of crap, so I know just because something has a name doesn’t mean it is going to work but I have to be on my game also.  I am approaching this with a certain err of caution.

But then it hits me.  Friends often accuse me of using appliances differently then anyone else, most recently crock pots were entered as evidence into this court of opinion.  So I asked myself, “why would I grill a steak?”  It took all of a second to answer my own question, “why not sear cauliflower steaks in a pan on the grill?”  That was easy enough, decision made.

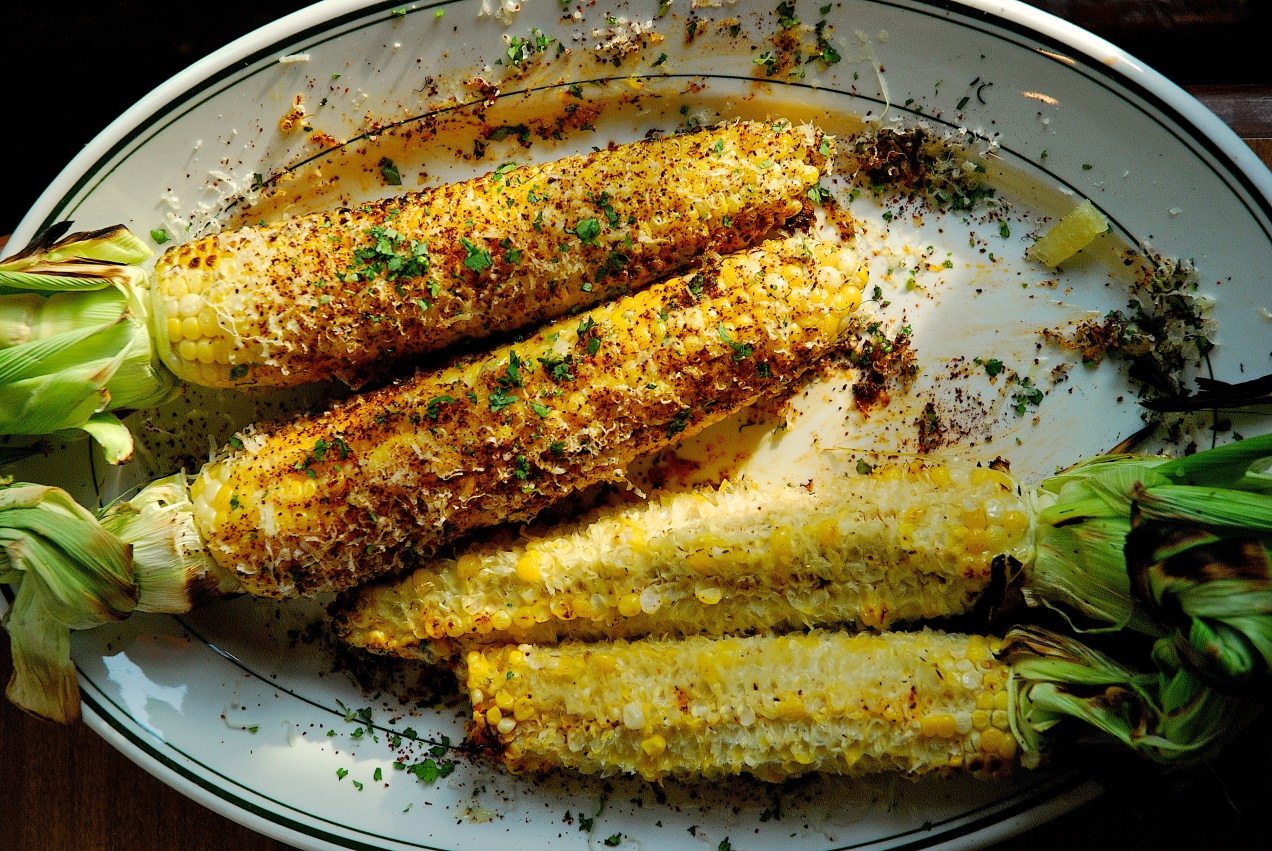
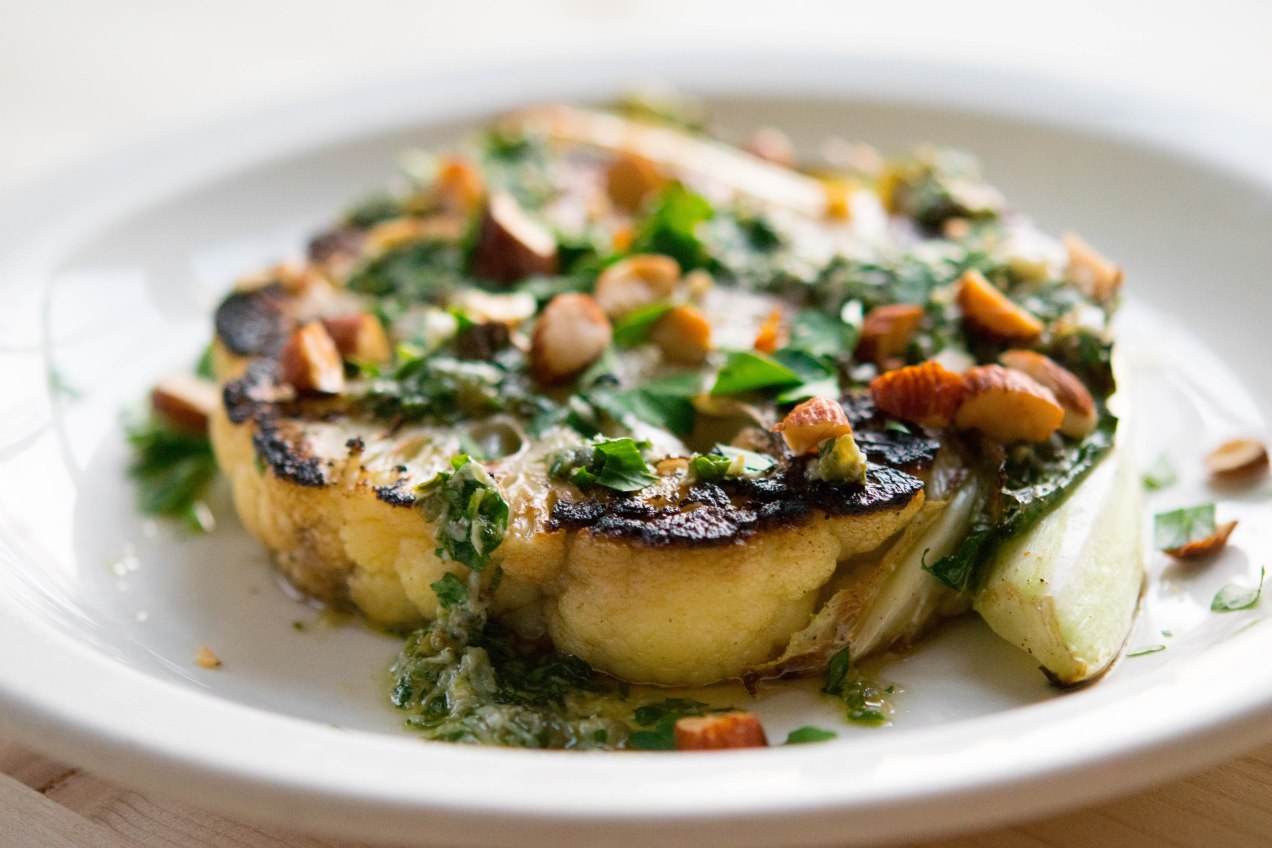
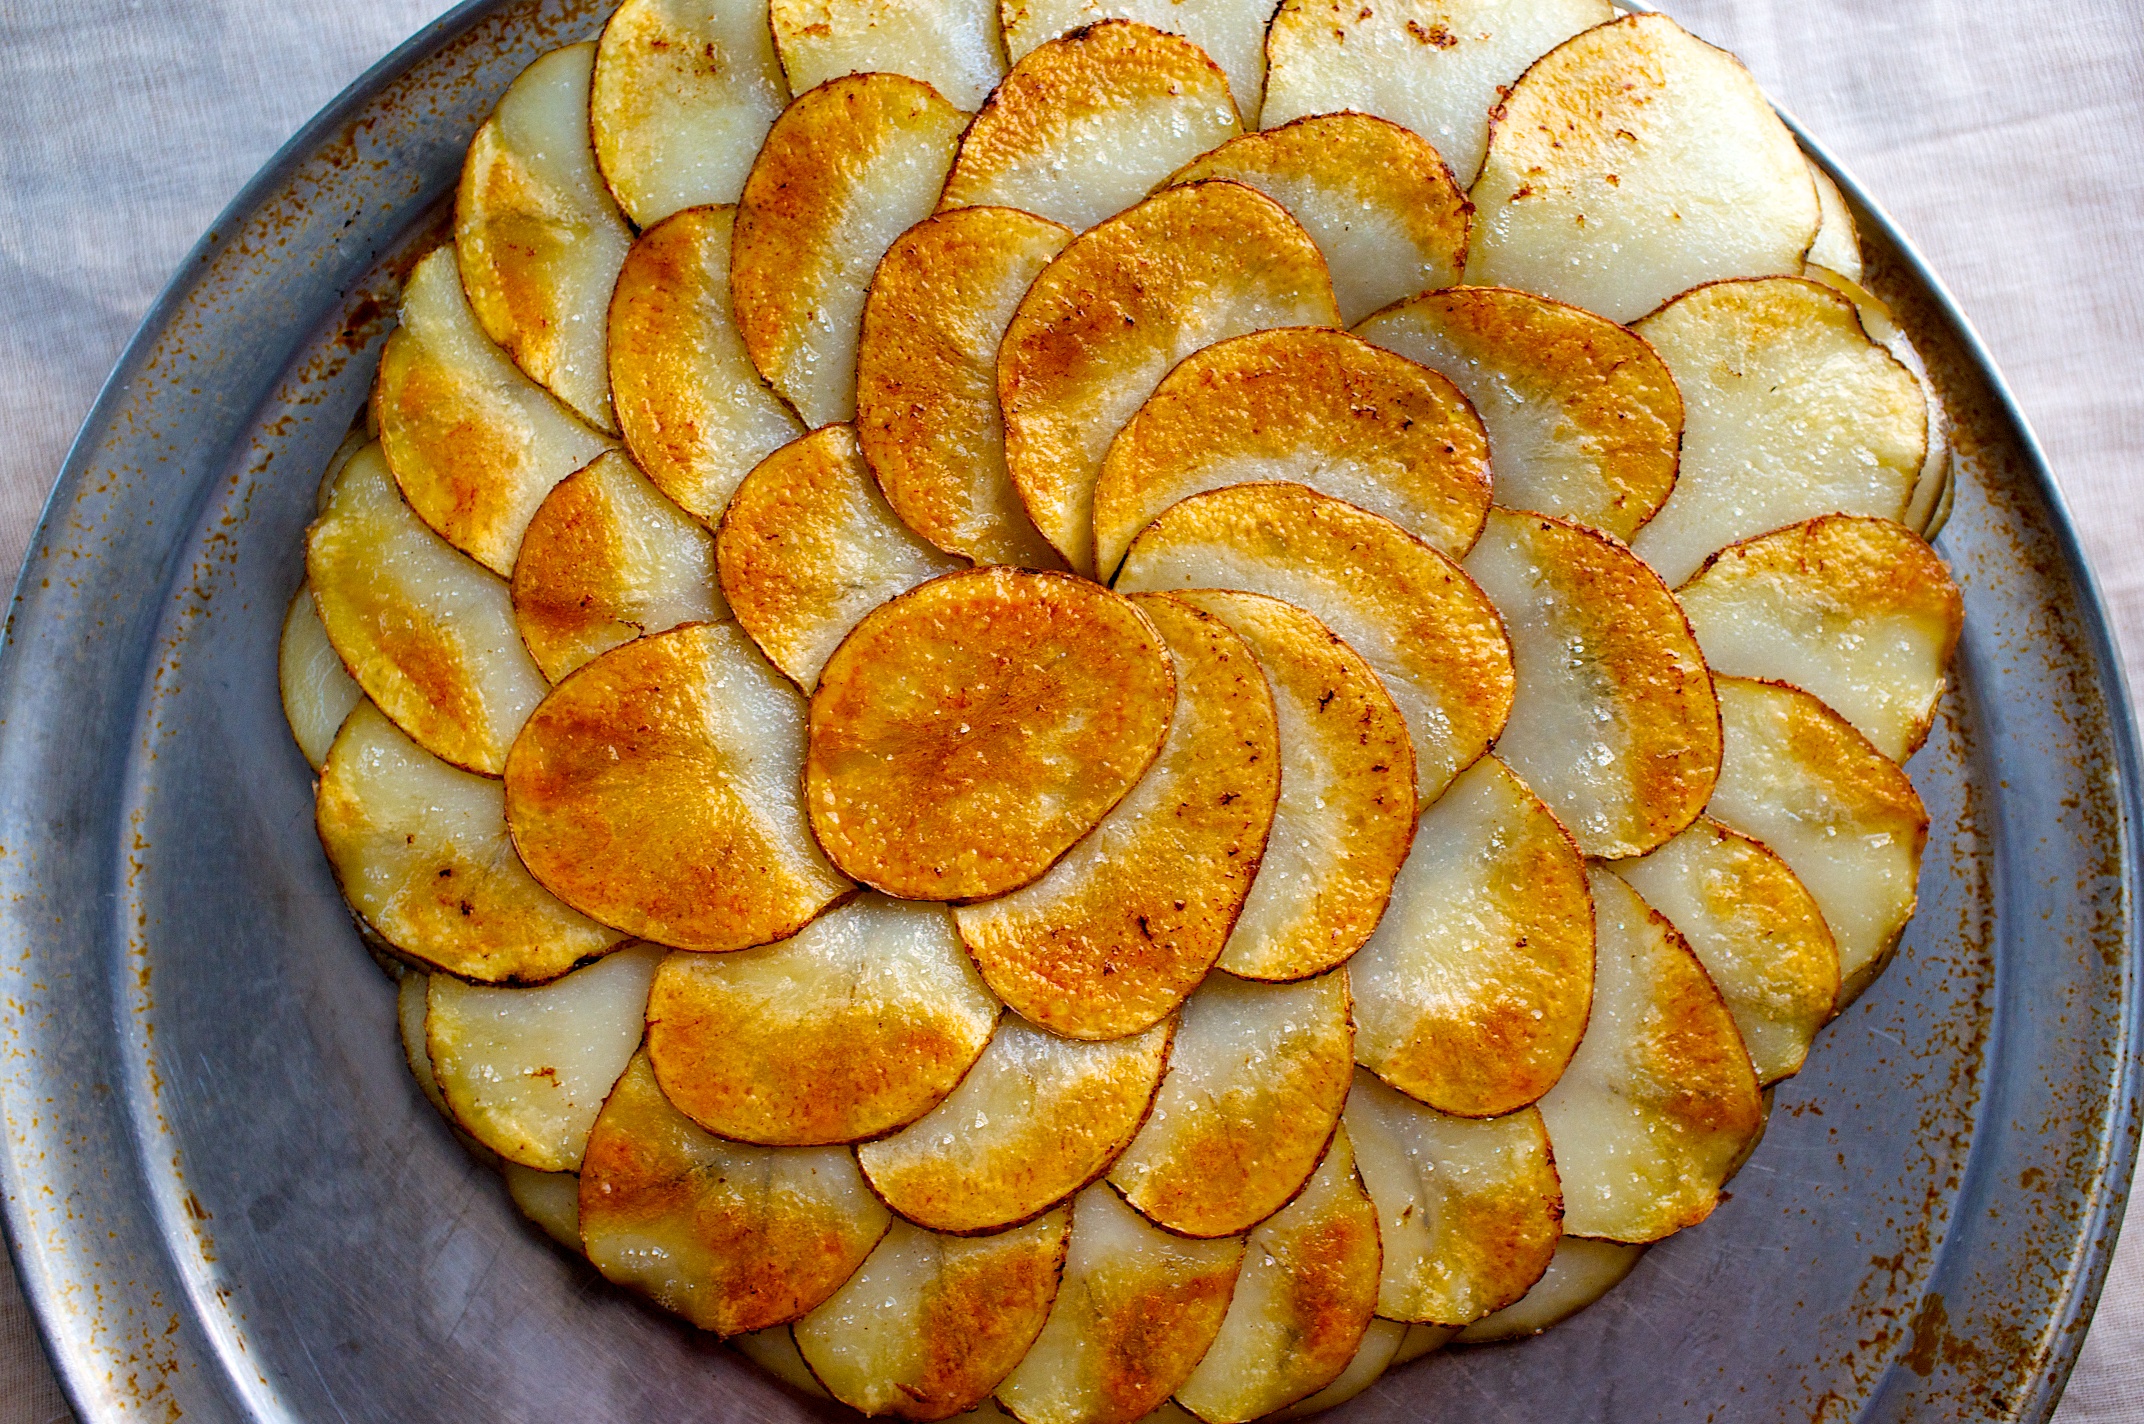
Here is why I wanted to cook cauliflower steaks.   The Big Green Egg people claim a lot of things about their grill.  You can cook pizza on it, bread, grill steaks or smoke brisket is what they say.  Which I get, it is sort of like a wood burning oven.  It is ceramic, it holds heat, and it gets very, very hot but can also hold a low temperature for a long time.  It holds a lot of promise.  So my thinking is, I want to put a cast iron pan on the heat, see how hot it gets and how well it sears.  I know, I know, you can cook with a cast iron skillet on your stove.  True, but my stove won’t impart a smokey flavor to whatever I am cooking.  And that is it,  that is what I want to find out, is what is the smoke flavor of the Big Green Egg going to be like.  It is the one character trait I am most interested in.  Will it be bitter and heavy or will it be just right.  When it comes to vegetables the right amount of smoke goes a long way.  To much and you have a very bitter ash tray kind of experience that will keep you from tasting any other part of your meal.  And seriously,  antacids are no kind of dessert.

I am not going to bore you with blow by blow cooking details other then to say the grill is great.  It lights fast, it gets very hot quickly and it imparts a great flavor to whatever you are cooking.  My cast iron casserole heated quickly, I actually thought it might get to hot and burn the cauliflower before it became tender on the inside, but it didn’t.  It cooked the cauliflower with a perfectly light kiss of smokey flavor.  Since then I have roasted chickens to great applause from the family, from me too.  A tri-tip roast delicious, pork chops amazing, cauliflower steaks a home run, and the Big Green Egg, a real winner.

DSC_0875

Seared Cauliflower Steaks (serves 2)

2 small heads of organic cauliflower

1/3 cup flat leaf parsley, minced

1 small garlic clove, grated on a microplane

1 tablespoon lemon juice

1 anchovy, rinsed

1/4 cup Asiago cheese

extra virgin olive oil

half a cup of salted almonds, chopped

1. Build a charcoal fire for direct heat grilling in your grill.  You want it to be very hot.  Place a large cast iron skillet right in the middle of  the grilling rack.  Cover the grill.  What happens when you cover the grill is the heat builds, the pan becomes very hot and the lid keeps a little bit of smoke flavor circulating.

2. While the grill is heating make the salsa verde.  In the bowl of a mortar and pestle combine the lemon juice, garlic, anchovy, and parsley.  Beat it up with the pestle.  Add a two finger pinch of salt, a dash of black pepper and a few glugs worth of olive oil.  Stir to combine, taste and add more oil it the salsa is to tart.  Stir in the cheese.

3. Trim the stalk ends of the cauliflower.  Using a good sharp knife cut one steak each out of the center of each head.  To do this turn the floret side of the cauliflower down.  Hold it firmly and place you knife onto the stalk.  Cut through to the florets.  Roughly gauge and inch in width and make another cut leaving yourself a nice center cut cauliflower steak.  Repeat these steps with the second head of cauliflower.  Use the loose outer edges of the cauliflower for another dish.

4. Drizzle the steaks with olive oil and season them with salt.  Take them out to the grill.  If you have a thermometer on your grill it should read about 600˚ F.   Nevertheless when you open the lid the cast iron pan should be beginning to smoke and when you place the cauliflower into the pan it should sizzle.  Cook each side until of the steak until it is very deeply caramelized.  Remove the steaks from the pan.

5. Drizzle the steaks with the salsa verde, top with almonds, minced parsley and serve.

Standard
pro tip, Vegetables

Hydrating Droopy Vegetables

DSC_0686While it is not ever my first choice, hydrating droopy vegetables is worth the effort if your vegetables aren’t too far gone.  I am not talking about trying to save rancid moldy vegetables but rather the carrots I bought yesterday that were crisp, fresh and gorgeous but somehow, within a 24 hour span in the fridge, have gone wilty, maybe even beyond wilty but nowhere near rotten.

It pains me to throw out food.  Generally I would make a stock with vegetables like this just to use them up but I was really counting on this particular gorgeous bunch carrots for dinner.  I wanted to roast them in a high heat oven, taste their sugary goodness alongside a perfect roast chicken, but not now.  At the end of an hour in a hot oven they would be nothing but mush. Continue reading

Standard
Gluten-free, Side Dishes, Vegetables, Vegetarian

Perfect Microwave Broccoli

_TJH7023Rarely do I use my microwave. I use it to take the chill off my coffee. I heat leftovers for lunch. Whenever a recipe calls for “butter, melted” onto the glass turntable the fat filled Pyrex measuring cup goes. I don’t cook with my microwave in any real culinary sense. I sometimes wonder why I have it, why I allow it to take up precious counter space when I know everything for which I use it can be done just as easily on the stove.

Of course there is also the fear that has been around as long as the microwave, that somehow it poses some sort of health risk. I don’t know if it does or not but if I error on the side of solid scientific research, it would tell me the microwave is harmless. Even so, I will lean on the side of caution and repeat the mantra I continually voice to my children, don’t put your face right up to the microwave door to watch as a cooking pizza pocket swells and shrinks, as if it is coming to life, and please, stand back an arms length.

I don’t believe the microwave has ever lived up to its original space age expectations. Nonetheless I read an article touting the healthy aspects of cooking vegetables in a microwave. Because it basically steams the vegetables, the vegetables retain a large portion of nutrients then if you used other cooking methods. It made sense, and I am buying in, or at least I want to and there are lots of reasons why. Continue reading

Standard
dog-eared, Gluten-free, Medium Time, Moderate, Salad, Side Dishes, Vegan, Vegetables, Vegetarian

Classic Creamy Coleslaw

cabbage

My favorite kind of coleslaw is the classic, creamy variety; it comforts me because I grew up eating it at a mom-and-pop catfish bar whose coleslaw was second to none. Their version was made with finely grated cabbage and bright orange ribbons of carrot. It was a bit tart and a little sharp — the way horseradish can be — because the cabbage was freshly grated. It paired perfectly with deep-fried catfish, whose crispy tails tasted of bacon. This is the slaw by which I judge all others. Continue reading

Standard
Appetizers/Starters, Gluten-free, Grains/Legumes, Salad, Side Dishes, Vegetarian

Three Bean Salad, Redux

Three Bean Salad

Now that picnic season is upon us, I get nostalgic over classic summertime fare. There is nothing quite like a family reunion over fried chicken and a potluck dinner, tables threatening to buckle under the weight of all the CorningWare and Pyrex.

Of course, there are the old favorites: green bean casserole, scalloped potatoes, pea salad with bacon and mayonnaise, three bean salad, and most certainly a mustardy potato salad — and, if luck is with me, an old-fashioned custard pie sprinkled with a little nutmeg. I love all these foods — but this year, I want something new. Continue reading

Standard
Fancy, Foraging, Moderate, Short Time, Side Dishes, Vegetables, Vegetarian

Morels with Asparagus & Five Reason to Eschew Recipes

Mushroom Hunting

There was a time when my father and I would have walked the distance up the hill to Gordon’s Rocky Top. We would have crossed the creek, stepping gingerly across the slick rocks like seasoned hopscotch players, hiked to the fork in the path, taken the trail on the left, and then quietly ascended the long, wooded hill. On our way, we would have walked past the pond, and if we were lucky, we might have spooked an owl or happened upon some white tail deer. Continue reading

Standard
dog-eared, Easy, Gluten-free, Medium Time, One-pots, Side Dishes, Vegetables

5 Resolutions to Make You a Better Home Cook (+ Pot-Roasted Collard Greens )

_TJH6714 (1)To be honest I lost interest in New Year’s Eve a long time ago. If memory serves me, the last New Year’s Eve I celebrated was sometime late last century. For that matter, I am not sure what year it was that I last made it to midnight.

It doesn’t mean I don’t celebrate, I do, I am just not in a rush to do so as the bell tolls. I guess I prefer to ease into it casually, like when my eyes pop open after a good night’s rest.

But let me just add: I am skeptical of New Year’s too. Maybe because we try to inject new vigor into failed promises, or because we also act as though eating a particular meal, either cleansing or lucky, is going give the rest of the year promise. The whole holiday feels dubious to me, with one exception: collard greens.

The caramelized smear on the bottom of the pot is an indication you collards are cooked perfectly.

The caramelized smear on the bottom of the pot is an indication you collards are cooked perfectly.

As always, combine collards with beans and rice and you can feel as though you are entering the new year at a low with nowhere to go but up. But there is another way of looking at it too. In my family, collard greens are not a one-hit wonder only to be served once during the year. Nor are they a fad. They are steadfast and as honest as the day is long. Sure you could hang out with the pretty people and eat kale, but kale isn’t collards. Neither are mustard or turnip greens. For me, because they are like the brainy girl who likes to read, collards are far more interesting. So much so that you want them around all year and with collards around there is no need to go up.

But, as always, sometime between Christmas and the new year I will put on the horsehair shirt, become all monkish and reflective, and try to set a direction for the new year ahead. I can assure you, in the kitchen, collards will act as a reliable compass.


Five Kitchen Resolutions for the New Year to Make You a Better Home Cook

1. Try to follow fewer fads and learn more technique. Take collards, for example. I had always simmered them in the typical manner with pork, pepper flakes, and liquid. While I still love cooking them this way, it wasn’t until I learned to pot-roast them vis-à-vis Thomas Keller that I picked up a new technique. And, I might add, one I am grateful to have in my tool kit.

2. It has been a battle this year with getting the kids to eat what is put in front of them, but, rather than forcing them to try new things, I am going to make more kid-friendly meals (that doesn’t mean junk) with the expectation they eat other meals without complaint. I also have this notion that if I feed them exotic foods all the time they will have to deal with the law of diminishing returns in that they will become bored with food. I also suppose I want them to have things left to explore and look forward to as they grow older.

3. Break out of your routine and explore other cuisines more often.

4. Choose three new dishes to master and do so. You know some say it takes cooking something a thousand times before you really understand how to cook it. While this might be a little extreme, I do like to be able to cook a dish multiple times and have it turn out the same each time. This takes practice.

5. Search out and explore five new ingredients.

Pot-Roasted Collard Greens ( Recipe adapted from Thomas Keller’s Ad Hoc at Home )

Serves 4

8 cups collard greens, stems removed and leaves chopped into 1-inch squares, then rinsed twice and dried
1/2 cup bacon lardons
1 tablespoon unsalted butter
Kosher salt and freshly ground black pepper

  1. Heat the oven to 300˚ F.
  2. Place a heavy-bottomed pot or Dutch oven (with a tight-fitting lid) over medium heat. Add the bacon and let it start to render, then add the butter.
  3. Once the butter has melted, add half of the greens. Season them with a heavy pinch of salt and freshly ground pepper. Stir and turn under the greens so they are coated with fat. Add the rest of the greens and repeat the seasoning and turning.
  4. Cover the pot with the tight fitting lid and slide it into the oven. Roast for 1 hour to 1 hour and 15 minutes. Remove from the oven, remove the lid, and stir. Taste and adjust the seasoning. Put the lid back on and let the collards set until ready to serve.
Standard
Gluten-free, Holiday, Medium Time, Moderate, Side Dishes, Vegetables, Vegetarian

A Classic Potato Gratin With No Recipe


Have you ever had a friend who knows no strangers? The kind of genuine person to whom everyone in the room gravitates — someone who doesn’t have to work at meeting new people, because somehow it is coded into their DNA for others to like them?

For me a potato gratin is just such a friend. A friend who hangs out with all the cool entrees too: a mustard crusted beef tenderloin  taking a bath in a flavorful sauce or a perfectly roasted chicken with crackly brown skin are its best friends.

But, to its credit, a potato gratin knows enough to complement all the other dishes and, with the exception of a few rules, remains unfussy enough not to need a recipe and somehow is always perfectly put together for any holiday gathering.

How to Make Potato Gratin Without a Recipe

1. Peel your potatoes. For a 10-inch oval gratin pan, I like to use six to eight medium-sized Yukon Gold potatoes — about 2 1/2 pounds. (Don’t worry: If you overdo it, you can snack on leftovers after step 6.)

DSCF0970

2. Slice the potatoes an 1/8-inch thick, ideally on a mandoline right into a heavy bottomed pot. Add a few minced cloves of garlic, about a teaspoon of salt, and roughly equal parts of water and milk to cover the potatoes.

Potato Gratin

3. Bring it to a gentle boil over medium heat and cook the potatoes till just tender but not falling apart, then drain. By cooking the potatoes most of the way through in flavorful liquid, you don’t have to worry about exact quantities of liquid and seasoning later on.

Potato Gratin

4. While the potatoes are cooling, grate approximately 2 1/2 cups of Gruyère or Comté cheese — they are traditional but expensive. Other cheese in the family would be gouda, fontina, or American Gruyère.

Potato Gratin

5. Get out an oval gratin, or any casserole, pie pan or dish you choose. Just take note: with a smaller circumference dish you have more creamy interior and less crunchy top and, obviously, the reverse is true for a larger gratin. Place around half the potatoes into the gratin (they don’t need to look pretty, yet). Season with salt and white pepper. Top with half the cheese and drizzle about 1/2 cup of cream over the top.

Potato Gratin

6. Starting with one slice of potato placed in the middle of the gratin, spiral the potatoes around until you reach the gratin edges. Make it look pretty — it makes a difference.

Potato Gratin

7. Top with the remaining cheese, then drizzle another 1/2 cup or so of cream over the top and around the edges so it gets to the bottom, too.

Potato Gratin

8. Bake at 425˚ F until brown and bubbly, about 30 minutes. Don’t overcook the gratin so it dries out. You want a little cream to remain on the bottom. Serve.

Potato Gratin

Standard
Braised, Medium Time, Moderate, Recipes, Side Dishes, Vegetables

The Virtues of Routine and Braised Cabbage

I like repetition. It guides me from one task to another. Like how in the morning I’ll make my wife’s coffee exactly the same way and take it to her while she is getting ready for work before making my own. Then I’ll pack the kids’ school lunches, followed by preparing breakfast, and every Tuesday, I go to the grocery store immediately after the kids get on the school bus.

I follow a routine when I go to the grocery, too. The automatic doors swoosh open like the welcoming arms of an old friend as I enter, and I wonder who the first person I’ll see will be. A stranger? A familiar face? What will they look like and will they be smiling? Which fruits and vegetables are right up front this week and who made the covers of the gossip rags at the checkout line? All pressing questions, I know.

But the other day I broke routine, for an observation. As usual, the endcap to the vegetable aisle was full of cabbage — red cabbage, green cabbage, some Napa and even Savoy. What occurred to me was that this endcap is always full, always a mountain in fact, of cabbage. It wasn’t just replenished either — they don’t restock until 9:30. I am nosy too, and often leer into peoples’ carts just to see what they are eating and, I can assure you, I don’t often see cabbage tucked into carts, other than those few days cabbage gets its due during the corned beef holidays. So why is this end cap continually dedicated to an Everest of cabbage? Are cabbage eaters late night shoppers? Is it for looks much in the same way as a mannequin in a window at Saks? Who, besides me, buys cabbage?

Yes, I eat cabbage and I am proud of it. So much so that I could write a poem, Mon Petite Chou, and it would be an ode to the poorest of poor man’s food. That is what it is though isn’t it: poor man’s food? Maybe this is why it is shunned, that to buy it means you are nearly destitute, for why else would you eat it? I used to feel this way, and never really encountered cabbage other than as a creamy coleslaw side to an all-you-can-eat catfish dinner — and even then I usually stayed closer to the hush puppies and fries.

That is, until Paula Wolfert’s book The Cooking of Southwest France introduced me to the possibilities. And there are many when it comes to cabbage — braised, steamed, creamed, and stir-fried. Cabbage, now, has become a part of my routine.

Tips for Choosing, Storing, and Preparing Cabbage

Pick a hefty cabbage.
I grow a lot of cabbage and I am always amazed at how solid cabbages can be, like a bowling ball. So when I do buy them at the store I look for very solid cabbages that feel heavy.

Look for purple leaves
Typically, the grocer cuts off the outer leaves and trims the stems. As the cabbage ages, they trim them up so to keep them looking pretty. You know you have a fresh cabbage when the leafy outer purple green leaves are still there.

Keep it cool
Cabbages can last a long time in the fridge. Make sure the outside leaves are free of moisture and wrap the cabbage in plastic wrap, then store the cabbage in the crisper. I like cabbage because it stores well, so I use up all the perishable veggies early in the week saving the sturdy ones, cabbage, for the end of the week.

©Tom Hirschfeld 2016 all rights reserved

©Tom Hirschfeld 2016 all rights reserved

Simple Braised Cabbage

Serves 6

3 ounces pancetta, small dice
2 tablespoons unsalted butter
1 cup yellow onion, small dice
1/3 cup celery, small dice
2 teaspoons garlic, minced
1/2 cup carrots, peeled, small dice
6 to 8 cups Savoy cabbage, julienned
2 bay leaves
Scrape or two fresh nutmeg
1 tablespoon flat leaf parsley, minced
1 1/2 teaspoon fresh thyme, minced

  1. Place a 3 1/2-quart Dutch oven with a lid over medium heat. Add the pancetta and render its fat. You want a gentle render here. You aren’t trying to crisp the pancetta, just render.
  2. Add the butter and, once it has melted, add the onion, celery, garlic, and carrots. Sweat the vegetables until they are tender, don’t let them brown. Add the cabbage, bay leaves, and season with salt and pepper. Turn the cabbage to coat the leaves in the fat. Add a quarter cup of water and put the lid on the pot. Reduce the heat to low. Cook the cabbage until tender, about 25 to 30 minutes. Add a scrape or two of nutmeg, the parsley, and thyme. Stir to combine, then serve.
Standard
Condiments, Grill, Grilling, Meatless Monday, Salad, Vegetables, Vegetarian

Everything but the Hamburger, Special Sauce Included

DSCF0022

Sadly, as I sit at the bus stop watching my daughters play, I have to tell myself: summer is so last season.

All summer I have been grilling vegetables for salads. Mostly zucchini and summer squash; I char it deeply and then chop it and toss it with basil, lemon juice, and olive oil, in sort of a grilled chopped salad. It captures all the flavors of early summer one could want. But at some point, either the zucchini or I tire and the dish no longer appears on the table. At least not until next summer, when the annual craving for these flavors peaks again. Continue reading

Standard
Appetizers/Starters, dog-eared, Easy, Gluten-free, Grill, Grilling, Meatless Monday, Snacks/Appetizers, Vegetables

Taco Night on the Grill


I can’t get enough of taco night. Neither can my wife Amy or my daughters. We love it, and especially me, because I can do everything — with the exception of chopping with a knife or the food processor — on the grill. It makes for easy clean-up, and who isn’t for easy clean-up?

I cut my teeth on Tex-Mex in Austin, Texas circa 1984 (does Instagram have a filter for that?). At this point in my life I hadn’t eaten that much Mexican food. For the most part it didn’t exist in Indiana outside of Chi Chi’s and my inner punk rocker wouldn’t allow me to set foot inside any place that colorful or where the waitstaff could happily sing Happy Birthday table side.

Nevertheless, when I would slide into a booth at one of the many hole-in-the-wall eateries (many of them were Spanish-speaking only), I would order as many kinds of salsa as I could point to on the menu. I didn’t know this many kinds of salsa existed, or for that matter soft shell tacos, or the food love of my life, tamales.

As I ate my way around both sides of Highway 35, little did I realize I was becoming an addict, to Texas country music, chili, and to Austin itself. It was hard to come home, and once I was back in Indiana it didn’t take long before I began jonesing for Texas Hill Country, salsa included.

All About Grilled Salsa

The grill is a great way to make an old salsa recipe feel new.
I couldn’t even guess how many varieties of salsa there are in the world, but I do know I haven’t found one yet that can’t be made on the grill. I like a fresh raw salsa as much as the next person, but sometimes I like to shift the flavor and it is an easy thing to do on the grill.

Chile oils on your hands are not your friend.
Be careful with hot chile peppers. I used to go at them in the manly man way and just tough it out, but the night I rubbed my eyes after working with Thai birds I thought a different approach might be appropriate. If you choose to go with bare naked hands in handling them, just realize you will quickly find out just how many places on your body you actually touch and how many places are very sensitive to capsaicin oils.

Get in touch with your inner caveman or woman.
I used to put my peppers and tomatoes on the grill grate and then one day I just decided to plop them right on the coals. It sears them very quickly while leaving the interior raw — the best of both worlds. You can roast whole heads of garlic too, but they need to be left to the side of the coals so they cook and soften slowly or you will burn the cloves which makes them bitter.

Liquidy or dry, it all depends on your tomato variety.
A lot of fresh tomatoes have a high liquid content. If you use too many tomatoes, your salsa will be watery, which isn’t always a bad thing. If you want a thicker salsa, it is a good idea to use plum or San Marzano tomatoes.

The finishing touches matter.
To the finished salsa I always like to add a drizzle of olive oil for mouthfeel and a splash of acid, be it lime, red wine vinegar, or whatever. Make sure you season your salsa with salt and black pepper.

Corn tortillas or flour both can be warmed on the grill, and should be.
I prefer corn tortillas over flour and my preference for cooking corn tortillas is right on the grill. They puff up and blacken in spots and become yummo-licous. Just make sure after searing them to wrap them in foil so they stay soft and don’t dry out.

Choose your toppings accordingly.
Almost every person I have ever met who hails from Central America prefers green cabbage, sliced razor thin, to lettuce for their tacos. It gets even better when you dress the cabbage with a touch of red wine vinegar and olive oil. You probably won’t find a lot of sour cream or cheese on the table either. I tend to go for authentic Mexican but I like Tex-Mex too. If you want to go for healthy, grill up a bunch of vegetables to use for toppings and forgo the dairy altogether.

Grilled Salsa

Makes 1 to 1 1/2 cups

Depending on the kind and size of tomatoes you use, this salsa can be liquidy or firm. You will have to judge. Roma tomatoes have little liquid and work well for a chunkier salsa.

  • 1small head of garlic
  • 3 or 4roma tomatoes
  • 1 or 2heirloom variety tomatoes (Box Car Willies or Wisconsin 55 are good)
  • 1poblano pepper or 3 jalapeños or your choice
  • 3 to 4half-inch-thick slices of red onion, left intact
  • Kosher salt and freshly ground pepper
  • Handful of cilantro
  • Splash of red wine vinegar
  • Drizzle of olive oil
  1. Fire up your charcoal grill. Let the coals get blazing hot.
  2. Wash the vegetables.
  3. Place the garlic off to the side of the coals where it will brown the paper skins but not burn the cloves. The garlic will take the longest to cook of everything. Let it get good and brown on all sides.
  4. Now place the tomatoes and peppers right on the coals. Let them blister and blacken. Remove them to a tray. Let the juices collect in the tray.
  5. Place the grill grate on the grill and grill the onions until they are caramelized and soft.
  6. If you plan to grill more stuff, like a nice skirt steak, you will probably need to add a few more coals to the fire. You be the judge.
  7. Peel the pepper, being carful not to spill or lose any pepper juices. I remove the seeds and, obviously, the stems. Put peeled peppers, tomatoes, onion, and peeled roasted garlic cloves into the bowl of a food processor. Add the tomato and pepper juices that collected in the bottom of the tray.
  8. Add a two-finger pinch of salt, some pepper, half the cilantro, the red wine vinegar, and olive oil. Pulse the processor until the salsa reaches your desired consistency. I like this particular salsa smoother than most but still chunky. Taste the salsa and adjust the seasoning as necessary.
  9. Pour into a serving bowl, garnish with cilantro, and serve
Standard
dog-eared, foodquarterly recipes, Soup, Vegetables

Three Onion Chowder

I really like chowders and really like French onion soup.  This is the best of both those worlds.  I don’t like pasty chowders so I didn’t thicken it except for the starch released from the potatoes. One tip I learned from Jasper White’s 50 Chowders is to let the chowder rest covered for thirty minutes. It really does make a difference when you allow the flavors to come together.

SERVES 4 TO 6

For the Soup:

For the Soup::

3 ounces pancetta, 1/4 inch dice

2 cups yellow onion, peeled and julienned

2 leeks, rinsed, white parts only, sliced into half moons

4 shallots, peeled and sliced

1/3 cup celery, 1/4 inch dice

1 1/2 tablespoon fresh garlic, minced

1 teaspoon fresh thyme, minced

1 bay leaf

2 cups chicken stock

2 cups half and half

3 russet potatoes, peeled and cut into 1/2 dice

1 tablespoon Italian parsley, minced

1 tablespoon fresh chives, chopped

Kosher salt and fresh ground pepper

1. In a 3 quart Dutch oven or sauce pan add the butter and pancetta and place it over medium heat to render the pancetta. Once some of the fat has been released add the onions, shallot and celery. Saute until they are just becoming golden. You don’t want them to brown too much or the soup will be brown. Add the leeks, garlic and thyme. Cook until the leeks are just becoming soft. Add the bay leaf and chicken stock. Bring it to a boil and add the half and half and the potatoes. Bring the soup back to a boil and then immediately turn off the heat and cover the pot. Allow it to rest for at least thirty minutes.

Parsleyed Oyster Crackers:

1 tablespoon unsalted butter

1 cup oyster crackers

1 tablespoon Italian parsley, minced

Fine sea salt and fresh ground pepper

1. Heat a small saute pan over medium high heat. Add the butter and once it has stopped bubbling but is not brown, add the oyster crackers and toss the crackers to coat with the butter. Season with salt and pepper. Stir in the parsley and toss the crackers gently in order to coat all the crackers with the parsley. Pour out onto a baking sheet and let cool.

2. To finish the soup reheat it but don’t let it boil. Taste a potato to check and see if it is done and adjust the seasoning if necessary. If the potatoes are not done then cook over low heat for 15 minutes. Stir in the parsley and chives and then ladle into cups or bowls. Top with a few oyster crackers and serve.

Standard
Meatless Monday, Side Dishes, Vegetables, Vegetarian

The Asparagus Has Not Sprung

The rain is really coming down now.

On the few days it has been nice I have been to the garden looking for the tiniest hints of spring.  Maybe thin asparagus tips might be peeking at me through the damp dirt.  The tarragon is growing, so is the sorrel and savory.  The  purple chive blossoms are ready to burst open and there are strong whiffs of lovage.  I have already made my beloved lovage cream cheese spread even if it is only beloved by me.

I know I could go to the store and buy asparagus.  I know it would taste good.  I have already seen countless asparagus recipes tempting me, one for an asparagus tart that looks amazing.

The mustard greens are blooming now, a toad has dug his way up from the mud.  Around dinner time he wrestles himself in between clumps of dirt getting himself as close to the earth’s warmth as he can.  He needs to protect himself from the night time cold. During the heat of the day a snake is searching the compost pile  for mice.  Soon…I think to myself…soon you will get to taste the sweetness of the asparagus that only happens when you grow your own. Continue reading

Standard
Easy, Grains and Legumes, Medium Time, Pantry meals, Recipes, Vegetables, Vegetarian

Chickpeas in a Spicy Tomato Gravy

Khatte Channe

A wonderful blend of deeply caramelized onions, spicy tomato broth and creamy chickpeas.  Khatte Channe, as it is know in India, is traditionally served with a flatbread but as it is cooked in this recipe it has lots of sauce so it makes sense to serve it with simple steamed rice and some sort of green vegetable.

I don’t like to use a lot of canned goods but beans are one that I rely on.  They are no fuss, no standing over the stove stirring or adding liquid because they are already cooked.  In fact I think this dish benefits from canned because the peas stand out by not absorbing all the gravy flavors that long cooking would have infused in them .

There is some extra expense in buying spices for the dish but if you have an ethnic grocery nearby, either Asian or Indian, you should be able to find the ingredients.  Buy the smallest amount they sell and if you like the spices and find yourself using them to make other dishes then buy bigger quantities.

The thing I really like about this dish and these kind of bean dishes is even though it is of Indian descent it still feels familiar, I think of it as soul food.  It is warm with a hint of spice and very much like bean dishes from Central America and Mexico.  The dish is comfortable.

Cost to make this meal:

  • three 14oz. cans organic garbanzo beans $1.49 each or $4.47
  • 2 large onions .74 cents
  • one 14 ounce can crushed tomatoes .99 cents
  • at my local Indian grocery an 8 ounce bag costs $3.oo dollars or 2 teaspoons .12 cents
  • 1 head of garlic .99 cents 4 cloves about . 50 cents
  • fresh ginger 3.99 per pound 2 ounces at .48 cents
  • 48 oz vegetable oil  $2.99 or 3 tablespoons at .10 cents
  • cumin seeds vary in price greatly depending on where you purchase them  1 teaspoon at .25 cents
  • my recipe calls for tamarind but substitute a 2 tablespoon of vinegar to give the dish its sourness

Total cost range is from  $7.65 to  $9.00 and if you are only serving 4 you should have a couple of lunches.

This recipe is adapted from Julie Sahni’s Classic Indian Cooking.  If you enjoy Indian food her books are a must for you shelf.

Makes 8 to 10 servings

3 (14.5 oz.) cans chickpeas/garbanzos (drained and liquid reserved)

2 tablespoons tamarind paste mixed with half a cup of water (or substitute 2 tablespoon of vinegar with no water)

3 vegetable oil

2 cups yellow onions, peeled and thinly sliced

2 tablespoons garlic, peeled and minced

1 teaspoon turmeric

1/2 teaspoon cayenne pepper

1 (14.5 ounce) can crushed tomatoes

1 tablespoon fresh ginger, peeled and minced finely

2 teaspoons curry powder

1 teaspoon ground cumin, toasted

kosher salt and fresh ground pepper

1. Place a 3 1/2 quart heavy bottomed pot over medium heat.  Add 3 tablespoons of oil to the pot and then the onions.  Season the onions with salt.  Cook the onions, patiently, until they begin to brown and become deeply colored. Stir them often enough that the onions on top brown at the same pace as those on bottom.   Don’t do this to fast you want melted gooey onions not seared.  Take your time it takes a while.

2. Once the onions are browned to your liking add the garlic.  Once you smell the garlic add the turmeric and cayenne pepper.  Give it a stir then add the tamarind,  tomatoes and ginger.  Reduce the heat and let the tomatoes simmer.

3. Add 1 cup of  the reserved bean liquid along with the cumin and curry powder.  Bring the liquid back to a boil reduce the heat and add the beans.

4. Cook the rice.  

5. By the time you finish the rice the beans will be warmed through and the flavors will have come together nicely.  Taste the peas and adjust the seasoning.  Serve over the rice.

Standard
Medium Time, Moderate, Recipes, Side Dishes, Vegetables

Potato Cake

Potato CakeWhat thrills me the most about potato cakes like this is the crispy top and creamy interior.  If you use good potatoes the flavor is unbeatable and if you are creative you can even layer the interior with things like roasted garlic, wilted onions, green onions or even chopped frozen broccoli that has been thawed and drained of excess moisture.

Yukon Golds

Yukon Golds

There are few products that I recommend, or in this case don’t recommend, and those are conventional potatoes and canned tomatoes.  I don’t like conventional potatoes because they spray them with an anti-sprouting spray which means they have a longer shelf life.  I don’t know if the spray is good for you or not but I want potatoes that aren’t far from the harvest because I want fresh potatoes.  They taste better and I know they do, it’s that simple.  Organic potatoes can’t lollygag around and therfore are generally fresh.

The two types of potato most readily available at most groceries that would work for this dish are Russet Burbanks(Idaho) or Yukon Golds.  Both brown up nicely and both create a creamy interior.

As for tomatoes, I don’t like canned tomatoes because the acid leaches out the chemical from the liner of the can.  I only by tomatoes in glass or those nifty carton type boxes.

Cost to make the potatoes:

  • one bag of organic russet potatoes $3.49 about 10 per bag or $1.75 
  • unsalted butter .10 cents
  • canola oil  and salt .10 cents

Total cost to make this dish: $1.95

Serves 4 as a side dish

5 good sized russet potatoes, scrubbed under cold water with a brush

1 tablespoon butter, room temperature

1 tablespoon canola oil

kosher salt

white pepper if you have it

1. Smear the bottom of a 10 inch non-stick skillet with soften butter.  Make sure to spread it evenly across the bottom.  Drizzle the oil into the pan too.

2. Slice the potatoes into very thin slices, a 1/16 of an inch would be great but no more then an 1/8 inch.

3. Starting in the middle of the pan spiral the potatoes by fanning them.  They should overlap about half the potato before them, if that makes since or you should cover the potato before the one you are putting into the pan by half by the one you are putting into the pan.

4. Lightly season each layer of potato with a pinch of salt.  Once the first layer is down you can layer the rest of the potatoes into the pan without detail to fanning them.

5. Heat the oven to 350˚ F.  Place the pan over medium heat to begin browning the bottom layer.  This always takes longer then I expect. I also have a baking stone that has a permanent spot in my oven so I also know then the pan goes into the oven it will continue to brown the potatoes.

6.  Once the bottom is browned nicely cover the pan and slide it into the oven.  Bake until the potatoes in the middle are tender.  Depending on how many layers you created anywhere from 25 to 35 minutes.

7. Remove the pan from the oven with a oven mitt or towel.  Place a pizza tray or the bottom of a sheet tray across the top of the pan.  In one swift motion invert the pan and tray.  Place the tray into the oven and let the cake bake another 5 to 10 minutes to crisp the top.  Serve.

Standard
Side Dishes, Uncategorized, Vegetables, Vegetarian

This time of year potatoes are a shot glass full of sunshine, they are the break-up song I can’t stop listening to, they are my noodle, my rice, and my comfort. They are soothing in the way a pacifier is to a child and they get me through the edgy emotions of late winter.

They are one of those rare ingredients that selflessly put other ingredients on a pedestal. They make butter better and cheese cheesier and we all know potatoes are versatile by the vast number of ingredients you can pair with them.

You can bet come Sunday when I want something comforting for dinner, they will make an appearance at the table. Most of the time they aren’t fancy. Something simple will do. But on occasion they get dressed up and this is one of the many things I like about potatoes: they adapt to any occasion. They can even go solo and be the meal themselves.

Potato GalleteWhile I am not particular so much about potato dishes I am particular about my potatoes, really particular. But I didn’t become so until I grew them in my garden. Not until then did I understand what fresh, good potatoes were about. I grow fingerlings, purple, Irish cobblers, Kenebec, and Yukon golds. All are unique, and all have peculiarities the cook needs to understand.

Like which potatoes to use for which dishes: the Russet Burbank, for example, is perfect for mashed potatoes because, when cooked, the grains in the potato swell and separate, making for a light and fluffy mash. On the other hand, when you want to make a nice vinegary French herb potato salad, it is nice to have French fingerlings or Russian Bananas because the waxy make-up of the potato keeps them from falling to mush.

I have a film changing bag in which I store my potatoes. It is a relic from, yeah, the days of film but it is light-proof, which makes it great for storing potatoes. And this is where I get picky. I will use potatoes if they are just beginning to sprout but I won’t use them if I see any signs of green. Storing  potatoes in complete darkness keeps them from getting green. I know you can cut off the green but I also know different people have different reactions to the glycoalkaloids. This is the chemical in potatoes that causes stomach issues for some and, while the green isn’t the glycoalkaloids, it is a sign they are abundant. So I simply won’t use green potatoes.

I also like to keep the skin on. I think they add so much flavor and extra nutrients, but obviously this recipe-dependent. Because of this, once my potato stash from the garden runs dry I only buy organic potatoes. They have a higher turnover rate because they sprout and turn green while the conventional are sprayed with a sprout suppression spray. I know the organic potatoes are fresh, good potatoes because they just can’t hang out like the conventional.

Click here for the Potato Cake recipe.


Potato Tips:

1. If the pile of 10-pound potato bags at the store looks messy, it’s because I was digging to the bottom to find the bag of potatoes that has absorbed the least amount of sunlight.

2. Smell the potatoes. They should smell like good soil, not mold.

3. Squeeze the potatoes. They should be firm, with no give.

4. When making mashed potatoes, let the potatoes sit in the colander after having been drained and let them steam off any extra moisture. Then add the butter first and mash it in before any of the other ingredients. Let the starch absorb the fat.

5. If you are making potato salad, dress the potatoes while hot. If making a vinaigrette, add the vinegar and herbs first, then the oil.

6. Waxy potatoes like fingerlings or German butterballs make the best roasted potatoes.

7. Duck fat or lard might be the best choice of roasting fat, and will brown the potatoes deeply and create a crispy exterior with a creamy interior.

8. If you want to roast potatoes in butter start off by roasting the potatoes in canola oil, then during the last 15 minutes of roasting time, stir the butter into the hot potatoes and finish roasting them. This will keep the butter from burning.

9. If your potatoes have begun to sprout but aren’t green, bake them till tender. Then let them cool and store them in the fridge to make hash browns or rösti. About five potatoes makes a nice dinner-sized rösti for two. The baked potatoes will last about 5 days in the fridge.

Everyday Potatoes

Aside
Breakfast, Offal, Pork, Side Dishes

scrappleSort of a cross between mush and sausage scrapple has been called many things, including “everything but the squeal.” In other words it gets a bad rap. If you look at the ingredients list below you will find, first and foremost, it is nitrite free, sugar free, and gluten free.

It is true when it comes to pig parts scrapple could be anything but the squeal but then that is up to the person making the dish. As with most charcuterie you are dealing with head to tail anyway so it is not a big jump to figure it is going to use pork liver. You don’t have to use pork liver but without it I am not sure you get the real gist of what is going on with the flavor and texture of scrapple. Generally after the liver the parts used are usually very flavorful cuts that need picked after being cooked and therefore wouldn’t normally be used except maybe in stews. Things like the cheeks or the snout. Pork ribs were used here because they are the most readily available to the general public.

Spicy, crispy, creamy and chock full of whole grain goodness. Give it a go and you won’t be disappointed.

Makes one 8 x 4 x 3 loaf

1 lb. meaty pork short ribs

6 oz. pork liver, if you can’t find it add more pork ribs

1 small carrot, peeled and sliced

2 green onions

1/4 cup yellow onion, chopped

4 cups water

2 teaspoons dried sage, toasted

1 teaspoon dried thyme

1 1/2 teaspoons fresh ground black pepper

1/2 cup cornmeal

1/3 cup buckwheat flour

a healthy pinch ground clove

kosher salt

1. Place the ribs, liver, carrot, green onions, and onion into a sauce pan where they will fit snuggly. Cover with the water and add pinch of salt.

2. Bring the liquid to a boil and reduce the heat to a simmer. Skim any foam that rises to the surface.

3. Simmer, covered, until the ribs are fall apart tender. Probably 2 hours, maybe 3.

4. Remove the meat to a tray. Strain the stock and measure it out. Wash the sauce pan. You will need 1 1/4 cup of liquid. If you have more than 1 1/4 cup put the broth back into the sauce pan reduce the liquid over high heat. If you have less add water to make 1 1/4 cup.

5. Pick the meat from the rib bones. Place half the rib meat and the liver into a food processor and grind it till it is finely chopped. Chop the rest of the rib meat with a knife so it is coarse but not big chunks.

6. Add 1 teaspoon of kosher salt, the broth and the spices to the sauce pan and bring it to a boil. Reduce the heat and while whisking add the cornmeal and buckwheat flour. Whisk until smooth.

7. The scrapple will thicken a lot at this point. Add the meat and mix it in while still cooking the scrapple. If it is really stiff you may want to add a tablespoon of water but don’t make it to thin.

8. Dump the mixture into a greased 8 x 4 x 3 loaf pan and smooth down the top with a rubber spatula. Push on it firmly with the spatula to get rid of air bubbles.

9. Place a piece of plastic wrap right on top of the scrapple and then wrap the pan. Place the scrapple in the fridge overnight.

10. When you are ready to fry it cut slices and either dredge it in cornmeal or flour. Shake off the excess and saute it in butter over medium to medium high heat until the exterior is crispy and brown on both side and the interior is hot. Serve

Note: excess scrapple can be frozen but when you go to fry it it won’t stay together in a nice block. It will not taste any different the shape is the only thing different.

Scrapple

Aside
Gluten-free, Side Dishes, Vegetables, Vegetarian

Celery Root and Potato Gratin

For some it might have been potato or green bean, but for me my gratin affinity began at an early age with macaroni and cheese. You know, the good old-fashioned kind with real cheddar and whole milk thickened with roux or egg yolks. The one that is baked until the correct ratio of crispy, crunchy top to creamy interior is achieved. It taught me early on in life just how fantastic a great food friendship is.

Then, as I came of age, somehow the gratin became any one-dish. It is tuna with the thin crispy onion rings baked on top or Chicken Divan with broccoli, cheddar, and crumbled Ritz crackers providing the crunch. There is the obligatory cottage pie, as done in the Midwest, topped with both cheddar and mozzarella, then browned. For a while, it was a multitude of eggy breakfast casseroles, all, of course, involving more cheddar.

It became neat, rectangular, and predictable. It served twelve. It was a 9×13 casserole world and I was living it.

I was fortunate. I got out. I went to college, I travelled, I ate.

With knowledge and experience came diversity. And we all know diversity makes the world a much better place. So I developed friendships with lasagna, cassoulet, moussaka, and the timballo, to name a few.

Through it all, and even though we didn’t see each other as much, the gratin remained my favorite.

What I realized is the gratin is the kick-ass cousin who went to college too. And when you reconnect at the family reunion you realize you hang with them because they are exciting, interesting, and you can rest assured that there is more depth to them than a spiky haircut and a couple of tattoos. You get each other in that way only family can.

I like the gratin’s quirks. I like its fondness for juxtaposition. I know that, without pretense, Tournedos Rossini can snuggle in next to a celery root gratin as easily as can Irish bangers and, regardless of which side of the tracks it finds itself, the gratin brings comfort to the table, weight to the unbearable lightness of being.

The thing is, the gratin comes by these traits naturally. But I also know that the things that make it stand out — the creamy interior and crunchy top — don’t just happen, that the building of flavors takes effort, and that without a true friend’s presence the gratin’s popularity might wane.

But then that is what true friends do, you know, bring out the best in each other, and relish in each others’ success.

Note: I have been making this recipe for years. It is based on a recipe in the Dean and DeLuca cookbook by David Rosengarten. I have always found it to be a lovely holiday side dish. It goes well with prime rib roasts and roast chicken. It is versatile and can be made ahead to be put into the oven when needed and also is easily doubled.

Celery Root and Potato Gratin

Serves 6 to 8

2 pounds russet potatoes, peeled and cut into 1/2 inch chunks

2 pounds celery root, peeled and cut into 1/2 inch chunks

Kosher salt and freshly ground white pepper

3/4 cups heavy cream

1 tablespoon garlic, minced

1/4 cup unsalted butter

1/8 teaspoon saffron, crushed

1 1/2 cup gruyere or comte cheese, grated

1. If you plan to cook the gratin right away heat the oven to 400 degrees. Otherwise move on to step two.

2. Place the potatoes and celery root into separate large pots. Cover by two inches with cold water and add a teaspoon of salt to each pot. Bring the pots to a boil over medium heat. Cook the vegetables until tender.

3. Once the vegetables are tender, pour them out into a colander set in the sink. Drain the vegetables and let them sit for a minute or two steam-drying.

4. Rinse out one of the pots and add the cream, garlic, butter, and saffron. Bring the cream to a boil over medium heat. Add a hefty pinch of salt and a few grinds of white pepper. Add 1/2 cup of the cheese. Stir it into the warm liquid till melted.

5. Place the celery root and potatoes into a mixing bowl (or the other blanching pot if it is big enough) and smash the mix with a potato masher. Add a pinch of salt then add the cream and saffron mix. Stir to combine. Taste and adjust the seasoning, adding more salt or pepper if necessary.

6. Use a little softened butter to grease an 8-inch oval gratin (12 inches long). Spread the rustic chunky mash out into the pan. Smooth the top with a spatula, then crosshatch the top with the tines of a fork. Spread the remaining cheese out over the top.

7. Bake until the cheese is browned, about 30 minutes. Let the gratin cool for 5 minutes, then serve.

Standard
Cooking School, Eggs/Dairy, foodquarterly recipes, Vegetables

Celery Root and Potato Gratin

Celery Root and Potato Gratin

For some it might have been potato or green bean, but for me my gratin affinity began at an early age with macaroni and cheese. You know, the good old-fashioned kind with real cheddar and whole milk thickened with roux or egg yolks. The one that is baked until the correct ratio of crispy, crunchy top to creamy interior is achieved. It taught me early on in life just how fantastic a great food friendship is.

Then, as I came of age, somehow the gratin became any one-dish. It is tuna with the thin crispy onion rings baked on top or Chicken Divan with broccoli, cheddar, and crumbled Ritz crackers providing the crunch. There is the obligatory cottage pie, as done in the Midwest, topped with both cheddar and mozzarella, then browned. For a while, it was a multitude of eggy breakfast casseroles, all, of course, involving more cheddar.

It became neat, rectangular, and predictable. It served twelve. It was a 9×13 casserole world and I was living it.

I was fortunate. I got out. I went to college, I travelled, I ate.

With knowledge and experience came diversity. And we all know diversity makes the world a much better place. So I developed friendships with lasagna, cassoulet, moussaka, and the timballo, to name a few.

Through it all, and even though we didn’t see each other as much, the gratin remained my favorite.

What I realized is the gratin is the kick-ass cousin who went to college too. And when you reconnect at the family reunion you realize you hang with them because they are exciting, interesting, and you can rest assured that there is more depth to them than a spiky haircut and a couple of tattoos. You get each other in that way only family can.

I like the gratin’s quirks. I like its fondness for juxtaposition. I know that, without pretense, Tournedos Rossini can snuggle in next to a celery root gratin as easily as can Irish bangers and, regardless of which side of the tracks it finds itself, the gratin brings comfort to the table, weight to the unbearable lightness of being.

The thing is, the gratin comes by these traits naturally. But I also know that the things that make it stand out — the creamy interior and crunchy top — don’t just happen, that the building of flavors takes effort, and that without a true friend’s presence the gratin’s popularity might wane.

But then that is what true friends do, you know, bring out the best in each other, and relish in each others’ success.

Note: I have been making this recipe for years. It is based on a recipe in the Dean and DeLuca cookbook by David Rosengarten. I have always found it to be a lovely holiday side dish. It goes well with prime rib roasts and roast chicken. It is versatile and can be made ahead to be put into the oven when needed and also is easily doubled.

Serves 6 to 8

2 pounds russet potatoes, peeled and cut into 1/2 inch chunks

2 pounds celery root, peeled and cut into 1/2 inch chunks

Kosher salt and freshly ground white pepper

3/4 cups heavy cream

1 tablespoon garlic, minced

1/4 cup unsalted butter

1/8 teaspoon saffron, crushed

1 1/2 cup gruyere or comte cheese, grated

1. If you plan to cook the gratin right away heat the oven to 400 degrees. Otherwise move on to step two.

2. Place the potatoes and celery root into separate large pots. Cover by two inches with cold water and add a teaspoon of salt to each pot. Bring the pots to a boil over medium heat. Cook the vegetables until tender.

3. Once the vegetables are tender, pour them out into a colander set in the sink. Drain the vegetables and let them sit for a minute or two steam-drying.

4. Rinse out one of the pots and add the cream, garlic, butter, and saffron. Bring the cream to a boil over medium heat. Add a hefty pinch of salt and a few grinds of white pepper. Add 1/2 cup of the cheese. Stir it into the warm liquid till melted.

5. Place the celery root and potatoes into a mixing bowl (or the other blanching pot if it is big enough) and smash the mix with a potato masher. Add a pinch of salt then add the cream and saffron mix. Stir to combine. Taste and adjust the seasoning, adding more salt or pepper if necessary.

6. Use a little softened butter to grease an 8-inch oval gratin (12 inches long). Spread the rustic chunky mash out into the pan. Smooth the top with a spatula, then crosshatch the top with the tines of a fork. Spread the remaining cheese out over the top.

7. Bake until the cheese is browned, about 30 minutes. Let the gratin cool for 5 minutes, then serve.

Standard
Kitchen Tips, Vegetables

Scrub Those Veggies

scrub that shit

Don’t think because the package says it was washed three times that you don’t have too.

I make one assumption when it comes to vegetables.  I assume a herd of cows walked through the veggie patch right before someone picked my food.  Keep in mind cows are not discrete.   Their bathroom is the great wide open and they don’t care t if that bathroom is located on top of your food.  It is buyer beware and it is up to you to wash your vegetables.

My point is, wash that shit.  I know, I know,  you hate how it splatters all over the new white shirt you are wearing or how it always seems to spray over the back of the sink but it doesn’t have too.

Submerge the vegetables underwater and then scrub them!  Seriously, it keeps the dirt and crud from splattering everywhere.

I place a large mixing bowl right under the water, leave the water trickling, then fill the bowl no more then halfway with the potatoes, carrots, beets or whatever root vegetable and it still allows me room to scrub with my hands, the brush and veggie, all submerged.  Also by letting the veggies soak in the bottom of the bowl it loosens the dirt and crud, a prewash so to speak.

I use a baby bottle brush because it washes well in the dishwasher,  I like the design because it makes it easy to get into the crooks and crannies and, finally, because the bristles aren’t so stiff as to take the skin off a potato when scrubbing.   I also use a salad spinner for all kinds of things.  Wash those herbs and give them a spin, broccoli and cauliflower too.

The thing is water and a quick rinse  alone will lessen your chances of any food borne illness.  Give the veggies a soak, scrub and rinse and you can pretty much eliminate the chances.  You don’t need to get fancy with the chemicals either water does a great job, was designed in fact to do this task and does it well all by itself.

Standard
Side Dishes, Vegetables

Braised Red Cabbage

Braised red cabbage

This dish will not be the same without the duck fat but that does not mean it won’t be equally as good. Bacon, bacon grease and even butter would all be good choices since I know most people don’t keep duck fat around or have access to it.

If planted midsummer red cabbage will mature just about the time of the first frost. As long as it is harvested before the first hard freeze it will last in storage until about the beginning of the year. Depending of the variety and the conditions under which it is stored it might last a little longer.

Whether you grow it or buy it red cabbage is a great winter vegetable that is under utilized by the home cook. It can easily be whipped into a tasty Asian slaw, turned into a comforting bowl of borscht or a wonderful braised red cabbage. This dish is perfect with pork chops or pork roasts and is also a fine accompaniment to ham or cured and smoked pork chops. Continue reading

Standard
Gluten-free, Grains/Legumes, Meatless Monday, Side Dishes, Vegan, Vegetarian

Stems and Seeds

Stems and Seeds, Stems and Seeds

Hippy food has long been a bastion of vegetarian eats for many reasons. Some political, some personal but in all honesty mostly because it is cheap and often utilizes every last morsel sharing some of the same philosophy as head to tail eating, ironic?, well, yes. Never mind the reasons though because that doesn’t mean it doesn’t taste great and utilizing every part means new tastes and textures from veggies you have long grown tired of.

There is nothing better than to take a bite of something and not only have it taste good but when it feels good, or nutritious, as you eat it it is all the better. Having said it time and time again there are certain dishes that hit that button and, man, there is no better eating. This salad hits that button.

So get out your tie dies and put on your birks, crank up the Dead and get in touch with your inner vegetarian, oh, and make extra because the nice thing about this salad is it is no worse for the wear the next day.

The soy ginger vinaigrette in this recipe was adapted from Jean-Georges Vongericthen’s Simple Cuisine. Learn this recipe you because will find yourself using it on everything. It is a genius recipe.

Makes 4 servings

For the vinaigrette:

2 1/2 tablespoons soy sauce

2 tablespoons lemon juice

1 teaspoon ginger, finely minced

1/3 cup canola or unflavored oil

1/3 cup extra virgin olive oil

kosher salt and fresh ground pepper

1 1/2 tablespoons water

Put all the ingredients into a pint mason jar and screw the lid on tightly. Shake the hell out of it. Set the dressing aside.

For the salad:

1 to  1 1/2 cups blanched broccoli stems, 1/4 inch dice

1/2 cup carrots, grated

3 cups cooked brown rice

1/4 cup sesame seeds

1 1/2 tablespoon chives, minced

soy ginger vinaigrette

kosher salt and fresh ground pepper

1. Place all the ingredients, except the dressing in a large bowl and toss to combine. Add 1/3 of a cup of the dressing and combine everything. Taste, adjust the salt and pepper and add more dressing if you like.

Standard
Grains/Legumes, Meatless Monday, Salad, Side Dishes, Vegetarian

White Wheat Berry Salad with Fresh Beans

White Wheat Berry Salad with Fava Beans, Green BeansIf you have ever had fresh raw fava beans then you know the wonderful tender pop, the tender chew and the juicy flavor. It goes wonderfully here with the green beans and the dressing.

Wheat berries are another wonderful addition to your repertoire. They add a subtle chew and give the dish a pasta flavor while digesting at a lower glycemic level because they are a whole grain.

This is one of those dishes that is here because it is delicious and, luckily, it just happens to be very good for you too.

Serves 6 as a side dish

1 cup soft white wheat berries, rinsed

3/4 cup green beans, blanched and chopped into 1/4 inch pieces

1 cup fresh fava beans, lima, or edamame,  shells and outer skin removed

1 1/2 tablespoons chives, chopped

2 teaspoons fresh thyme, minced

1/4 cup mayonnaise

1/3 cup buttermilk

2 teaspoons lemon juice

kosher salt and fresh ground pepper

1. Place the wheat berries into a large pot and cover them with cold water by two inches. Place the pot over high heat and bring it to a boil. Boil for two minutes then turn off the heat, cover the pot and let it sit for two hours.

2. After two hours add a couple of pinches of salt and then place the pot back over the heat and bring the berries to a boil again. Now reduce the heat to medium and let them simmer until soft, or the texture you want, about 15 minutes.

3. Drain the berries in a colander and let them cool to room temperature.

4. In a large mixing bowl combine the mayo, buttermilk and lemon juice. Season it with salt and pepper then add the thyme and chives. Add the rest of the ingredients and mix to combine. Taste and adjust the seasoning. It is nice if you can let it sit for at least a half hour to let the flavors meld and even overnight is good.

5. Serve

Standard
Grains/Legumes, Side Dishes, Vegetarian

Farro and Roasted Garlic Pilaf

Farro and Roasted Garlic PilafThe term farro can be very confusing. If you look it up you will see no one really wants to pin the tail on the donkey, and as such, all the authors of the articles seem to want to avoid naming a specific grain as farro.

People really want spelt to be farro but I can say spelt is not farro. Spelt is much larger and has a sweeter flavor to me. What I have found is farro can come in different sizes, roasted, and for lack of a better term, par cooked or pearled which means it cooks quicker.

In this recipe I use piccolo farro from Anson Mills. It is easy to cook, is extremely delicious and quite honestly I have become enamored with it as well. I think I can say with all clarity it should be spelled Pharroh because it is the food of gods. It feels nourishing to eat and is such a refreshing change, or I should say replacement, from rice or potatoes.

I always cook extra and use the grain, plain, when baking bread and I plan to save the cooking water next time and use it as well.

Serves 4 to 6

1 cup farro piccola

2 heads of garlic

1 stick unsalted butter

1 tablespoon marjoram

kosher salt

fresh ground pepper

1. Preheat the oven to 325˚F. Slice the heads of garlic across the top at a point where you will remove enough to expose as many cloves as possible but not so much that you loose a lot of the head. Usually I slice off about the top third of the head. Place the heads in a small ovenproof gratin or some other dish. Smear the heads with 1/2 teaspoon of butter and then salt and pepper them. Cover tightly with foil and bake the garlic for one hour. At the end of the hour remove the foil and bake another fifteen minutes to brown up the cloves.

2. Using a strainer rinse the farro under cold water. Place the farro into a 3 quart heavy bottomed sauce pan with a lid. Cover the farro with cold water to cover by two to three inches and add a two finger pinch of salt.

3. Place the pan over high heat and bring it to a boil. Turn off the heat and cover the pan. Let the farro sit in the pan for an hour to two or until the grains have popped.

4. Use a large strainer or colander and drain the farro.

5. Wipe out the pan and put the pan back on the stove over medium low heat. Add the remaining stick of butter. Let it melt gently and then add the drained cooked farro, marjoram and squeeze the roasted garlic into the pot. Stir in the creamy soft garlic smearing it into the farro. Season the pilaf with salt and pepper to taste.

6. Once it is hot, bowl it up, and serve.

Standard
Grains/Legumes, Side Dishes, Vegetables, Vegetarian

Peas and Rice with Crispy Shallots

Rice and Peas with Crispy Shallots

I never feel like people like to cook rice unless of course they are from a country or region where it is a staple.  I will say it took me a while to get the hang of it.  Even after culinary school, because I didn’t cook rice often, it was a struggle.  It seemed like it would either be a gooey mess, or dry and not cooked all the way through.  Some recipes seemed to work one time and the next they failed.

It wasn’t until I started to look for a rhyme and reason that it started to get better for me.  I stopped buying different brands, types and kinds of rice for regular use and narrowed my selection down to two.  I use medium grain brown rice from Lundberg farms in California and a kapika short grain white rice from Japan.  For other dishes such as risottos or paella I use carnaroli.

For those not familiar with kapika it is a process where by the rice is polished using the grains themselves to remove the outer husk which also allows for greater water absorption.  What I like about the kapika process is you do not need to rinse the rice before it is cooked and it has a stickiness to it that allows you to be able to eat it with chopsticks if you choose.  Still there is more to kapika then just chopstick usability, there is the chew.  It has, for me, the perfect chew it is tender with a spring.

I cook brown rice using a method that is wildly different from how I cook any other rice.  I always parboil it in large quantities of lightly salted water, drain it and cool it much like you might pasta.  They I use it in applications like fried rice, casseroles and pilafs.

I usually by larger quantities of white rice then brown.  I love brown rice but brown rice can go rancid if left sitting around or because of lower turnover in the store, the rice is already old and needs to be used up before it goes south.  It has an acrid smell to it when it is old.  White rice like white flour has a longer shelf life.

Obviously brown rice is better for you because it is a whole grain but I am certain white rice is more soothing to my stomach.

For this recipe I could simply enjoy sitting at the table and eating it all on its own.  I need no other dish alongside it but if it is going to be a side dish roast chicken is a real good choice as is rabbit.

My absolute favorite condiment for this dish is the gelatinous stock (not the chicken fat) that forms on the bottom of the roast chicken pan.  If you have it available stir some of it in to the rice after it has cooked but before serving.

Serves 4 to 6

2 cups kapika rice

2 3/4 cup vegetable broth

1 cup peas, fresh or frozen

1/2 cup shallots, sliced into very thin rounds and separated

peanut or safflower oil

2 teaspoons fresh chives, minced

2 teaspoons parsley, minced

1. Place the rice into a 3 1/2 quart enameled Dutch oven with a heavy lid.  Add the vegetable stock and a pinch of salt.  Bring the broth to a boil over high heat.  Immediately turn down the heat to simmer and put the lid onto the pot (I weight the lid with a two pound weight but that is up to you).  Set a timer for 20 minutes.

2. While the timer is running place a 2 quart sauce pan over medium high heat.  Add a 1/2 inch worth of oil to the pan.  Once the oil is to temperature, you can test this by dropping in a shallot ring it should drop to the bottom then come back to the top all in slow motion, add the shallots.  It won’t take long for them to brown so don’t leave the stove.  Once they are brown remove them from the pan with a metal slotted spoon to a paper towel lined plate and season them with salt and pepper.  Set aside.

3. When the rice timer goes of quickly lift the lid and add the peas.  Don’t stir them just leave them on top to steam.  Cover the pot and set the time for 10 minutes.

4. At the end of ten minutes remove the lid to the pot and with a fork fluff the rice which will also stir in the peas.  Bowl up the rice, sprinkle on the herbs and finish it with the shallot garnish.  Serve.

Standard
Grains/Legumes, Side Dishes, Vegetarian

Wild Rice and Barley Pilaf

Wild Rice and Barley PilafThis is so good for you you won’t even know it taste really delicious. Seriously good eats and a great side dish for roast birds of any kind and I’ll even throw salmon onto that list.

Yes, I know it uses two sauce pans but, please, neither grain leaves behind a sticky mess. You could almost just wipe the pan with a towel after emptying it of the grains. Don’t get any ideas I said almost.

Makes 6 to 8 servings

3/4 cup wild rice

3/4 cup pearl barley

1/2 cup yellow onion, small dice

1/4 cup flat leaf parsley, minced

3 to 4 tablespoons unsalted butter

kosher salt and fresh ground black pepper

1. Put the grains into two different sauce pans. Add water to cover by 2 inches and add a two finger pinch of salt to both pots.

2. Bring the water to a boil then reduce the heat to a gentle but continuous bubble. Cook both grains until they are tender. The barley should take about 30 minutes and the rice maybe 40. The rice will just begin to open up its pod.

3. Drain both grains. The dish can be done up to a day in advance at this point.

4. Put the larger of the two sauce pans over medium heat and add the butter. Once it has melted add the chopped onion and sweat it until it is tender. Add both grains and season everything with salt and pepper. I like lots of pepper but season to your liking. Heat everything until hot, taste, and if it needs more add more butter or even a dash of water. Stir in the parsley, plate it and serve immediately.

Standard
Salad, Side Dishes, Sponsored Posts, Vegetarian

Dexas Turbo Fan Salad Spinner-Dryers

Dexas Greens Spinner

I had an email arrive in my box a couple of weeks back from a company by the name of Dexas.  I have never done a sponsored post but in this case I decided to.  I don’t know why, maybe it is just time but instead of me reviewing a product I thought I would just post the email I sent back to Dexas with my likes and concerns for the product.

But time passes and Jeff who sent me the original email,  who is very nice and good people usually don’t stay at bad companies, sends me another email  just checking in or code for, nudge nudge is the post getting close to being done.  Me being me, his second letter sits in my inbox for some time.  I finally get around to actually photographing the spinner  but by now I have used it a lot more.  After I did my initial testing I had some clear ideas, even sent Jeff a letter with my concerns but now I have become comfortable with the spinner and I have changed my mind on several issues.  First here is my letter to Jeff (take note, I removed a portion of the letter about a cutting board, not because it was bad or a bad product but because they didn’t ask me to test it but sent it along for my thoughts.  It is a great product too.)

Hi Jeff,

Thanks for the follow-up.  I did receive the spinner and the cutting board.  It came at the perfect time since all my fall greens from the garden are just getting really good.

I have put the salad spinner to the test and really like a lot of things about it, the gearing in the top and the fan are fantastic, really fantastic,  and the offset and size of the handle is perfect.  It is much like a honey extractor I have and feels just as solid.  It does a great job of cleaning and drying greens of all types.

The spinner really is a nice product but I would be remiss in my testing if I didn’t mention a couple of things.  I really like the way the water runs out the open bottom but one of the things I really like about other salad spinners is the ability to store greens in the fridge right in the spinner.  This may seem trivial but for some reason I have found spinners as a storage unit really helps to extend the shelf life of salad and greens.  Are there any plans to make the spinner available with an optional, I’ll say, drip bowl?  I also mention this because I sometimes have a sink full of dishes when I get to the point in my prep that I want to clean greens I have to clean the sink out.  Don’t get me wrong you have a great product and these are just a few of my thoughts.

Anyway, I like the quality and durability of your products and I will look for them in stores around our area.  I still plan to write a post for my blog and will do so soon.  Thanks so much.

Tom

So what did I change my mind about.  Well, after using it and getting used to storing the greens in a plastic bag instead of the spinner I realized how much fridge space spinners of all kinds actually use.  Now the fridge is far less crowded, a definite plus.

In all seriousness this thing is built like a tank and works great!.

In the market for a good quality spinner?   Get yourself one here Sur la Table   or here Dexas.com

Standard
Breakfast, Main Dishes, Seafood, Side Dishes, Snacks/Appetizers, Uncategorized

Rösti with Gravlax and Caperberries

This makes for a great brunch or a good starter for an elegant dinner. The key to success here is to get the inside done without burning the crust. Patience in other words.

SERVES 4

1 1/4 pound russet potatoes, scubbed and roughly peeled

4 tablespoons unsalted butter

2 tablespoons grape seed oil

4 pieces gravlax style smoked salmon

4 caper berries

1/3 cup cultured sour cream

2 teaspoons prepared horseradish

kosher salt and fresh ground white pepper

1 tablespoon fresh chives minced

1. Place a clean towel under a mandoline and grate the potatoes using the julienned blade and let them fall right onto the towel. Bunch up the corner of the towel and rinse the potatoes under cold running water. Twist the towel forming a tight ball and keep twisting until all the moisture is removed.

2. Place the potatoes into a bowl and combine with the melted butter. Season with salt and white pepper.

3. Heat a 10 inch nonstick saute pan over medium heat. Add the grape seed oil and then place the potatoes evenly across the bottom of the pan.

4. It took me 8 minutes on medium flame then bumping it up to medium high for 6 minutes to get the right crust. Use that as a guide it is not an absolute.

5. When the rosti is ready to flip use an over size lid or pizza pan and cover the saute pan. Do this by the sink. Flip, without hesitation, while holding the pizza pan tightly to the pan, and them slide the cake carefully back into the pan. Cook the other side of the rosti until crispy.

6. Combine the sour cream with the horseradish and season it with salt and pepper. Roll the salmon slices attractively. Rinse the caper berries. Chop the chives.

7. Arrange the different elements attractively on the cake, cut, and serve.

Standard
Main Dishes, Meatless Monday, Vegetables, Vegetarian

Spinach and Feta Pie

Spinach and Feta Pie

Most people, it seems, remember the first time they ate spinach pie. Chances are you were at an ethnic restaurant, maybe on your first food adventure to a Greek establishment, feeling continental and worldly. Maybe you where in college and eating at the local hippie restaurant where they also introduced you to North African Peanut Stew with Tofu, bags of tamari pepitas and herbal tea.

The joint smelled of clove cigarettes, Turkish coffee and sweat. Hank Williams and Lefty Frizzell tunes rained down from the speakers above and mingled with the smell of patchouli making you think it was the birth of cool. There are newspapers hanging on bamboo racks, a clothesline drying out today’s laundry, for anyone to pick up and read. People played checkers and chess and snacked on millet muffins.

It was a health food restaurant without a non-smoking section.  In the kitchen Moosewood cookbooks lined the shelf above the stove.  The food was vegetarian except on Sunday morning when all of campus lined up for a killer breakfast that included sausage and bacon. Sunday being the only day the restaurant actually made money.

Just sitting in the pine high-backs with a good cup of your daily grind and a used but unopened copy of The Sheltering Sky, lying face up on the table, made you feel smart. Lots of broody wannabes wrapped in black with their berets mimicking Kerouac, but really, all of them a breed of Caulfield.  Each with tattered composition notebooks lying open to the first page waiting for that initial first stroke of the pen.

It was an ocean of intellectual doldrums, bitter hopes and angst filled dreams. Everyone who came here was looking for more than a good meal.  They had either lost the wind in their sails or were looking for an intellectual soul mate with which to share their troubled waters, if not their sheets.

And, yet, you came back. Somehow at this place in time, the angst ridden shirt feels comfortable, it fits and you fit or maybe the spinach pie, really, was just that good.

Serves 4 as part of a larger meal

For the strudel dough:

1 1/4 cup all purpose flour dough

1 tablespoon plus 2 teaspoons safflower oil

5 to 7 tablespoons cold water

For the filling:

2 tablespoons olive oil

2 cups yellow onion, small dice

1 1/2 tablespoons garlic, minced

two 1 x 4 inch pieces of orange zist

1 teaspoon finely grated orange zest

10 oz. baby spinach, washed

1 cup fresh bread crumbs

1/2 cup crumbled feta cheese

1/2 to 1 teaspoon red pepper flakes

2 tablespoons currants

kosher salt and fresh ground black pepper

1. Place the flour, safflower oil and water into the bowl of a mixer and using the paddle attachment mix the ingredients until they become well combined and elastic.

2. Turn the dough out and need it till it is satiny smooth. Wrap in plastic wrap and let it rest for 1 hour. You can make the dough up to a day in advance and store it, wrapped, in the fridge. Just be sure to let it come to room temperature before shaping the dough.

3. Place a large saute pan over medium high heat and add the olive oil. Add the orange zest strips and let them bubble away for a few minutes. Remove the strips.

4. Add the onions and cook them until they just start to turn golden at the edges. Season them lightly with salt and pepper, remember feta is salty. Add the garlic and chili flakes and stir until fragrant.

5. Add the spinach and turn it with tongs in the pan to coat it with oil and to wilt it. Once it is mostly wilted turn it out into a clean kitchen towel that is set in a colander. Pull the edges of the towel together then place your tongs around the towel, like a hair pin, and use the tongs to twist the towel into a ball around the spinach and squeeze out the moisture.

6. Place the pan back over the heat and add a more olive oil. Add the bread crumbs and brown them. Add the grated zest and the cooked spinach to the pan and mix to combine. Remove from the heat and cool. Once cool add the feta and currants. Taste and adjust the seasoning as necessary.

7. Preheat the oven to 375 ˚F.

8. A large 18 x 24 wood cutting board works great for this but the corner of a counter or table will do as well. Cover the cutting board with a large, non terry cloth, towel or apron. Dust it with flour.

9. Flatten the dough into an 8 inch disk and dust it with flour. Work it out with you hands into a larger disk. 12 to 14 inches round. Now, hook an edge of the dough onto a corner of the board. Using the backs of your hands, tucked under the dough, start stretching and pulling, gently, the underside of the side of the dough towards the empty corners of the board. If you get a whole just pinch the dough back together and continue. You can stretch the thicker edges from time to time with your hands. Keep stretching from the underside of the dough with the backs of you hands until the dough is transparant and eggshell thin and is 18 x 18 inches.

10. Sprinkle the dough with a little bit of olive oil and using a pastry brush gently and lightly coat the dough with the oil.

11. Lift the dough into a 12 inch non-stick saute pan leaving the edges of the dough to hang over the sides. Trim off the thick edges of the dough with scissors.

13. Place the filling ingredients into the center of the dough. Grab the edges of the dough and bring then to the center of the pan. Pinch the center and twist the dough. Pinch of the dough ball in the center.

14. Bake in the preheated oven for 45 minutes or until brown and crusty. Remove from the oven and let the pie rest for 20 minutes. Cut into wedges and serve.

Standard
Chicken/Poultry, Grains/Legumes, Main Dishes, One-pots, Vegetables

Okra and Sweet Corn Purloo

It is the time of year, at least for me, where I have remnants–odds and ends–coming from the garden.  A few rebellious plants refusing to be defeated by a light frost are still putting forth small amounts of tender vegetables.  The real fall plants, broccoli, cauliflower and Brussel sprouts haven’t yet committed to blooming.  In my garden basket I have Silver Queen sweet corn, okra, and a few green peppers.

I make purloo, a simple but very satisfying one-pot of vegetables, rice and some sort of meat (meant more as a seasoning then an entree.)

Purloo is a dish of economy.  It is a dish of diversity.  It is a dish that tells many a family history simply by ingredients the cook chooses to use. It is of Low Country origin.  Most likely a slave dish.  It is meant to serve many and it is meant to be comforting.  It is.

Serves 6

3/4 cup onion, small dice

1/3 cup green pepper, seeded and small dice

1/3 cup celery, small dice

1 teaspoon garlic, minced

1 teaspoon dried thyme

1/4 teaspoon dried marjoram

1/2 teaspoon dried basil

2 cups okra, cut lengthwise or into stars

1 cup sweet corn, such as silver queen

2 cups smoked turkey thighs, skin removed, chopped (or ham)

1 cup short grain white rice

2 cups vegetable or chicken broth

kosher salt

fresh ground black pepper


1. Heat the oven to 400˚ F. Place a heavy bottomed 3 quart pot over medium heat. Add enough oil to the pot to barely coat the bottom.

2. Once the oil is hot add the onion, pepper, and celery. Season with a pinch of salt and a grind of pepper. Cook, stirring often, until the vegetables are soft but not brown.

3. Add the thyme, basil, marjoram and garlic. Saute, being careful not to brown the garlic, until they become fragrant. Add the okra, corn and turkey. Season the purloo again with salt and fresh ground pepper. Taste and adjust any seasoning necessary.

4. If the pan seems dry add a little more oil. Then add the rice and stir it around to coat the grains with the oil. Add the broth.

5. Grab the pot by the handle and give it a sharp shake so everything evens out and is distributed evenly. Bring the broth to a boil.

6. Turn off the heat, cover the pot with a lid and slide the whole thing into the oven. Immediately turn the heat to 325˚ F.

7. Set a timer for 35 minutes. At the end of thirty five minutes remove the pot from the oven, remove the lid and using a tasting spoon check the rice to see if it is done.

8. If it is not done, cover the pot and return it to the oven for 10 more minutes.

9. If the rice is tender, serve.

Standard
Side Dishes, Vegetables

Fried Green Tomatoes

More often then not, actually to many times to count, I have seen fried green tomatoes served one way, sliced, Cajun spiced and dredged almost always in cornmeal.

Then last year Amy and I went to The Publican restaurant in Chicago.  It is an everything pig restaurant.  Crispy pigs ears, everything fried in lard, boudin blanc  and, well, you get the picture.

It is great restaurant so it isn’t surprising they have amazing side dishes too.  The one that caught my attention was the fried green tomatoes.  I almost didn’t order it but,  then as I often do,  at the last minute I went back to it and did.  I was very, very happy I did.   It was simply the most delicious version of fried green tomatoes I have ever eaten.

This was a midwinter outing.  So green tomatoes at home were out, at least until summer, but I was impressed enough I looked for the recipe online and was surprised to find nothing, well,  not nothing there were zillions of fried green tomato recipes cooked like I mentioned earlier.

Nevertheless this dish resonated with me.  I made it once earlier this summer and it wasn’t to my standards.  It was really good but it just didn’t work like I wanted from a technical standpoint.  Now it is late fall and I have come back to it and this time it came out great.

It is so good for several reasons.  The tomatoes are cut into wedges which keeps them a little firmer when cooked, not tough, and you get more tomato jelly with the wedge shape then if you had a slice.  Also oatmeal and pig are like bread and butter, they just go together, and it feels good to have these two flavors co-mingling and you can accomplish this without buying buckets of lard.

It is time to share this recipe.  I hope you enjoy it.

Note: I made this gluten-free and egg free.  If you don’t need to be gluten-free or egg free then substitute in all-purpose flour for the Cup4Cup and instead of using the egg replacer use three egg whites beaten to stiff peaks.

Makes 4 servings

7 to 10 green tomatoes, about the size of a small tangerine, cut into 4 or 6 wedges

1/3 cup quick cooking oats, not instant oats

1/3 cup quick cooking oats, coarsely ground

1/2 cup Cup4Cup flour (or all-purpose flour)

1 tablespoon paprika

1 1/2 teaspoon ground garlic

2 tablespoons egg replacer mixed in a large bowl with 1/4 cup water (or 3 egg whites whipped to medium peaks, also in a large bowl)

1 teaspoon salt

1/2 teaspooon black pepper

 peanut oil for frying

1 thick slice pancetta or bacon

1. Combine the oats, flour, paprika, garlic powder salt and pepper in a large mixing bowl.

2. Heat the oven to 250˚ F.  Pour enough peanut oil into a 6 inch deep cast iron Dutch oven to come 1/3 the way up the sides of the pan.  Add the pancetta to the oil.  Place it over medium high heat and heat the oil to 375˚ F. on a fry thermometer.  Make sure to remove the pancetta when it is crispy and has rendered its fat to the oil and make sure you, as the cook, eat the pancetta because it is within the rights of every good cook to eat the best bits while standing at the stove and if the peanut gallery doesn’t like it tell them to learn how to cook.

3. When the oil is just about to temperature toss half the tomatoes with the flour mix making sure to coat the tomatoes well.  Place them into the bowl with the egg replacer or egg whites and toss them to coat.  Put them back into the flour mix and coat them well.  Remove them to a cookie cooling rack.  Repeat this step with the remaining tomatoes.

4.  If the oil is to temperature carefully add  half , or less, of the tomatoes to the oil making sure not to crowd them.  When they start to take on color and brown remove them from the hot oil, sprinkle them with salt,  and place them onto the cookie rack.  Add the rest of the uncooked tomatoes to the pot then slide the fried tomatoes into the oven to keep them warm.

5. Serve with you favorite tartar sauce, aioli, or hot sauce

Standard
Vegetables

Oven Roasted Plum Tomatoes in Olive Oil

I make these tomatoes often, mostly at the end of garden season,  and have done so ever since I opened the cover of the French Laundry cookbook and found Chef Thomas Keller’s recipe.  You can use a recipe other than Keller’s recipe but at least do as Keller does and make sure you season the tomatoes with salt and pepper before roasting them and make sure you cook them over a long period of time in a low heat oven.

I say this for a simple reason.  If they aren’t seasoned before you cook them they just aren’t very good and why go to the trouble if they aren’t going to be good, you won’t eat them and they will just sit in the fridge taking up space.  Season them agressively and you will be happy.

One thing to make note of.  I don’t peel the tomatoes until I use them.  The skin, I think, holds them together while in the jar but is really easy to peel off before you use them.

If you try them on a thin crust homemade pizza some Friday night don’t blame me when pizza is never again the same.

20110915-DSCF2320Recipe adapted from The French Laundry Cookbook

Makes 1 quart

30 to 36 Roma or San Marzano tomatoes, perfectly ripe, stemmed and halved

kosher or sea salt

fresh ground black pepper

a handful of fresh savory or thyme sprigs

extra virgin olive oil

1. Heat the oven to 275˚F. 

2. Spread to tomato halves out onto a half sheet tray lined with foil.  Season the tomatoes evenly with salt and fresh ground pepper.  Spread the savory or thyme out over the tomatoes.  Place the sheet tray into the oven.

3. Bake the tomatoes for 3 hours or until they have shrunk but still tender.  It may take longer then three hours depending on how juicy the tomatoes are to begin with.

4.  Remove the tomatoes from the oven and let them cool.

5. Once they have cooled pack them into a 1 quart jar, or a smaller jar if need be, and then use a spatula to get all the oil, accumulated juices and herbs off the tray and into the jar.  Top the jar off with olive oil to cover.

6. Store in the fridge but remember pull them out about an hour before you need them so the oil warms and you can easily remove the tomatoes without breaking them.

Standard
Side Dishes, Vegetables

Mexican Street Fair Corn

Nothing new, been done countless ways and yet if you get, grow or steal perfect sweet corn and make this dish you will continually come back to it again, and again, and again throughout the summer.

SERVES 4

8 ears of the tastiest sweet corn, still in the husk, you can lay you hands on

mayonnaise

2 cups grated hard cheese, Asiago, Manchego, or Cotija

2 tablespoons ancho chile powder

1/2 teaspoon garlic powder

Kosher salt and fresh ground pepper

3 tablespoons cilantro, minced

lime wedges

1. Soak the corn in a water filled sink for 2 to 4 hours.

2. Fire up your grill for direct heat grilling. While the grill is heating peel back the husks leaving them attached to the ear of corn making a handle. Remove the bulk of the silks but you are going to be grilling the corn so any remaining threads will burn off, this is one of the pluses of grilling corn. Combine the cheese and cilantro on a large plate. Combine the ancho and garlic powder.

3. When the grill is hot add the corn and cook it until tender. It should get splotches of brown caramelization if the grill is hot enough.

4. When it is done use a pastry brush to paint the ears with mayonnaise. Roll them in the cheese and cilantro crust. Then sprinkle with chile garlic powder combo and salt and pepper. Serve with a squeeze of lime.

Standard
Side Dishes, Vegetables, Vegetarian

Glazed Carrots with Lettuce

I am not sure when my fascination with carrots began but it wasn’t as a kid. I really don’t think I thought much about carrots until I started growing them in my garden. I think the fact that a good carrot in the middle of winter taste so good and feels so completely nourishing while you are eating them it makes them hard to pass up.

This recipe uses classic technique, yet, is really simple. I find this recipe to be old school Flemish/Belgian and borderline Dutch. The first time I made it years ago I had my doubts about the lettuce addition but they quickly dissolved into bliss. As always the best and freshest produce you can lay you hands on is always going to make the best food.

SERVES 4

16 carrots with tops, you can tell how fresh the carrots are by the tops, not more than 3/4 inch diameter, peeled and timmed with 1 inch of top left on

1 teaspoon sugar

scant 1/2 teaspoons salt

1 1/2 teaspoon white wine vinegar

1 bay leaf

1 sprig of fresh thyme

3 tablespoons unsalted butter

a few grinds of white pepper

water

1/2 dozen bibb lettuce leaves, larger ones torn in half

  1. Place everything, except the lettuce, into a 12 inch heavy bottom saute pan. Add about 1 cup of cold water to the pan or just enough to reach an 1/8 inch from the tops of the carrots.
  2. Place the pan over high heat and bring to a boil. The idea here is to have the water all but evaporate at the same time the carrots finish cooking leaving you with a rich and delicious glaze to coat and be poured over the dish. If the water seems to be evaporating before the carrots are close to being done you can add a little more. At the same time if the carrots seem to be getting to done remove them from the pan. Reduce the glaze and then at the end add the carrots back to warm them and to cook the lettuce.
  3. The whole idea here is to have a tender carrot that is not mushy or one that when you cut it is so hard it shoots across the table. It is timing and you can always use a toothpick to test the fattest part of the carrot. It should yield with a some pressure pressure. As the water gets close to being gone add the lettuce. Let the lettuce wilt and get soft. You want it to be vibrant green but tender like cooked spinach. Taste and adjust the seasoning. Plate, drizzle the glaze over the veggies and serve.
Standard
foodquarterly recipes, Vegetables

Braised Kale with Sweet Potatoes and Corn

        Without question this goes against the grain of  eating seasonally and if it weren’t so good you  would reconsider it.  In defense of this dish it is also that strange time of year where the garden isn’t quite producing and all kinds of things from all over are showing up in the produce department of the grocery.
Still,  it is a dish that is great served with a whole grain pilaf for a vegetarian menu, and of course, with roast chicken, braised chicken, steak, pork or you name it.

Serve 4
4 to 5 sweet potatoes, peeled and cut into 1/2 inch cubes, about 3 cups
1 to 2 tablespoons honey
2 to 3 tablespoons unsalted butter

2 bunches kale, ends trimmed and rinsed
1 onion, small dice, about 1/2 cup
4 cloves garlic, peeled and sliced thin
1/2 cup cream
1 ear sweet corn or 3/4 cup frozen , thawed
safflower oil
kosher salt and white pepper

1. Place a large pot of heavily salted water over high  heat and bring it to a boil.  Place the kale into the boiling water and blanch it until it is tender but the color is still vibrant.  Remove the kale to an ice bath and cool it immediately.  Drain it, squeeze out most of the liquid and then chop it.
2. Preheat the oven to 400 ℉.  Place a 12 or 14 inch non-stick skillet over medium high heat.  Once the pan is hot add 1 tablespoon of butter and the sweet potatoes.  Season them with a big pinch of salt.  Toss them in the pan to coat them with butter.  Cook the sweet potatoes until they start to brown, if they look dry add up to another tablespoon of butter,  then slide them into the oven.  Set a timer for 20 minutes.
3. While the sweet potatoes are cooking place another saute pan over medium heat and add a tablespoon of safflower oil.  Add the onions , season them with salt and white pepper, and cook them until they begin to take on color.  Then add the garlic.  Stir the contents of the pan and then add the chopped kale.  Stir again and season with another pinch of salt.
4. Add the cream and the corn and stir everything together.  Reduce the heat to a simmer and cover the pan with a lid.
5. Using a thick dry kitchen towel remove the sweet potatoes from the oven and add a tablespoon of honey and toss or stir the potatoes to coat them.  Place the pan back into the oven.  Bake the potatoes for another 5 minutes or until tender.
6. Check the kale for seasoning and adjust.  Try a sweet potato and add more honey, salt or pepper if needed.
When everything is hot and tender, bowl it up, and serve.

Standard