
Author Archives: Tom Hirschfeld

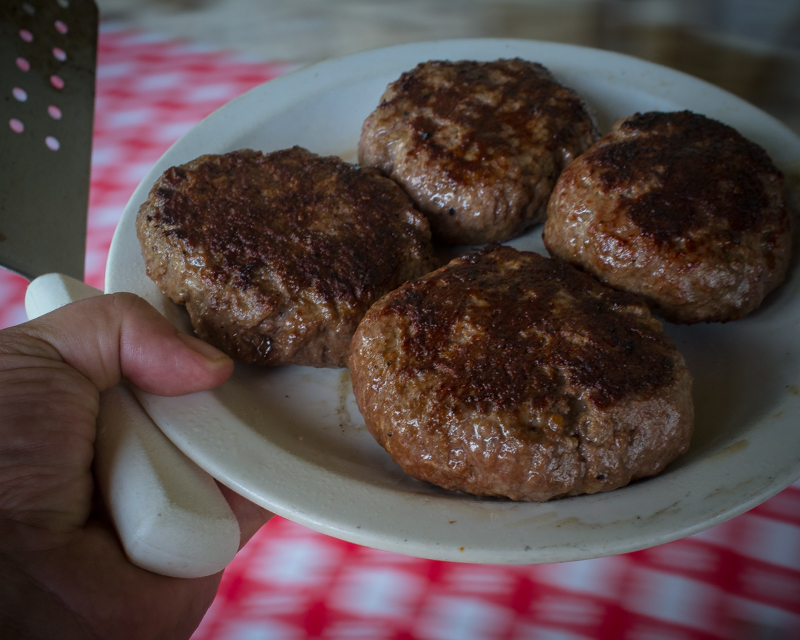
Building a Better Burger
If you think about it, a hamburger is nothing more than a sausage without a casing. Once you accept this notion, you open yourself up to endless burger possibilities! I mean really, there are as many burger recipes as there are cooks. Everyone has their own little tweaks and a go-to recipe.
With that being said, I am not going to sit here and try to convince you this is a recipe for the best hamburger in the world — even though it is — because someone will undoubtedly draw a line in the sand, slap me with gloves in hand, and challenge me to a duel. It’s inevitable. Continue reading

Marie’s Freedom Station and Crispy BBQ Chicken Thighs
Marie’s Freedom Tire Shop
Marie, in her sixties, ran Freedom’s Tire Shop in Freedom Indiana. It had been years since anyone bought tires but they kept coming for the gasoline. The station sat at the edge of town across the street from the only grocery. Marie’s husband had been dead 15 years when I met her in the late 1980’s. Her only source of income had been her husband and his business. When he died she decided she would run the gas station and each day, with walking stick in hand, she would walk to work. She had never had possession of a drivers license nor did she want too. Continue reading
The Midwest, Barbecue, And Zeb’s All Purpose Mambo Sauce
Midwesterners like pork and we like beef, even chicken but we do not like change.
Well, that’s not exactly true. We understand that change is inevitable, we just don’t like it sneaking up behind us and yelling BOO. We prefer change we don’t see, change that slips on like a comfortable pair of socks that go unnoticed throughout the day, not a constant reminder like a fancy necktie.
Growing up in suburban 1970’s Indianapolis “barbecue” meant baking a chicken and basting it in a bottled sauce. If there was smoke it was liquid, if there was fire it was a heated oven. This was the logical extension of my mother’s Midwest, the pot-roast, chicken-and-dumplings-tuna casserole Midcentury Midwest. Spice was reserved for vacations south of the Mason Dixon line. But even as we were tucking into ketchup-mild barbecued chicken, tiny outposts of smoke, fire and mostly pig, had long-since migrated north.
Stubbs, you see, is tall. His cowboy hat makes him taller. His hands make him appear well, like a folkloric hero, his hands are big enough to palm a turkey, thick and calloused and more heat resistant than a fireman’s glove.
One was Zeb’s barbecue, a shack I spied from the back window of the station wagon as I was ferried to Saturday morning art lessons. The place billowed smoke. I was sure that one Saturday we’d see a line of fire trucks, the red glare of emergency lights, firemen unfurling their hose to do battle with a five alarm, sirens blaring.
But week after week, the cloud of smoke billowed across the avenue without a fire truck in sight. The smoke smelled like Sunday morning bacon — and slow cooked pork. Continue reading

An Affair
The little bit of lemon in the tea is wonderful, but something about citric acid causes Stanley’s tongue to become clumsy. It makes him sound Duchy when he speaks. Not in a God-awful way, and no more difficult to understand than Mr. FitzDermot’s heavy Irish brogue as they sit and converse in the tiny living room of the old house.
The FitzDermot Bed and Breakfast is much larger than it looks from the street, and on most nights it is near capacity–the tenants being Mr. FitzDermot’s twelve children, ten of whom are old enough to be out on their own. The tea bread, sweet with currants and speckled with tiny pieces of crunchy toasted walnuts, cures Stanley’s speech impediment, the salted butter slathered over it acting as a lubricant for his tongue.
Stanley sleeps away his first two days in Ireland. He doesn’t know if it is jet lag or if he is afraid, but he has knots in his stomach. He’s very much an introvert when it comes to strangers and it didn’t once cross his mind when he impulsively bought a one-way ticket to Shannon, that he might have to talk to people. But very quickly he found he didn’t have to–the Irish would do all the talking and all he had to do was listen. Continue reading

The Wonder Of Store-Bought Crackers
I have a deep affinity for crackers. Not gourmet varieties, or even homemade, but good old plain Jane everyday crackers, be it Captain’s wafers, or saltines, and especially any kind that comes two-to-a-pack.
I don’t think anyone needs a reason to like crackers but my fondness, I am certain, begins with my childhood memory of inexpensive family restaurants and sit down pizza joints that bring cracker baskets to the table instead of bread. I love the cracker basket and who in their right mind doesn’t? They hold something for everyone after all. Remember those crunchy breadsticky thingys, the sesame rounds, or the oblong townhouse crackers shaped like flattened capsules all wrapped up, by twos, in cellophane.
Wandering along my merry way as we do in life, I eat crackers. I eat crackers without much thought. I eat Club crackers wrapped in thinly sliced bacon and then baked, I learn it is okay to drink a martini with saltines topped with pickled bologna and American cheese because they are a match made in heaven, I will never forget having Georgia cracker salad and realizing it is nothing more than a tomato, mayo, whitebread sandwich on steroids, and my favorite, I use all kinds of crushed crackers as croutons for my salad. To this day every time I walk past a stick of butter I can’t help but want to drag a saltine down the length of the stick before popping it into my mouth, the perforations at the edges of the cracker leaving the soft butter to look like a perfectly raked zen garden. Continue reading

The Music Lesson
All afternoon and from inside his parent’s house, as Bill and I sit outside in the comfort of lawn chairs talking, trumpeters one after another run through their scales, do re mi fa sol la ti do, over and over again. The notes drop from the open windows like fall leaves from the trees. It could get annoying, it doesn’t, and after a bit the repetition becomes soothing.
I reach out and flip open the lid on the large orange ice chest. Into the ice laden water goes my hand and it quickly goes numb. I fish out a cold beer, pass it to Bill then promptly repeat the fishing expedition for myself. It is easy to look forward to the time Bill and I spend with each other, we have known each other a long time, and besides at the very least it is always nothing short of unforgettable.
Like today, my friend and I often sit in lawn chairs out in the grass just a few feet from the back porch of his parents’ house. Sunglasses shield our eyes from the bright sun until it finally tucks itself behind the steep hill that rises upward at the back of their yard. Even then the sun won’t actually set for another hour. So the landscape becomes a black wall of matchstick trees lit by the yellow glow of evening right up until the sky burns out and the back porch light kicks on. Mostly, Bill and I sit and talk a lot about nothing but we do it well. Even so we manage to garner a few epiphanies over the years, some shared, some not, this one wasn’t.
As a high schooler I hated running scales while practicing the trumpet. I thought they were pointless, boring, and stupid. I should be practicing the music, memorizing it note for note, if I want to play it well. But sitting here, two or three beers into my thoughts, remembering what an awful trumpet player I really was, all of the sudden, all these years later, I understood, I got it.
Bill’s dad was a world class trumpet teacher at the university. He is retired but he still gives lessons to advanced students. His biggest lesson, the one he repeats over and over again, the one I heard him tell his last student for today, “if your mind leaves the sound of the horn, obstacles will appear.”
I have heard Bill Sr. say it so many times before but today it hit me differently, it’s exactly what we don’t do when we teach people how to cook. We give people a recipe, much like a piece of sheet music, and expect the cook to be able to play. While we know there are those that have the skill set there are many, many more who don’t. We try to pretend it doesn’t matter, it’s just a recipe after all but it does because the cook never builds the skill set to play at a level satisfactory to their own liking. Hence obstacles appear which prevent real enjoyment. I’ll wager it happens in cooking all the time.
And in this is where the conundrum lies.
I count myself lucky in that I honed my kitchens skills for years in a commercial environment. I can never fully express how much the experience has added to the happiness I feel when I am in the kitchen. Simple things like cutting onions for onion soup might take me minutes while others are in tears for hours, or maybe because I sautéed boneless skinless chicken breast by the thousands I know when they are just the right color of brown and that anymore coloring will make them chewy and dry and how with the push of my fingertip I can tell when they are no longer pink in the middle but still juicy and edible without fear of food born illness.
I don’t think of anything I do as special but I know sometimes friends look on with amazement and wonder while I look back at them through my own naivety as if everyone knows how to do these things.
So the question for me becomes how do I translate my joy to others, how do I create a desire in others to build the skill set needed so they can create the kind of food they like to eat, create it with efficient, quality results and excitement.
It is frustrating for me in moments such as this, not because it makes me mad but rather because I love being in the kitchen and I want people to share in this same joy while being in theirs.
When I started cooking I copied, to the T, recipes of every famous chef and cookbook author whose food I liked. I cooked from cookbooks day-in and day-out. Even when I am cooking full time at a restaurant when I come home I turn around and cook at every opportunity. At first it is hard to build the confidence to cook even with step by step directions at my side but as I progress my fear of cooking without any guidance diminishes. I am convinced my abilities improve because I learn solid cooking technique until I know how to sauté, braise, roast, grill, and poach. My knife skills improve and I work on plating. I want nothing more than to learn to cook.
My style at first is a conglomeration of all those I mimic until one day my style of cooking just “is”. It is easy for people to tell whose food they are eating and before long I find myself edging up to the stove and cooking from experience. I don’t even remember the day it happened because it just did.
I wasn’t born a chef. I started out life as a photojournalist and I never thought I would be anything but but when I decide I want to learn to cook I dive in head first, I expect to come out with a filthy apron, I am passionate about it, and I know I won’t stop until I am good at it.

To Give Thanks
I don’t know why but I always find the silence during heavy snowfall deafening. It’s a wonderful time for reflection.
Amy moves about uncomfortably in the hospital bed. I look down at the pulse monitor on her forefinger. It is a bright red beacon in the darkness. On her arm closest to me I let my eyes follow the faintly lit trail of her IV line to where it disappears into her taped and bruised hand. This time they only had to stick her with the IV needle four times before they found a vein that didn’t collapse.
A gray and black leopard patterned blanket, a blanket Lynnie gave to her mom for good luck, covers Amy’s legs. Three days of treatment again, but this is day three, 4 more hours to go and then we are done for the year. Every set of completed treatments feels like an accomplishment, no more waking the girls up early to get them to before school care, no more waking up at 2am, panicked, and thinking I overslept and we missed an appointment, or watching the EKG machine obsessively, knowing what each reading means but we are done and in a few hours Amy will begin to come out of it.
I pull the car into the driveway and park. It won’t be long before Vivian gets off the bus. I have enough time to get Amy into bed so she can sleep, the treatments are exhausting . An hour after Vivian gets home Lynnie will get off the bus. Today is really no different than any other day, the ketamine treatments are a part of our life now. We get through each day as any other family might and like everyone else we jump each hurdle as it presents itself.
It’s in the passing moments of mindlessness that I find myself reconciling our new life, and much like someone stuck in an abusive relationship I am constantly creating ways to make it livable while ignoring the obvious.
Vivian is upstairs reading and Lynnie is playing with her guys, she is having an interesting conversation with them but I am only sort of listening.
In the pantry I collect up ingredients. I load up my arms, a Cambro full of flour, another of sugar, on top of them I lay a bag of brown sugar and a jar of green and red Christmas sprinkles. When I get everything together I call the girls and we begin measuring ingredients. It’s time to make some Christmas cookies.
As 2017 exits, we are ending the year much as it began.
I try to give Amy’s days structure. It is around 1:30 in the afternoon when I wake her. I bring her coffee in her favorite Klimt mug, sugar in the bottom until it forms an Appalachian sized hill, half and half to cover, and to the top with strong, hot, coffee.
This afternoon I don’t have the time because we are making cookies, but on the afternoons when I don’t have lots to do I lie in the bed next to Amy while she sips her coffee and we talk. We relish these afternoons. Sometimes we talk about pop culture, on others it’s about something we read, there are days when we laugh hysterically, some afternoons are spent bringing her up to date on the kids school stuff but it’s on the days we talk about how lucky we are, even in this worst of moments, that we both feel fortunate. We know that with a few simple turns of fate our situation could be wholly different. We know we are the exception and not the rule, the fact that I can stay home with Amy while, we hope, she begins to recover is a luxury, that her illness hasn’t depleted our savings is because we have and can afford good health insurance.
We also know we have an amazing family always at the ready to help in anyway but on top of that we have great friends who continually call or text to ask if we need anything. I will likely turn down the help but it is more with the knowledge there might come a time when we will need it rather than we don’t want it. Besides when you reach out it lets us know there is a world outside of Amy’s disease and on bad days sometimes it is the best thing that happens.
It is still snowing, it is a lighter snow, and I am thankful.
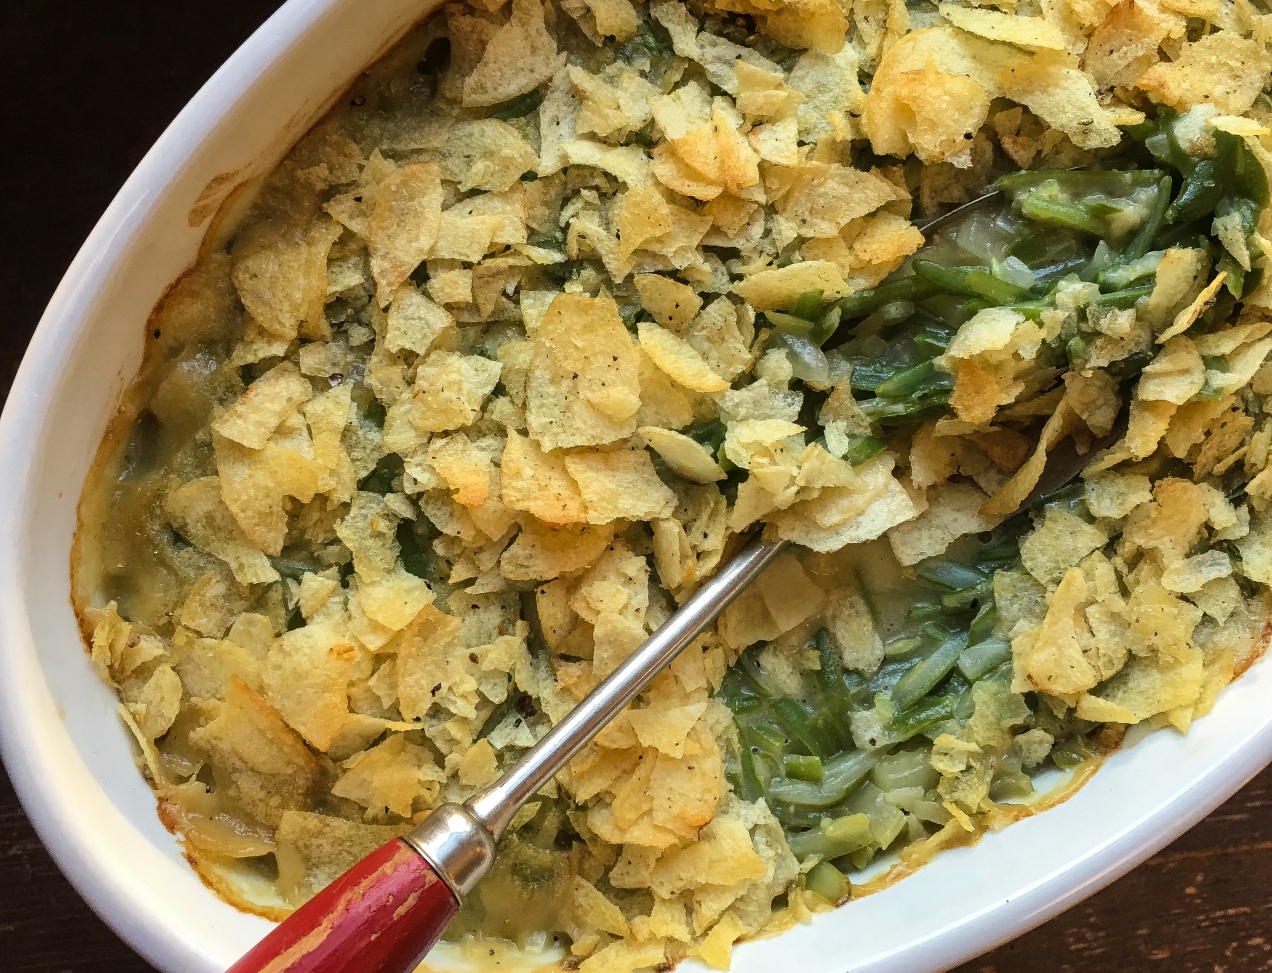
Day Two: Green Bean Casserole
I don’t make anything fancy for Thanksgiving. I like, and my family likes, a good homey kind of Thanksgiving. One that we have eaten in some iteration for as long as I can remember.
I figured out a long time ago my food is far better when I don’t try to hide behind fancy. Don’t get me wrong I like fancy and I enjoy cooking gourmet meals but in my early days of cooking I would hide behind fancy instead of doing the hard work of using good culinary methods and sourcing quality ingredients. If you do the later homey becomes fancy and incredibly delicious.
My definition of quality ingredients has varied over the years but I think I have finally landed squarely in the Jacques Pépin camp. What I like about Chef Pépin is he uses what is best in the moment. Summer fruits in winter? To which I am quite certain he would say, don’t be afraid to use frozen because they more than likely taste far better than anything in the fresh produce department. I feel the same way about green beans. I didn’t always, but a well sourced bag of frozen Frenched green beans far out ways the hassle of blanching fresh beans and frozen is worlds ahead of canned.
I provide the usual suspects at my Thanksgiving table, like this casserole, but I choose my ingredients and cooking methods carefully so as to get the best out of each dish. In the recipe I call for making a velouté, a mother sauce in the culinary world. (For folks around Indianapolis of the right age and if you ever ate at the LS Ayres tea room you will more than likely know this sauce as Chicken Velvet Soup. There, the secret is out, I just taught you how to make chicken velvet soup using this green bean casserole recipe, simply leave out vegetables and you have it or, for that matter, leave in the onion, carrots, and celery.)
For Thanksgiving, this is a dish where I would have all the ingredients ready in advance. If I felt the need I would get it into the casserole dish on Wednesday but I would leave off the potato chips or onions, until right before I am going to bake it in the oven.
2 TBS. unsalted butter
2 ½ TBS. all purpose flour
⅔ C. yellow onion, minced
½ C. celery, minced
1 ½ C. chicken broth, unsalted (or turkey stock-hint, hint)
2 TBS. heavy cream
1 pound frozen Frenched green beans, thawed in a colander to drain excess water
Salt and fresh ground black pepper
2 oz. potato chips, crumbled (you can use crispy onions here too)
- Place a medium sized heavy bottomed sauce pan over medium heat. Add butter and let it melt.
- When the butter has melted add the flour and stir with a wooden spoon to make a roux/paste. Stir constantly but gently until the butter/flour mixture smells like popcorn and turns from yellow to golden.
- Add onions and celery. The roux will clump up around the vegetables. Cook the vegetables for 3 minutes.
- Add the broth to the pot, turn the heat to high, and stir continuously until the liquid comes to a boil and thickens.
- Reduce the heat to low and allow the sauce to cook and thicken. Taste, add pepper and salt, stir, and taste again.
- Combine the sauce with the beans and spread into a buttered gratin. Spread the crumbled chips over the top and bake at 375F for 35 minutes or until bubbly and brown.
- Let cool for 5 minutes before serving.
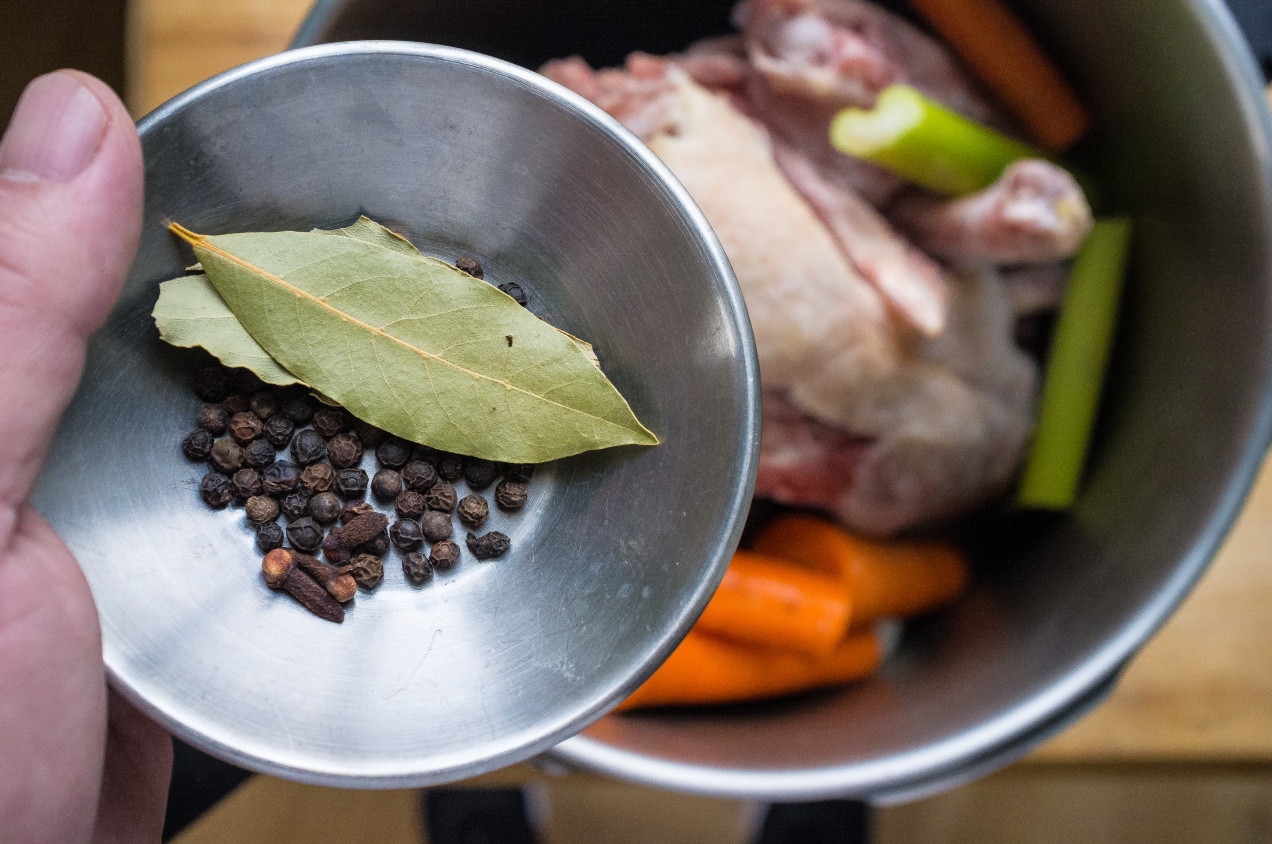
Day One: My Turkey Stock Recipe
It’s my favorite holiday, Thanksgiving is.
Amy is lying down and not feeling good when I walk into the bedroom to ask if she wants to have Thanksgiving dinner at our house this year. She hesitates, not saying what we both already know, about how we are planning to put the house up for sale, but by the look in her eyes I know she wants too so I jump in and tell her I think we should and she agrees. Continue reading

RECIPE CARD: 3 Cheese Beef & Noodles + How To Get The Most Out Of Prep Day
I have always said, “if I am going to cook one chicken, I might as well cook two.” It’s not really any more work. I have come to believe the same about pot roast, pork roast, and just about anything that is braised, smoked or roasted.
Continue reading

RECIPE CARD: Slow Cooker Baked Potato Soup
This is the Midwest and we like baked potatoes and we aren’t ashamed to say so. Loaded baked potatoes, twice baked potatoes, simple baked potatoes, in my part of the country it is un-American not to like them. For that matter, how good is a baked potato on those nights when they are what you crave? Truth is we like all kinds and cooked lots of ways. That is what is so good about this soup, it can be dressed up or kept very basic but no matter what at the dinner time it is nothing short of delicious. Continue reading
I am new to slow cookers. I bought mine with the intention of immersing myself into the world of the crock pot. My reasons are simple I need to create a few bigger blocks of time each week to immerse myself into other projects. It feels like the right thing to do. Continue reading
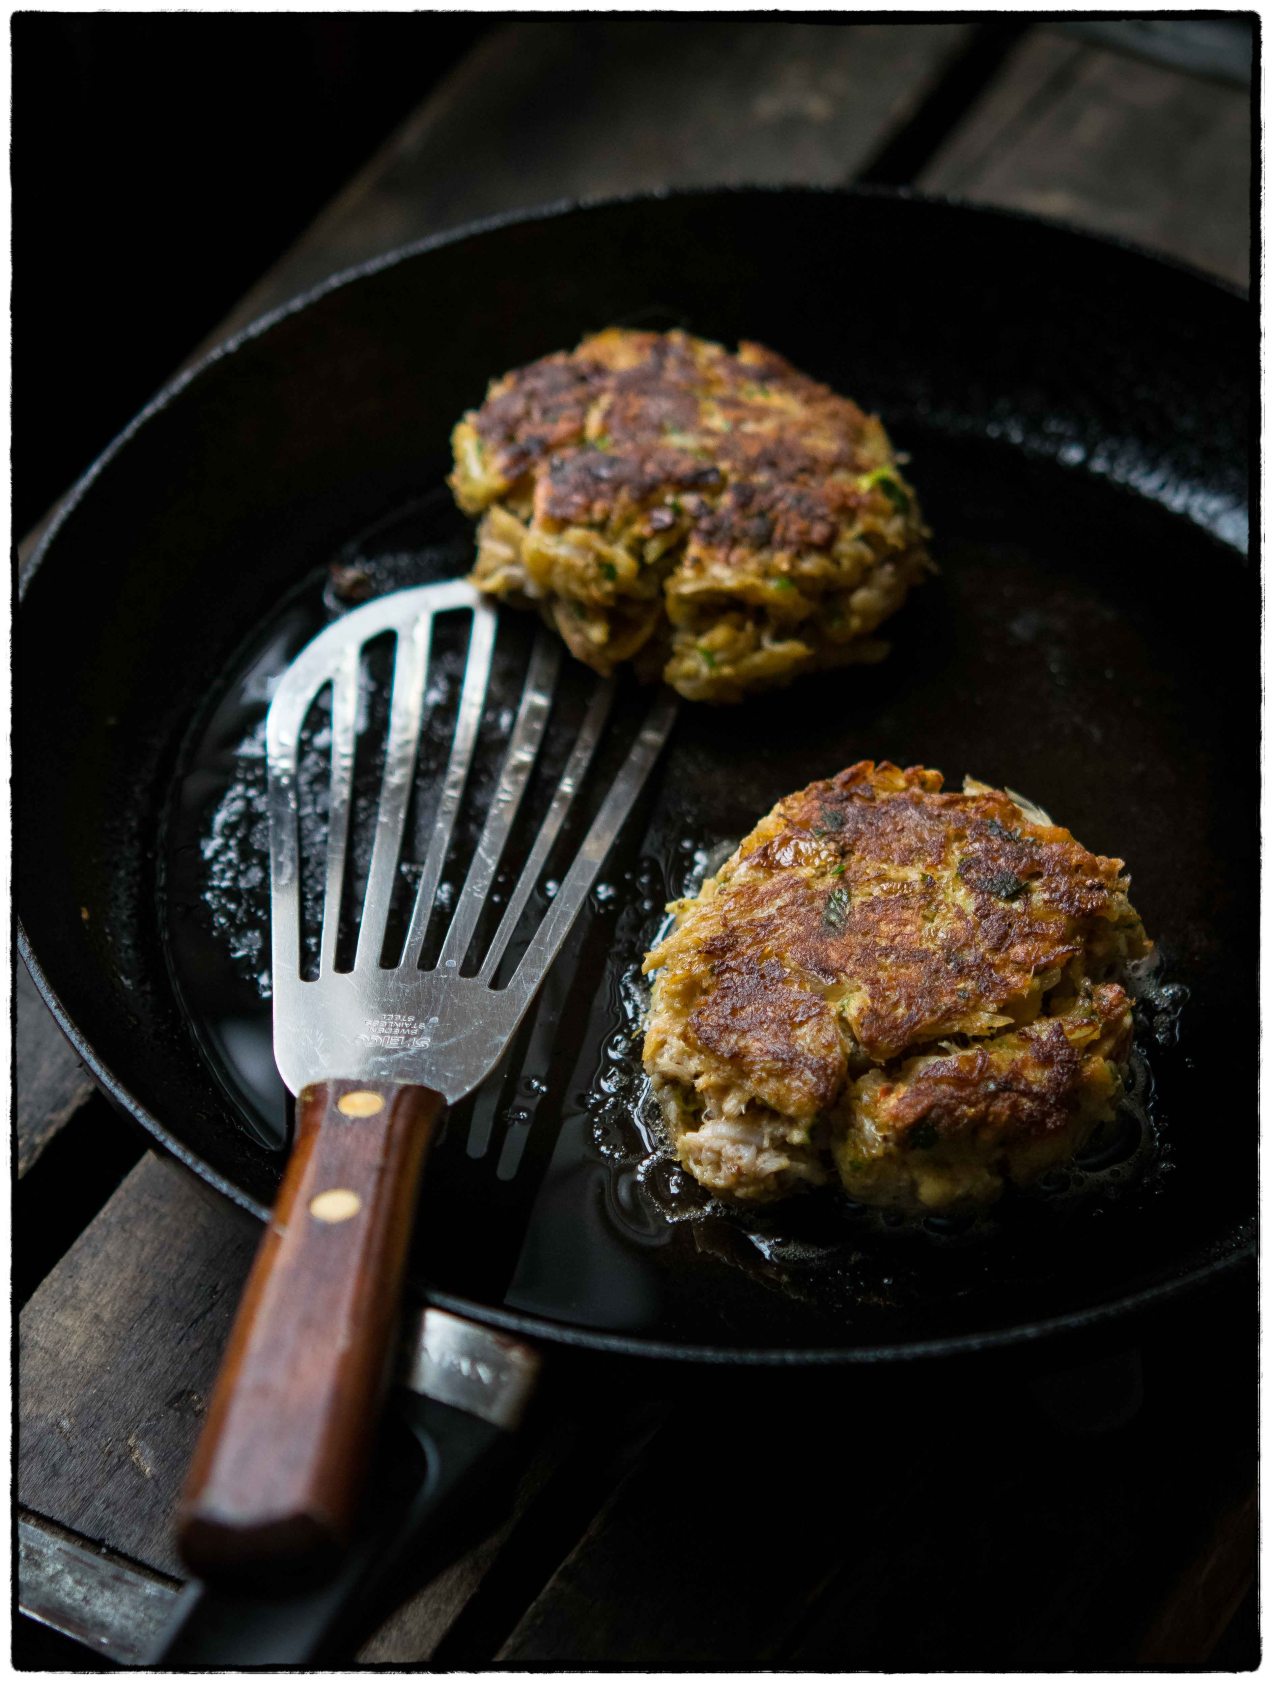
RECIPE CARD: All-American Crab Cakes
I can’t tell you how many times I made crab cakes while working at different restaurants. I am pretty sure even I don’t want to know. What I do know is many times they had lots of flavors sans one, crab and I often thought the cakes were more bread crumb than crab. So here is a quick, easy, and very crab tasting recipe that can be made any night of the week. This recipe makes a lot of cakes but realize you can make the cakes and freeze them in sets of 4 cakes or whatever works for you. Continue reading
My wife Amy and I had the pleasure of eating a multi-course vegetarian meal a few years back. The dinner came with many drink options, wine, cocktails, and homemade sodas/mocktails. For no reason other then curiosity, we chose to drink the mocktails and we were glad we did. It was an amazing dinner all the way around. Continue reading
RECIPE CARD: Celery and Lemon Tom Collins (mocktail or cocktail)
I like the unexpected. Especially when it is something new to me, or it tastes and sounds exotic but in reality it has a longstanding history—a marriage of flavors that is natural. Flavors tried and tested over time, in this case, in towns all across Portugal.
Octopus is a food that falls into a category that not to many foods do—it is either flash cooked very quickly or it is stewed for a very long time. Both methods intended to render the octopus meltingly tender. I have tried flash cooking octopus several times and either I am an idiot and just can’t get it right or my definition of tender is radically different from everyone else who uses the flash cooked method. Continue reading
Octopus and Potato Salad with a Tomato Vinaigrette

Bar Pizza—It’s What You Crave
There has never been a more one-of-a-kind pizza like the bar pizza. For the most part they are never good, many times they are awful, but that has never stopped anybody from ordering one. Patrons order them because they are drinking. Combine it with hunger and it makes these pizzas far better then they would ever be if a shot of better judgement was in hand. Without exception a bar pizza reigns over the pink pickled eggs languishing in the murky liquid of the large glass jar back by the whisky. Bar pizzas are also infinitely better then the microwavable cups of Spaghetti-Os or the burritos ensconced in a cardboard tortilla. Even so, that doesn’t make them good. Continue reading
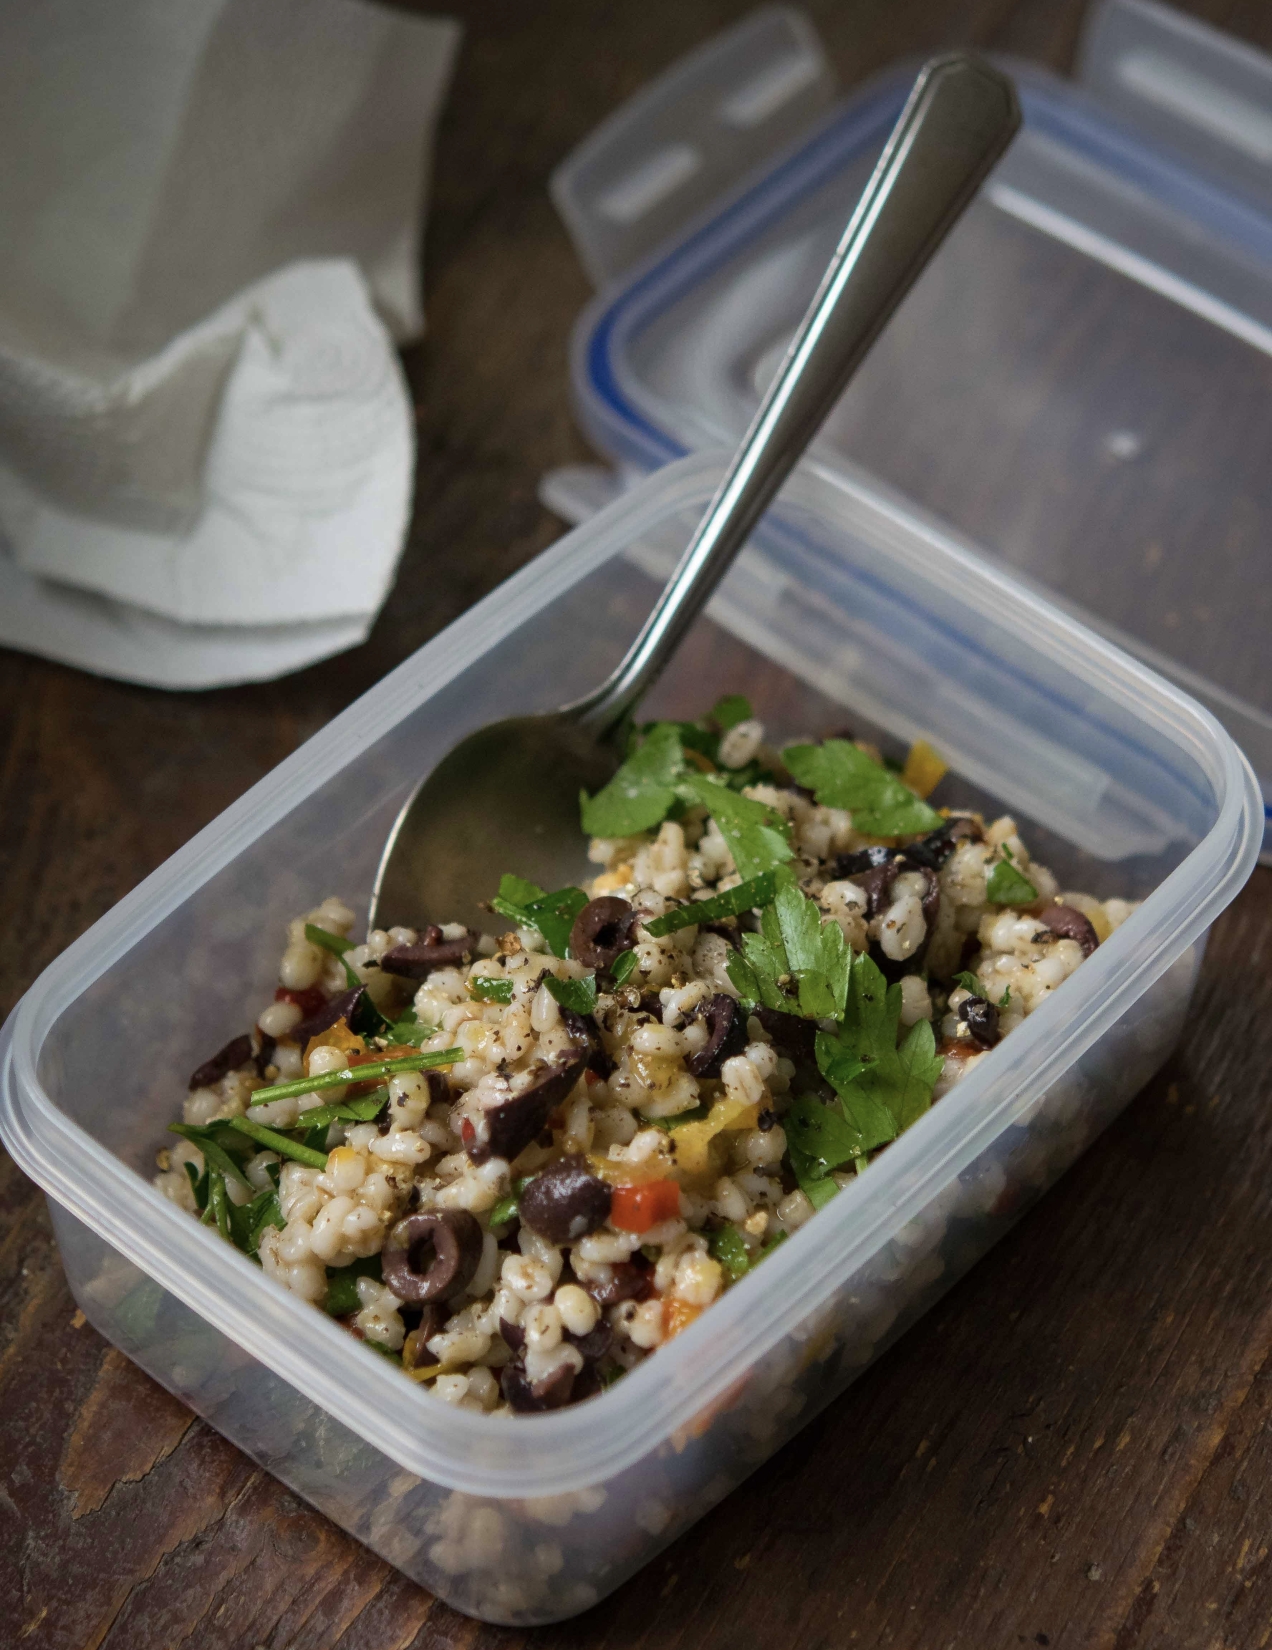
Barley Salad with Kalamata Olives, Sun-dried Tomatoes, and Parsley
I have cooked with whole grains for a long time. My fascination began, simply enough, with bulgur wheat used to make tabouleh. It was a gateway to all sorts of other grains; winter wheat, soft summer wheat, oat groats, farro, you get the idea. There are lots of grains readily available that a few short years ago were very difficult to locate. A good earthy health food store went a long way to rectifying the shortage but now about every food store carries some sort of whole grain. Continue reading

Peanut Butter, Butter, and Lingonberry Jam Sandwiches
I went to my regular restaurant, the one I favor over all others. I ordered my favorite dish only to be disappointed. It lead me to wonder why it wasn’t as good as usual. In my head I worried the quality of the restaurant was slipping, are they ordering a lower quality product that isn’t as flavorful? To be fair I stopped and thought it might be me, maybe my taste buds were off that night. It happens.
I think a lot about taste, not so much about the five taste receptors; bitter, sour, sweet, salty, and umami but more about the law of diminishing returns. Take for instance today, I am making a tomato soup that clearly states in its recipe title it’s the only recipe I will ever need. I hope it’s that good and it may well be delicious but I also know after I eat it 5 or 6 times I will more then likely move on to another recipe for tomato soup, say, the world’s best tomato soup. Knowing my taste buds become familiar with tastes, if the food on the plate in front of me becomes to familiar at some point it is less likely to excite me. I also know there are people who don’t care. They eat simply to survive, their interest lies elsewhere, or they want the familiar. I don’t.
How many times have you eaten a peanut butter and jelly sandwich? Are you ever excited to eat them anymore? As a kid I could eat them breakfast lunch and dinner if my mother would have let me but they began to wear thin and I started to eat ham sandwiches or turkey, sometimes a grilled cheese. As an adult there are times I get a kick out of eating a PBJ but they never seem to match the intensity and joy of eating them as a child. I compare it to going back to the neighborhood sledding hill as an adult only to find what at one time seemed like the Rocky mountains now looks more like a speed bump. Childhood can make experiences larger then life.
Peanut Butter, Butter, and Lingonberry Jam Sandwiches
While I am and always have been enamored with simple foods that use honest ingredients it doesn’t mean I don’t stray from time to time. My cooking has become more about good technique and nurturing rather then showmanship. In a way simple food is like going back to my childhood experiences without fear of being disappointed.
1 brioche hamburger bun or 2 slices of brioche, toasted almost burnt
1 1/2 tablespoons Skippy Natural Peanut Butter
2 unsalted butter pats, about 2 teaspoons at room temperature
1 tablespoon lingonberry jam or red currant jam
Maldon Sea Salt (this is a big flaky sea salt meant for finishing dishes)
- When the bread has cooled enough not to melt the peanut butter spread the peanut butter evenly across the bottom bun. On the top bun smear the butter and top it with the lignonberry jam.
- Sprinkle the peanut butter with Maldon salt to taste. Smush the top bun onto the bottom and serve.
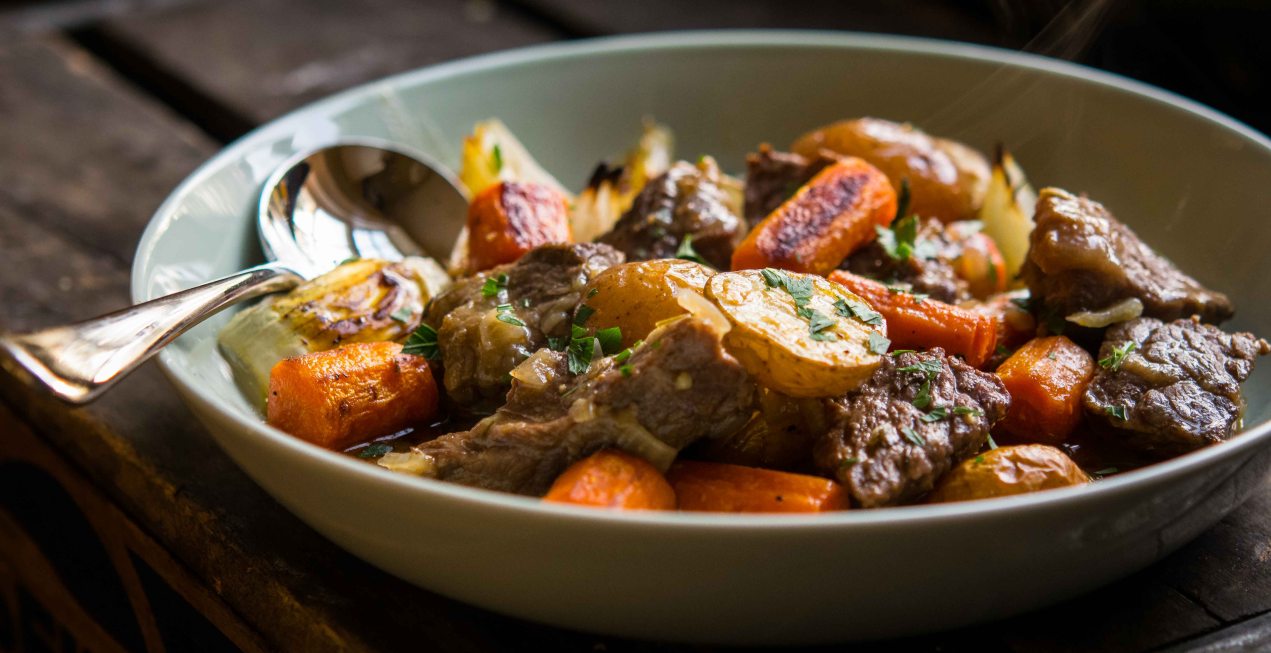
A Very French Beef Stew
If you are like me, you have made what seems like hundreds of variations on beef stew; the classic tomatoey American version, a Korean version, Chinese, Irish, with beer, or with wine. It’s all done in the name of variety and the constant quest for new flavors to excite the taste buds. We do it in order to make dinner ever more interesting, because let’s be honest, if you only cook the same 5 or 6 meals and present them over and over again at some point they become lackluster and boredom sets in. This is not to say, as a cook you need to know how to cook a hundred variations on beef stew because you don’t. If you are like me though you are curious, always looking for upgrades, and it is nice to have some surprises in your back pocket when you need them.
While I call this a French stew it is far from a classic daube. Daube’s make use of lots of red wine, olives, and orange peel. This stew does not. What this dish does do is keep flavors separate. By cooking the meat on its own, roasting the vegetables, then combining them only when it is time to serve the dish some very wonderful flavors only become present when everything is in the bowl.
Let me say a few things about clay pot cooking. Clay is unique, so if you have a clay pot stored in a cabinet somewhere begging to be used then this is a great place to start and here is why. Cooking in clay pots feels like cooking. The smell of the clay as it heats, the aroma that reminds you of the last meal you cooked, the cracks in the glaze, the smell of olive oil as it heats seems basic in an elemental way. It is comforting. It’s as if you a are connected to every cook that came before you and every meal too.
When you heat clay on the stove the culinary history of the particular pot makes itself well known very quickly. Often pots are dedicated to certain kinds of cooking like curry, or rice, or beans. They are used for meals made with similar spices. They are the original slow cooker and you can find them being used all around the Mediterranean, the Middle East, Asia and throughout South America.
The recipe doesn’t require cooking in a clay pot for it to be good but it does add to its mystic. It can be cooked in a slow cooker or in an enameled Dutch oven on the stove top.
Clay Pot Beef Stew with Roasted Vegetables (serves 4)
2 TBS. olive oil
2 pounds beef brisket, trimmed of fat and cut into 1 1/2-inch cubes
1 1/2 TBS all-purpose flour
3 medium yellow onions
15 cloves garlic, peeled and left whole
3 cups homemade beef broth of sodium free beef broth
1 1/2 teaspoons Herbes de Provence
1 tsp. kosher salt
2 tsp. Japanese tonkatsu sauce or Heinz 57
1 bay leaf
2 tsp. flat leaf parsley, minced
3 large carrots, peeled and cut into 1 1/2-inch cylinders
7 fingerling potatoes, washed and halved
- Peel and trim one onion. Halve it and dice both halves into a small dice.
- Place a 3 1/2 quart clay pot or enameled Dutch oven over medium heat. Add olive oil and let it become hot. Add half the beef and brown it on all sides. Remove the meat to a tray. Repeat with the remaining beef.
- Add the flour to the oil and stir with a wooden spoon until the flour begins to color and smells nutty (do not taste the roux it will burn your tongue off.)
- Add diced onions and garlic. Stir. The roux will stick to the vegetables and clump. This is as it should be. Add the hot broth while stirring. Continue to stir until the liquid comes to a boil.
- Add a 1/2 tsp. kosher salt, Herbes de Provence, tonkatsu, bay leaf, parsley, and a few grinds of fresh ground black pepper. Add the brisket back to the pot, bring to a boil, reduce to a simmer, cover and let it gently bubble until the brisket is tender but not falling apart. About 4 hours.
- About 1 1/2 hours before the brisket is tender heat the oven to 425 degrees. Peel the remaining 2 onions and cut each into 6 wedges. Place the onions, carrots, and potatoes into a bowl. Toss with enough olive oil to coat them. Season them with salt and fresh ground pepper. Toss them again.
- Spread the vegetables out onto a sheet tray and roast them for 1 hour or until they are brown and blistered. Remove them from the oven.
- To serve place a sprinkling of vegetables into the bottom 4 bowls, ladle over meat and broth over the vegetables and them top with some vegetables. Sprinkle with parsley and serve.
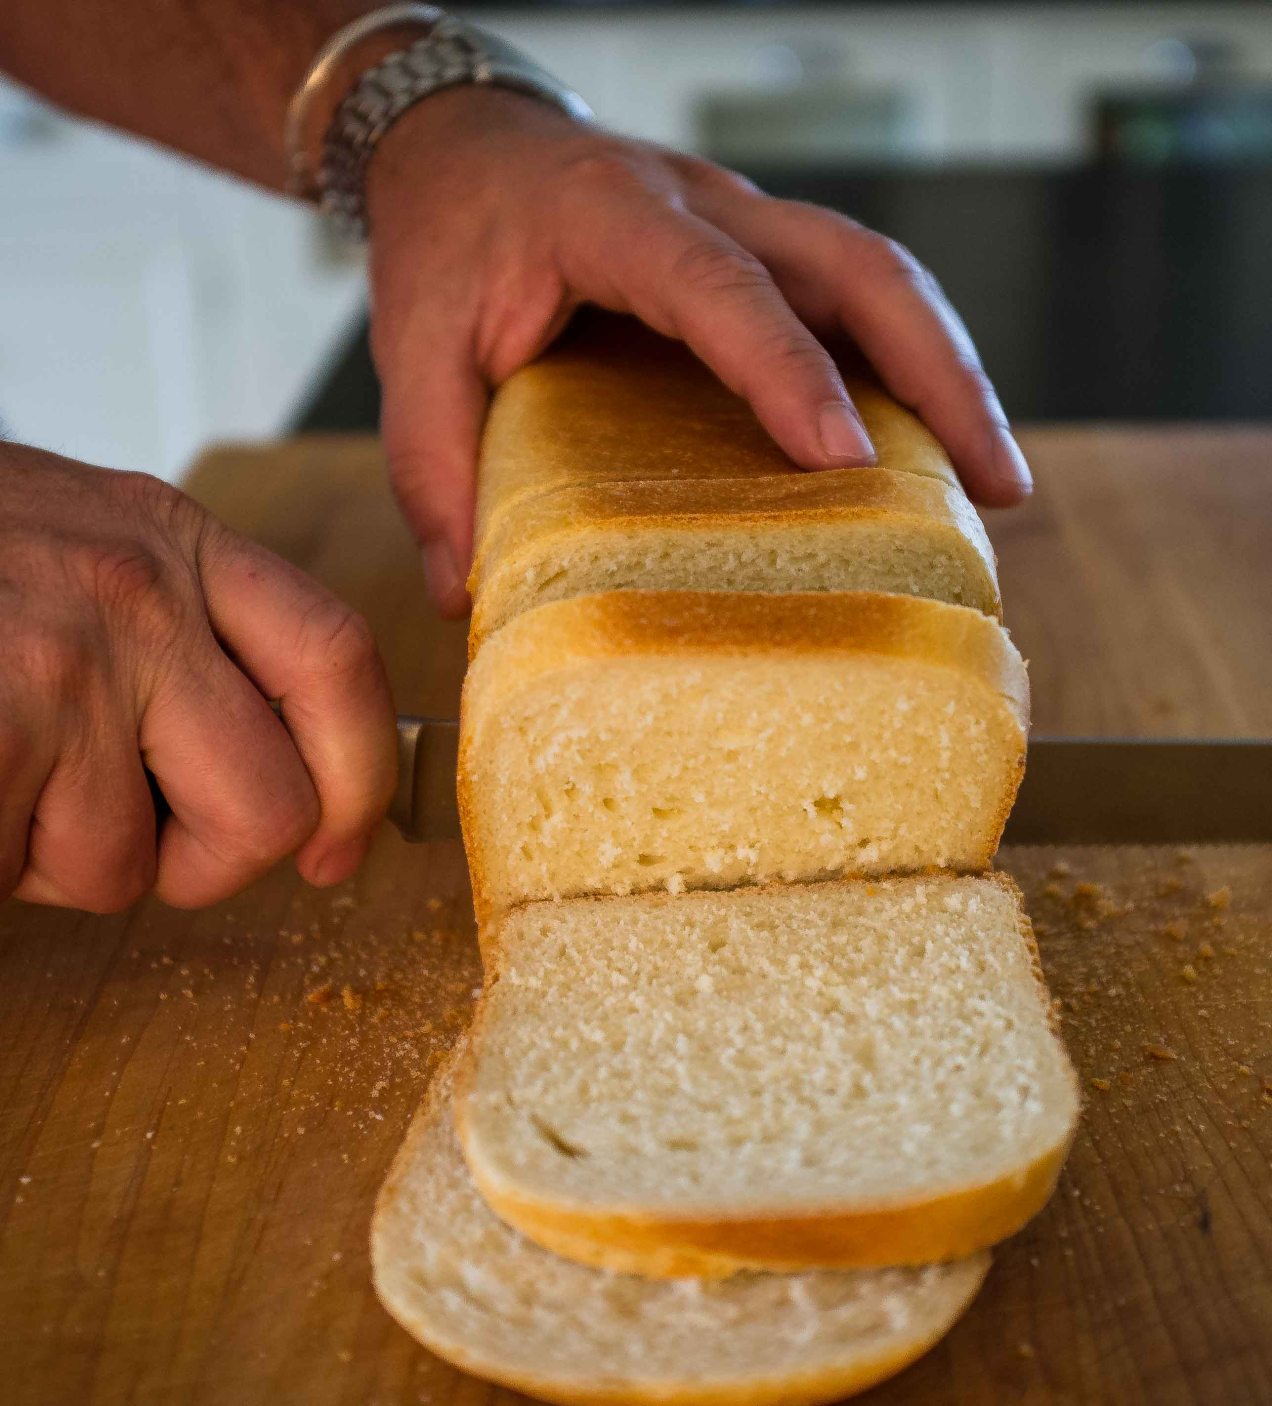
Cheats, Lies, and Hucksters (How to Cook a God Damned Grilled Cheese Sandwich)
As a kid, learning to cook a fried egg and bologna sandwich is like teaching me how to load a gun without establishing any safety guidelines. While the combination of griddled bread, egg yolk, mayonnaise, seared bologna, and American cheese is white trash foie gras, perfecting the fried bologna without having made a grilled cheese, well, it is Picasso without a Blue Period, Miles Davis having composed no song book before Bitches Brew. There is no reference and no history, a drifting ship with no anchor. At the time, I didn’t understand the damage done by using the cliff notes without ever reaching for the novel.
But here we are, in that time of year when we think about grilled cheese. It is the age old discussion, as if we forgot the combination to the safe and it needs to be cracked again, of how to cheat a grilled cheese. As if the answers locked away are new kinds of offerings; in a waffle maker, with an iron, use mayonnaise instead of butter, or turn a toaster on its side.
So I am just going to say it, I am tired of hucksters and cheats. It pains me to be over sold or even worse, blatantly lied too. I am not putting myself on a pedestal, far be it from me to cast stones, I am no practicing perfectionist and neither am I an Elmer Gantry. I have my faults and I try to be honest about them. Even so, when I witness an egregious wrong I can’t keep my mouth shut. After all, I can’t have my children wondering around this world thinking they will be able to succeed without ever learning the fundamentals. It happens everywhere and now, of all arenas, the kitchen is under attack.
Why can’t we just learn to cook a god damned grilled cheese? What are we afraid of, actually learning how to cook? There are so many basics to be learned by placing a sauté pan onto the stove to griddle two pieces of bread with cheese stuck in between and yet at all costs we try to avoid it. I don’t care what kind of cheese is put between the slices of bread, I don’t even care what kind of bread you use but I do care that you know how the different kinds of bread are going to react to the heat, that types of bread with more sugars and fats are going to brown faster then lean breads made with nothing more then water, flour, and yeast. Or that certain kinds of cheese are so stringy when you go to take the first bite every bit of the cheese is going to come along with it.
Cheats and shortcuts are wonderful but only after you know how to cook the original dish in the tried and true fashion, only after you have mastered the grilled cheese is it okay to riff on it. If you ignore, or fail to recognize, the subtle nuances of cooking you can follow a recipe to the T and still have it fail. It is because there are so many variables that can lead you down the path to disappointment that it becomes imperative to learn how to cook, which is wildly different from simply following a recipe.


Grilled Cheese Sandwich (makes 2 sandwiches)
4 slices Pullman bread
1 1/2 cups gruyere cheese, grated
1 1/2 teaspoons prepared horseradish
1 tablespoon green onion, minced
a splash of heavy cream
fresh ground black pepper
unsalted butter, softened
1. Combine the grated gruyere, horseradish, green onions, and a splash cream in a medium sized bowl. Add a grind or two of fresh ground black pepper. Mix everything with a spoon to combine.
2. Place a 12-inch sauté pan over medium heat. Liberally butter one side of each of the pieces of bread making sure to cover the whole surface. Place the bread, buttered side down into the pan. Top each piece with one quarter of the cheese mixture. Turn the heat to medium low.
3. Once the cheese begins to compress and soften check the bottom of the bread. If it is browning to fast turn the heat down. Once the bread is browned and the cheese melted put the sandwiches together. Cut the sandwiches into 4 crusty cheese sticks and serve.
I don’t get the allure of risotto. Years ago at culinary school, every student revered the dish except me, and slowly I’ve come to hate it. It’s overrated.
I’ve practiced making it at home with the guidance of some of the best cookbook authors of the day. I stand at the stove as instructed, stirring, hot broth on the back burner, and all of the ingredients at hand. Inevitably after the required 19 minutes of stirring, ladling, and coddling as instructed, I have a pot of hot, goopy rice, but I am never impressed.
I never get tired of cooking, but eventually I did tire of making risotto.
I had given up ordering risotto in restaurants long ago for the same reasons I quit making it at home. But on a chance, just like the dollar I dropped into a slot and pulled the arm as I walked by, I ordered it. I took the gamble and it too payed off, just like the $1600 slot earlier in the day.
I don’t eat at restaurants often. Not because I don’t enjoy them – because I do – it’s more that my wife, Amy, and I splurge when we go out to eat. A few times a year we spend lots of money at a few restaurants. A weekend in Napa or New York City is perfect for this. This time we headed to Las Vegas where there are lots of great restaurants tucked within a confined space. We made plans to hit several famous chef’s restaurants. It’s what we do when we go to Vegas. Others gamble, we eat.
On a whim, we decided to go into Le Cirque, the off shoot of the famous New York City restaurant. Le Cirque is whimsical. It ’s dinner under the big top, draping curtains hanging from the ceiling like a technicolor circus tent, highlighting a huge chandelier centered in a huge circular room. No corner table. Gaudy at best but it pairs perfectly with Cirque Du Soleil playing one ring over.
As I glanced at the veritable circus around us, the ringmaster balanced hot plates on his arm and delivered them to our table. The risotto dish set in front of me was the most exquisite rice dish ever. Tender rice but with a spring to it. The acidity of the white wine, added and burned off au sec, is a perfect match for the Parmesan and the starchy rice. Brothy, but not too much so. Fine dinning at its best. It is out of place in Vegas: to simple, not garish enough. Still, that rice dish will hold a place at the front of my mind for the rest of the weekend and follow me around for a long time to come.
I arrived back home with renewed determination. I had to figure out how to make risotto like that. It’s like a three-ring circus in my kitchen: ingredients spread all around while I’m stirring and ladling and stirring and measuring and stirring some more. Another carefully measured attempt ends yet again with disappointment. How could it not? I can make a perfect pot of rice, but I can’t make risotto. No amount of hope can fix that.
I did my best to just move on. There are so many wonderful foods in this world; there is no point in getting hung up on any one failure. It’s not like anyone notices a gaping risotto hole in my cooking repertoire. And what if they did? It’s only risotto.
But I do. I notice. And for me it is an empty pan smoking over high heat. Cooking is what I do. Making food the best that I possibly can is what drives me. Once my palate has experienced something new and exciting there are no lengths to which I won’t go in order to replicate that experience.
And so I head back to the stove with another recipe for Risotto Milanese, seeking yet again that illusive pairing of a creamy texture and toothsome rice. I carefully ladle in the broth, stirring and stirring and seeking to master the ultimate balancing act.
Perfect Risotto Milanese (serves 4)
2 tsp. unsalted butter
1/2 cup yellow onion, finely diced
1/4 cup dry white wine
1 cup arborio rice
1/4 tsp kosher salt
2 3/4 cup homemade or sodium free chicken broth
1/2 tsp saffron
2 TBS. unsalted butter, cold
1/2 cup Parmegiano-Reggiano cheese, grated
1 TBS. chives, minced
- Place a 4-quart pressure cooker over medium high heat. Add the butter, and when it begins to bubble, add the onions. Sauté until the onions begin to soften.
- Add the dry white wine and bring it to a boil. Reduce the wine by half and add the rice and stir to coat. Add salt, chicken stock, and saffron, and bring the liquid to a boil.
- Lock the lid into place and bring the pressure to high. Once the pot is to pressure start a timer set for 7 minutes. Remove the pot from the heat and use the cold water release method to drop the pressure. Remove the lid.
- Stir in the chilled butter followed with the Parmesan. If the risotto is stiff, add more broth 1 TBS. at a time until you reach the desired consistency. Divide the rice into 4 bowls, garnish a little more cheese and chives. Serve immediately.
Searching for the Perfect Risotto
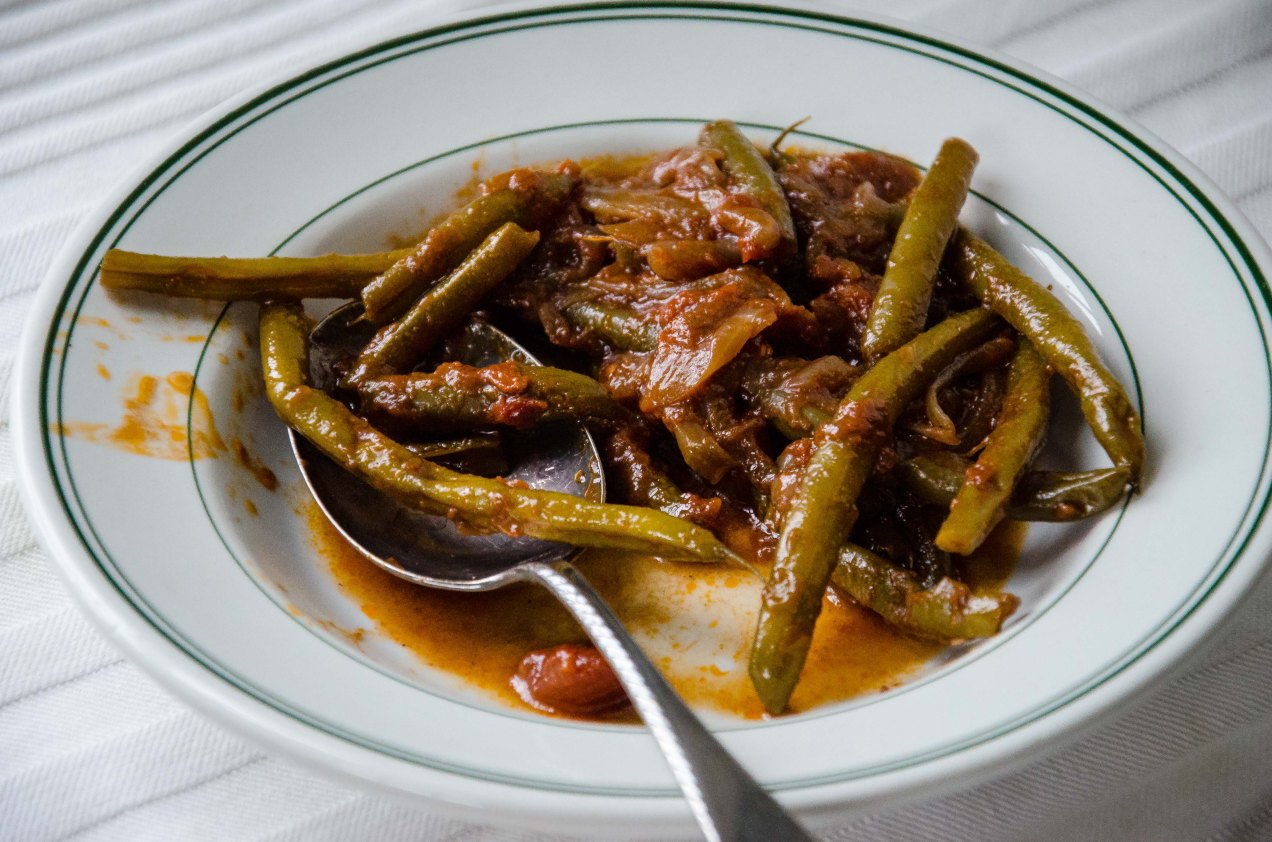
Middle Eastern Braised Green Beans
I don’t know when it came to be that chefs and cooks decided that your veggies needed to be cooked al dente. While I know they retain more of their vitamins when cooked a minimal amount I also know it’s not like the vitamins just vaporize into thin air but instead I am pretty sure, and take note I am not a scientist, that they wind up in the cooking broth.
Either way and no matter how you slice it I like veggies that can stand up to multiple cooking methods giving me choices as how best to enjoy them. I like green beans blanched then sautéed al dente but then I also like them long cooked. That doesn’t mean I want mush because I want something that still has character and a bite.
So after cooking green beans and eating green beans pretty much all my life with potatoes or onions, and even bacon and onions I was looking for a change. This last summer I found a wonderful recipe for okra that was stewed and I liked the recipe so much I made it two or three times.
The other night I was thinking how good that recipe would be with green beans and, actually even easier and less time consuming then the okra. So here is a link to the original article and recipe from the New York Times’ Recipes for Health by Martha Rose Shulman http://tinyurl.com/7ebxpk3 just in case you have any interest in the original okra recipe which I will make again this coming summer.
Middle Eastern Braised Green Beans (Serves 6)
1/4 cup extra virgin olive oil
2 cups onion, thinly sliced
3 cloves garlic, minced
1 teaspoon all spice
1/2 teaspoon sugar
1 1/2 pounds green beans, clipped and cleaned
1 teaspoon pomegranate molasses
juice of half a lemon
14 oz chopped tomatoes
2 teaspoons tomato paste
kosher salt and fresh ground black pepper
- Place a large heavy bottomed pot over medium heat. Add the olive oil and once it is hot add the onions. Season the onions with a pinch of salt and some pepper. Sweat the onions until they begin to soften trying not to brown them.
- Add the garlic and once it becomes fragrant add the all spice and sugar. Then add the beans and stir them to coat with the oil.
- Now add the rest of the ingredients and stir to combine. Cook on medium until you hear the pot sizzling then reduce the heat to low, cover, and cook for an hour remembering to stir about every twenty minutes. They may take longer the an hour but not much.
- Taste, adjust the salt and pepper and serve.
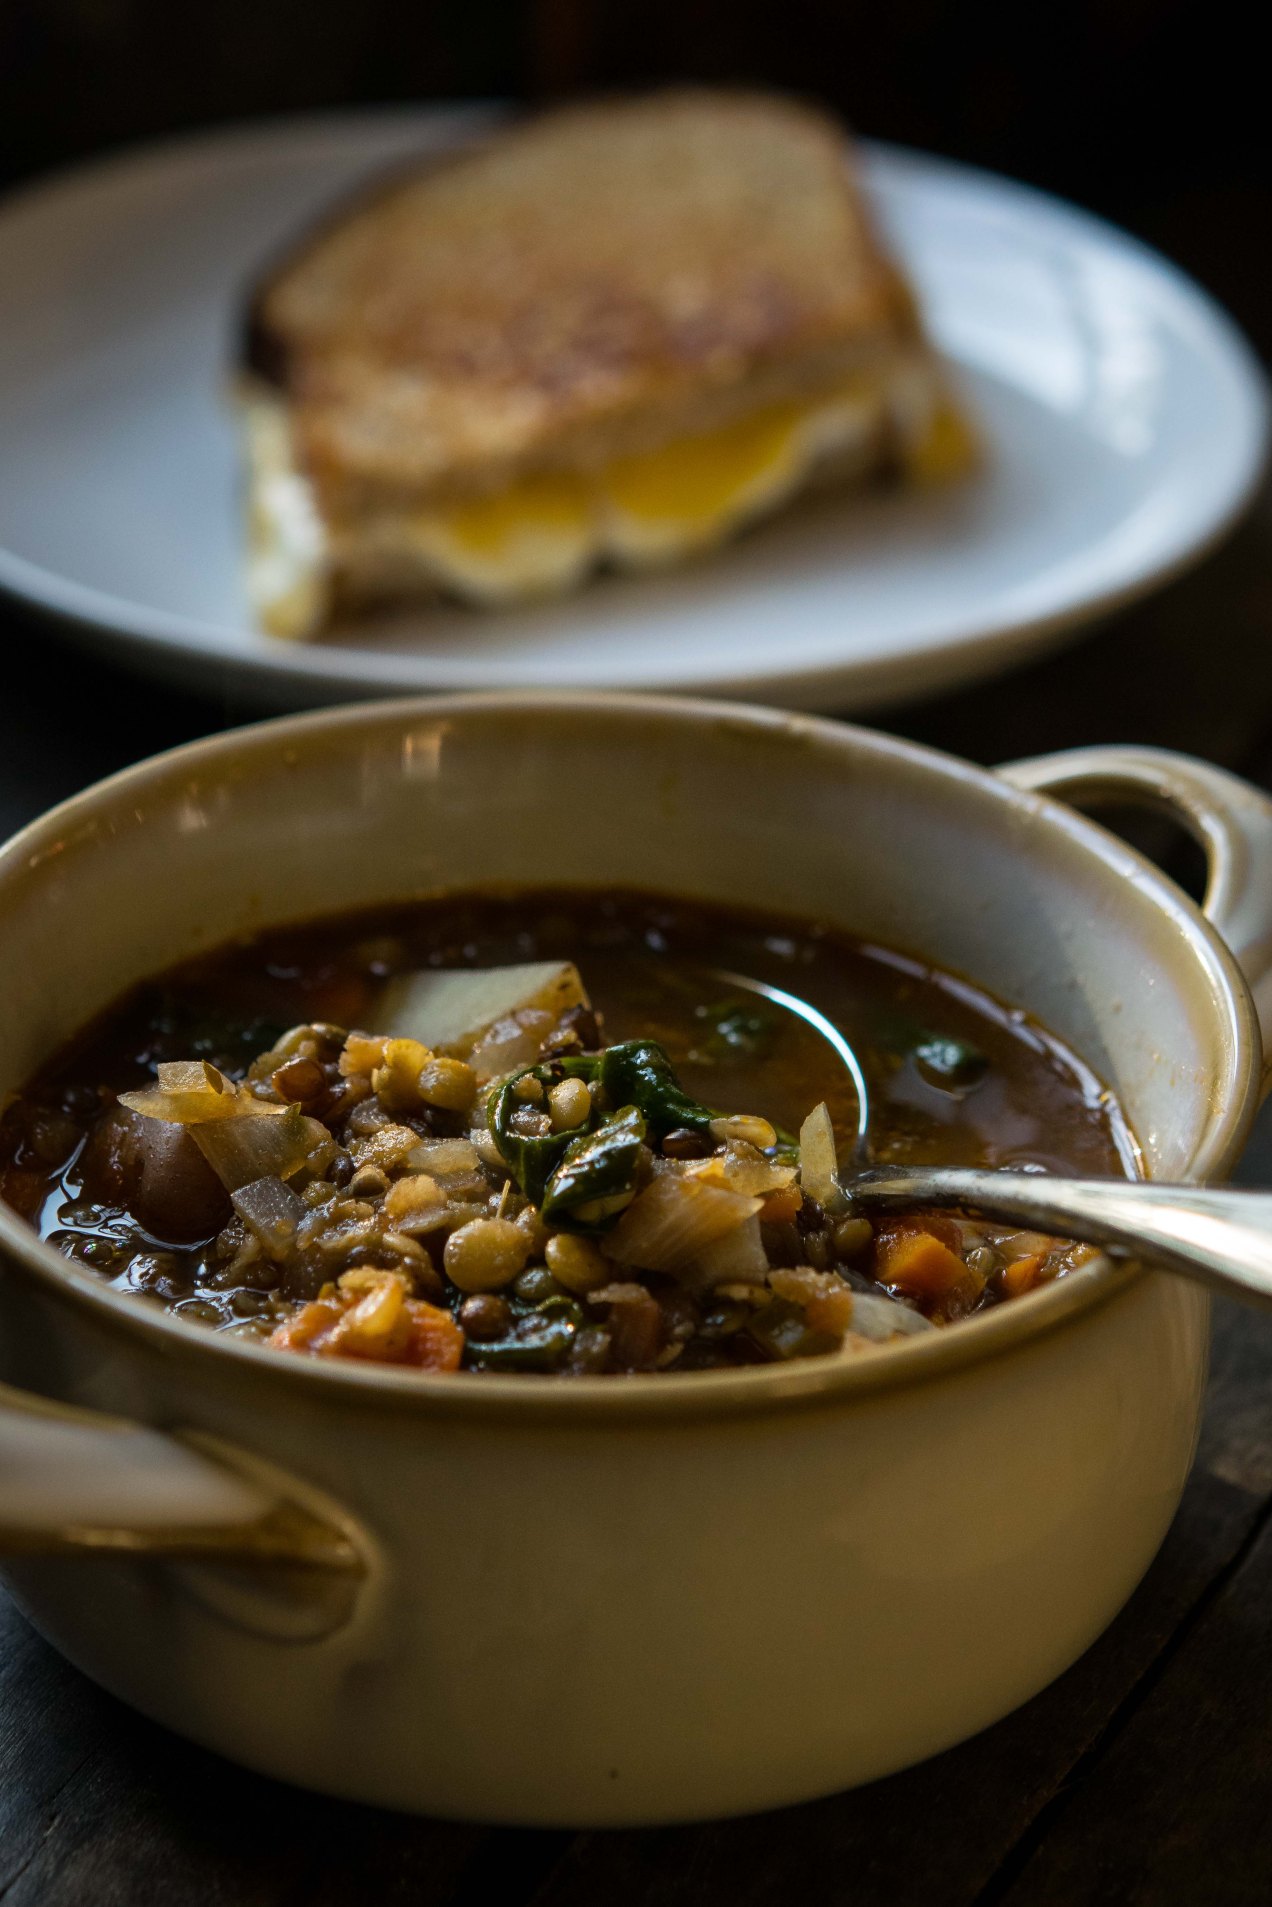
A Delicious Lentil Soup With A Dirty Little Secret
What you need to know about lentil soup is everyone has their “simple” version. Knowing this, it reminds me how easy it is to get a nutritious hot bowl of soup to the table. It also tells me that it must taste really good if there is a reason to keep publishing simple lentil soup recipes, and we do keep publishing them and it does taste good.
The hardest part of making this soup is cutting the vegetables, which with the exception of the potatoes, can be done up to two days in advance as long as the vegetables are stored in an airtight container in the refrigerator. The recipe calls for four types of lentils but the truth of the matter is, I had just a small portion of different kinds of lentils I needed to use up. It so happens that the different textures and subtle flavor differences in the legumes was a welcome addition but if you don’t have but one kind of lentil in the house the soup is still really good.
And here is the secret, soups depend on good broth but sometimes the broth isn’t strong enough. Without a good broth soups come off as watery and bland and no amount of salt is going to change this. This fact, and this fact alone, is enough of a reason to keep bouillon cubes in the pantry, or some sort of stock base, that can be used more as a seasoning then as an actual broth. The idea is to taste the soup after it has cooked and if it comes off as a little flat you add a quarter teaspoon or more of stock base or break off a small piece of bouillon cube to kick up the flavor. Add the base to the pot, let the it dissolve, stir, and taste again. Keep adding a small piece if needed until the soup is delicious. Get the picture? It works, makes the soup more exciting, even if it is a dirty little secret.

©Tom Hirschfeld 2016 All Rights Reserved
4 Lentil Soup (makes 6 servings)
2 tablespoons extra-virgin olive oil
1 medium yellow onion, peeled, small dice
3 carrots, peeled and cut into thin rounds
1 large celery stalk, small dice
3 medium yellow potatoes, cubed
1 cup lentils, a mix of beluga, du pays, yellow, and red
3 garlic cloves, minced
2 tsp. fresh rosemary, minced
1 tsp. dried oregano
2 tsp. fresh thyme
1 cup crushed tomatoes
salt
pepper
vegan sodium free bouillon cube
5 cups homemade vegetable stock or no-sodium vegetable stock
2 handfuls baby spinach
1.Place a 3 1/2 quart (3.5l) enameled Dutch oven over medium heat and add olive oil. Once the oil is warm add onions, carrot, celery, and garlic.
2. Season with 1/2 teaspoon kosher salt. Stir, and sauté the vegetables until they are soft, about 3 minutes
3. Add oregano, thyme, and rosemary. Stir again and add potatoes and lentils. Stir. Add tomatoes, broth, and bouillon cube. Season with a pinch of salt and fresh ground pepper.
4. Bring the broth to a boil, reduce the heat to a simmer and cover. Cook for 20 to 25 minutes, or until the lentils are tender.
5. Remove the lid, taste the soup, and add any seasoning necessary. Add 2 big handfuls of fresh spinach and stir it into the soup. Once the spinach is wilted, ladle up bowls of soup and serve.

A Simple Pot Of Beans (And Tips For Pressure Cooking Them)

©Tom Hirschfeld 2016 all rights reserved
Just about anything can be cooked in a pressure cooker. It does lots of things well. Stews, roasts, soups and one pots all come to the table hot and delicious. Even so, what really keeps the pressure cooker on the stove top is the basics. A pressure cooker cooks beans, grains, rice, and stocks effortlessly and it cooks them perfect every time. A pressure cooker is a natural in the kitchen. Not only that, as everybody knows, the pressure cooker saves time and when it comes to cooking beans it saves lots of time.
Bean Myths
We live in a world of bean myths. A world where bits of anecdotal information is passed from one generation of cooks to another. Dried beans carry suitcases full of informational baggage around with each and every pound. But what is truth and what is fiction and how should it all be sorted out?
Dried beans
There are a lot of choices when it comes to the kinds of beans you choose to cook. There are all the traditional beans -‑ black, pinto, garbanzo, navy, and kidney but there are also limitless kinds of heirloom beans with fancy names like Tiger Eye, Eye of the Goat, and Snowcap. There are even more.
When combined with a grain, more often then not rice, beans make a complete protein. This makes beans one of the least expensive healthy foods to put onto the stove. Combine them with a few spices and herbs and it becomes a flavorful dish the whole family will love.
To buy the best beans frequent a grocery that has a high turnover of dried beans. The newer the bean the better it cooks. Beans that have been around for a long time might not ever soften no matter how long you cook them. It pays to pay a little extra for good quality beans.
There are other legumes too. Split peas, lentils, and field peas cook up just as wonderfully in a pressure cooker as any of their cousins mentioned above. These legumes don’t need any kind of soak either, they can go right into the pot and cook in no time at all.
To Soak or Not to Soak?
This is a personal question. It is up to the cook whether or not to soak the beans overnight. In pressure cooker you do not need to soak the beans but there may be reasons why you want to.
One reason would be how are the beans going to be used. If they are to be pureed soaking isn’t necessary but if they are to be left whole a pressure cooker often splits beans leaving them cracked. If this is important then soak the beans.
Under pressure dried beans are cooked in minutes. Not something that can happen when they are cooked traditionally. The question becomes one of digestibility. If the beans are soaked a good deal of the gas causing chemical, phytic acid, is leached out into the soaking water which is discarded and fresh water is then added for cooking. If gastrointestinal issues are a factor presoaking is mandatory.
So while you can eliminate the soaking water when pressure cooking here is another reason it might not be a good idea. Almost any presoaked bean cooks in 10 to 14 minutes in a pressure cooker. That is what is amazing. Cooked delicious beans in such a short amount of time!
A Quick Soak
If you should forget to soak you beans you can still get a pot of beans to the table with a quick soak. Simply put the amount of beans you want to cook into the pressure cooker and for every 1 cup of beans add 4 cups of water. Bring the water to a boil and lock on the pressure cooker lid. Bring to pressure and set a timer for 2 minutes. When the timer sound turn off the heat and let the beans sit for 20 minutes or until the pressure has released. Drain the soaking liquid and proceed.
Salt
There is an old wives tale about salt and beans. It says that salting beans extends their cooking time and makes the beans tough. It does not. Salting beans is paramount to great tasting beans. It is best to salt them during the soak time. About 2 teaspoons of salt per 4 cups of water is sufficient.
Foaming
Foaming is always a concern when using a pressure cooker. Foam carries particulate which can lodge and clog the pressure valves. It is best to add a tablespoon of oil or fat to the cooking liquid. This will help to prevent foaming. It is also best to use a natural or cold water release beans for the same reasons.
When To Add Acids
Tomato sauce and vinegars are often added to beans for flavor. The acids in these products can cause the beans to toughen and take longer to cook. It all depends on how much you add. A can of tomato sauce is going to affect the cooking time, a tablespoon probably not. Nevertheless, it is always best to add any of these products toward the end of the cooking time.
Baking Soda
There is no good reason to add baking soda to beans.
A Simple Pot Of Beans
2 cups pinto beans, rinsed and picked over for debris soaked in 8 cups of salted water for 4 hours to overnight
1 small yellow onion, peeled, small dice (about 3/4 cup)
3 garlic cloves, minced (about 1 TB.)
1 tsp. kosher salt
1 bay leaf
[1/2] tsp. fresh ground black pepper
- Drain the beans into a colander and strain. Rinse the beans.
- Place the beans into a 6 quart (5.51l) or larger pressure cooker. Add enough water to cover the beans by about 1-inch (2.5cm) about 5 or 6 cups.
- Add onion, cloves, garlic, salt, bay leaf, and pepper to the pot. Bring the water to a boil over medium high heat (traditional)/high(electric).
- Lock on the lid, bring the pressure to level 2(traditional)/high (electric). Set a timer for 10 to 12 minutes.
- After the time sounds either perform a natural or quick release. Serve or cool and refrigerate beans until needed.
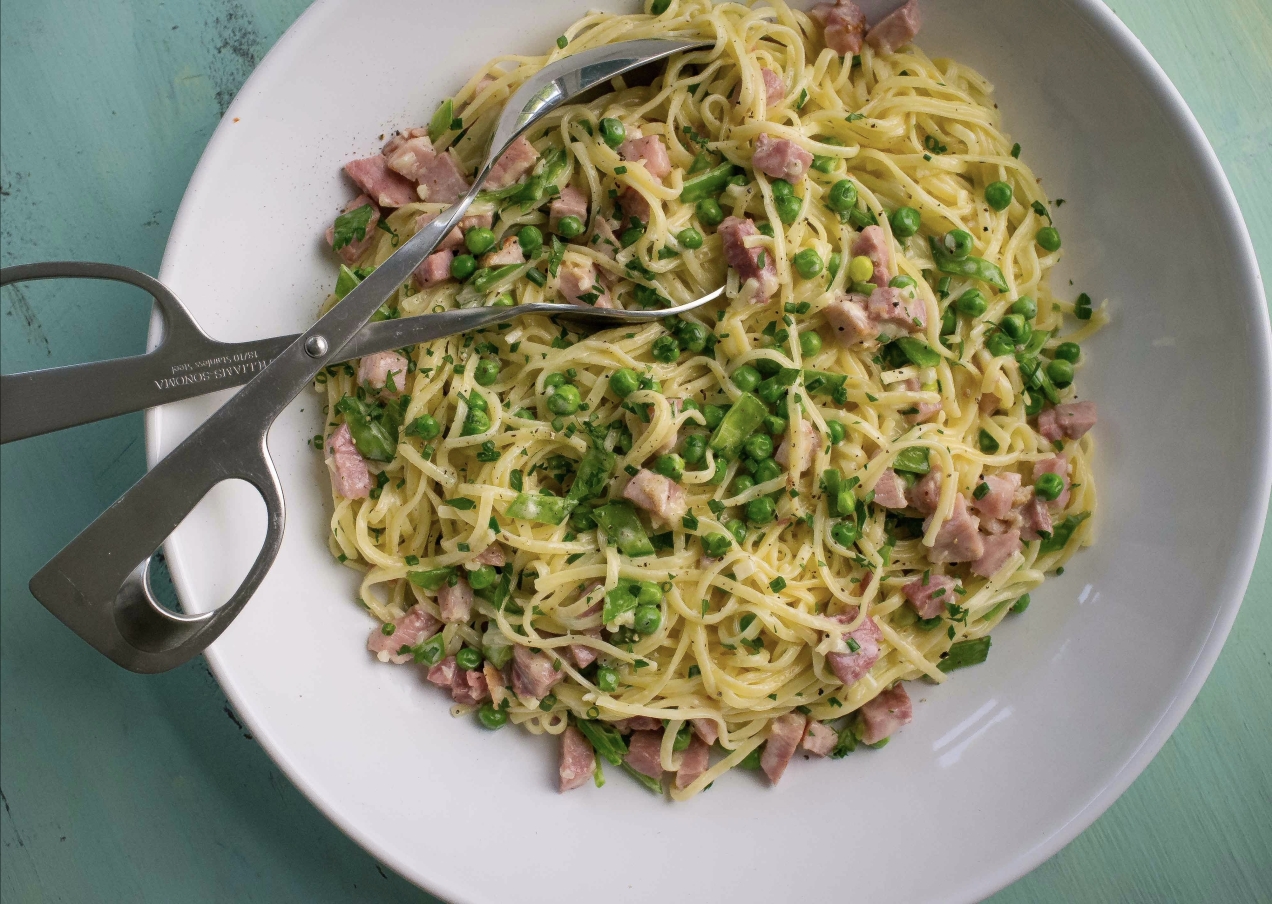
Pasta Carbonara (A Midwestern Hybrid)
I melt for this pasta. I always have.
As a kid I grew up on heavy, roux laden Fettuccini Alfredo. It was the rigor of the day and it was served everywhere and with everything mixed into the noodles, from shrimp to broccoli. Unfortunately, and even though it was a childhood favorite, cream based pastas in the Midwest were bad, no, they were awful.
Fettucini Alfredo in the Midwest became a Parmesan cream with noodles. Sometimes more soup then pasta. The Italian heritage of the dish suddenly was nowhere to be found. Alfredo in Italy is simply a pasta of butter and Parmesan cheese much like carbonara but without using egg yolks as an emulsifier. When the noodles are hot out of the cooking water butter and parmesan are tossed with the pasta and melt into a beautiful, silky coat for each noodle. Fettuccini Alfredo in its Italian form has nothing to do with buckets of cream reduced or thickened with a flour and butter roux.
In the same breath, Carbonara had its day too but it also comes with its own set of problems. Eggs used to enrich the bacon lardon and Parmesan base often become gloppy and sometimes make the pasta more dry then wet while at other times, because to much egg is used, the dish ends up with the noodles stuck together in a pasta pancake better cut with a knife then twirled onto a fork. When made right carbonara can be sublime but when done wrong it can be one of the worst pastas in the world. Making carbonara involves proper technique and quality ingredients if the finished pasta is to be anywhere close to extraordinary.
This pasta is not a carbonara but neither is it an Alfredo. It is what I like to think of as a Midwestern hybrid. Something we do really well here in the middle states, for better or worse, we make dishes to our liking. For me, I like several things about this pasta. To begin, I like the use of ham instead of bacon. There is no rendering of any fat and yet the typical Midwestern farm ham, piquant with its rosy cure, matches perfectly with the peas, garlic, and pasta. While the recipe calls for cream it uses far less then one might imagine and the use of starch heavy pasta water to thicken the sauce is a perfect alternative to a classic roux or eggs. While they might look like an unnecessary garnish, the parsley and chives are important in flavoring the final dish and should be added in the last minutes of cooking.

©Tom Hirschfeld 2016 all rights reseerved
Midwest Carbonara (Serves 4)
1 tablespoon unsalted butter (55g)
1 tablespoon garlic
8 oz. ham, small dice (225g)
1/2 cup heavy cream (110g)
1/2 cup pasta water (110g)
3/4 cup frozen peas (170g)
1/2 cup sugar snap peas (110g)
1 tablespoon parsley, minced
1 tablespoon chive, minced
kosher salt
fresh ground white pepper
1/2 cup Parmesan cheese, grated (110g)
1 pound vermicelli pasta (450g)
- Place a 6 quart (5.51l) pot, filled with 4 quarts (4l) of water, onto the stove. Add 2 tablespoons kosher salt and bring the water to a boil.
- While you are waiting for the water to boil heat a 14” inch (35.5cm) over medium heat. Add unsalted butter and let it melt. Add ham, stir then add garlic.
- When the garlic becomes fragrant but not brown add cream. Bring the cream to a boil and turn off the heat.
- This is about timing. The vermicelli only takes minutes to cook but if you are using a different noodle that takes longer adjust you timing.
- Add the vermicelli to the boiling water and cook according to the package instructions.
- Place the cream back onto the stove top and turn the heat to medium high. Bring the cream to a boil, add peas, season with white pepper.
- If the cream reduces to fast add pasta water by the 1/4 cup. Use pasta water because the starch will thicken the sauce.
- Drain the noodles when the finish cooking. Add noodles to sauté pan, carefully toss them with the cream. Add half the cheese and carefully toss the noodles with the cream. Taste, add salt if necessary, and a few grinds of fresh ground white pepper, half the chives and parsley. Carefully toss again taking note that it will be hard to get the peas and ham to mix into the pasta. This is okay.
- Pay attention in order to keep the pasta from scorching on the bottom of the pan.
- When everything is hot, use you tongs to place the pasta onto a large platter. Top the pasta with remaining peas and ham. Sprinkle on the remaining cheese, and top with remaining chives and parsley. Serve.
I remember the first time I saw a bison up close and personal. It was out on the rolling prairies of South Dakota. No, it wasn’t wild. Reality is, I am not sure there are to many of those left. Maybe in Canada and Yellowstone but beyond that I think most herds are domesticated, sort of.
When you walk up on a buffalo it is like you stepped back in time, especially if they are starring at you head on. They are huge animals yielding in the neighborhood of four hundred pounds of meat. You heard that right four hundred pounds. I can’t imagine killing one of these with a bow and arrow. I have a hard time trying to imagine how the Native Americans did it.
It is interesting to note at one time Indiana had bison that followed the Buffalo Trace on their east/west migration through the southern portion of the state. The trace was one of the first roads used by animals and people alike.
The mushroom ragu is really what this dish is all about. I love buffalo, I can eat it plain without any toppings, but the simple addition of this simple ragu makes the whole dish.
The ragu is an umami bomb. The deep earthiness of the mushrooms, combined with the red wine and soy, and cooked on the stove top until all the flavors are intensified by reduction makes it a great combination. Not only is it good on red meat but it also is delicious on salmon and monk fish.
If you don’t want to mess with buffalo, of course this recipe would be great with beef. I like to pan sear the sirloins but the grill works great too. Use whichever works best for you.
 Serves 4
one (1 1/2 to 2 pound) buffalo sirloin
5 cups assorted exotic mushrooms
2 heads garlic, roasted, see step 5
1 teaspoon marjoram
2 tablespoons soy sauce
1 cup red wine
1 tablespoon unsalted butter
1 tablespoon canola oil
parsley for garnish
- Place a 14 inch saute pan over medium high heat. Let it get good and hot. Then add the oil. Add the oil first to keep the butter from burning.
- Now add the mushrooms. Spread them out across the pan and let them sit without shaking or turning them so they get good and brown. Season them with a heavy pinch of salt and some pepper.
- When the mushrooms are good and brown flip them and do the same to the other side. Add the shallots and the butter. Let the shallots soften.
Add the wine, soy sauce and garlic. Bring the liquid to a boil, then reduce the heat and cook until the wine is almost all absorbed by the mushrooms. - Meanwhile heat a cast iron skillet or if you are using a grill you should already have it going, over high heat. Add enough oil to coat the bottom of the pan and cook the sirloin caramelizing both sides of the steak to the internal temp you want it to be.
- Let the steak rest, slice and serve with mushrooms on top. Garnish with parsley.
Bison Sirloin with Mushroom Ragu
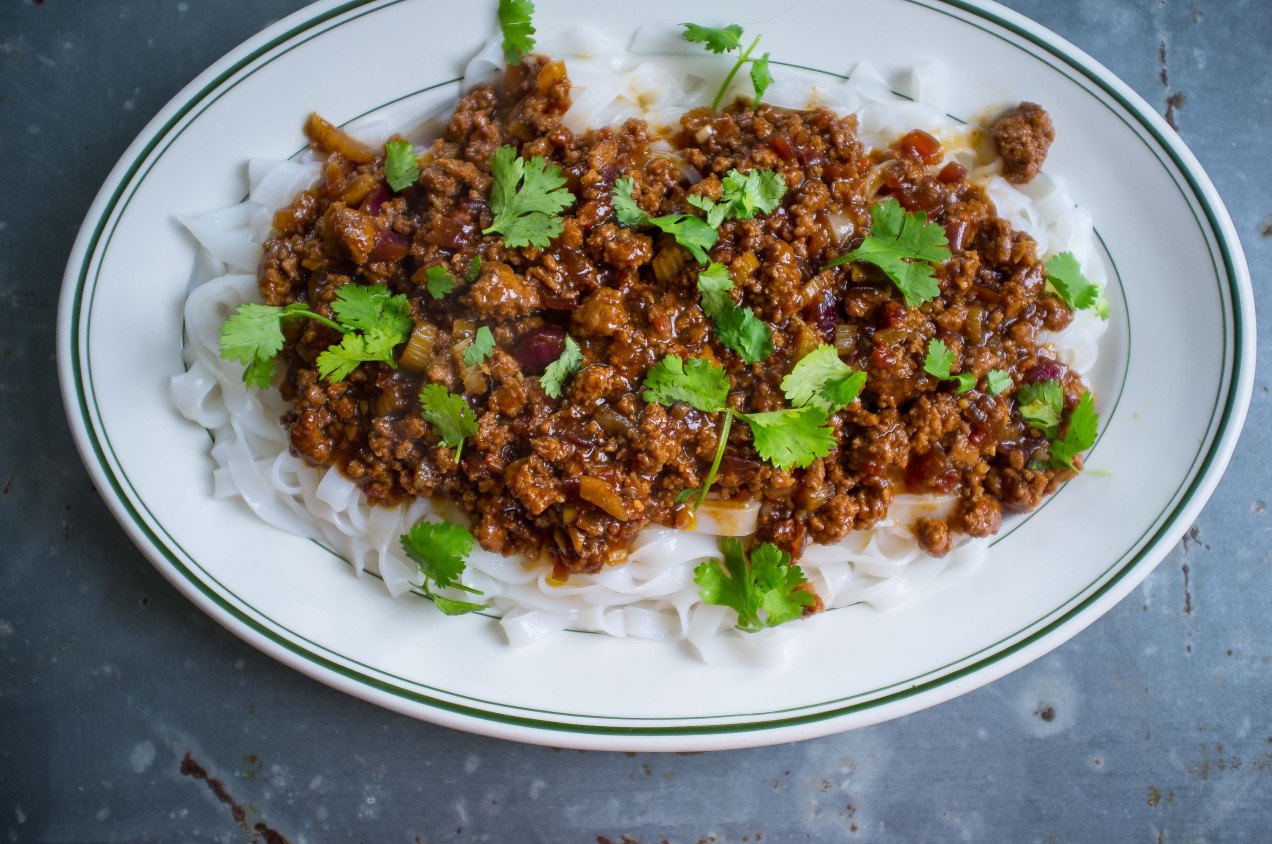
Asian Spaghetti, Changing Seasons
If your weekend was anything like mine then you are comfortable having put summer to bed, tucked-in snugly with the knowledge it will sleep tight until it awakens again next year. Windows will close, doors are shut, and the nuanced smells of long simmered foods become more prevalent.
I can’t imagine a life without seasons. Not because I like the hot and cold but because they are markers, clear delineations that it is time to get on with life, a deep breath of reflection before pushing on, no summit to conquer, no eye on a prize, just a moment to reflect on the journey.
I am back to doing what I love—cooking, my way. This time of year I always cook Asian cuisine. It is such a departure from what I have done all summer, cooked from the garden, be it mid-western or southern foods, or farm favorites. Now I go to the Asian grocery and buy up bok choi, pigs liver, shiso peppers, lemon grass, and Chinese celery. Foods that I have done without since last fall.
For a few months I will get my fill, until winter.
Asian Spaghetti (serves 4)
This is great for weeknights. The sauce like many gets better with age and can be made ahead of time and stored in the refrigerator for up to 4 days (you can even double the recipe and freeze half.) Then simply make your noodles, warm the sauce, and serve.
1 tablespoon vegetable oil
1 lb. ground beef
1 medium red onion, fine dice (about 1 cup)
3 celery stalks, trimmed, fine dice (about 1 cup)
1 tablespoon ginger, minced
1 tablespoon garlic
1/2 cup Hoisin sauce
1/2 cup canned chopped tomatoes with juice
1 tablespoon fresh squeezed lime juice
2 tablespoons soy sauce
1 Fresno red pepper, chopped
3 Shiso peppers, chopped
1/4 cup cilantro
rice noodles, cooked
- Set a 3 quart (3l) enameled cast iron pot, or any heavy bottomed pot onto the stove. Turn the heat to medium high. Add oil and let it become hot.
- Add the ground beef, break it into small pieces and let it brown. Add red onion, celery, ginger, and garlic. Stir, let the vegetables soften and become fragrant.
- Add Hoisin sauce, tomatoes, lime juice and soy. Bring to a boil, reduce the heat to simmer and let the liquid reduce until it thickens, about 15 minutes. Taste and adjust the seasoning.
- Place the hot noodles onto a platter, top with sauce, and sprinkle the peppers and cilantro over the top. Serve with a nice stir fried vegetable like bok choi in oyster sauce.

Chocolate Chiffon Pie
Years ago, when I was first starting out in the restaurant business, I put together a business plan. The idea came to me early one morning while rolling out Danish dough in pastry class. Lots of ideas came to me while I was in pastry class. I think it was all the coffee and sugar. At the time it was just talk and I had no real notion of putting them into place. But this particular idea stuck with me. I wanted to open a diner, and not just any diner, but a classic 1940’s Silk City diner. To me the Silk City is the the Cadillac-Airstream-Harley-Davidson of diners. I located an empty one just up the road. It had recently shuttered its doors and gone out of business. I thought I might get it for a steal.
The Duroc Dinette, that is what I was going to name it because it was to have a pork heavy menu. I would move the thing to Indianapolis if I had it my way and open in a neighborhood where it was much needed. A dear friend even owned a lot in a prime location downtown and I was talking to him about giving it up for a reasonable sum and he was ready too.
I don’t know why I didn’t push it any further other then in those days I didn’t have much confidence in my abilities. At that point I had never worked in a restaurant. I wanted to get a few years under my belt before I made the leap. As is the case with many of these things you drift in other directions. A plan gets put into a file and it never gets pulled out again.
I still love diner food. I especially like the desserts at diners. Diner desserts are interesting because they are streamlined much like a diner itself. In a diner food cost have to be kept down but that doesn’t mean the food is short on flavor. The desserts are always somewhere between kitsch and homey, lots of gelatin and coconut but mind you that doesn’t mean the refrigerated glass case full of pies won’t grab my attention like I hope this delicious chocolate chiffon pie grabs yours.
For the crust:
12 chocolate graham crackers
2 tsp. unsweetened cocoa powder
1/4 cup unsalted butter plus 2 tsp.
For the chiffon:
1/4 cup water
1 tsp. instant espresso powder
1 envelope unflavored gelatin
4-oz. 72% dark chocolate or unsweetened chocolate
3/4 cup whole milk
3 large eggs, separated
1/2 cup sugar
1/8 tsp kosher salt
2 cup heavy cream
1 tsp. vanilla extract
1/4 cup powdered sugar
.
1. In the bowl of a food processor pulse the graham crackers, cocoa powder, and butter until a fine crumb is formed and a crust forms when you push the crumbs firmly to the side of the processor bowl.
2. Dump the crumbs into a pie pan. Starting with the edges press the crumbs firmly into the pan. Bake the crust in a heated 350˚ F oven for 10 minutes.
3. Remove from the oven and allow to cool.
4. While the crust is cooling, combine water, espresso powder, and gelatin in a small bowl and let the gelatin bloom.
Add milk and chocolate to a small sauce pan and place it over medium heat. Bring to a simmer and stir until the chocolate has melted. Remove from the heat.
5. In a mixing bowl combine salt, half the sugar, with the egg yolks. Add 1/4 cup of the cream and while whisking add the hot milk and chocolate mixture.
6. Pour milk mixture into the gelatin mixture and whisk until smooth and the gelatin has completely dissolved.
7. Clean all the pots and pans.
8. In the bowl of a mixer begin whipping the egg whites until they become stiff. Slowly add the remaining 1/4 cup sugar and continue to whip until the whites become glossy and stiff.
9. Fold the egg whites into the chocolate filling until not trails of white remain.
10. Pour 3/4 of the chocolate filling into prepare pie crust. Refrigerate the pie and the remaining filling.
11. To make the whip cream whisk the remaining 1 3/4 cup of cream until it begins to stiffen. Add powdered sugar and vanilla extract until and continue to whip until stiff peaks form.
12. Whisk the extrea cold chocolate filling. Fill a pastry bag fitter with a star tip with the filling and pipe a it around the outer edge of the pie.
13. Fill the the circle you just made with whipped cream being sure not to cover up the piped chocolate.
14. Grate chocolate over the top of the pie and refrigerate for another hour.
15. Cut the pie into pieces. Serve cold.

Pimento Cheese Sandwiches
Is it the heat in August, or the midday cicadas—grinding, grinding, grinding—that reminds me of the time of year? The horizon, corn pollen and gravel dust, is smudged. This is the first August I can ever remember going outside after lunch to find it refreshing instead of repressing. The sun is as bright as on a crisp fall afternoon and the humidity is nowhere to be found—grinding, grinding, grinding.
I like to hear the corn grow and without the humidity there is nothing from which the growing pains can echo. An ambulance, siren blaring, leaves town. The sirens grow louder until the emergency vehicle turns north on the state highway. The sirens begin to fade.
It has been like this all summer and I am being robbed. I like the heat. It is the humidity and heat that makes my vegetables grow. I have nothing growing in my garden this year. By rights I should be eating okra. I should have so much zucchini I have to feed it to the chickens. I should be looking forward to garden succotash and fried chicken but my lima beans died long ago in the continual down pours of early spring. I should be picking fresh field peas and pole beans but I never even got the baskets down from the cabinet. I should be cutting sweet corn from the cob and freezing it.
I rock gently in an easy chair on the front porch and eat a pimento cheese sandwich. From out across the fields I can hear the announcer for the high school football game calling plays. I think back to all my first days back at school. I feel the butterflies in my stomach, another summer grows quite.
Pimento Cheese
(Makes 2 cups)
3 cups cheddar cheese, grated (about an 8oz. block)
2 teaspoons yellow onion, grated on a micro plane
3 tablespoons jarred pimentos plus 1 tablespoon pimento juice
2/3 cup mayonnaise
1 tablespoon Nathan’s mustard
1 tablespoon cider vinegar
1 tablespoon Tabasco sriracha
1 tablespoon ketchup
fresh ground black pepper to taste
- Place all the ingredients into a mixing bowl. Stir gently with a spoon until everything is combined. Let sit for an hour before serving. Store in the refrigerator tightly covered.
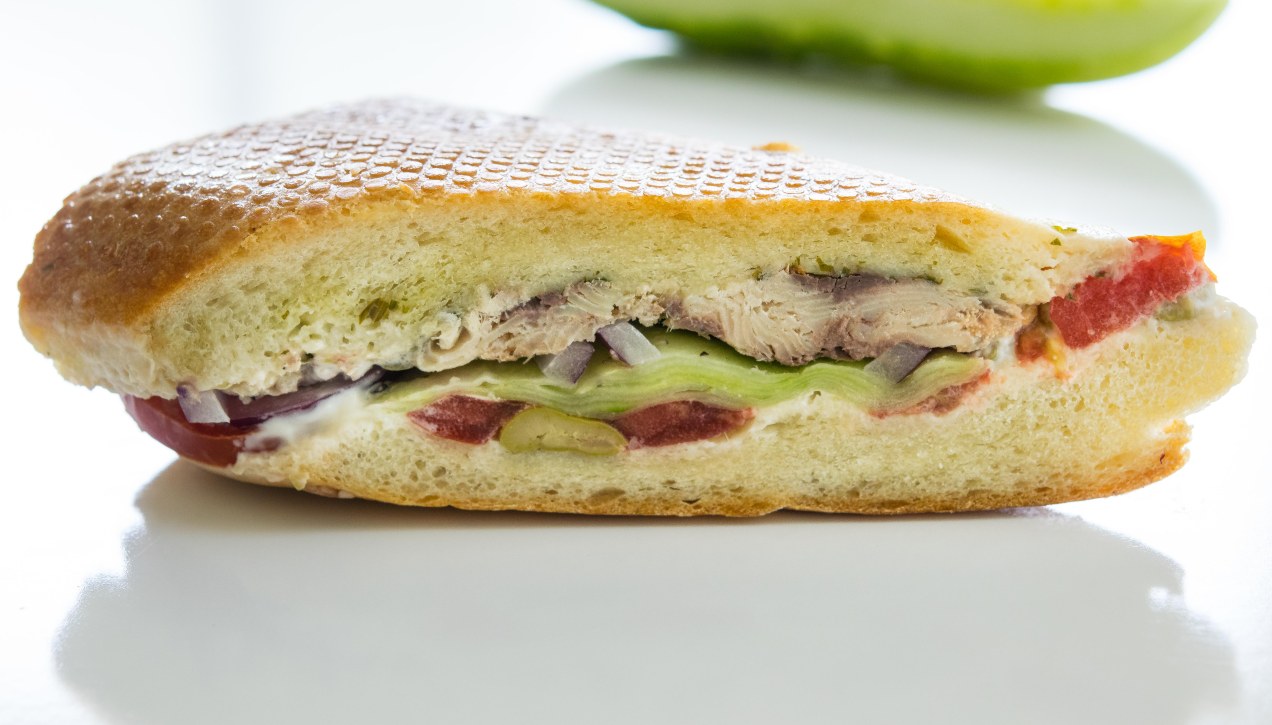
Pan Bagnat – Summer’s Best Sandwich
 In a sense, to smush, press, or mash a sandwich could feel redundant but it’s not. It is a tool employed to make certain kinds of sandwiches better. Case in point, a Cuban, panini, a shooter’s sandwich, and pan bagnat.
I love all these sandwiches. Classics, each and everyone.
In the heat of summer, I rely on the pan bagnat, which when translated means bathed bread. It is a vegetable based sandwich from the south of France, it is light and I find it refreshing. Often the ingredients list is patterned after a Salad Nicoise subbing in anchovies for the tuna. For me I like to use omega-3 oil rich sardines but use whatever tinned fish you fancy.
The sandwich is built in layers, wrapped tightly in plastic wrap, and then some sort of weight is put on top of it. At my house the sandwich gets sandwiched between sheet trays and the milk and juice jugs set on top compress it. Because the sandwich is lightly salted and weighted after a couple of hours under pressure a lot of liquid is released only to be soaked back up by the bread.
And that’s the genius of this sandwich. In my experience it never gets soggy but instead it becomes meltingly tender, the juices mingle, and in the end this makes for a perfect sandwich on a hot summer day.


Pan Bagnat (makes 1 sandwich)
a 6-inch (15.25cm) piece of French baguette
1 tin skinless, bonleless, sardines in oil
1 small cucumber, peeled
1 medium sized tomato, sliced
5 or 6 thinly sliced red onion rings, skin removed
8 picholine olives or olive of you choice
mayonnaise
kosher salt
fresh ground black pepper
- Slice the baguette in half lengthwise. On one piece of the bread coat the interior with mayonnaise. On the other spread out a tablespoon or two of salsa verde.
- Using the peeler, peel thin strips of cucumber, 10 or more of them. Lay them in an even layer across the salsa verde side. Give the cucumbers a sprinkle of salt.
- Top the cucumber with the sardines, on top of the sardines lay out the tomatoes. Season the tomatoes with a sprinkle of salt and fresh ground black pepper.
- Top the tomato with red onion. Place the olives onto the mayonnaise so they stick.
- Place the olive/mayonnaise bread on top of the sandwich. Wrap it tightly with plastic wrap and then either place a brick on top, a sheet tray with weight, something heavy. Let the sandwich remain weighted for at least three hours to overnight.
- To serve remove the plastic wrap, slice on the diagonal, and serve with a glass of chilled dry white wine.

The Best Corn on the Cob in the World
 Something as simple as good corn on the cob shouldn’t be elusive. There shouldn’t be any big secrets but there is and it is this, the best corn on the cob in the world is cooked in a pressure cooker. It couldn’t be simpler to do and the results are divine.
I live in corn country. If there was a vortex for the center of a corn universe I am at ground zero. And if not the exact center I am still close enough that if it shook in the middle of the night it would knock me out of bed. What I am saying is in the Midwest we know corn, and all you have to do is visit any state fair to know I am telling you the truth.
We roast it, boil it, we scrap it off the cob, we make it into pudding, make chowder out of it, we slather ears of it with mayonnaise and sprinkle it with any number of spices, and we even deep fry it like it is a corn dog.
But when a real treat is in order, in the heat of late-summer, we set up a table under the shade tree, even put a table cloth on it along with plates and silverware. Then we grill some thick cut pork chops, cut thick slabs of ripe homegrown tomatoes and lightly salt them, maybe a green salad with a sugary vinegar and oil dressing, and we steam perfectly rip ears of sweet corn under pressure, slip the ear out of the husk from the stalk end and roll the perfectly steamed ears through sun softened sticks of butter.
Pressure cooking an ear of corn does something magnificent. It gives the kernels a snap, and by leaving the husk on the ears develop a robust corn flavor, much like wrapping tamales in a dried husk. It tastes like corn should, pure and simple.
The Best Corn on the Cob in the World
(serves 6 to 8 people)
When buying ears of corn look for husk that are vibrant and fresh. It is also always best to cook sweet corn the same day you buy it.
8 ears of sweet corn still in the husk (buy ears that fit your cooker)
1 cup water
1 stick of unsalted butter
sea salt
fresh ground black pepper
Equipment: a 6 or 8 quart pressure cooker with a steamer basket
1. Set an ear of corn onto a cutting board. Using a good chef’s knife trim the stalk end back so that there is no stalk showing just kernels, about a 2-inch piece. Repeat with all the ears of corn.
2. Place each ear of corn cut end down into the steamer basket.
3. Place the cooker over medium-high heat. Add 1 cup of water and bring it to a boil. Slip the steamer basket with the corn into the pot.
4. When the water returns to a boil, lock on the lid, and bring the pressure to level 2, or high. Once pressure is reached lower the heat while maintaining pressure.
5. Set a timer for 6 minutes. When the timer sounds perform a quick or cold water release.
6. Remove the lid and use a pair of tongs to lift out the steamer basket.
7. Using a dry and clean kitchen towel grab and ear of corn by the silk and push the ear out of the husk toward the stalk end. The silks should come along with husk and the ear should be clear of silk. Repeat for all the ears. Serve immediately with lots of butter, salt, and fresh ground pepper.
(A tangent: If you own a pressure cooker you are in luck, if you don’t then you are going to want one. So go buy one, I am serious, and I don’t peddle stuff on here. Not only do pressure cookers cook things well they are going to help save the planet one meal at a time by conserving energy, water, and time. If you like that sort of stuff, conservation, then you have to get one. A 6 or 8 quart stove top cooker will feed your family delicious meals for years to come.)
I often wonder what makes a recipe so good it goes viral. I am sure it’s lots of factors. Sometimes it’s the recipe itself, other times it is what the author expresses in words through their post, and sometimes it is simply because the author is very famous. This recipe, originally posted on the blog My New Roots, has shown up on lots of other sites and was even a Genius Recipe on Food 52, and rightly so. At the very least it has gone viral in my circles.
There are lots of things to like about this bread, like stacking it with thinly sliced crisp cucumbers, topped with oily mackerel, shallots, and parsley like in the picture above. I also like it with thick cut bacon and peas shoots, or simply toasted and topped with butter and lingonberry jam. It is delicious bread. I even bake it on my Big Green Egg to give it a more authentic, and Danish, baked-in-the-dying-embers of a wood fired oven flavor.
My only problem is if I make the loaf of bread following the original recipe it comes up short. I heard the same words of disappointment from others who tried it too. The bread can be fussy, difficult to cut, crumbles, and becomes dry. Many I know have given up making it.
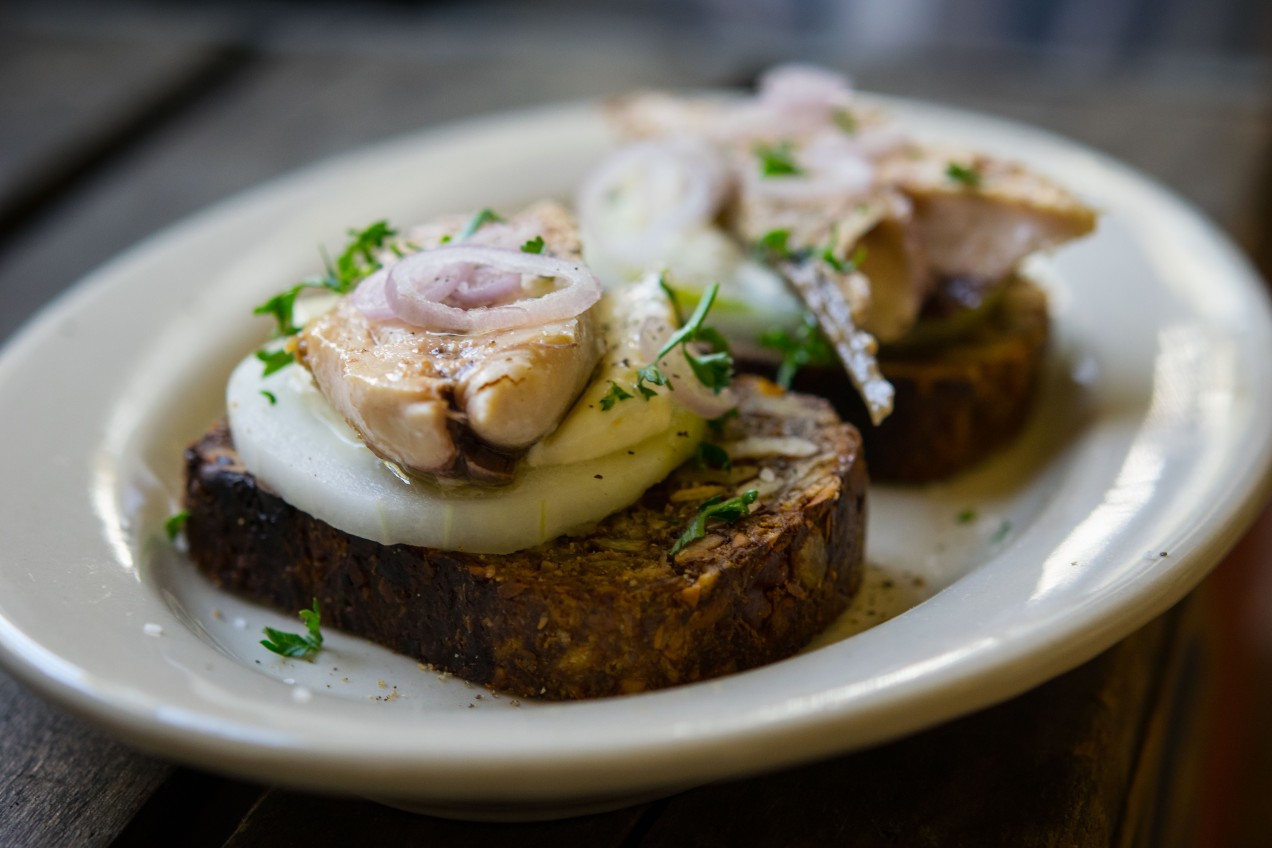
One of my favorite ways to top this bread is with thin slices of cucmber, mackeral, parsley, and shallot.
I am sure the loaf bakes up perfect and to the satisfaction of many people every time. It doesn’t for me, but I understand when it comes to cooking and baking there are so many variables that to place fault elsewhere is simply not taking responsibility for ones own abilities. After all, it is up to the cook to get what they want from a recipe. It is why you need to know how to cook rather then simply follow directions. Just like different musicians playing the same piece of sheet music. The song sounds very different depending on the players abilities. It is only because there are so many things about this loaf of bread I like that I stuck with it, experimented with it, until I got the loaf of bread I wanted, until I heard the song I wanted to hear.
I didn’t change much, although I used pumpkin seeds instead of sunflower and ground psyllium instead of seeds and I ground a portion of the oats and pumpkin seeds to create a finer crumb in the end product. And while I use coconut oil in some recipes I didn’t use it here nor did I use maple syrup but instead brown rice syrup was substituted. For me all these small touches made for a more manageable loaf in the end.
The fact is, made from the original recipe this loaf of bread is delicious, the taste is very satisfying, nutty, feels good to eat, and it is nourishing. I simply made adjustments which gave me the product I wanted to eat. Rest assured though, for those on a restricted diet, and those that aren’t, this seed bread is an important find. It’s worth practicing to get it right.

Seed bread packed into a pate mold and waiting to be wrapped up for a rest before baking. Notice the parchment handles.

This recipe creates a less delicate loaf.
Seed and Grain Bread (adapted from My New Roots)
1 cup unsalted pumpkin seeds (1/2 cup coarsely ground)
1/2 cup golden flax meal, ground
1/2 cup walnuts
1 1/2 cups rolled oats ( I generally grind 1/2 cup coarsely in a coffee grinder )
2 tablespoons chia seeds
3 tablespoons powdered psyllium
1 teaspoon kosher salt
1 tablespoons brown rice syrup or whatever syrup you have and want to use
3 tablespoons spectrum vegetable shortening (it’s palm oil and non-hydrogentated) or unsalted butter
1 1/2 cups hot water
1. Combine all the ingredients in a bowl. Using your hands work the mass until the shortening or butter and the other ingredients are evenly distributed.
2. Line a pate mold, or small loaf pan, with parchment. To remove air bubbles, literally, pack the dough into a 3 x 4 x 10 pate mold. Wrap the whole thing in plastic wrap and let it sit for 1 to 2 hours.
3, Heat the oven to 350˚F. Remove the plastic wrap, place the loaf pan onto a baking sheet and bake the bread for 25 minutes.
4. At the end of the baking time remove the tray from the oven and using excess parchment paper as handle lift the loaf from the pan. Place the loaf, with the parchment still under it, back onto the sheet tray and bake the bread for another 20 minutes.
5. When the timer sounds, roll the loaf so that a new side is flush with the sheet tray. Bake another twenty minutes. Do this until all four sides have been baked against the sheet tray.
6. Remove from the oven and let the bread cool completely before cutting.
7. The bread is best toasted. Store in the fridge wrapped in plastic wrap.
Note: recently I baked a loaf on my Big Green Egg. It is a fantastic way to bake this loaf. Much like it might be baked in a shop in Europe using the dying embers of a wood fired oven.
A Life-Changing Loaf of Bread (Redux)
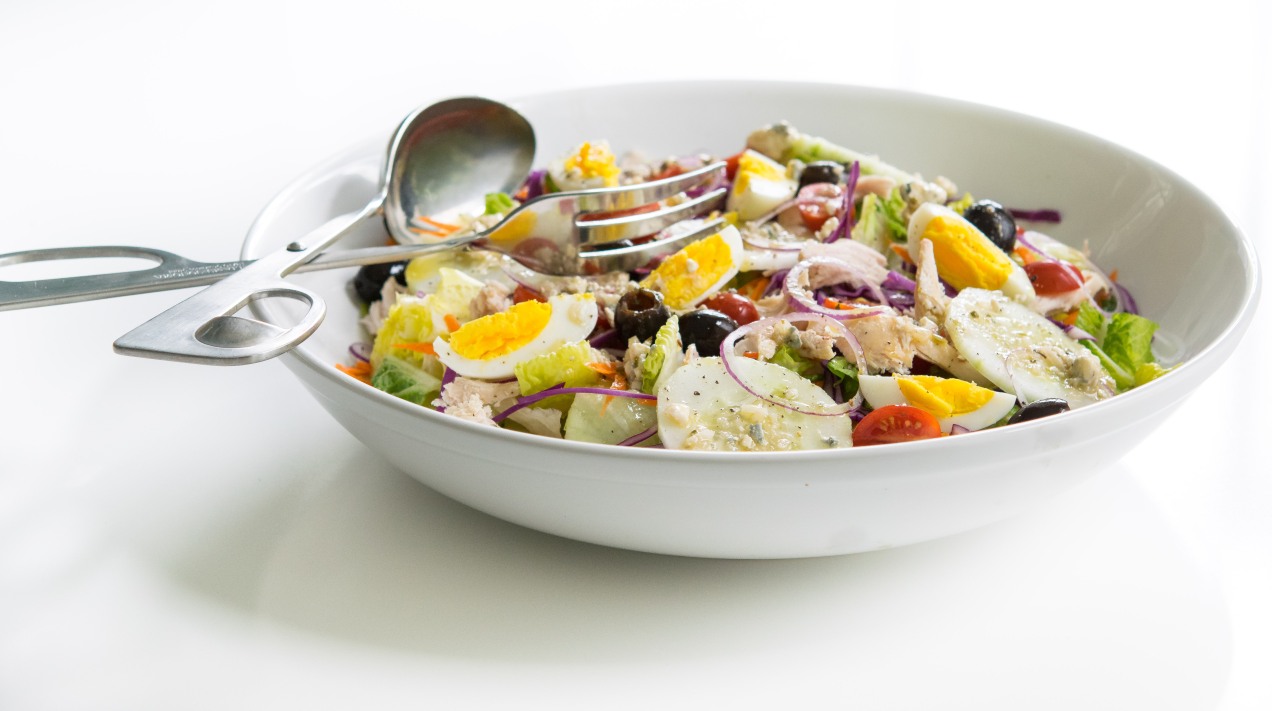
With What Remains of Summer: Two Salad Dressings
Something like you find at a pizza shop, made of Romaine and iceberg lettuce cut into chunks, mini-wedges meant to soak up a heady dressing and topped with everything but the kitchen sink, this salad is a simple summer salad.
It doubles as a full on dinner salad or as a side. It is laced with shredded red cabbage and carrots added every bit as much for taste as color. It is topped with your hearts desire, in this case crisp cucumbers, muddy black olives, protein rich eggs, raisiny grape tomatoes, and sharp red onions. I even threw in a little bit of last nights roast chicken but chopped ham, bacon bits, or whatever you have on hand works good too.
Sometimes I like it dressed with Thousand Island, other times Ranch, and occasionally Catalina but whatever I use it is always homemade. Today I made a Blue Cheese Vinaigrette. Feel free to use whatever dressing you like but I am begging you with what remains of summer to make them homemade.

Blue Cheese Vinaigrette (makes 1/2 cup)
1 TBS. shallot, peeled and grated on a micro-planer
1 tsp. garlic, grated on a micro-planer
1/2 tsp dried oregano
3 TBS. red wind vinegar
1/2 cup extra-virgin olive oil
1/4 cup blue cheese, crumbled (don’t like blue cheese, use goat cheese)
1/8 tsp fresh ground black pepper
a pinch of kosher salt
1. Combine all the ingredients in a pint Ball Mason jar. Screw the lid on tightly and shake like hell.
note: this dressing is best if made in advance. An hour will suffice but as it ages it gets better and better.
Thousand Island Dressing (make 1 cup)
2/3 cup mayonnaise
3 TBS. ketchup
2 TBS. bread and butter pickles, minced
1 TBS. shallot, peeled and minced
2 tsp. pickle juice
pinch of kosher salt
1/8 tsp fresh ground black pepper
1. Place everything into a mixing bowl. Combine with a whisk. Store in the refrigerator in a tightly sealed glass jar.
Garden Salad (serves 4 as a side salad or 2 as an entree)
1/2 large head iceberg lettuce, cored and cut into 1-inch (2.5cm) chunks (about 2 cups)
1 romaine heart, outer leaves removed, core discarded, and cut into 1-inch (2.5cm) chunks
1/3 cucumber, peeled and thinly sliced (8 rounds)
1 medium carrot, peeled and grated on the large wholes of a grater (about 1/4 cup)
1/2 cup shredded red cabbage
10 California black olives
8 grape tomatoes, halved
8 thinly sliced rings of red onion, minus any paper skin
2 hard boiled eggs, shelled and quartered
1. Place the greens in a large salad bow.
2. Attractively arrange the vegetables over the top of the greens. Dollop with 1/3 to 1/2 cup of dressing. At the table mix the dressing into the greens and vegetables using a pair of salad tongs. Serve.

The Lobster Roll’s Better More Lovable Brother
It is almost August. The month in which my parents would always load me and my siblings up in the car and we would head to the east coast for vacation. It was as much a search for a cool ocean breeze as it was a temporary reprieve from the mundane everyday Midwest. Continue reading

Rusty the Rooster, A Cock of Notable Size, Is No Longer
(Arcadia, Indiana) The barn yard is silent tonight. After a day of carefree sex, pecking Blackie the Rabbit on the head for eating chicken feed, and scaring the children when they try to collect the eggs, Rusty the Rooster is dead.
Long considered the venerable dean of a cadre of free range cocks, he ruled the roost with an iron spur and the swagger of an overqualified pimp. In his career, having been responsible for the care and well being of twenty hens, he was known for his short temper and violent outburst against challengers large, small, and of any species. He wrangled snakes, ate rats, and came face to face with coyotes all the while walking away to live another day.
Of intimidating size and broad girth, Rusty could be seen day-in and day-out in his suit of feathers the color of a dark moonless night. So dark in fact, his feathers shone with the rainbow sheen of a crude oil slick. His muscular chest puffed out in pride for his flock he wandered the barnyard with a sure footed masculinity not seen since his predecessor Red.
He held many positions on the hen house floor before winning the coq au vin coin toss in which Rhode Island Red lost his head and was steeped in red wine. Now top cock, Rusty took his promotion seriously until middle life when he became an egg addict of such voraciousness he was banned from the hen house in desperate need of a spin dry. Eventually gaining control of his addiction he was let back into the hen house but it was widely known and no secret that he had occasional relapses.
His reckless lifestyle took its toll. Loosing toes to frost bite after a long winters night out and part of his comb in an early morning scuffle with a racoon he eased into old age believing he was still in charge. He could be heard making light of his nick name, Starting Gun, knowing he was shooting blanks and was smart enough to turn over his duties to a younger rooster without a life threatening scuffle of which he assuredly would loose. He was at peace with his place in life.
Whether it be at sunrise, or in the middle of the night after an owl sighting, his cock-a-doodle-do carried far and wide and was sure to wake anyone within range when they least wanted to be. It was on these days everyone wished he didn’t do his job so well.
He went as peacefully as any chicken in the throws of a heart attack could. Rusty the Rooster is survived by Boots the Hen, the only hen this side of Cicero Creek to wear feather chaps, and a whole host of other nameless conquests. Services will be held at the ass crack of dawn in a private ceremony where he will be buried out by the old apple tree alongside his friend and long time companion Mr. Blue fin, the beta fish.
Rusty the Rooster is at rest and so shall we.
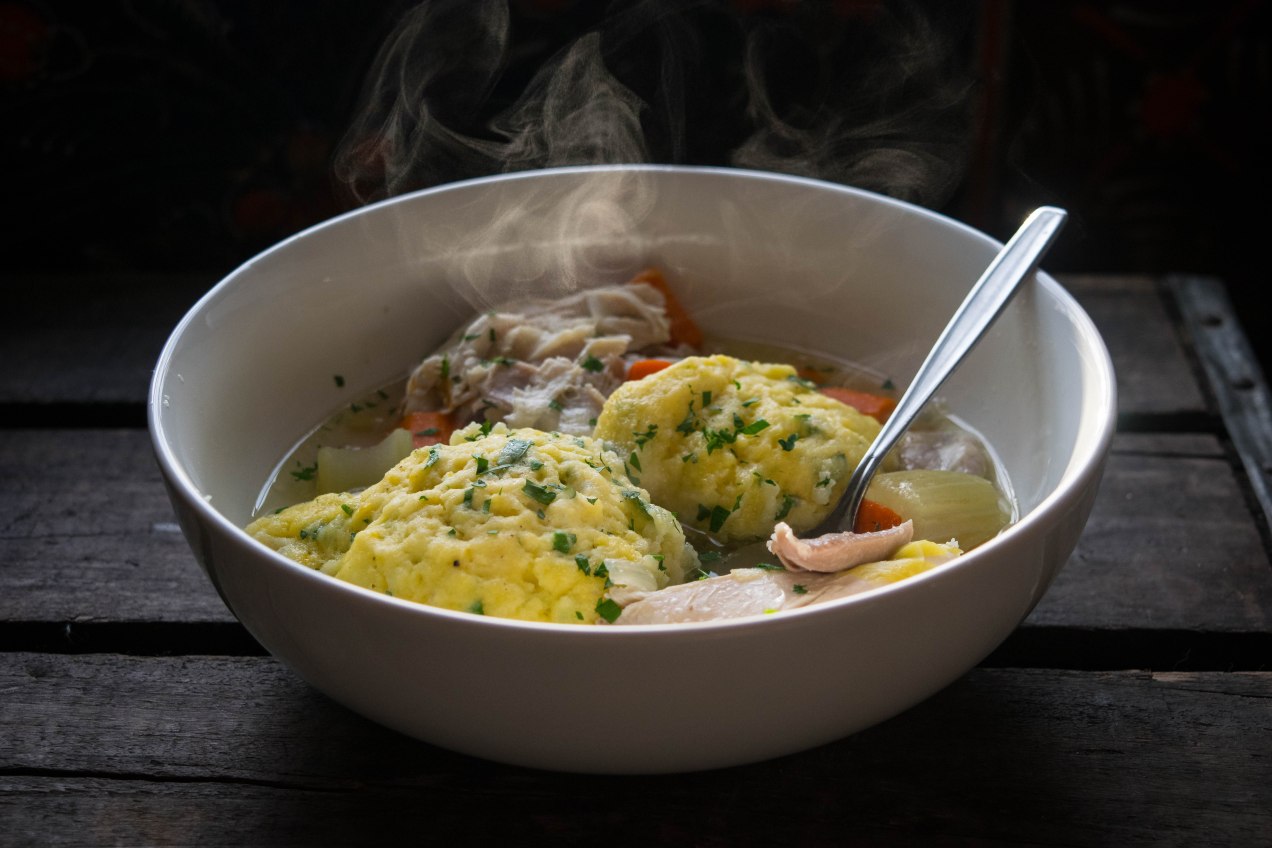
Pressure Cookers + Chicken and Dumplings
Next to farm fresh brown eggs, nothing conjures up an image of the farmhouse kitchen quite like the site of a pressure cooker. It’s Rockwellian in that it brings to mind iconic images of the aproned farmer’s wife peeling home grown carrots at the counter while on the stove behind her sits a huge pot-like contraption whistling and blowing steam through a small whole in its lid.
The image leaves you with a feeling of wholesomeness much like homemade whole wheat bread. It’s as if the pressure cooker does something magical that only the farmer’s wife knows. After all, for some reason, we always equate wholesome home cooking with the country kitchen. Continue reading

Putting the Bullet into Your Bone Broth: Consommé

©Tom Hirschfeld all rights reserved
If you can fortify coffee by whizzing in butter and making it into an emulsion of sorts, or make fortified wine by upping the alcohol to give it a boost, aging it, and calling it port then why not fortify your bone broth?
Great chefs have known the deliciousness of consommé for centuries. Now I am not going to repackage it, call it bullet broth or anything stupid. Consommé is fortified stock that is clarified and enriched by adding lean ground meat, finely chopped vegetables and egg whites then the whole thing is slowly brought to a simmer. A raft forms when the egg whites cook and it floats to the top clarifying the stock so it becomes crystal clear. It has a lot to do with the albumen in the eggs and ground meat but lets not get bogged down in the science of the thing.
It is refined food. It adds richness and mouth feel while deepening the flavor beyond anything salt could do for your stock. It is far more satisfying to sip a cup of consommé on a cold day, on any day for that matter, then it is swill down a jar of bone broth.
It isn’t complicated to make but it does take some attention to detail. You can’t improve poorly made stock by making it into consommé but you can make well made stock into something really special. If you were to choose to do so you can make it into a really highly refined soup worthy of holiday dinners by adding garnishes. The garnish for consommé is often vegetables cut with precision into a small dice, blanched al denté, and added to the broth just before the soup is served.
Whether or not you make your bone broth into consommé isn’t the point but the fact that you are making your stock at home is and you deserve a hearty pat on the back for that alone. If you are looking for something more refined, or an occasional treat, or you just want to upgrade your holiday menu then consommé is for you.


Chicken Consommé
8 ounces ground chicken breast
1/2 cup yellow onion, minced
1/4 cup celery, small dice
1/4 cup carrot, grated
5 ounces egg whites, about 4 large eggs
1/2 cup tomato, chopped
a sprig or two of chopped parsley, minced
1/4 teaspoon dried thyme
1 bay leaf
1 whole clove
1/4 teaspoon whole black pepper corns
1. Keep everything cold. The colder the better, just not frozen.
2. Combine all the ingredients except the stock in large heavy bottomed 4 quart pot. Using a wooden spoon stir everything together for 2 minutes. You need to stir it well to break up the protein strands. This is all part of the clarification process.
3. Add the cold stock and stir everything to combine.
4. Place the pot over medium low heat. Let it come to a soft boil very, very slowly. Stir often and by often I mean every 15 to 30 seconds otherwise your egg whites could burn at the bottom of the pot. Not only that by stirring you keep the albumen doing its job of clarifying.
5. As it get close to boiling stop stirring. If you see strings of egg white and your consommé is starting to look like egg drop soup stop stirring immediately. The raft needs to form and as it does it will rise to the top. Reduce the heat so the consommé does not come to a hard boil. A hard boil will destroy the raft.
6. Once the raft has stabilized and looks like a dirty egg white omelet us a spoon and make a vent in the raft. This is like taking the lid off a boiling pot, it keeps it from coming to a boil or boiling over.
7. Simmer the stock for and hour and a half. At the end of the simmering time use a ladle and ladle the stock through a fine mesh strainer, or a coffee filter, into a storage container. Season it to taste with kosher salt. If you use table or sea salt it could cloud the consommé because of impurities in the sodium.
8. Make into soup, or serve hot in your favorite tea or coffee cup.
Today was supposed to be a day off from running or lifting but sometimes you just know it’s best to go ahead and put on your favorite running shoes, put your favorite song list on the iPhone, and get it done. It feels better to do it than not.
My nature is not that of a runner. It goes against everything I can think of about myself. But I have been and with consistency. Some days it is much harder then others but running is always better then not running at all.
Lunch today! Continue reading
Thai Collard Wraps (day 5 )
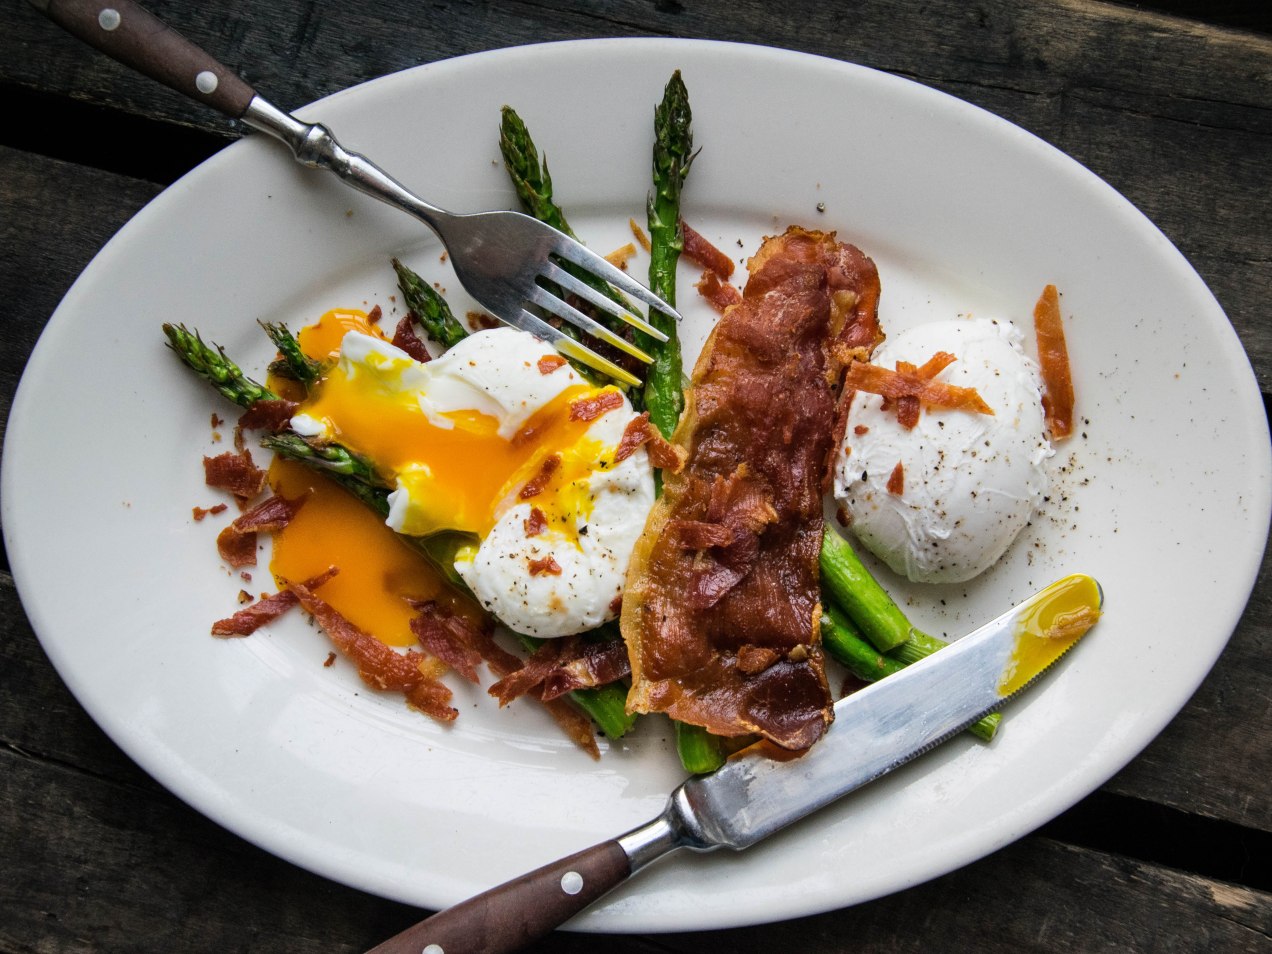
A 90 Day Fitness Challenge (Breakfast Day One)
I ran out of booze last night. It is a rare occasion that I would let that happen but I did it on purpose. Even though I miscalculated by a day or two and because I have no intention of replacing it for a while, this does nothing but allow me to start my fitness challenge early.
I am still not comfortable with those words, fitness challenge but I decided to take on the task for a lot of reasons. There is money that will be donated to school lunch programs for one but mostly because I started my fitness journey almost 1 1/2 years ago and I have hit the wall over the past months. As with everything in life lots of things get in the way, we loose interest, or gain interest in other pastimes but nonetheless it is easy to move onto other things.
I kept chiding myself though. I wasn’t ready to give up on my fitness goals, I am not ready to settle for less then what I told myself I would accomplish, nor am I ready to go into a maintenance mode where I don’t loose what I have gained but don’t gain anything either. I want more.
Of course if you know me, or haven’t been around me for a while, you would know these are foreign words coming out of my mouth but somehow I have really taken to the idea of being healthy from an exercise standpoint.
So the journey continues and for the next 90 days I am going to lift myself up each day and exercise, go the the gym, and run. I am also going track my diet, make sure I am on track to eat healthy well rounded meals so that I don’t hurt my, uh hum, 50 year old body.
I think you will see I don’t plan on changing my diet a whole lot. I do want to track my macro intake so I know my percentages of carbs, fats, and protein. I want a good balance. I also have no intention of weighing myself. This challenge is about Body Mass Index (BMI) for me, it is not about losing weight. The goal is to change my body shape by gaining muscle mass and building a stronger core.
My ultimate goal isn’t that I might live longer but my hopes are I will live better.


Poached Eggs, Roasted Asparagus and Crispy Prosciutto
4 eggs
1 bunch of asparagus
4 pieces of prosciutto, real prosciutto is cured with salt only and the ingredients list should reflect that, if you are trying to avoid sugar or additives make sure you read the list.
olive oil
red wine vinegar
1. Heat the oven to 425 degrees.
2. Place the asparagus onto a sheet tray and drizzle it with olive oil. Roll, or toss them around being sure to give them a good coating of oil. Salt and pepper the asparagus.
3. Separate the thin slices prosciutto and place them on top of the asparagus making sure to keep them from overlapping.
4. Fill a 3 1/2 quart sauce pan 2/3 full with water. Add 2 teaspoons of red wine vinegar. Bring the water to a boil then reduce the heat to low.
5. Place the asparagus and prosciutto into the oven. Roast for 15 minutes, or until the prosciutto is crispy and the asparagus tender.
6. Crack your first egg into a small bowl. Using a slotted spoon stir the water vigorously so you create a water spout/tornado kind of effect. As it slows carefully lower the small bowl to the center of the vortex with out letting the bowl touch. Gently pour the egg into the center of the vortex. Let it spin. Poach the egg for 3 minutes. Remove it to a plate and continue to poach the remaining eggs.
7. When you have finished poaching all the eggs place them all back into the water to gently warm them. Don’t leave them in the water to long or they will become hard.
8. Plate up the asparagus and prosciutto, top with two warm eggs and serve.
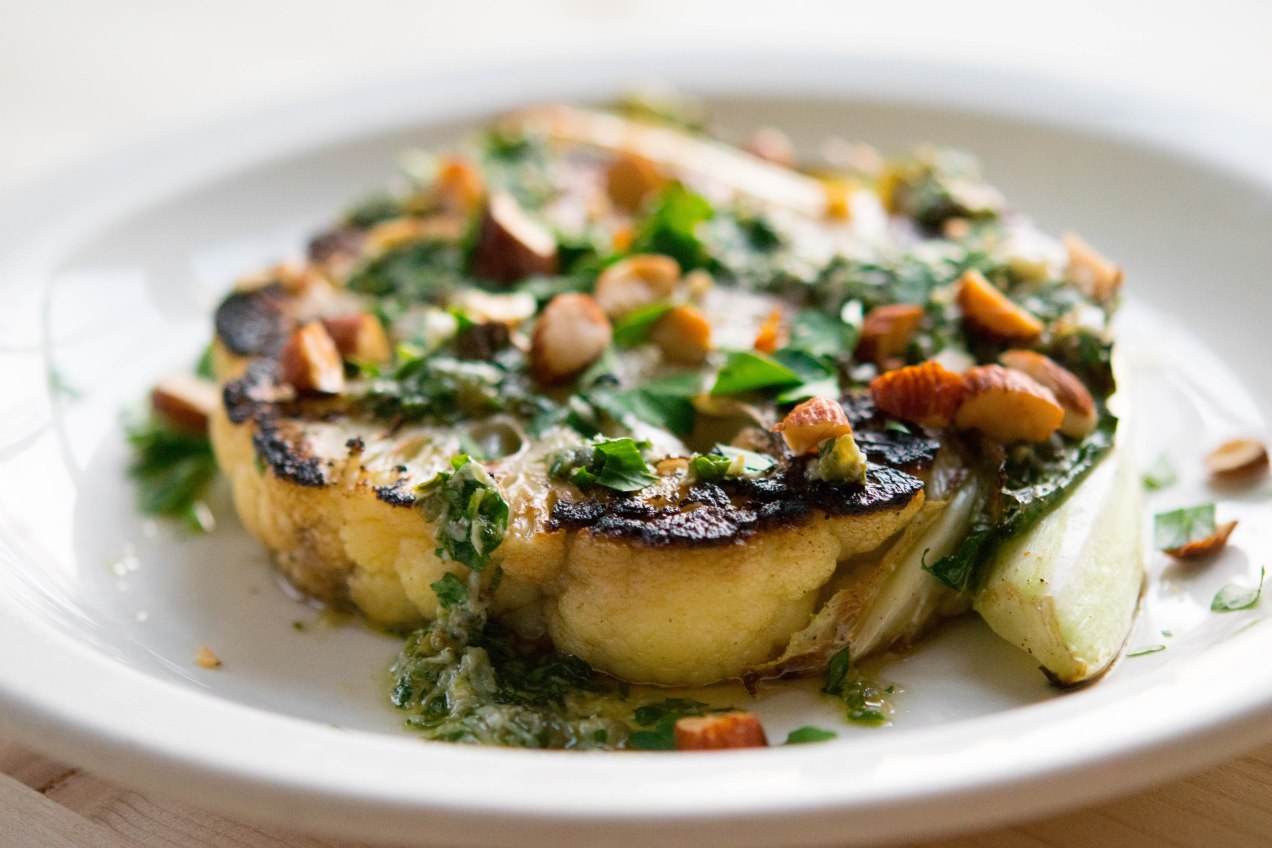
A Real Winner: Seared Cauliflower Steaks with Salsa Verde and Almonds

Some people collect cars, for others it is playing golf, for me, it’s barbecues. I don’t collect them per se but rather I cook with them. Their value isn’t termed by condition but in hours of use. Much like a cast iron skillet I can gauge the worth of a good smoker by the black patina that coats its inside. While many men might spend their weekends under a car, I prefer to smell like hickory rather then gasoline and motor oil. It’s how I get my kicks.
So you can imagine my excitement to I discover I won a Big Green Egg! Yea, I won. I never win anything but Debra Smith at SmithBites pulls my name from a hat of entrants and I win, I never win. Nevertheless, it is like getting the Most Improved trophy in grade school. I sort of treat it like that, it sort of looks like that and I couldn’t be any happier then to be a proud owner of one. Hell, I park it in the garage if that tells you anything. I don’t even put my car in the garage, the garage is for my tractor, and now the grill.
 The whole time I am assembling my grill I think about what I am going to cook first. A steak, a brisket, venison, burgers, pork chops, butt steak, I go through all the possibilities and my head spins in anticipation. The dogs look on with concern for my well being, TrixieB even comes over and gives me a lick on the face and some big sad eyes of worry.
As I said, I don’t collect grills. I have three. One is a smoker, that is all it does, it smokes meat, charcuterie and hams at low temperatures. My other grill I hand made. It is a street food kind of contraption meant to cook fast and furious. It is for meat on a stick, small stuff that cooks through quickly. Both serve their purpose. So maybe I don’t consider my self an aficionado but I do consider myself an expert. It was my station each day at the restaurant. I worked the grill day-in and day-out for seven years. I can cook a steak, a boneless chicken breast and any kind of fish you can imagine but, like professional ball players who sometimes hit a foul ball, I do sometimes miss the mark but rarely, and I mean rarely, do I over cook a steak.
My point being, I am excited to try what many consider to be the Mercedes of grills, the Big Green Egg but I am a little apprehensive having never used one. Don’t think I wasn’t a little more then cautious too, I bought a high end Wolfe stove and it’s a piece of crap, so I know just because something has a name doesn’t mean it is going to work but I have to be on my game also. I am approaching this with a certain err of caution.
But then it hits me. Friends often accuse me of using appliances differently then anyone else, most recently crock pots were entered as evidence into this court of opinion. So I asked myself, “why would I grill a steak?” It took all of a second to answer my own question, “why not sear cauliflower steaks in a pan on the grill?” That was easy enough, decision made.
Here is why I wanted to cook cauliflower steaks. The Big Green Egg people claim a lot of things about their grill. You can cook pizza on it, bread, grill steaks or smoke brisket is what they say. Which I get, it is sort of like a wood burning oven. It is ceramic, it holds heat, and it gets very, very hot but can also hold a low temperature for a long time. It holds a lot of promise. So my thinking is, I want to put a cast iron pan on the heat, see how hot it gets and how well it sears. I know, I know, you can cook with a cast iron skillet on your stove. True, but my stove won’t impart a smokey flavor to whatever I am cooking. And that is it, that is what I want to find out, is what is the smoke flavor of the Big Green Egg going to be like. It is the one character trait I am most interested in. Will it be bitter and heavy or will it be just right. When it comes to vegetables the right amount of smoke goes a long way. To much and you have a very bitter ash tray kind of experience that will keep you from tasting any other part of your meal. And seriously, antacids are no kind of dessert.
I am not going to bore you with blow by blow cooking details other then to say the grill is great. It lights fast, it gets very hot quickly and it imparts a great flavor to whatever you are cooking. My cast iron casserole heated quickly, I actually thought it might get to hot and burn the cauliflower before it became tender on the inside, but it didn’t. It cooked the cauliflower with a perfectly light kiss of smokey flavor. Since then I have roasted chickens to great applause from the family, from me too. A tri-tip roast delicious, pork chops amazing, cauliflower steaks a home run, and the Big Green Egg, a real winner.

Seared Cauliflower Steaks (serves 2)
2 small heads of organic cauliflower
1/3 cup flat leaf parsley, minced
1 small garlic clove, grated on a microplane
1 tablespoon lemon juice
1 anchovy, rinsed
1/4 cup Asiago cheese
extra virgin olive oil
half a cup of salted almonds, chopped
1. Build a charcoal fire for direct heat grilling in your grill. You want it to be very hot. Place a large cast iron skillet right in the middle of the grilling rack. Cover the grill. What happens when you cover the grill is the heat builds, the pan becomes very hot and the lid keeps a little bit of smoke flavor circulating.
2. While the grill is heating make the salsa verde. In the bowl of a mortar and pestle combine the lemon juice, garlic, anchovy, and parsley. Beat it up with the pestle. Add a two finger pinch of salt, a dash of black pepper and a few glugs worth of olive oil. Stir to combine, taste and add more oil it the salsa is to tart. Stir in the cheese.
3. Trim the stalk ends of the cauliflower. Using a good sharp knife cut one steak each out of the center of each head. To do this turn the floret side of the cauliflower down. Hold it firmly and place you knife onto the stalk. Cut through to the florets. Roughly gauge and inch in width and make another cut leaving yourself a nice center cut cauliflower steak. Repeat these steps with the second head of cauliflower. Use the loose outer edges of the cauliflower for another dish.
4. Drizzle the steaks with olive oil and season them with salt. Take them out to the grill. If you have a thermometer on your grill it should read about 600˚ F. Nevertheless when you open the lid the cast iron pan should be beginning to smoke and when you place the cauliflower into the pan it should sizzle. Cook each side until of the steak until it is very deeply caramelized. Remove the steaks from the pan.
5. Drizzle the steaks with the salsa verde, top with almonds, minced parsley and serve.
No Recipe Greek Nachos
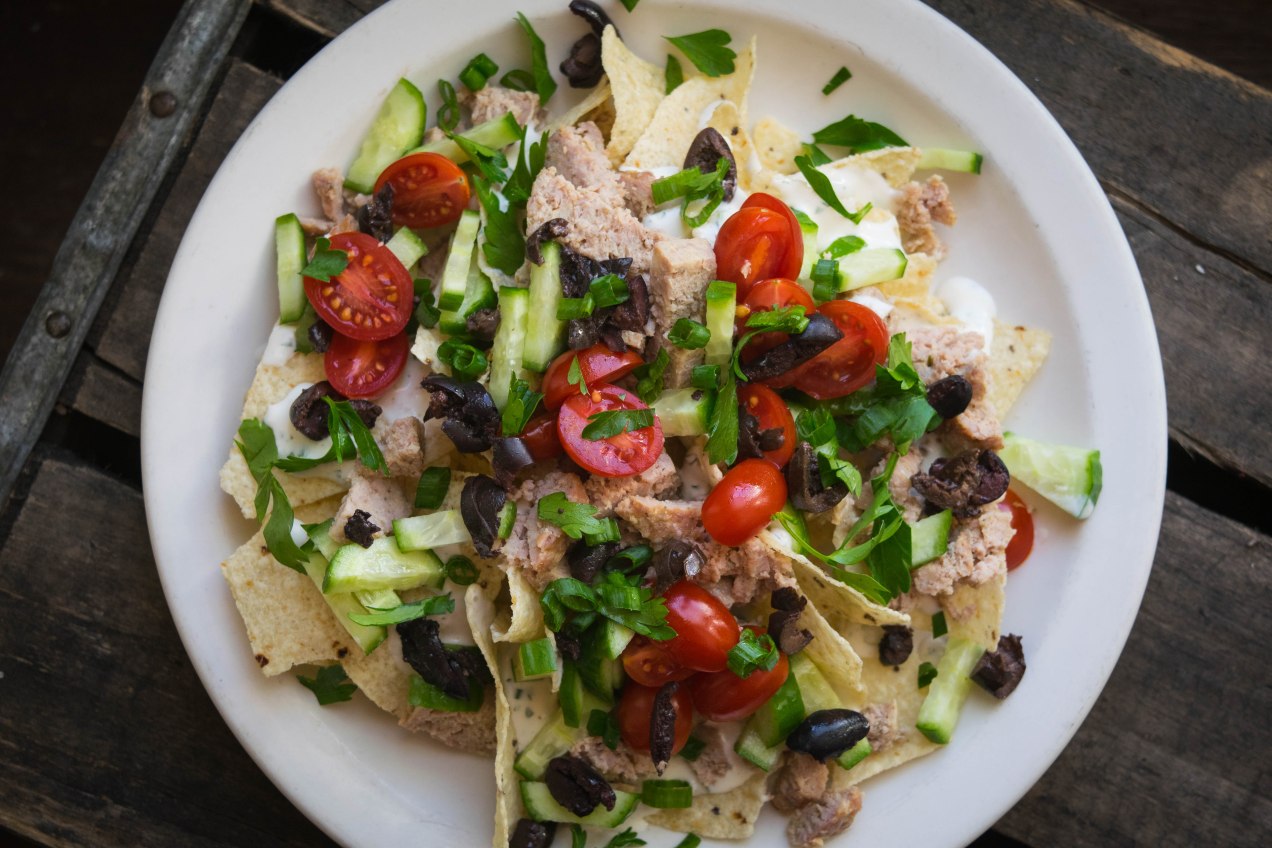
You don’t need a recipe. You can make these from scratch and it will take you less then 10 minutes. Of course that doesn’t include grocery time, I am making the assumption you did a little pre-planning. Although when I made this the other day it came out of leftovers, no planning required. (Don’t want to make the tzatziki, sub in ranch dressing and go for it.)
Pile good quality corn chips onto a plate. If you are making the ranch/tzatziki sauce scoop about 1/2 cup of mayonnaise into a bowl, just eyeball it don’t dirty a measuring cup. Add a splash of buttermilk, milk, or kefir and whisk it to make a smooth dressing. To thick, thin it out with another splash of liquid. Add a half a tablespoon of chopped dill. No dill, use dried oregano just make sure to let it sit and hydrate in the dressing for a few minutes. Again just put it into the palm of your hand, does it look like half a tablespoon? Toss it in, add salt, pepper and a little lemon juice if you want. Stir it again then set it aside until you get the rest of the ingredients together.
Slice some grape tomatoes in half, cut some olives, pit them if you have the fancy kind but pitted California black olives work fine. Chop some cucumbers, I like the baby kind but big ones work too. Any kind of cooked chopped-up ground meat works here. Don’t have any animal protein around, drain a can of chickpeas and rinse them.
Drizzle the chips with the tzatziki, top with everything else, add a bit of crumbled feta, a sprinkle of minced parsley and green onion, if your heart is in it, and serve.
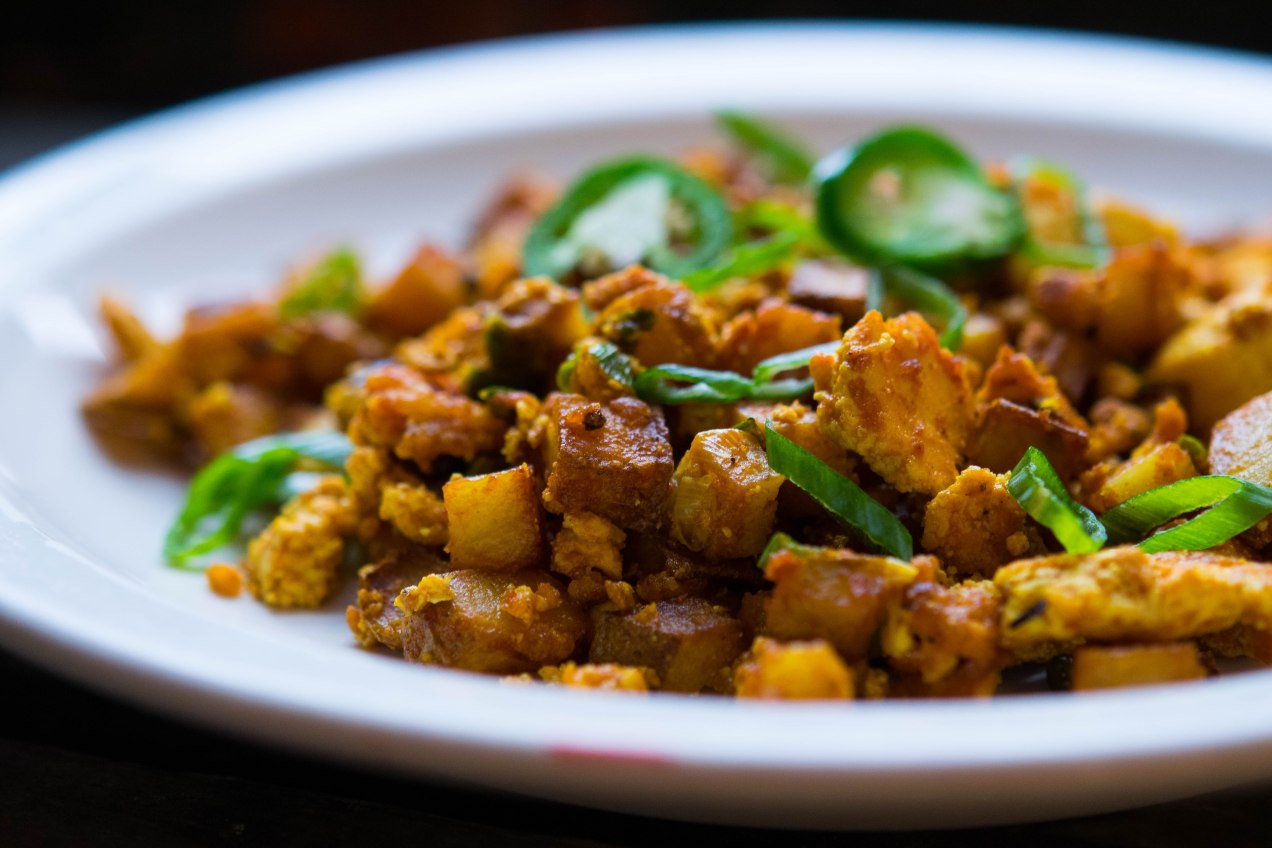
My Favorite Tofu Scramble
It’s not for a lack of eggs. I raise chickens, I have more eggs then I can use most days.
So what drives me to this dish. I especially like sprouted tofu, a lot. It’s not just tofu though. I like the process, the feel of the tofu as I crumble it between my fingers onto a plate, the precision of cutting the potatoes into tiny squares so they cook faster but stay crispy on the outside while remaining creamy in the interior, the smell of the curry powder when I sprinkle it into the hot pan, or the sizzle of the tomato sauce.
I like this dish because it requires a few minutes to make but isn’t complicated to get to the table.
I like it because it is doable on a weekday morning.
I like it because it feels nutritious to eat, as if it is resetting something in my body.
I like it because after eating I am still hungry for the day.
Curried Tofu Scramble (2 servings)
10 ounces sprouted firm tofu, crumbled
1 russet potato, scrubbed and diced into 1/4 inch squares
peanut or grape seed oil
1 green onion, thinly sliced
1 jalapeno, chopped
1 tablespoon curry powder
1/4 cup tomato sauce
kosher salt and fresh ground pepper cilantro, optional
1. Place a 12 inch non-stick skillet over medium high heat. Add enough oil to the pan to generously coat the bottom of the pan. Add the potatoes. Season them with salt and pepper. Gently toss the potatoes in the pan until they are brown on all sides, crispy but still creamy in the center.
2. Add the tofu, jalapeno, and green onion to the pan. Season again with salt and black pepper. Stir to combine the sprinkle the curry powder over the tofu. Stir again being sure to evenly stain all the pieces of tofu with the nice yellow color of the curry. Add the tomato sauce and stir. If need be add a tablespoon or more of water.
3. Once everything is heated through, the right consistency, and seasoned to your liking divide the scramble onto two plates, garnish with cilantro and serve.
Hydrating Droopy Vegetables
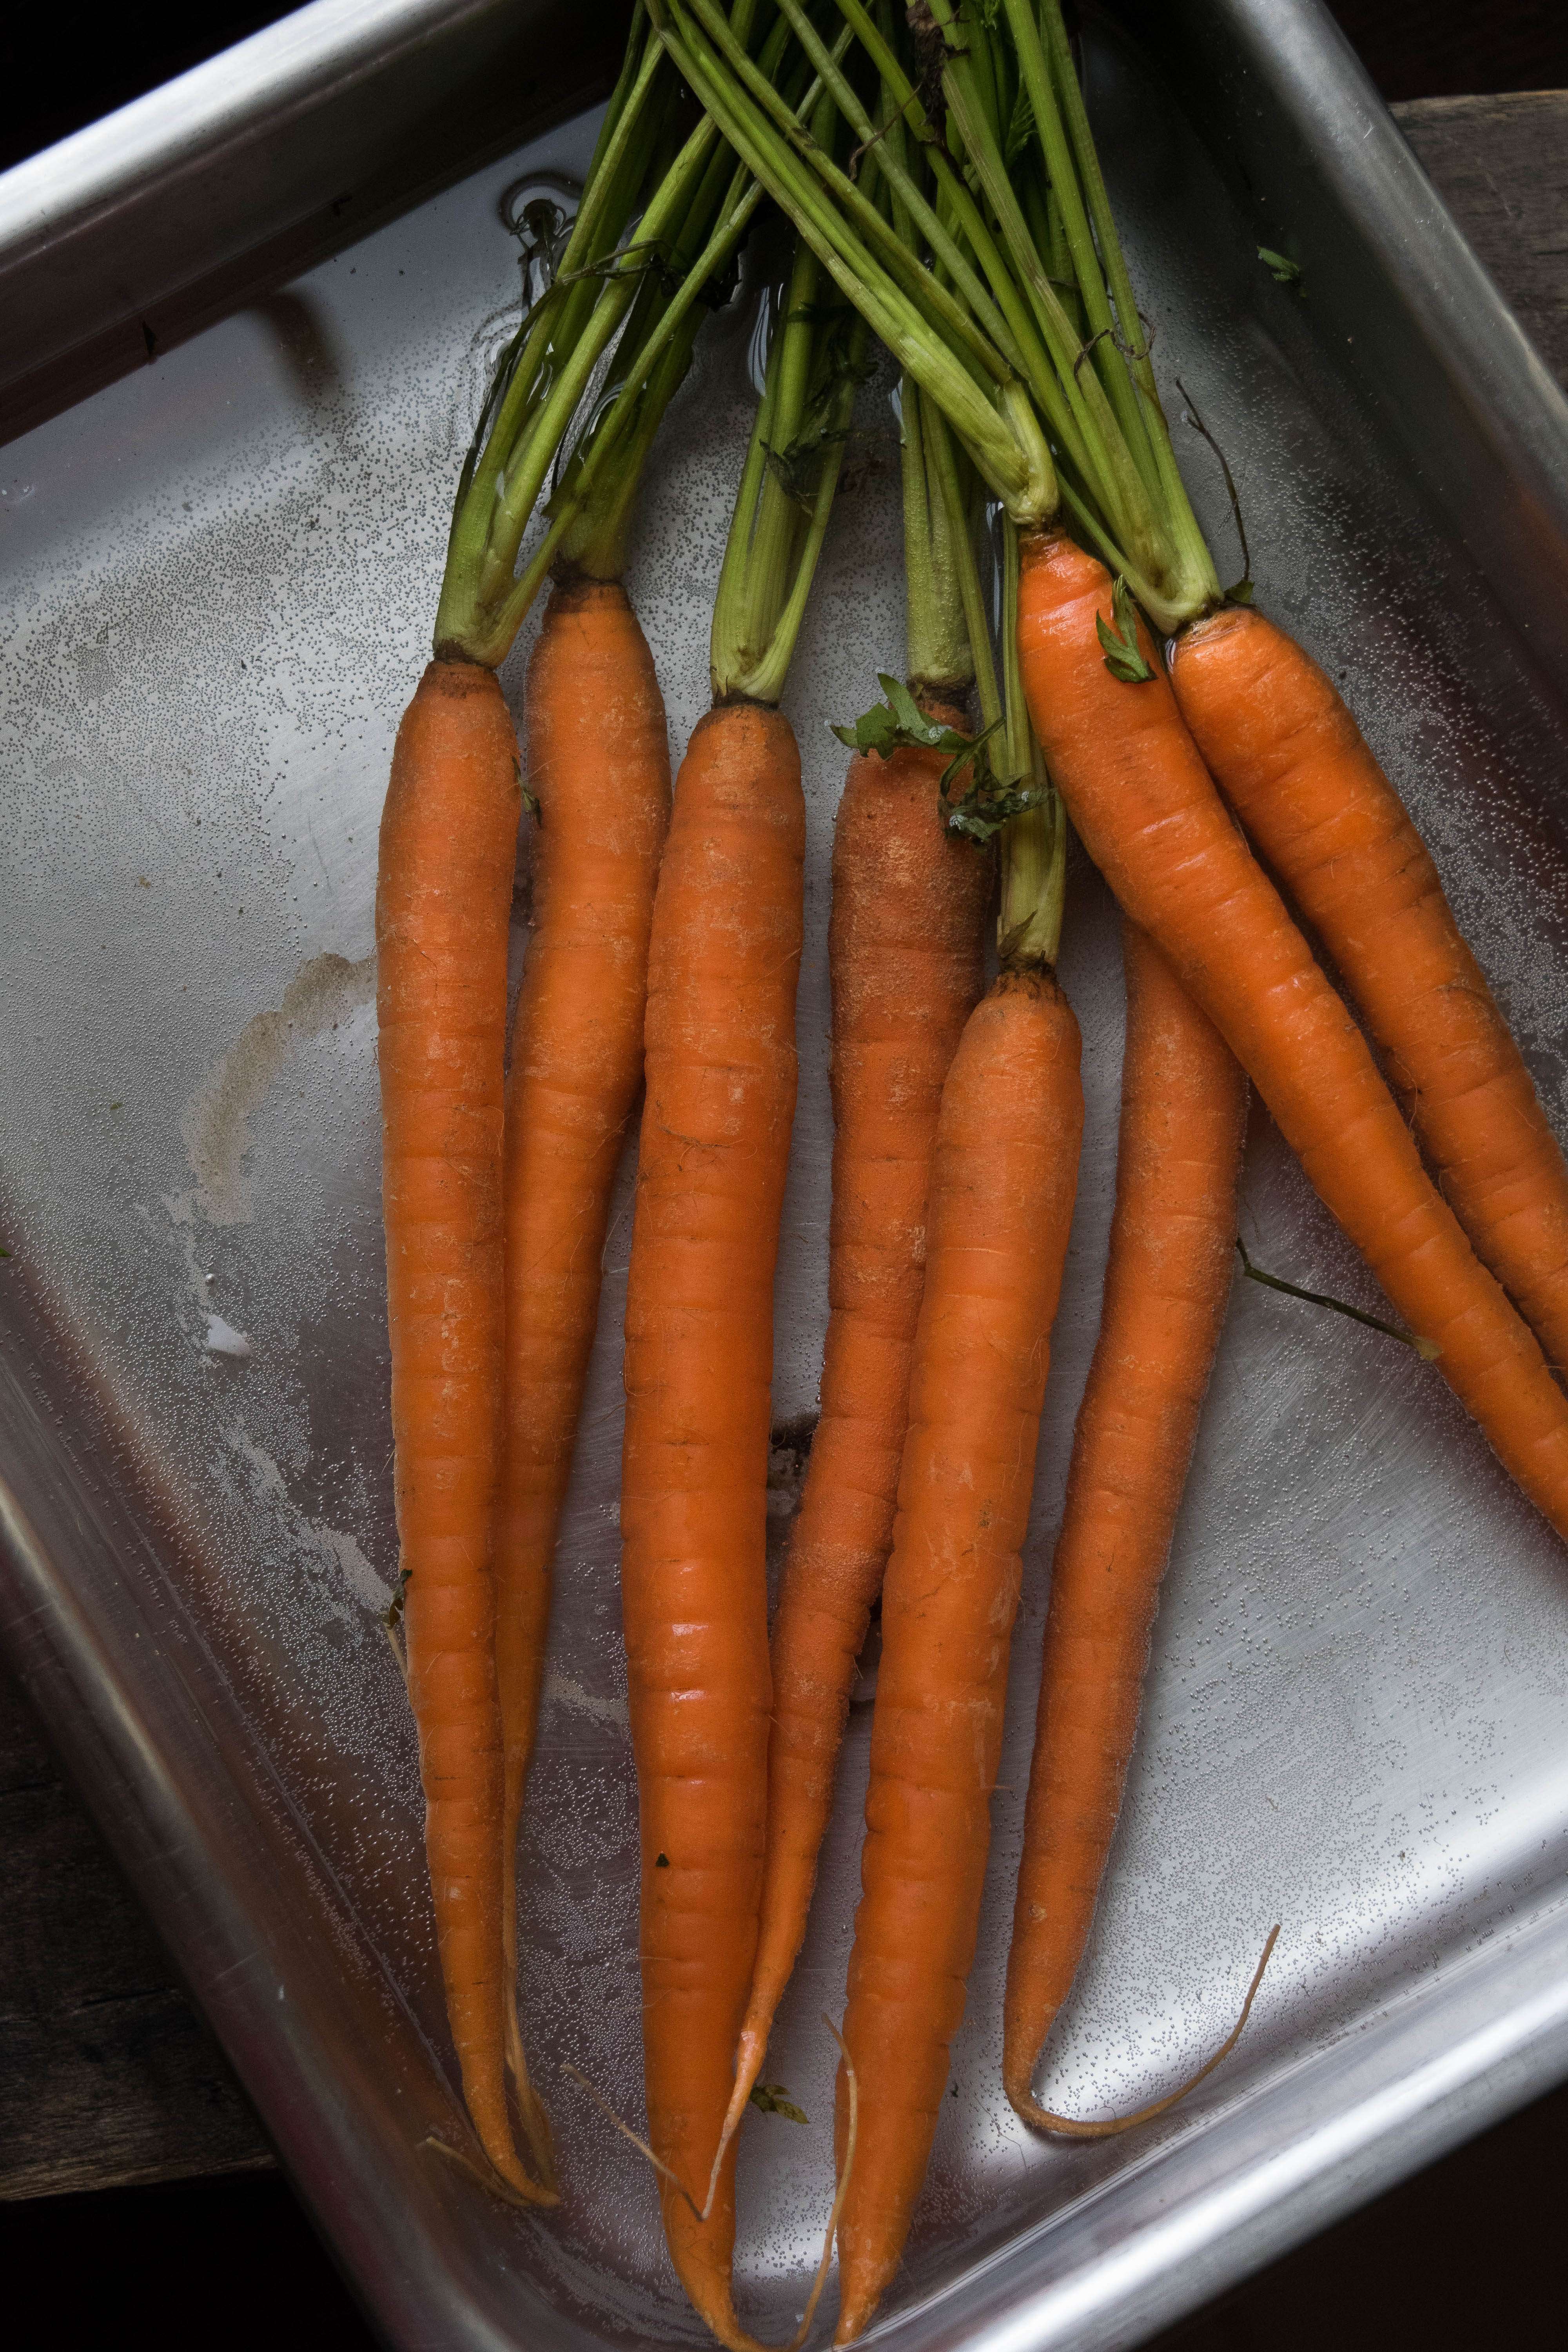 While it is not ever my first choice, hydrating droopy vegetables is worth the effort if your vegetables aren’t too far gone. I am not talking about trying to save rancid moldy vegetables but rather the carrots I bought yesterday that were crisp, fresh and gorgeous but somehow, within a 24 hour span in the fridge, have gone wilty, maybe even beyond wilty but nowhere near rotten.
It pains me to throw out food. Generally I would make a stock with vegetables like this just to use them up but I was really counting on this particular gorgeous bunch carrots for dinner. I wanted to roast them in a high heat oven, taste their sugary goodness alongside a perfect roast chicken, but not now. At the end of an hour in a hot oven they would be nothing but mush. Continue reading
Perfect Microwave Broccoli
 Rarely do I use my microwave. I use it to take the chill off my coffee. I heat leftovers for lunch. Whenever a recipe calls for “butter, melted” onto the glass turntable the fat filled Pyrex measuring cup goes. I don’t cook with my microwave in any real culinary sense. I sometimes wonder why I have it, why I allow it to take up precious counter space when I know everything for which I use it can be done just as easily on the stove.
Of course there is also the fear that has been around as long as the microwave, that somehow it poses some sort of health risk. I don’t know if it does or not but if I error on the side of solid scientific research, it would tell me the microwave is harmless. Even so, I will lean on the side of caution and repeat the mantra I continually voice to my children, don’t put your face right up to the microwave door to watch as a cooking pizza pocket swells and shrinks, as if it is coming to life, and please, stand back an arms length.
I don’t believe the microwave has ever lived up to its original space age expectations. Nonetheless I read an article touting the healthy aspects of cooking vegetables in a microwave. Because it basically steams the vegetables, the vegetables retain a large portion of nutrients then if you used other cooking methods. It made sense, and I am buying in, or at least I want to and there are lots of reasons why. Continue reading
A Simple Smoothie
 “Last night I had a glass of wine. Not so much to celebrate the new year but more to bury the last, there have been better years.” This is what I had to say on New Year’s Day. I am still mulling over my words.
As is my usual, I didn’t make a resolution. I am more likely to sit in a chair and assess last year rather then try to change the new one. Assess I did, and of all the good things that happened, and good things did happen, I made a conscious decision in October of 2013 to become physically fit. Continue reading
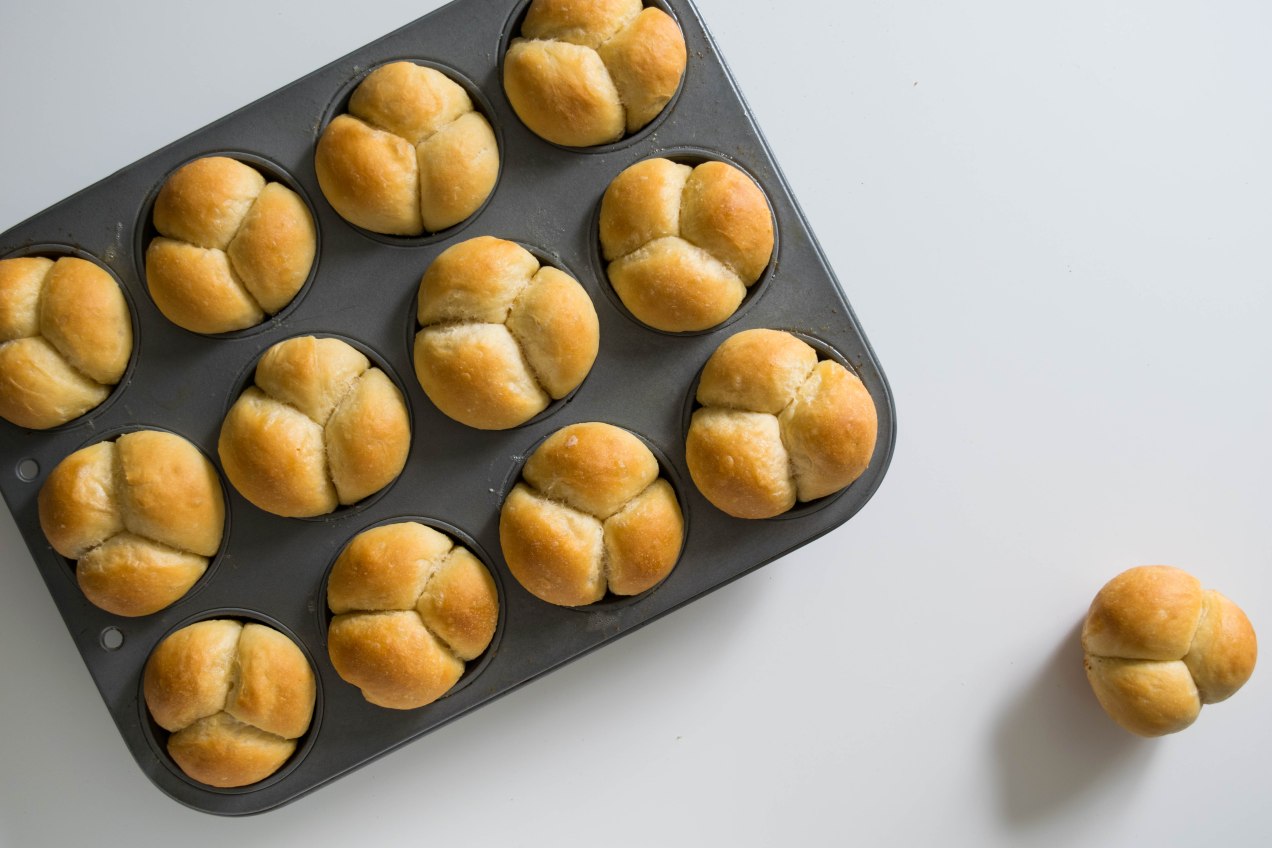
Dinner Rolls and a Bonus Southern White Loaf
I have been, and will continue to be a believer in simple good recipes that follow great technique. I often feel as though complicated directions and hard to find ingredients set us up for disappointment and failure. Don’t get me wrong. I understand the law of diminishing return. That today’s worlds best recipe will be boring tomorrow.
We need to search out new tastes, techniques and flavors but it is also important to return to the classics. For me, I also like to share my childhood favorites with my children. These rolls are a part of me. They connect me to my past, and by sharing them, they connect me to my children. Continue reading
Let’s Talk Turkey
 As with anything in cooking there are many ways to cook a turkey. It is only limited by your imagination. Beer can, the Louisiana Turducken, deep fried, you name it and someone has attempted it, some with better results then others. Simply put, I am from the midwest. When it comes to the holidays I want to know what I am getting into. On the holidays I don’t like change, I am good with tradition and see no need to break with it. Continue reading
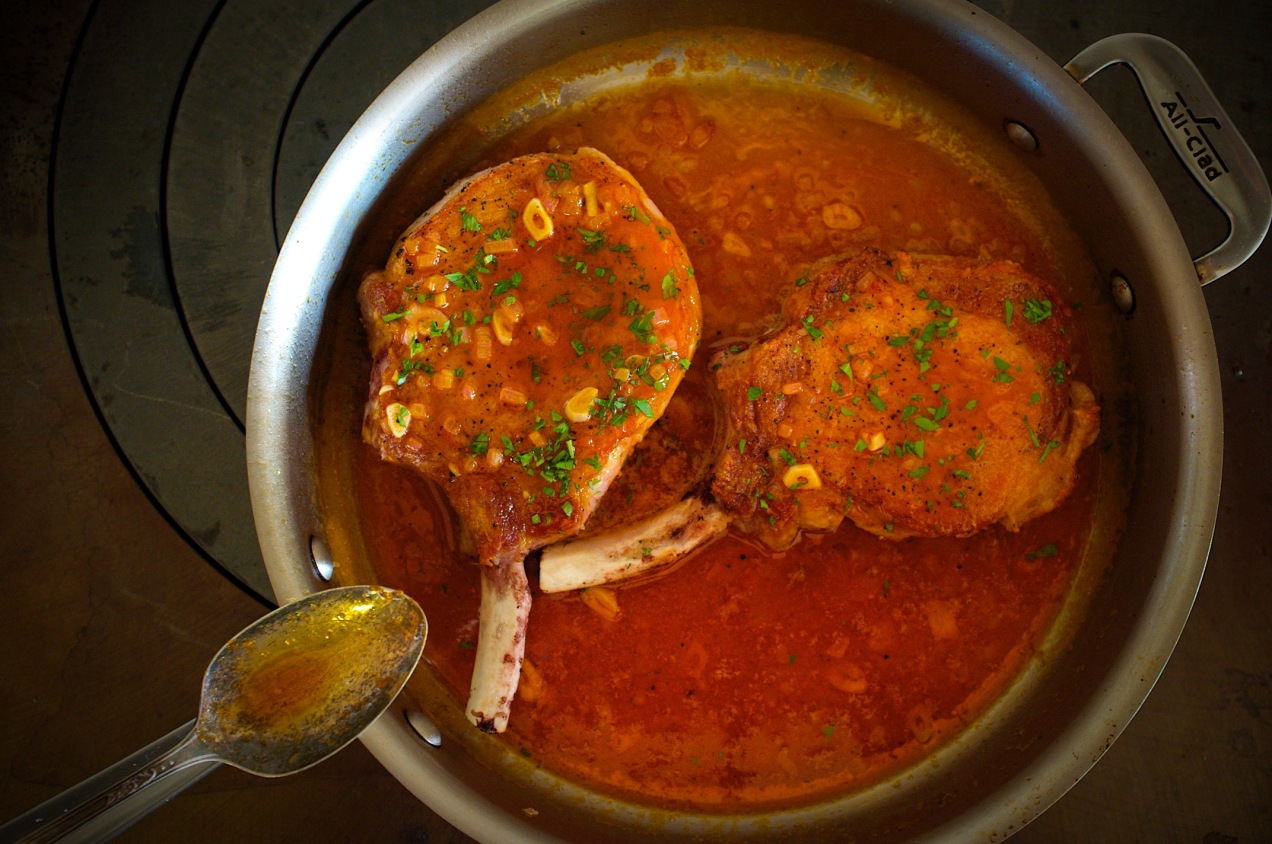
Farmhouse Chops in Wing Sauce
We love our wings in the Midwest but until I made wing sauce, equal parts real butter to hot sauce, I hadn’t had wing sauce. Sadly, and I know it is about cost, I doubt a single wing shop uses real butter in their sauce anymore. The good thing is you can have the real deal, easily, and without having to buy a pre-made version that is less then stellar. Continue reading
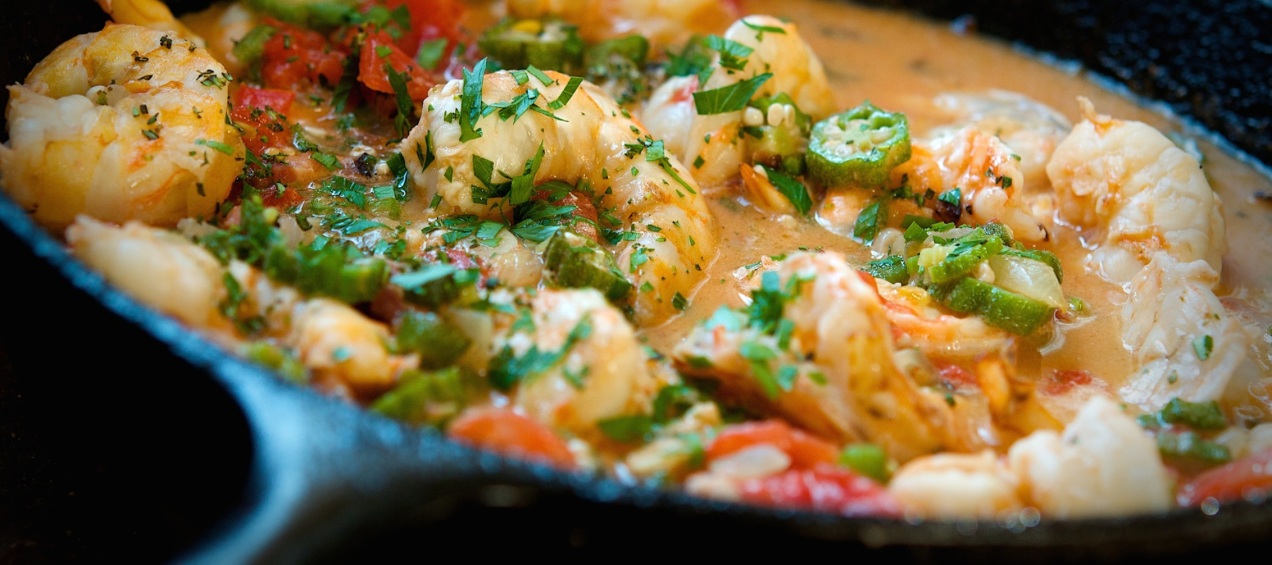
Shrimp and Okra Stew
Some lucky people grew up eating okra; there are even families with rich okra histories that they pass on from generation to generation. I am not one of those lucky people.
I came late to okra — or at least my love for it did. Since I didn’t come from a family of okra-eaters, I always remained skeptical of the vegetable. My relationship with it was like that of boys and girls at an elementary school dance: standing at opposite corners of the room. It’s not that I didn’t like okra — it was that I had no idea what to do with it. I preferred to stay in my comfort zone and stick to eating green beans. Continue reading

Barbecue Chicken Pizza (+ How You Should Think About Prep)
This recipe is a throwback. It was extremely popular in the 1990s — along with duck confit and tuna steaks, seared rare. I still see it now and again on menus, but it has largely disappeared due to overexposure; we became bored with it simply because it was everywhere.
But, it’s been long enough. Let’s dust off the recipe for barbecue chicken pizza and give it another taste. I can practically make this pizza in my sleep — it was a bar special at a restaurant I worked in, and I made so many of them that I still have dreams about it.
I also realize that I no longer cook like I did at the restaurant. I only have four mouths to feed at home, and the prep for any given dish needs to be relatively quick.
As such, I’m a firm believer in this theory: If you are going to take the time to make one of something, you might as well make two or more. This belief holds water especially when it comes to baked potatoes, doughs, and most of all, whole chickens.
To save time, it also helps to organize and think like a chef — this involves weekly menu planning and daily ingredient prep.These simple steps help me to run an efficient home kitchen, reduce overall waste, and improve time management. Before I adopted this philosophy, I wasted an awful lot of time.
I still cook what I want, but I make those decisions on Monday when I menu plan. Ultimately, I aim to complete the prep work for five meals while cooking the first three dinners of the week. That means that planning ahead can be a lesson in patience: If I want to eat this pizza, I have to wait until the end of the week when most of the prep is done. But once you are in the habit of planning ahead, you’ll find yourself with more time — and better dinners.


Barbecue Chicken Pizza
Author Notes: I make my own pizza dough, and I always make enough for two to three pizzas. I divide the dough into portions after the first rise and freeze what I don’t want to use immediately. When I want to use the frozen dough, I simply thaw it (this counts as the second rise), roll it out, and assemble the pizza. This particular dough is based on Alice Waters’ recipe from “Chez Panisse Pasta, Pizza, and Calzone”. It is the same dough I always use and trust.
Makes one 10 x 12-inch pizza
3/4 cups warm water
2 teaspoons active dry yeast
1/4 cup whole wheat flour
1 3/4 cup bread flour
1 tablespoon whole milk
2 tablespoons olive oil
3/4 teaspoons Kosher salt
2 1/2 to 3 cups mixed onions, sliced
2 cups shredded chicken
1 1/2 cup Gouda (some people like smoked Gouda but I find it too strong)
4 ounces fresh mozzarella
1 to 2 serrano peppers, sliced into thin rounds
1/2 cup Memphis-style barbecue sauce
Olive oil, for sautéing the onions
Kosher salt and fresh ground pepper to taste
1 tablespoon parsley, chopped
1 tablespoon cilantro, chopped
1. Combine the water and yeast in the bowl of a stand mixer or mixing bowl. Let the yeast dissolve, then add the rest of the ingredients. Use the dough attachment on a stand mixer (or a heavy-duty wooden spoon) and mix the dough until smooth; add more flour if the dough seems too wet, but don’t add more than a 1/4 cup at a time. Place the dough on the counter and knead until smooth and elastic. Place the dough into a bowl, cover it with a damp, warm towel, and let it rise for 2 hours, or until it has doubled in size.
2. Punch the dough down and knead it for a minute. Divide the dough in two, place one half in a plastic bag, and freeze it. Place the remaining piece back into the bowl, cover with the damp towel, and let it rise for another hour.
3. While the dough is rising for the second time, place a sauté pan over medium heat. Add a glug or two of olive oil to the pan and then add the onions. Let the onions wilt, get gooey, and caramelize slowly. Remove them from the heat.
4. After the second rise, remove the dough from the bowl and flatten it out into a small disk. Let the dough rest for 10 minutes.
5. Heat your oven to 500° F. This is a good time to use your pizza stone; if you don’t have one, use a sheet tray lined with parchment paper.
6. Roll the dough into a 12- by 10-inch square, place it onto a piece of parchment paper, then put it onto a peel or sheet tray. Pour 1/3 cup of BBQ sauce onto the center of the dough. Working from the middle and, using the back of a spoon, spread it in a spiral motion until the sauce reaches the edges of the dough.
7. Combine the remaining BBQ sauce with the shredded chicken and stir until the chicken is evenly coated.
8. Spread a layer of red onions onto the pizza, followed by the chicken, Gouda, mozzarella, and finally, the serranos. Sprinkle some freshly ground pepper and salt over everything, then slide the pizza onto the stone.
9. Reduce the heat to 450° F. Bake for 15 minutes. Once it has browned to your liking, remove the pizza from the oven and let it cool for 5 minutes before cutting. Top with cilantro and parsley and serve.
Classic Creamy Coleslaw

My favorite kind of coleslaw is the classic, creamy variety; it comforts me because I grew up eating it at a mom-and-pop catfish bar whose coleslaw was second to none. Their version was made with finely grated cabbage and bright orange ribbons of carrot. It was a bit tart and a little sharp — the way horseradish can be — because the cabbage was freshly grated. It paired perfectly with deep-fried catfish, whose crispy tails tasted of bacon. This is the slaw by which I judge all others. Continue reading
Memphis Style Barbecue Nachos

Great barbecue is about the cut of meat, the smoke, the rub, and the sauce. But just because sauce is only one part of the equation, doesn’t mean it shouldn’t be excellent. In fact, barbecue sauce should be so delicious that you can use it for much more than simply dipping or brushing. Continue reading
 There is something about big hunks of meat cooked over long periods at low heat that appeals to us at a very basic level. Pit-cooking traditions like hog roasts, barbacoa, and luaus aren’t just barbecues — they’re celebrations. They conjure up visions of earthen pits and long buffet tables with folding chairs, all set up for a multitude of guests.
This kind of cooking takes judgement and practice, though, so unless you host these kinds of events on a regular basis, you’re more than likely cooking blind. After all, you probably aren’t buying a whole lamb or calf more than a couple times a year. It could take you a few years to get it right. Continue reading
Small Batch Barbacoa Beef for Tacos
All About Smoking + A Pulled Pork Sandwich

Barbecue is a far cry from the days past when you were simply handed a platter of meat and sent outside to a grill. I mean, you don’t see leg of lamb braising contests at every turn, or weekend-long fish sautéing competitions — at least not yet — and while you won’t see men look longingly at a stock pot, they will ogle a smoker or a grill like it’s the centerfold of a men’s magazine. Continue reading
Three Bean Salad, Redux

Now that picnic season is upon us, I get nostalgic over classic summertime fare. There is nothing quite like a family reunion over fried chicken and a potluck dinner, tables threatening to buckle under the weight of all the CorningWare and Pyrex.
Of course, there are the old favorites: green bean casserole, scalloped potatoes, pea salad with bacon and mayonnaise, three bean salad, and most certainly a mustardy potato salad — and, if luck is with me, an old-fashioned custard pie sprinkled with a little nutmeg. I love all these foods — but this year, I want something new. Continue reading
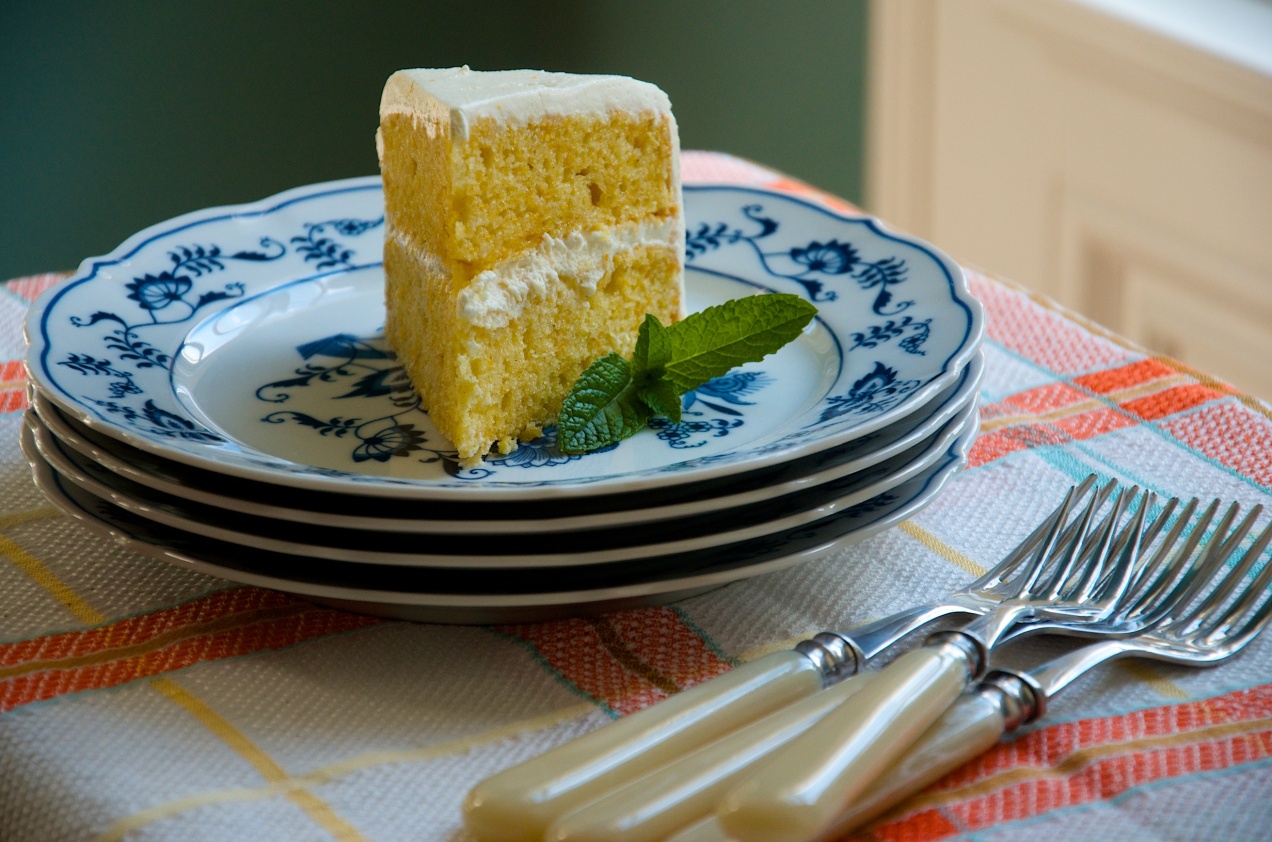 I am a last-minute baker — a procrasti-baker. As such, I am most likely going to make the least complicated sorts of desserts and baked goods. On the occasions I have my act together, I like to make cakes — and even then, I want them to fit my schedule. At one point, I believe, Mandarin Orange Cake — also known as “Dream Cake” or “Pig Pickin’ Cake” — was made from scratch. Continue reading
Mandarin Orange Cake
Morels with Asparagus & Five Reason to Eschew Recipes

There was a time when my father and I would have walked the distance up the hill to Gordon’s Rocky Top. We would have crossed the creek, stepping gingerly across the slick rocks like seasoned hopscotch players, hiked to the fork in the path, taken the trail on the left, and then quietly ascended the long, wooded hill. On our way, we would have walked past the pond, and if we were lucky, we might have spooked an owl or happened upon some white tail deer. Continue reading
Poulet á l’ Estragon (Chicken Tarragon)

Spring always seems rushed. It’s as if we spend months climbing a mountain called winter, and when we finally reach the peak, we’re so grateful that we run as fast as we can down the other side — past spring and directly into summer. It’s even true for the vegetables we’re attracted to — the fleeting cool weather crops that are harvested and eaten before spring has truly begun. Continue reading
The New Steak (+ a Recipe for Duck Teriyaki)

A whole roast duck is as satisfying to eat as it is pretty on the table; while foie gras is a rich man’s food and confit is pure comfort, a delicious seared and crispy-skinned duck breast is one of the real luxuries of eating.
Duck is versatile, but quirky to cook. And when something is unusual, people tend to keep it at an arm’s distance in a that’s my crazy uncle sort of way. But I’m here to say that it is simple to prepare; no matter which cut you’re preparing, cooking duck comes down to two things: rendering off the fat, and getting the skin crispy. Continue reading
Greek Style Shrimp in Tomato Sauce (+ 10 Tips to Better Sautéing)
 There is something wonderful about a one-pan sauté. Sure, a quick dinner and easy clean-up would be enough to pass muster for most, but what I love is how wonderfully delicious dinner becomes as you build flavors in the pan. Starting at the bottom of the pan, there is an order to how things go; it is not a dump-it-and-go process. Continue reading
Cuban Style Skirt Steak + 5 Tips for a Better Sear

I won’t lie to you — I like steak. To be specific, I like pan-seared steak. It’s the roar of the hood fan as it comes up to speed; the exhilaration and anticipation of the pop, crackle, and sizzle of red meat on a hot pan; and the wisps of white smoke curling around the steak’s edges, like a passionate embrace that gently kisses the bits of ground black peppercorn and fat. And, as always, the resulting taste of the brown butter against the crispy-edged meat. This kind of carnivorous zeal should be illegal.
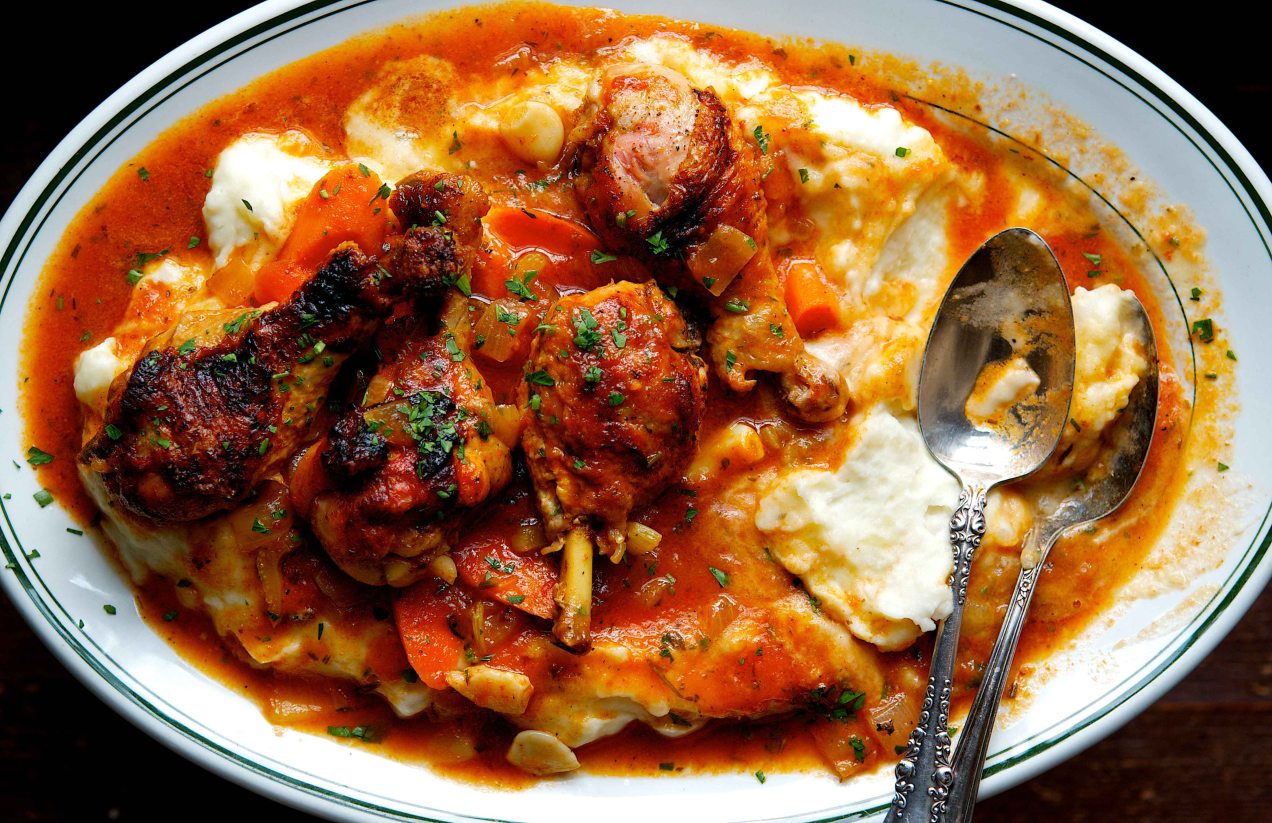
Chicken Legs in Tomato Gravy ( + 5 Tips to a Better Braise)
Finally, the long standing blanket of snow has begun to recede and melt back into the dark earth, but not without leaving behind a disheveled landscape — like lifting an area rug you have meant to clean under for the past year. It is ugly outside, and depressing too. It is the worst time of year. The melt-off signals the beginning of the end of winter, but the skeptic in me knows that the weather is more than likely crying wolf. Either way it sets a spark to the natural cycle of things.
A bee flying in the orchard still bare of leaves, lands on my arm, walks around a moment, then looks up at me with sad puppy dog eyes and flies off. A couple of raccoons out during daylight forage the field for last season’s spilt corn. At the wood’s edge an opossum trips on a branch and falls fifty feet before landing with a thud in the remnants of a wet snow bank. I realize it is time to join the others as well — to come out of hibernation, to replenish.
But I have a problem. I am sick of kale. Even my beloved collards put me off. The hell with you turnip and rutabaga, for you’ve left a bitter taste in my mouth. I push bowls of Brussels sprouts away as if I am a child again, and my mother is trying to force feed them to me (she even threatens me with no dessert). I have eaten my greens in all forms, and I can’t stand them anymore. I have hit the winter vegetable wall. With the exception of but a few, the only way vegetables are still palatable is with heavy cream and bits of bacon.
Through it all, somehow potatoes taste good — more then good — amazing. Anything resembling a jar of sunshine helps (like last summer’s canned tomatoes with basil tucked into the red pulp). Going outside helps, too, because the musty smell of thawing earth and the gentle heat of the midday sun gives me hope for what is to come. Luckily, any food on a platter that resembles comfort is still a hit at the table– such as these chicken legs, tenderly covered with a parchment lid and slow cooked in a Dutch oven until they become sticky. A dish that’s good anytime of the year, but especially welcome during the wait until spring.
-

- Cut off the chicken leg just at the joint
-

- Push down on the skin with both hands to French the chicken leg
-

- Caramelize for deeper flavor
-

- Veggies and chicken should snuggle for a while
-

- The brown bits is the fond
-
- Making a parchment lid is simple
-
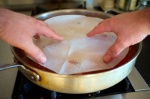
- Parchment lid
-
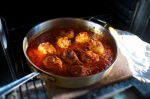
- Finished braise
Tips for Better Braising:
1. Always caramelize the protein. Mind you, many times the vegetables are caramelized too, but not always. The deeper the caramelization, the deeper the flavor of the finished dish. Be mindful of the fond (the brown bits stuck to the bottom of the pan) — don’t let them burn. The ideal braise includes a beautiful fond, which occurs when the bottom of the pot is schmeared with brown bits of cooked-on-goodness that releases into the sauce when you add liquid. For good measure, always use a wooden spoon and scrape along the bottom of the pot to make sure that nothing is left behind.
2. If a recipe calls for vegetables, always add more. If a recipe calls for 1-cup of mirepoix, don’t be afraid to add 2 cups. A braise, as far as I know, has never been hurt by too many vegetables.
3. A parchment lid is one of my favorite kitchen cooking methods. I don’t know the exact science behind it other than that it works (and makes your food better). It allows, at least in my mind, the food that sits atop the liquid to brown and caramelize while preventing the liquid from evaporating.
4. Just because meat is cooked in a liquid doesn’t mean it won’t dry out. Have you ever eaten a piece of pot roast that is so hard to swallow that it gives you the hiccups? It is most likely because the roast was too lean or overcooked. Be mindful of cooking times and fat content.
5. If a braise only calls for a mirepoix to be used in the broth, at the end of the cooking time I will oftentimes remove the meat, degrease the braising liquid, and purée the vegetables to make the sauce creamy without having to add even a touch cream.
Serves 4 or more
For the chicken legs:
olive oil
8 to 10 chicken legs, skin-on
1 cup celery, diced
1 1/2 cup yellow onion, diced
1 1/2 cup carrots, thinly sliced on a bias
12 to 18 garlic cloves, chopped
1 cup dry white wine
2 cups tomato purée
1 cup vegetable broth or water
2 bay leaves
1 1/2 tablespoon rosemary, minced
1 1/2 tablespoon flat leaf parsley, minced
Kosher salt and fresh ground pepper
1. Season the chicken on all sides with salt and pepper. Heat the oven to 375˚ F.
2. Place a large sauté over medium high heat. Add enough olive oil to the pan so that the bottom is just coated. Add the chicken legs and brown them generously on all sides. Adjust the heat as necessary. Add the carrots, celery, and onions to the pan. Season them with salt and pepper. Let the vegetables brown.
3. Once the veggies brown add the garlic and rosemary. Stir the veggies around and once the garlic is fragrant nestle the chicken legs comfortably with the veggies. You want you veggies and chicken spooning. Add the white wine and let it reduce to almost nothing. While the wine is reducing use a wooden spoon to scrape up all the good bits stuck to the bottom of the pan. Add tomato and vegetable broth. Bring the liquid to a boil, cover with a parchment lid, then slide it into the heated oven for 45 minutes to 1 hour.
For the mashed potatoes:
6 to 8 russet potatoes, depending on their size, peeled and cut into 1 inch rounds
6 tablespoons unsalted butter
1/3 cup whole milk, possibly more
kosher salt and fresh ground white pepper
1. While the chicken is in the oven make the mashed potatoes. Place the sliced peeled potatoes into a large pot and add enough cold water to cover them by 4 inches. Add a tablespoon of kosher salt. Place the pot over high heat and bring it to a boil. Once it is boiling reduce the heat to keep the pot from boiling over. After about 15 minutes check the potatoes to see if they are done by inserting a kitchen knife into the middle of one of the larger pieces of potato. If the larger ones are done you are assured the smaller ones will be too. The knife should easily pierce the potato.
2. Drain the potatoes into a colander. Let them steam for a few minutes to rid themselves of excess moisture. Then using a ricer, a mixer or a stand mixer with a paddle attachment either rice, or mix the potatoes till broken down. Add the butter and mix some more. Season the potatoes with a touch of salt and fresh ground white pepper. Add the 1/3 cup of milk. Mix and then taste for seasoning. Adjust the seasoning as necessary and add more milk if the potatoes are too stiff. Be careful as to how liquidy you make the potatoes. Error on the stiff side because the tomato gravy will loosen them up a lot as they co-mingle on the platter.
3. Plate the potatoes onto a large platter. Top the potatoes with the chicken legs then the carrots, onions and celery. Ladle the tomato gravy over all and sprinkle on the parsley. Serve.
This is a television feature piece I did recently on venison. Click continue reading for the recipe.
Eastern European “Style” Venison Meatballs
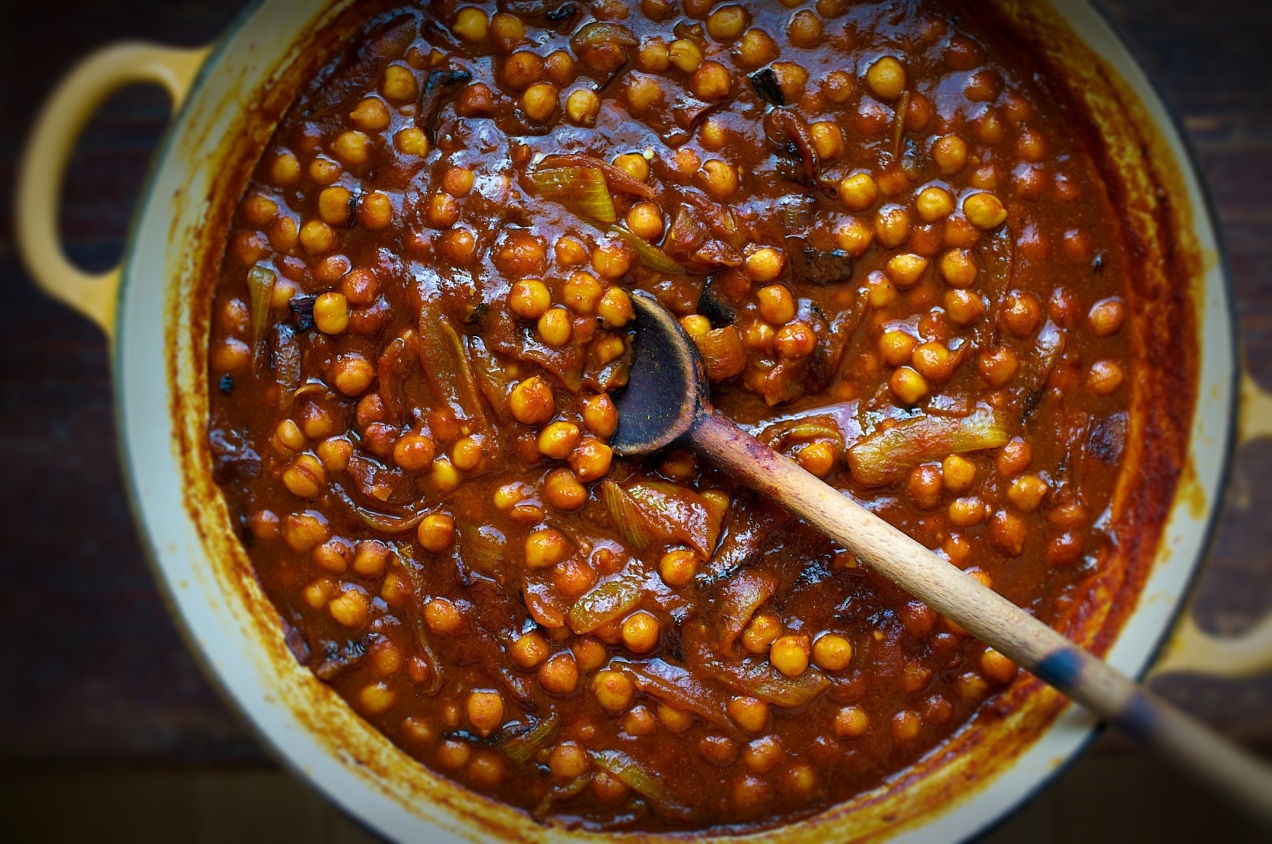
Spicy Chickpea and Sour Tomato Curry with Pasta
Whenever a simple, delicious dish — like this spicy chickpea curry — is placed next to me at the table, it doesn’t just make me happy; I become protective of it in a selfish, rabid dog sort of way.
This recipe is based on Indian khatte channe, which is grounded on good Indian home cooking — but to be fair, it could also have easily been born out of a 1970’s hippie cafe in which cheap eats and a flair for the exotic were popular. In fact, Moosewood Restaurant and its cookbooks always come to mind when I cook this stew. But no matter where it came from or how it found its way to my table, I can tell you that there is a lot to like about this pasta, from the first forkful of twisted noodles loaded with tangy sauce to the last spoonfuls of creamy chickpeas.
I could start with the fact it is vegan, but that will scare some of you off, just as if I said it was gluten-free. In this case it is both, but the good news is that after you try this dish, it won’t really matter.
What does matter is how easily it comes together and the fact it can easily come from your pantry. When I make this, I head to the pantry with a tray in hand and begin by collecting all my ingredients and equipment.
What stands out during the pantry search-and-seizure is tamarind concentrate. It is a bit of an oddball ingredient, but one I always have on hand. Unlike tamarind paste, which requires soaking and straining, this concentrate dissolves easily in water. It has the consistency of molasses, and it gives this stew its characteristic tang. A popular substitute for tamarind is equal parts lime juice and brown sugar, but this only works when a small amount of tamarind is called for in a recipe, so it probably wouldn’t work here. If you like Pad Thai and ever wanted to cook it at home, tamarind really is an essential ingredient to have on hand.
When it comes to curry powder, I prefer Madras — I like the fragrance of kari leaves — but feel free to use your favorite. For more heat, you can add more cayenne; just be sure you know how hot your curry powder is before you get too crazy.
As always, when it comes to caramelizing onions, I don’t know how long it will take for them to become a deep, dark brown. It could be 15 minutes or 45, and maybe more depending on your pan, the heat, and the sugar content of your onions. I do know, however, that you shouldn’t cheat yourself; color them deeply, as they are essenial to this dish.
Assuming you have done your prep, once the onions are caramelized, this becomes a dump-and-pour procedure followed by a short simmering period just for good measure.


Spicy Chickpea and Sour Tomato Curry with Pasta
Serves 6
Two 14.5-ounce cans of chickpeas, drained
1 to 2 tablespoon tamarind concentrate mixed with 1/2 cup of water (more tamarind will make the dish more sour)
3 tablespoons olive oil
2 cups yellow onion, julienned
1 tablespoon fresh garlic, minced
2 cups tomato sauce
1 tablespoon fresh ginger, peeled and minced
1 teaspoon turmeric
1/4 teaspoon cayenne
2 teaspoons Madras curry powder, or your favorite kind
1 teaspoon cumin seeds, coarsely ground
Kosher salt and freshly ground pepper
Cilantro, green onion, or both
1 pound thin long noodles: wheat or rice or gluten free, use whatever floats you boat
1. Place a 3 1/2-quart heavy-bottomed pot over medium heat. Add 3 tablespoons of oil to the pot and then the onions. Season the onions with salt. Cook the onions, patiently, until they begin to brown and become deeply colored. Stir them often enough that the onions on top brown at the same pace as those on bottom. Don’t do this too fast; you want melted, gooey onions, not seared onions. Take your time; it takes a while.
2. Once the onions are browned to your liking, add the garlic. Once you smell the garlic, add the turmeric, curry powder, cumin, and cayenne pepper. Give it a stir then add the tamarind, tomatoes, chickpeas and ginger. Reduce the heat and let the sauce simmer. Taste the sauce for salt and adjust as necessary.
3. Cook the noodles.
4. Once the noodles are done, drain them, and put them on a platter. Top the noodles with the chickpea stew and top with green onions or cilantro or both. Serve.

Chef Leichte spun on the balls of his feet. A millisecond ago he was heading forward, and I was following him. Now we are face to face, and he pokes my chest with his finger. “Commit!” he says in a raised voice, his chef’s toque rising from his head and towering above me like the leaning Tower of Pisa. “Quit asking all these questions and cook! Commit to the recipe; if it fails, we will fix it, but realize you will probably learn more from your mistakes than if I coddle you through the process.” Continue reading
Tips for Reading Recipes (& Chinese Style Honey Hoisin Sticky Ribs)

5 Resolutions to Make You a Better Home Cook (+ Pot-Roasted Collard Greens )
 To be honest I lost interest in New Year’s Eve a long time ago. If memory serves me, the last New Year’s Eve I celebrated was sometime late last century. For that matter, I am not sure what year it was that I last made it to midnight.
It doesn’t mean I don’t celebrate, I do, I am just not in a rush to do so as the bell tolls. I guess I prefer to ease into it casually, like when my eyes pop open after a good night’s rest.
But let me just add: I am skeptical of New Year’s too. Maybe because we try to inject new vigor into failed promises, or because we also act as though eating a particular meal, either cleansing or lucky, is going give the rest of the year promise. The whole holiday feels dubious to me, with one exception: collard greens.

The caramelized smear on the bottom of the pot is an indication you collards are cooked perfectly.
As always, combine collards with beans and rice and you can feel as though you are entering the new year at a low with nowhere to go but up. But there is another way of looking at it too. In my family, collard greens are not a one-hit wonder only to be served once during the year. Nor are they a fad. They are steadfast and as honest as the day is long. Sure you could hang out with the pretty people and eat kale, but kale isn’t collards. Neither are mustard or turnip greens. For me, because they are like the brainy girl who likes to read, collards are far more interesting. So much so that you want them around all year and with collards around there is no need to go up.
But, as always, sometime between Christmas and the new year I will put on the horsehair shirt, become all monkish and reflective, and try to set a direction for the new year ahead. I can assure you, in the kitchen, collards will act as a reliable compass.
Five Kitchen Resolutions for the New Year to Make You a Better Home Cook
1. Try to follow fewer fads and learn more technique. Take collards, for example. I had always simmered them in the typical manner with pork, pepper flakes, and liquid. While I still love cooking them this way, it wasn’t until I learned to pot-roast them vis-à-vis Thomas Keller that I picked up a new technique. And, I might add, one I am grateful to have in my tool kit.
2. It has been a battle this year with getting the kids to eat what is put in front of them, but, rather than forcing them to try new things, I am going to make more kid-friendly meals (that doesn’t mean junk) with the expectation they eat other meals without complaint. I also have this notion that if I feed them exotic foods all the time they will have to deal with the law of diminishing returns in that they will become bored with food. I also suppose I want them to have things left to explore and look forward to as they grow older.
3. Break out of your routine and explore other cuisines more often.
4. Choose three new dishes to master and do so. You know some say it takes cooking something a thousand times before you really understand how to cook it. While this might be a little extreme, I do like to be able to cook a dish multiple times and have it turn out the same each time. This takes practice.
5. Search out and explore five new ingredients.
Pot-Roasted Collard Greens ( Recipe adapted from Thomas Keller’s Ad Hoc at Home )
Serves 4
8 cups collard greens, stems removed and leaves chopped into 1-inch squares, then rinsed twice and dried
1/2 cup bacon lardons
1 tablespoon unsalted butter
Kosher salt and freshly ground black pepper
- Heat the oven to 300˚ F.
- Place a heavy-bottomed pot or Dutch oven (with a tight-fitting lid) over medium heat. Add the bacon and let it start to render, then add the butter.
- Once the butter has melted, add half of the greens. Season them with a heavy pinch of salt and freshly ground pepper. Stir and turn under the greens so they are coated with fat. Add the rest of the greens and repeat the seasoning and turning.
- Cover the pot with the tight fitting lid and slide it into the oven. Roast for 1 hour to 1 hour and 15 minutes. Remove from the oven, remove the lid, and stir. Taste and adjust the seasoning. Put the lid back on and let the collards set until ready to serve.
The Best, 5-Minute Smoked Salmon Appetizer

Last summer, my mother asked me to make cupcakes for the June birthdays. We have several in June and, in order to make it easy, we celebrate them all at once. Nevertheless, I forgot to make the cupcakes and I was on my way to the party when I remembered. “Oops,” or as Vivian, my daughter who never misses an opportunity to repeat a cuss word, noted from the back seat, “Oops” was more like a cuss word or three. Continue reading
Mustard Crusted Beef Tenderloin with Sauce Robert

Brown the tenderloin first for added flavor before crusting and baking in the oven.
Through most of the month of December, I spend a lot of my time preparing recipes that taste great but don’t absorb a lot of my time. It’s the holidays after all, and not only do I want to enjoy them but I have other things to do: trim the tree, make cookies, go to the neighbors’ caroling party where they serve the punch that requires a second cup of coffee and a little extra recovery time the next morning. Continue reading
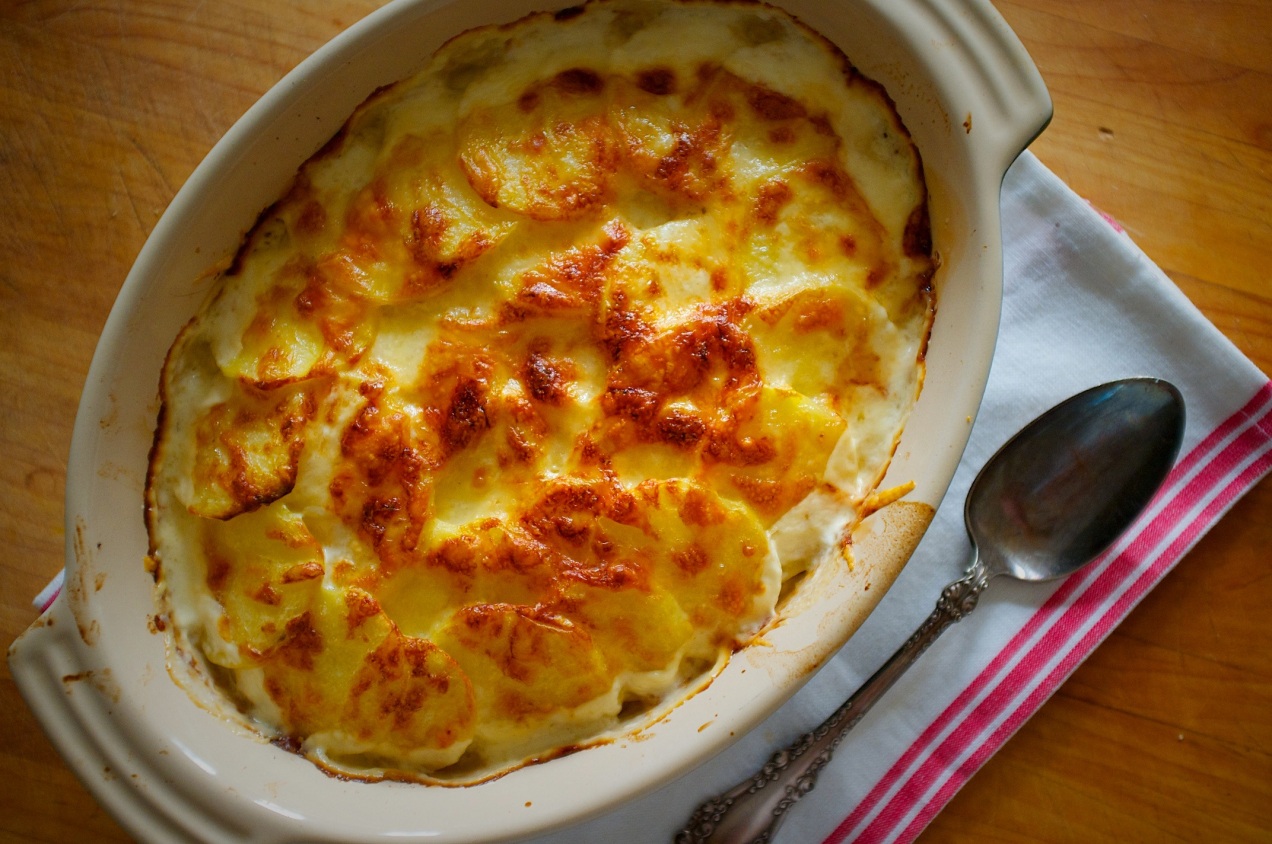
A Classic Potato Gratin With No Recipe
Have you ever had a friend who knows no strangers? The kind of genuine person to whom everyone in the room gravitates — someone who doesn’t have to work at meeting new people, because somehow it is coded into their DNA for others to like them?
For me a potato gratin is just such a friend. A friend who hangs out with all the cool entrees too: a mustard crusted beef tenderloin taking a bath in a flavorful sauce or a perfectly roasted chicken with crackly brown skin are its best friends.
But, to its credit, a potato gratin knows enough to complement all the other dishes and, with the exception of a few rules, remains unfussy enough not to need a recipe and somehow is always perfectly put together for any holiday gathering.
How to Make Potato Gratin Without a Recipe
1. Peel your potatoes. For a 10-inch oval gratin pan, I like to use six to eight medium-sized Yukon Gold potatoes — about 2 1/2 pounds. (Don’t worry: If you overdo it, you can snack on leftovers after step 6.)

2. Slice the potatoes an 1/8-inch thick, ideally on a mandoline right into a heavy bottomed pot. Add a few minced cloves of garlic, about a teaspoon of salt, and roughly equal parts of water and milk to cover the potatoes.

3. Bring it to a gentle boil over medium heat and cook the potatoes till just tender but not falling apart, then drain. By cooking the potatoes most of the way through in flavorful liquid, you don’t have to worry about exact quantities of liquid and seasoning later on.

4. While the potatoes are cooling, grate approximately 2 1/2 cups of Gruyère or Comté cheese — they are traditional but expensive. Other cheese in the family would be gouda, fontina, or American Gruyère.

5. Get out an oval gratin, or any casserole, pie pan or dish you choose. Just take note: with a smaller circumference dish you have more creamy interior and less crunchy top and, obviously, the reverse is true for a larger gratin. Place around half the potatoes into the gratin (they don’t need to look pretty, yet). Season with salt and white pepper. Top with half the cheese and drizzle about 1/2 cup of cream over the top.

6. Starting with one slice of potato placed in the middle of the gratin, spiral the potatoes around until you reach the gratin edges. Make it look pretty — it makes a difference.

7. Top with the remaining cheese, then drizzle another 1/2 cup or so of cream over the top and around the edges so it gets to the bottom, too.

8. Bake at 425˚ F until brown and bubbly, about 30 minutes. Don’t overcook the gratin so it dries out. You want a little cream to remain on the bottom. Serve.

Shoofly Pie, with or without gluten

In the dessert world, there is a whole mess of what I like to call pantry pies: pecan, pumpkin, the chess family, derby, custards (like sugar cream), and last but not least, shoofly (or its aliases: shoo-fly, molasses, sorghum, or Montgomery). All of them are good with coffee, exceptional for breakfast, and of course, we all know that they are standards at the Thanksgiving table.
The least known of this group is the shoofly. While most have heard of it, few, I will wager, have eaten it. Maybe it’s all the molasses, which can be overwhelming, or maybe it’s because it isn’t much known outside of Pennsylvania Dutch country and a few select pockets of the South. Continue reading
While it might not be haute cuisine, chopped meat is surely economical, flavorful, and versatile. From meatballs to croquettes to tacos, it can do it all and can do it with ease. It is an uncomplicated ingredient, often interchangeable, and more often than not is a beacon signaling out comfort food to anyone within range.
Take for example chopped steak: it is nothing new. Salisbury steak for instance has been around since 1897. Named after a doctor, Dr. Salisbury, who created it. Salisbury was also a believer in a low-carb diet, fancy that. Continue reading
Recipe Reclamation: Bringing Back Chopped Steak
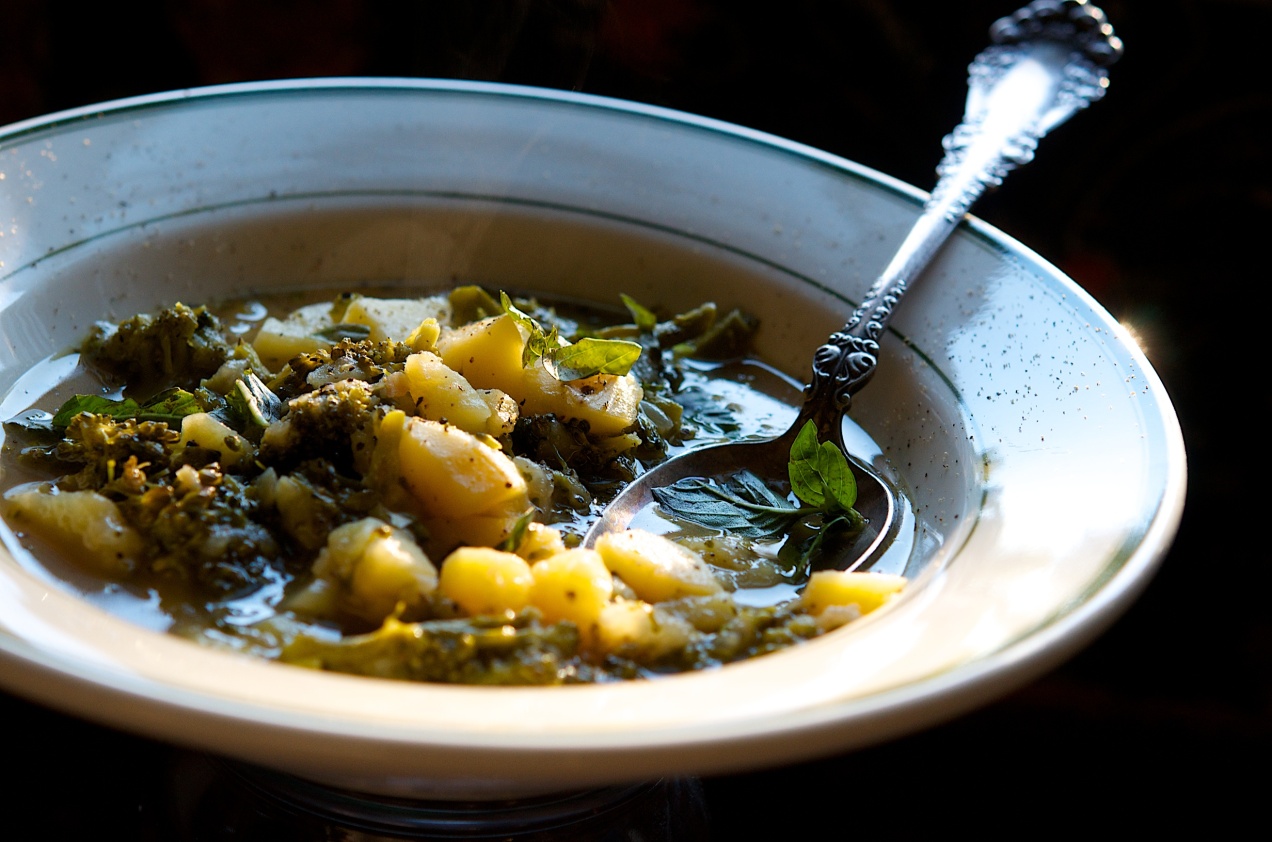
Marcella’s Broccoli and Potato Soup
Each year I look forward to making this recipe with the first broccoli from the fall garden. I’ll make it several times from mid-autumn to early winter. It requires but a few humble ingredients which, when combined in the soup pot, are as satisfying as knowing you have an uncommitted hundred dollar bill in your pocket.
As with many soups of few ingredients, it requires attention to detail, your best technique, as well as quality ingredients. But if you are anything like me, you find as much enjoyment in the process as the reward.

The process for me starts with chicken stock made from scratch. I use old hens from my flock each year to make my stock, but any bones would work great. From the carcasses I make a very richly flavored stock which I preserve by canning. I use the homemade canned stock for many soups throughout the cold months. I urge you, if you don’t already, to learn how to make good stock even if you don’t preserve it by canning.
The next step for me is in my garden. I walk the rows of heirloom broccoli looking for tight, almost purple in color, florets. I give them a delicate squeeze for firmness and if they make the grade I get out my pocket knife and cut the stalks. It doesn’t stop there: there are the firm, yellow-fleshed potatoes and the pungent basil leaves stripped from thick, late-summer stalks.
All the ingredients are laid out on the counter top. I have an urge to stick close to Marcella’s original recipe, I want her book close at hand and set it next to the cutting board. Even though I have made this recipe from memory I want to make it as Marcella has it written. I like to do this occasionally, to refresh my memory and taste.
I clean the vegetables. With the exception of the potatoes, I cut everything and collect up the ingredients setting them neatly on a sheet tray. Then I move them close to the soup pot so they are at hand.
I came late to Marcella’s books in my cooking, even then it took time for her to grow on me. She was a champion of home cooking and I was more interested in preparing fancy and complicated restaurant food. I never met her; even so I often call her Marcella as if I knew her. I bet lots of people do this.
We did have a conversation once through social media. She called me out on a picture of a branzino, a Mediterranean sea bass. I had this fancy picture, a great photograph of the fish on a bed of greens with prosciutto and I posted it. I received lots of positive comments and likes. Then later that Saturday night Marcella asked me, “What are you doing to this poor fish?”
She may as well have rolled up a wet kitchen towel and snapped me on the ass. She called me out. What proceeded from the sting was a weekend-long exchange of messages, me going to the grocery to get another branzino and her teaching me how to simply poach the fish in aromatics and serve it with a simple aioli. Her recipe was by far the better.
What was important wasn’t that she taught me how to cook a branzino, or that she shared a recipe with me, but that she reeled me in. In one fell swoop she made me realize the importance of simple home cooking, that making restaurant food at home is silly, often wasteful and that great home cooking isn’t about chasing trends and being a foodie but more importantly how to cook wholesome good food for your family.
It might have taken culinary school to make me a chef but in a single Saturday night Marcella turned me into a home cook.


Marcella’s Broccoli and Potato Soup (adapted from Marcella Cucina)
Makes 6 servings
3 tablespoons unsalted butter, divided
1/4 cup extra virgin olive oil
2 cups yellow onion, julienned
Kosher salt and freshly ground black pepper
3 garlic cloves, peeled and minced (about 1 tablespoon)
2 cups Yukon Gold potatoes, peeled, medium dice
2 1/2 cups broccoli florets, no stems
3 1/2 cups stock, chicken or vegetable
6 smallish fresh basil leaves, torn
1/2 cup Parmesan, grated
- In a 3 1/2-quart heavy-bottomed pot, combine the olive oil and half the butter. Place the pot over medium heat. Once the butter begins to melt, add the onions. Season them with a pinch of salt and freshly ground black pepper.
- Saute the onions until they become golden. Don’t rush this step and adjust the heat as necessary to keep them from browning too fast. Add the garlic and cook until fragrant.
- Add the potatoes. Stir them to coat with oil and let them sizzle away for a minute or two. Add the broccoli and do the same as you did with the potatoes. Add the stock.
- Bring the stock to a boil. Taste the broth and adjust the seasoning. Go easy on the salt though because the Parmesan has lots and will act as seasoning as well.
- Simmer the soup until the broccoli and potatoes are tender. The broccoli is not going to remain vibrant green, but if it is good broccoli it won’t be olive drab either.
- Once the potatoes have cooked through, add the parmesan, the remaining butter, and the basil. Stir to combine and serve with more black pepper.
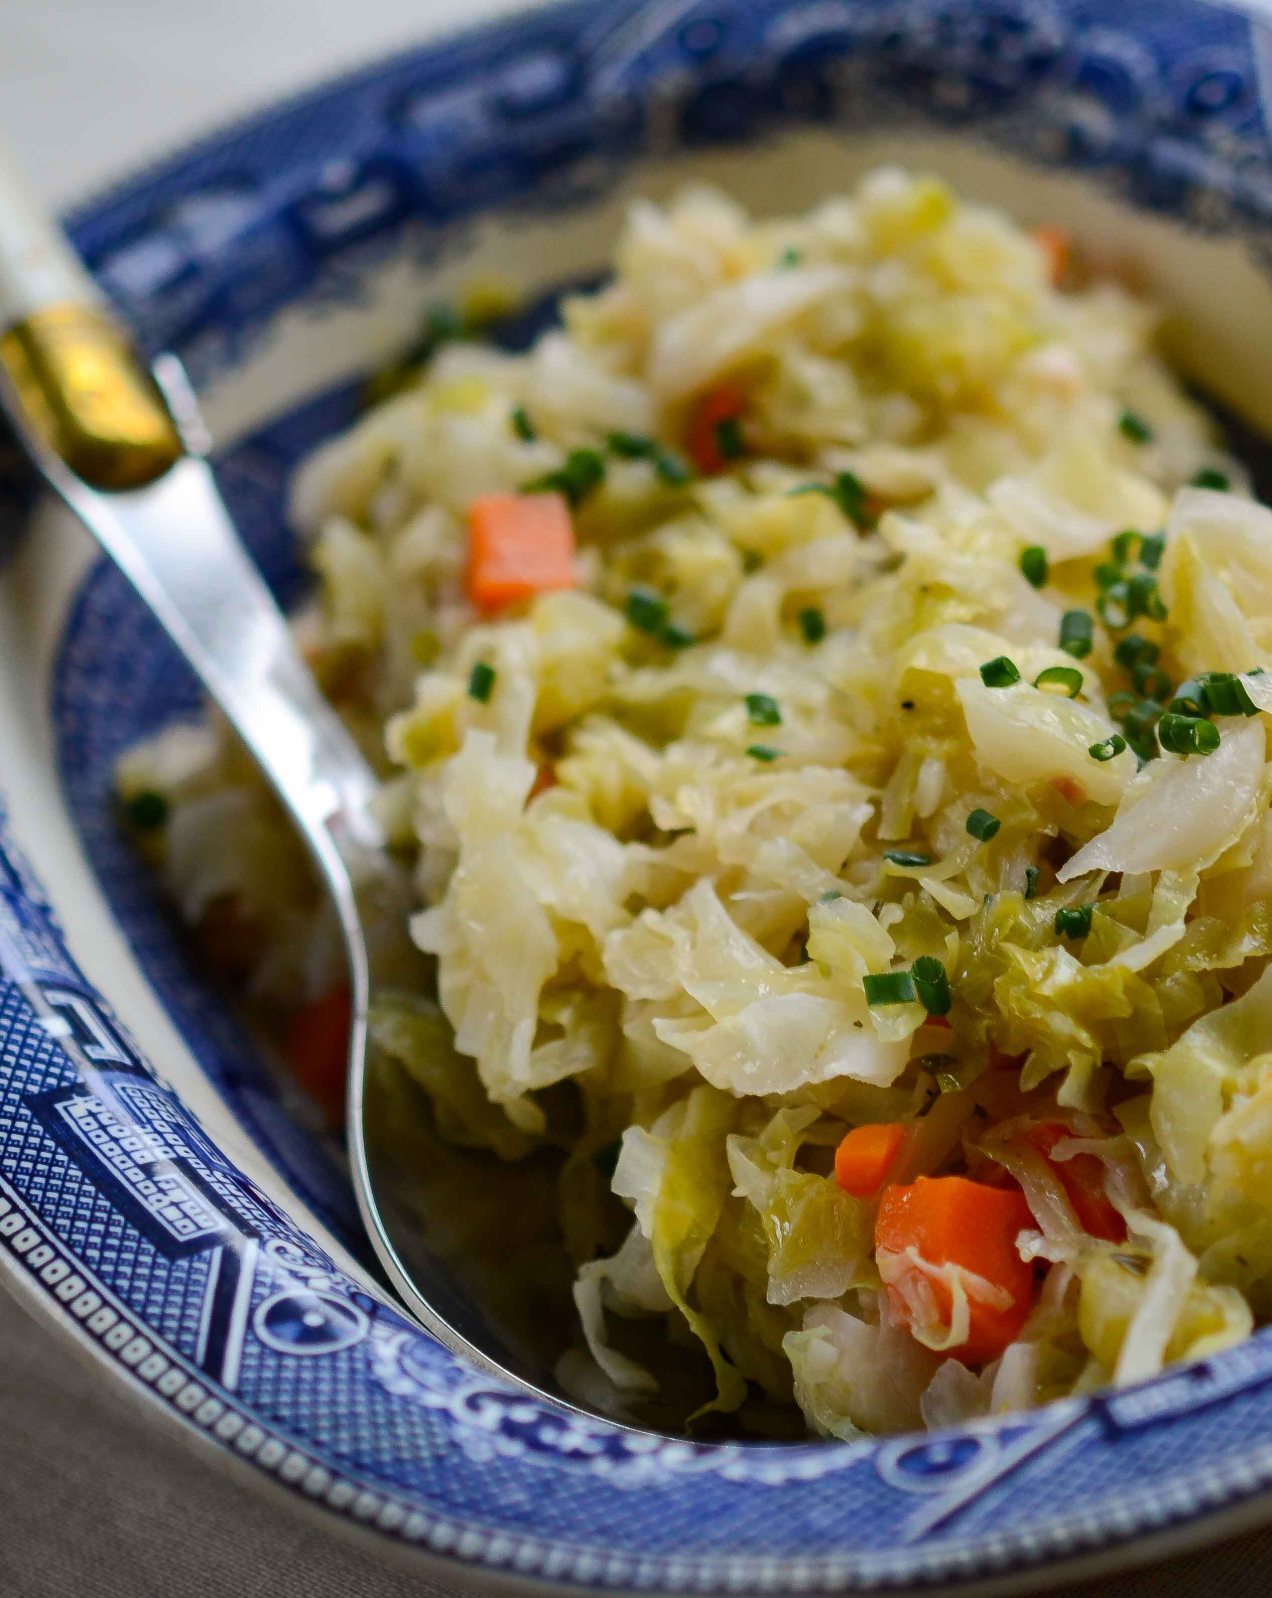
The Virtues of Routine and Braised Cabbage
I like repetition. It guides me from one task to another. Like how in the morning I’ll make my wife’s coffee exactly the same way and take it to her while she is getting ready for work before making my own. Then I’ll pack the kids’ school lunches, followed by preparing breakfast, and every Tuesday, I go to the grocery store immediately after the kids get on the school bus.
I follow a routine when I go to the grocery, too. The automatic doors swoosh open like the welcoming arms of an old friend as I enter, and I wonder who the first person I’ll see will be. A stranger? A familiar face? What will they look like and will they be smiling? Which fruits and vegetables are right up front this week and who made the covers of the gossip rags at the checkout line? All pressing questions, I know.
But the other day I broke routine, for an observation. As usual, the endcap to the vegetable aisle was full of cabbage — red cabbage, green cabbage, some Napa and even Savoy. What occurred to me was that this endcap is always full, always a mountain in fact, of cabbage. It wasn’t just replenished either — they don’t restock until 9:30. I am nosy too, and often leer into peoples’ carts just to see what they are eating and, I can assure you, I don’t often see cabbage tucked into carts, other than those few days cabbage gets its due during the corned beef holidays. So why is this end cap continually dedicated to an Everest of cabbage? Are cabbage eaters late night shoppers? Is it for looks much in the same way as a mannequin in a window at Saks? Who, besides me, buys cabbage?
Yes, I eat cabbage and I am proud of it. So much so that I could write a poem, Mon Petite Chou, and it would be an ode to the poorest of poor man’s food. That is what it is though isn’t it: poor man’s food? Maybe this is why it is shunned, that to buy it means you are nearly destitute, for why else would you eat it? I used to feel this way, and never really encountered cabbage other than as a creamy coleslaw side to an all-you-can-eat catfish dinner — and even then I usually stayed closer to the hush puppies and fries.
That is, until Paula Wolfert’s book The Cooking of Southwest France introduced me to the possibilities. And there are many when it comes to cabbage — braised, steamed, creamed, and stir-fried. Cabbage, now, has become a part of my routine.


Tips for Choosing, Storing, and Preparing Cabbage
Pick a hefty cabbage.
I grow a lot of cabbage and I am always amazed at how solid cabbages can be, like a bowling ball. So when I do buy them at the store I look for very solid cabbages that feel heavy.
Look for purple leaves
Typically, the grocer cuts off the outer leaves and trims the stems. As the cabbage ages, they trim them up so to keep them looking pretty. You know you have a fresh cabbage when the leafy outer purple green leaves are still there.
Keep it cool
Cabbages can last a long time in the fridge. Make sure the outside leaves are free of moisture and wrap the cabbage in plastic wrap, then store the cabbage in the crisper. I like cabbage because it stores well, so I use up all the perishable veggies early in the week saving the sturdy ones, cabbage, for the end of the week.

©Tom Hirschfeld 2016 all rights reserved
Simple Braised Cabbage
Serves 6
3 ounces pancetta, small dice
2 tablespoons unsalted butter
1 cup yellow onion, small dice
1/3 cup celery, small dice
2 teaspoons garlic, minced
1/2 cup carrots, peeled, small dice
6 to 8 cups Savoy cabbage, julienned
2 bay leaves
Scrape or two fresh nutmeg
1 tablespoon flat leaf parsley, minced
1 1/2 teaspoon fresh thyme, minced
- Place a 3 1/2-quart Dutch oven with a lid over medium heat. Add the pancetta and render its fat. You want a gentle render here. You aren’t trying to crisp the pancetta, just render.
- Add the butter and, once it has melted, add the onion, celery, garlic, and carrots. Sweat the vegetables until they are tender, don’t let them brown. Add the cabbage, bay leaves, and season with salt and pepper. Turn the cabbage to coat the leaves in the fat. Add a quarter cup of water and put the lid on the pot. Reduce the heat to low. Cook the cabbage until tender, about 25 to 30 minutes. Add a scrape or two of nutmeg, the parsley, and thyme. Stir to combine, then serve.
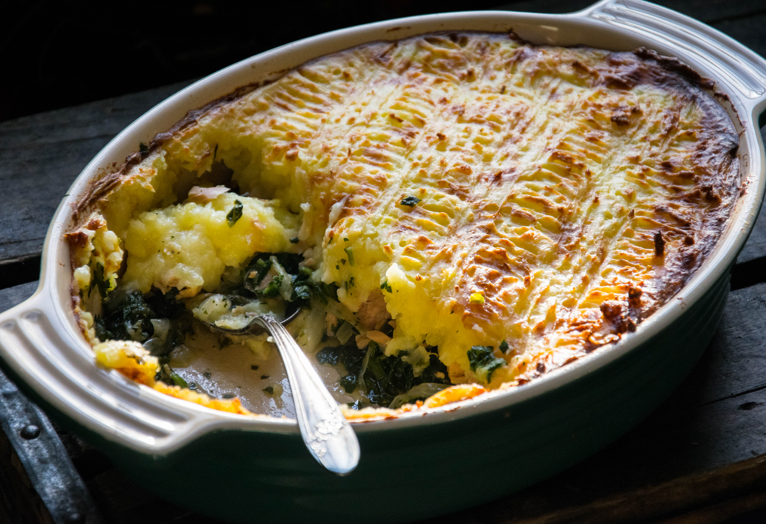
It is not generally in my nature to go out of my way to make a shepherd’s pie from scratch. Instead of cooking all the individual components — breaking them down only to put them back together — it always seems like a job best done by leftovers. I don’t mean to pick on shepherd’s pie alone — this goes for most meat and potato casseroles. And while not meat and potatoes, it reminds me of the time I looked at a recipe for turkey tetrazzini and the first step in the instructions was: Roast a turkey. Continue reading
Pork Confit Parmentier (or “Sorta” Shepard’s Pie)
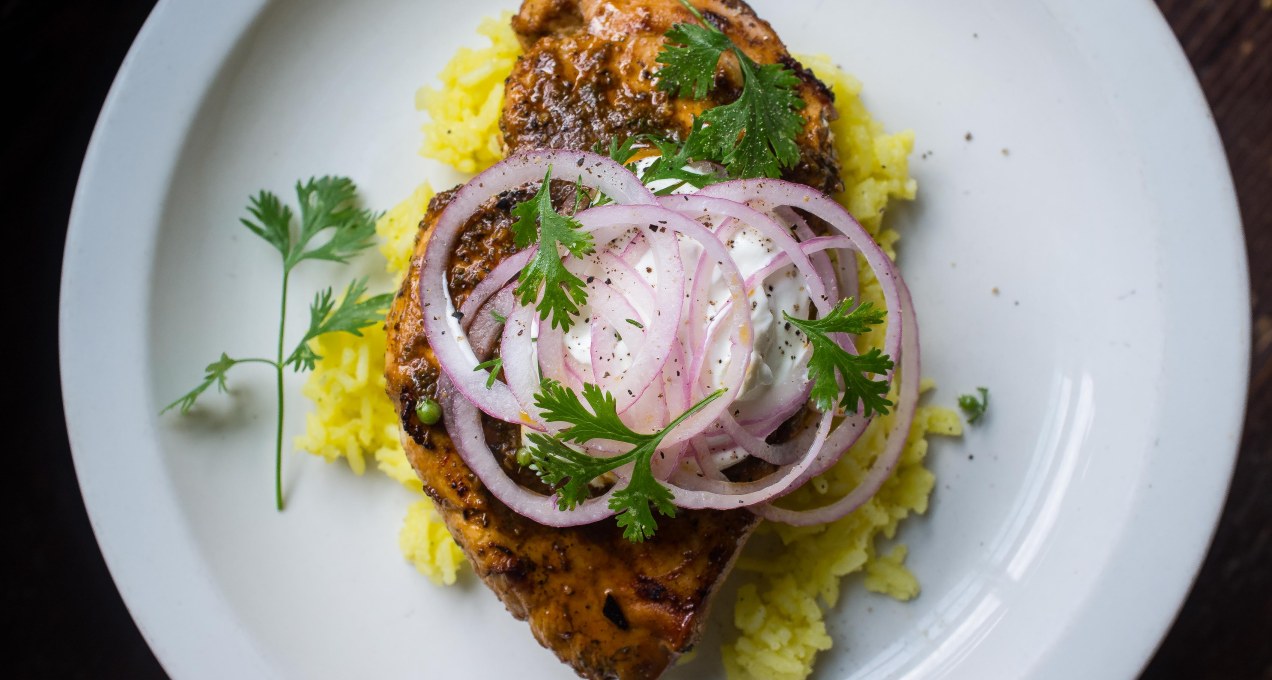
5 Tips for Better Grilled Chicken Breasts
Grilling boneless skinless chicken breast presents a set of problems. I’m a firm believer that leaving the skin on and the bones in your chicken goes a long way to alleviating tough, dried out breast. But it’s an unpopular decision, because of the convenience and the ease with which we can gobble up the boneless skinless kind.
There are ways, however, to defend yourself against dry chicken.
Bigger is not better when it comes to grilling a chicken breast.
They don’t grow them like they used to. Today’s standard meat bird is a hybrid designed to grow big breasts and nice thighs.
The birds of yesteryear, however, were all about the thighs, and the breast was almost non-existent. These days it’s not unusual to find a double lobe breast that weighs in around two pounds — or bigger. Chicken breast can be the size of a turkey breast if you want it to be.
But you can get chicken breasts in any size you want. Restaurants, for example, will often serve two 4- to 6-ounce breasts as a single serving because seeing two on the plate makes you feel as if you’ve gotten your money’s worth. Your butcher should be able to order these small breasts for you. I prefer a single 6-ounce breast per person because it seems like an appropriate portion size — especially if, like me, you like to serve lots of side dishes.
Shape matters as much as the temperature of the grill.
A chicken breast tapers at each end, more so at the tail end than the neck end, which means the tips are either cooked perfectly while the middle is rare to raw, or the tips are burnt to a crisp and the middle is perfectly cooked. It is a lose-lose scenario.
I always buy the breast still connected in double lobes.
It assures pairs of evenly sized paillards, but I always cut them before pounding them out. It is important to note that sometimes in the middle of a double lobe is a piece of cartilage that needs to be removed. Cut along each side of the center line of fat to get it out.
Choose your instruments of destruction.
I have four pictured in the photo below; any will work fine. I prefer the flat side of a meat cleaver because it’s heavy and gets the job done. If you use a mallet, you will have to start in the middle and work your way to the edges in order to end up with an evenly pounded chicken breast. The pan is a last resort, but it is by no means a slacker.
For sanitation and clean-up purposes I like to use multi-layers of plastic wrap. I place a breast to one side then fold the wrap over the top before I get out my daily aggression.
Keep it hot, but not too hot.
I like the grate to be hot but to use coals that are on their way down from their highest heat. You want grill marks that caramelize without blackening. Chicken flesh becomes stringy and chewy if it is left to dry out on the grill, so use your common sense: preheat your oven if you think you might want to finish cooking the chicken at a low temperature.
(recipe adapted from the Fog City Diner)
Serves 4
- 3ancho chiles
- 3guajillo chiles
- 1/2cup reserved soaking water
- Juice of one lime
- Juice of one orange
- 1/4cup red wine vinegar
- 1/4cup olive oil
- 3garlic cloves, minced
- 1tablespoon oregano
- 2teaspoons thyme
- 2teaspoons cumin seed, ground
- Kosher salt and freshly ground pepper
- 4single lobe chicken breasts
- 1red onion, thinly sliced
- 1lime
- Sour cream
- Cilantro
- Cut the tops off the dried peppers and shake out the seeds into the trash can. Place the peppers into a bowl and cover them with hot water. Let them soak for two hours, making sure they stay submerged. Remove the peppers from the water and place them into the bowl of a food processor. Add a 1/2 cup of the soaking liquid to the bowl. Process until you have a pepper paste. Pass the paste through a strainer set over a bowl. You are removing the skins and seeds. Don’t skip this step or you will be severely disappointed.
- Combine 3 tablespoons of the paste with the remaining marinade ingredients and mix to combine. Season it with a healthy pinch of salt and a grind or two of pepper.
- The marinade can easily be made a day or two in advance and stored in a jar in the fridge. The leftover pepper paste is great for enchiladas, black bean soup or chili. Store the paste in a jar in the the fridge. It holds for a long time.
- Pound out the chicken breasts so they are of an even thickness, then place the chicken into a casserole. Use half the marinade and coat the pieces of chicken. Let them marinate for two hours. Be sure to flip them after an hour.
- While the chicken marinates, make the lime pickled onions by tossing the red onion rings with the lime juice. Let them sit for at least 20 minutes.
- Remove the chicken from the marinade. Place the marinade into a small sauce pan and heat it over low heat. Heat the marinade to a brisk simmer.
- Fire up the grill to medium-high heat. Grill the chicken breast. Cook them till done. Serve on rice, spoon the hot marinade over the chicken, top with sour cream, then pickled onions, and garnish with cilantro.
Everything but the Hamburger, Special Sauce Included

Sadly, as I sit at the bus stop watching my daughters play, I have to tell myself: summer is so last season.
All summer I have been grilling vegetables for salads. Mostly zucchini and summer squash; I char it deeply and then chop it and toss it with basil, lemon juice, and olive oil, in sort of a grilled chopped salad. It captures all the flavors of early summer one could want. But at some point, either the zucchini or I tire and the dish no longer appears on the table. At least not until next summer, when the annual craving for these flavors peaks again. Continue reading
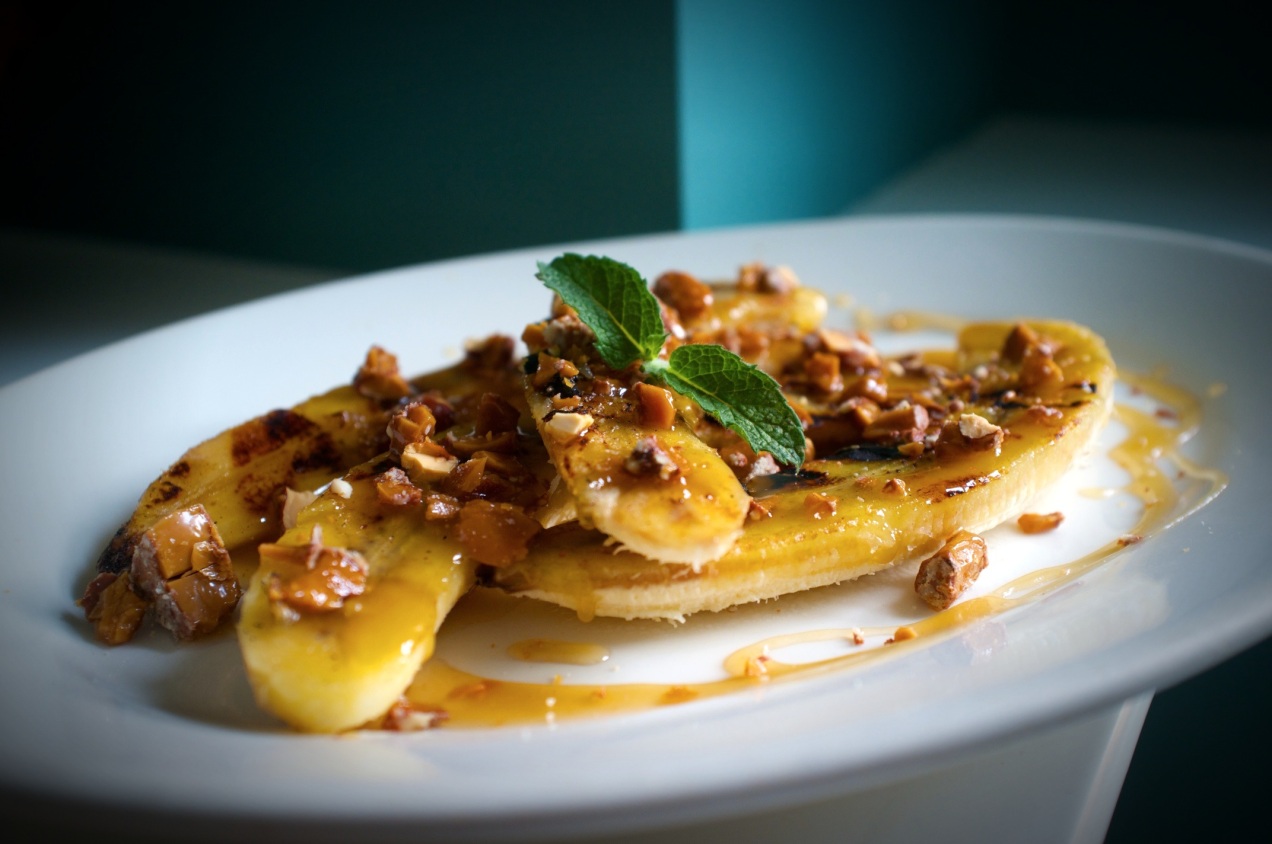
Grilled Bananas with Buttered Maple Sauce and English Toffee

I quit eating bananas years ago because I would buy them and not eat them. They would sit in the fruit bowl idling away, eventually passing through the different stages of ripeness. I would watch, like a gambler calling another’s bluff, knowing that I had until they turned black to do something with them. It was then that I would convince myself I needed to make banana bread. I even froze them for future use and had a stack of them in the freezer, until one day they fell out onto my wife’s toe and broke it.
Continue reading

Taco Night on the Grill
I can’t get enough of taco night. Neither can my wife Amy or my daughters. We love it, and especially me, because I can do everything — with the exception of chopping with a knife or the food processor — on the grill. It makes for easy clean-up, and who isn’t for easy clean-up?
I cut my teeth on Tex-Mex in Austin, Texas circa 1984 (does Instagram have a filter for that?). At this point in my life I hadn’t eaten that much Mexican food. For the most part it didn’t exist in Indiana outside of Chi Chi’s and my inner punk rocker wouldn’t allow me to set foot inside any place that colorful or where the waitstaff could happily sing Happy Birthday table side.
Nevertheless, when I would slide into a booth at one of the many hole-in-the-wall eateries (many of them were Spanish-speaking only), I would order as many kinds of salsa as I could point to on the menu. I didn’t know this many kinds of salsa existed, or for that matter soft shell tacos, or the food love of my life, tamales.
As I ate my way around both sides of Highway 35, little did I realize I was becoming an addict, to Texas country music, chili, and to Austin itself. It was hard to come home, and once I was back in Indiana it didn’t take long before I began jonesing for Texas Hill Country, salsa included.


All About Grilled Salsa
The grill is a great way to make an old salsa recipe feel new.
I couldn’t even guess how many varieties of salsa there are in the world, but I do know I haven’t found one yet that can’t be made on the grill. I like a fresh raw salsa as much as the next person, but sometimes I like to shift the flavor and it is an easy thing to do on the grill.
Chile oils on your hands are not your friend.
Be careful with hot chile peppers. I used to go at them in the manly man way and just tough it out, but the night I rubbed my eyes after working with Thai birds I thought a different approach might be appropriate. If you choose to go with bare naked hands in handling them, just realize you will quickly find out just how many places on your body you actually touch and how many places are very sensitive to capsaicin oils.
Get in touch with your inner caveman or woman.
I used to put my peppers and tomatoes on the grill grate and then one day I just decided to plop them right on the coals. It sears them very quickly while leaving the interior raw — the best of both worlds. You can roast whole heads of garlic too, but they need to be left to the side of the coals so they cook and soften slowly or you will burn the cloves which makes them bitter.
Liquidy or dry, it all depends on your tomato variety.
A lot of fresh tomatoes have a high liquid content. If you use too many tomatoes, your salsa will be watery, which isn’t always a bad thing. If you want a thicker salsa, it is a good idea to use plum or San Marzano tomatoes.
The finishing touches matter.
To the finished salsa I always like to add a drizzle of olive oil for mouthfeel and a splash of acid, be it lime, red wine vinegar, or whatever. Make sure you season your salsa with salt and black pepper.
Corn tortillas or flour both can be warmed on the grill, and should be.
I prefer corn tortillas over flour and my preference for cooking corn tortillas is right on the grill. They puff up and blacken in spots and become yummo-licous. Just make sure after searing them to wrap them in foil so they stay soft and don’t dry out.
Choose your toppings accordingly.
Almost every person I have ever met who hails from Central America prefers green cabbage, sliced razor thin, to lettuce for their tacos. It gets even better when you dress the cabbage with a touch of red wine vinegar and olive oil. You probably won’t find a lot of sour cream or cheese on the table either. I tend to go for authentic Mexican but I like Tex-Mex too. If you want to go for healthy, grill up a bunch of vegetables to use for toppings and forgo the dairy altogether.

Makes 1 to 1 1/2 cups
Depending on the kind and size of tomatoes you use, this salsa can be liquidy or firm. You will have to judge. Roma tomatoes have little liquid and work well for a chunkier salsa.
- 1small head of garlic
- 3 or 4roma tomatoes
- 1 or 2heirloom variety tomatoes (Box Car Willies or Wisconsin 55 are good)
- 1poblano pepper or 3 jalapeños or your choice
- 3 to 4half-inch-thick slices of red onion, left intact
- Kosher salt and freshly ground pepper
- Handful of cilantro
- Splash of red wine vinegar
- Drizzle of olive oil
- Fire up your charcoal grill. Let the coals get blazing hot.
- Wash the vegetables.
- Place the garlic off to the side of the coals where it will brown the paper skins but not burn the cloves. The garlic will take the longest to cook of everything. Let it get good and brown on all sides.
- Now place the tomatoes and peppers right on the coals. Let them blister and blacken. Remove them to a tray. Let the juices collect in the tray.
- Place the grill grate on the grill and grill the onions until they are caramelized and soft.
- If you plan to grill more stuff, like a nice skirt steak, you will probably need to add a few more coals to the fire. You be the judge.
- Peel the pepper, being carful not to spill or lose any pepper juices. I remove the seeds and, obviously, the stems. Put peeled peppers, tomatoes, onion, and peeled roasted garlic cloves into the bowl of a food processor. Add the tomato and pepper juices that collected in the bottom of the tray.
- Add a two-finger pinch of salt, some pepper, half the cilantro, the red wine vinegar, and olive oil. Pulse the processor until the salsa reaches your desired consistency. I like this particular salsa smoother than most but still chunky. Taste the salsa and adjust the seasoning as necessary.
- Pour into a serving bowl, garnish with cilantro, and serve

The Best Burger in the World

The sacks on the table, dotted with spots of grease and limp from French fry steam, are from Burger Chef. I have a plain cheeseburger. It is the first burger I remember eating. I eat them with glee and in anticipation of the next time my father would pile us into the back of the metallic green Plymouth Fury and drive us the short distance to the shopping center to pick up dinner from the shiny new burger spot.
Shortly thereafter, we packed up and moved to the country. Everything changed. That’s not to say we didn’t get to eat at burger joints anymore — we just didn’t get to eat at them as often. We didn’t eat at Burger Chef all the time to begin with, but at the new house there were no eateries close by.
At our new home, the height of my formative years, if we ate burgers, it was from the grill on our porch. The burger meal was best on the weekends when we came off the boat after a long day on the lake waterskiing, tubing, and swimming. We were wet, sunburned, and wrapped in beach towels. As we walked up the hill from the water, fresh-cut blades of grass stuck to our damp feet and, at the top, we sat down to the table on the back porch deck with wet hair and water-freckled arms. A pot of long-cooked green beans speckled with bacon, a plate piled high with boiled corn on the cob begging for butter, thick slabs of sliced Early Girl tomatoes, and a stack of juicy burgers hot off the charcoal grill waited for us, courtesy of my mother.
At the table we built our own burgers. Mine was always the same, 1 1/2 slices of American cheese, mayo, thickly spooned onto the top bun, Boston lettuce, and two thick slices of homegrown tomato. By the time I got close to finishing the sandwich, the soft Kaiser roll was soaked with tomato and beef juices, making the last sloppy bites the best — napkin mandatory.
But when you leave home, you stretch your wings, or at least I did, and you experience the world without the watchful eyes of your parents. You do things you shouldn’t and you do things you should. But I figured I’d get it out of my system, experience as many possibilities as I could. I won’t settle on any one thing until I have none left to try:
The Hinkle Burger: Caramelized onions smashed into the patty which is griddled on a big steel flat top. Double cheese means two slices on a single patty, not two patties. College. My first true love. The burger, fries, and blueberry milkshake is a hard memory to run from.
White Castle: A plate of sliders, double cheese with extra pickle. The break-up girlfriend. A friend with benefits.
And then there is the fall I spent in Austin as a newspaper intern. The jalapeño burger, theschnitzel burger, the Tex-Mex burger, the BBQ bacon burger, the Cordon Bleu burger, and the breakfast burger. Incorrigible. Notches on the burger bed post.
The Wheel-In Diner. Post graduation. A goober burger. Peanut butter slathered on a bun, a burger, and your choice of toppings. Here’s to you, Mrs. Robinson.
The Corner Bistro. Dream big. The big city cheddar burger. Served on a toasted English muffin. As close to a corner office as I want to get.
The stuffed blue cheese burger, mushroom and Swiss, bacon California Reuben pizza Cajun 1/2 pounder Swedish meatball foie gras wagyu … and ground short rib burger. All delicious but nothing more than meaningless hotel rooms on an endless road trip because in the end, you discover, there is nothing like the comfort of home, The Lake House Burger.
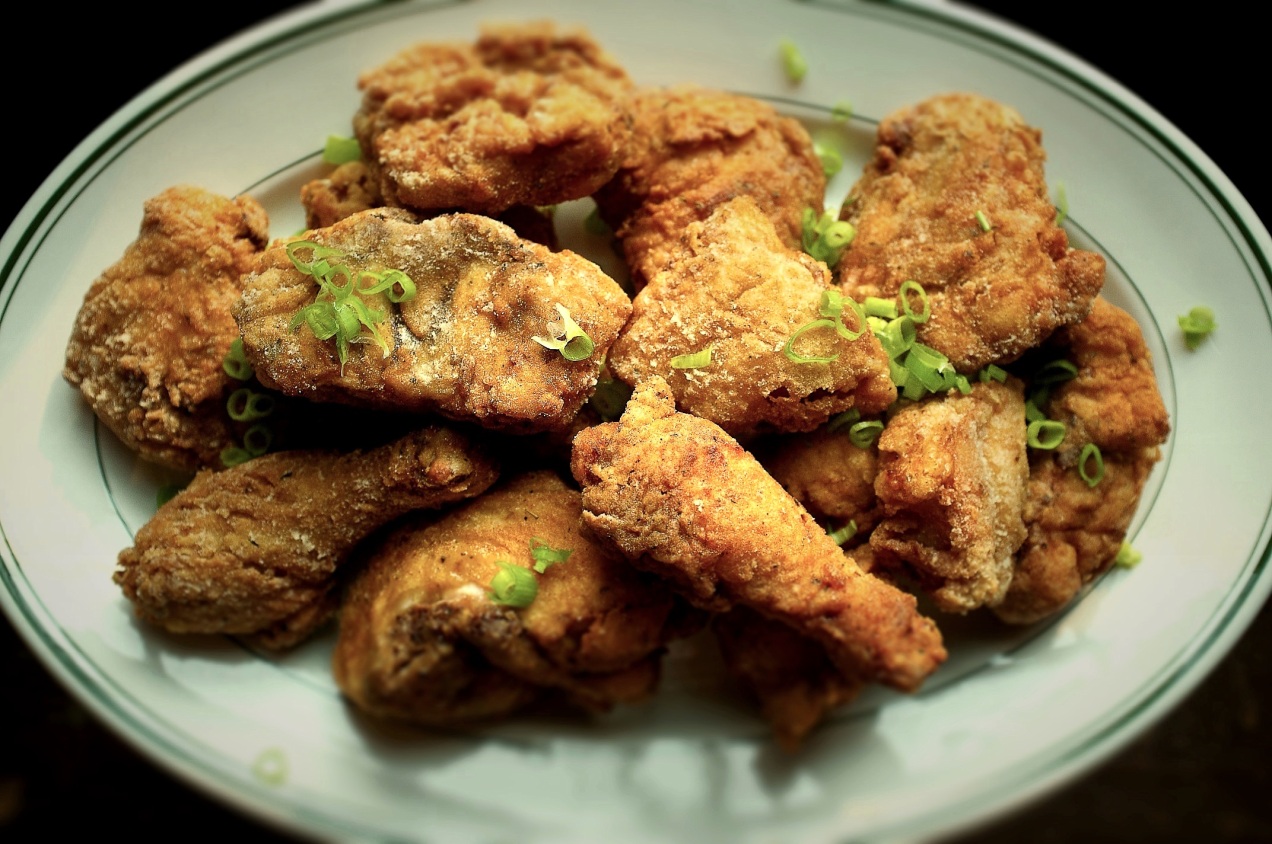
The Art of Honest Fried Chicken (A Lifestyle Choice)
Frying chicken, at its best, is a state of mind formed much in the same way as the quiet back beats of a porch-sitting session with a dear friend. It has a rhythm. It is good company on a sunny summer afternoon. It is pointless to rush. Futile, even. Besides, the comfort of a good friend comes from the effortlessness of meaningful conversation and is further heightened by the knowledge you have nothing you would rather do. Continue reading
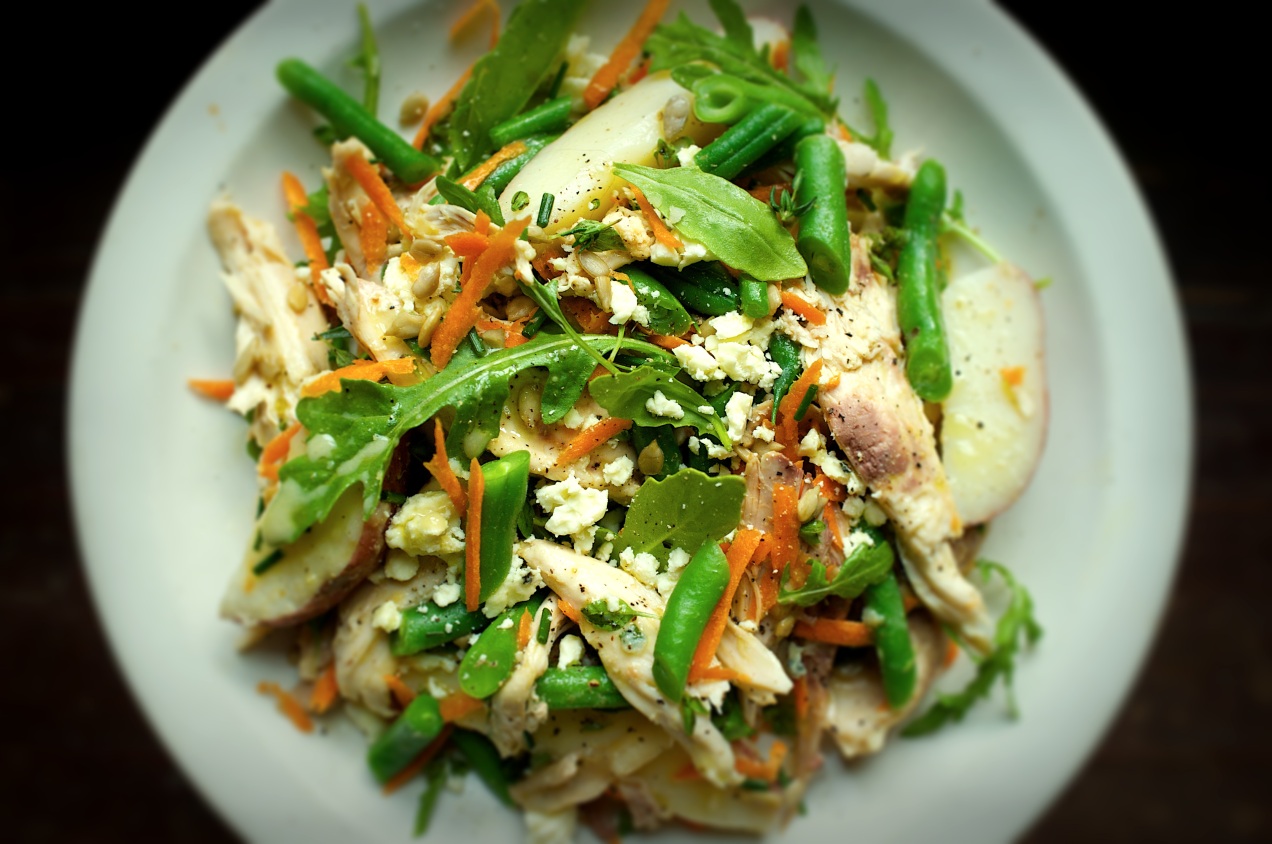
Farmhouse Chicken Salad

Look at the three lazy beasts lying on the cool concrete floor of the garage and you might think it’s the dog days of summer. If I’m in need of another sign, I don’t look any further than the Indiana state fair, which starts this week. The dog day heat always coincides with the fair but not today, and maybe not this year.
Of the three dogs lying there, not one so much as lifts an ear as I walk by.
It has been a good summer, hardly hot at all, with just the right amount of rain. The garden is going gangbusters: I have a basketful of green beans in my hands right now, and we’ve come to that moment when we can’t give away enough row boat-sized zucchini. The only thing we are short of is chicken, but we’re in the midst of raising a second flock for the winter freezer.
But today, for some reason, I want to shirk my familial duties and avoid the hot stove, and any other tasks altogether. If I’m going to cook today, it will be in the cool of early morning. At the back door I take off my mud boots, put on flip flops, and head to the kitchen. I need coffee. I fill the teapot with water, put it on the stove, and set up the French press.
While I’m waiting for the teapot to heat, I head into the pantry to retrieve a couple of big blanching pots. While I have a minute to spare, I do some light organizing of misplaced pantry goods and forget why I’m there in the first place. The teapot throws a hissy fit and it’s not until I’m halfway to the stove that I remember why I even went into the pantry.
The girls started back to school today; Lynn began kindergarten. It’s been seven years since I haven’t had a little one underfoot. This morning the only one talking is the fan, whizzing away in the window. The house is full with cool morning air and quiet.
After a cup of coffee, I make it back to the pantry for those pots. I told myself that this year, when both girls are in school, I’m going to set up a routine for myself. This morning I’m going to prep some meals ahead of time. Hopefully, I’ll get more done in less time and maybe make a little time for myself.
Three serious prep tools:
1. Big pot blanching: This is important enough that in The French Laundry Cookbook, Chef Thomas Keller devotes the entirety of page 58 to the process. It’s mostly for green vegetables or veggies like cauliflower or white asparagus (while they’re white they will still benefit from blanching). The idea of big pot blanching is that you bring a large pot of heavily salted water to a rapid boil. When you drop the green vegetables into the pot, the water should never stop boiling. The salt and heat set the color of the vegetables, keeping them vibrant, while still allowing you to cook green veggies until tender. It also uniformly seasons your vegetables. Chef Keller calls for a cup of kosher salt to a gallon of water. Personally, I find that excessive for the home cook and I have found 1/4 cup of salt to a gallon of water to be sufficient.
With most vegetables you need to have an ice bath ready to shock (cool very quickly) the item being cooked in order to stop the cooking as quickly as possible. An ice bath is nothing more than a large bowl filled with ice and cold water. For a large quantity of vegetables, you might have to add more ice.
2. Boiling: When you boil a potato with the skin on, you should cook it until a knife slips almost to the middle but experiences some resistance near the center. Drain the potatoes into a colander. Do not run water over them. This lets the potatoes become tender through carry-over cooking. If you were to run hot water over the potatoes, the skins would peel off like paint. Do not halve or quarter the potatoes until you are ready to use them.
3. Poaching: There are lots of ways to poach something, but one of my favorite ways is to poach it in its own juices. This always reminds me of sous vide, which is sort of the same thing but without all the fancy equipment. Basically, you’ll want to poach in vacuum-sealed freezer bags (which are not the same as regular Ziploc bags, though Ziploc does make vacuum-sealed bags, too). I have also accomplished the same thing by wrapping a chicken in two layers of plastic wrap followed by a layer of foil. It holds out the water and keeps in the juices.
Depending on what you’re poaching, it may be a good idea to completely submerge the item (as is the case wth a whole chicken). I simply place a heavy, heat-proof plate on top to keep things submerged.
Serves 4
For the chicken:
1 whole chicken, 2 1/2 to 3 pounds
A handful of fresh herbs (thyme, parsley, chives, and tarragon)
1 small onion, peeled and julienned
1
small carrot, peeled and cut
A handful of celery leaves
Kosher salt and freshly ground pepper
For the salad:
1
juicy lemon
1
tablespoon extra virgin olive oil
1
teaspoon Dijon mustard
3
tablespoons cooking juices (from the bottom of the poaching bag or from the tray on which the chicken was resting)
1/2
cup carrot, grated on the large holes of a grater
1 1/2
cups green beans, blanched in a large pot, then cooled and cut into 1-inch pieces
6
red potatoes, boiled, cooled and quartered
1/2
cup celery, thinly sliced
1/4
cup sunflower seeds, roasted and salted by you
A healthy handful of arugula (wild rocket is good, too)
1/4
cup mix of basil, tarragon, chives, and thyme, minced
1/4
cup blue cheese
- Place the chicken, a pinch of salt and pepper, and all the aromatics into a vacuum pack bag, or if you want, just poach it with the aromatics (but you won’t have the juices for the dressing). Vacuum seal the bag and place it into a large pot. Cover with cold water by at least 6 inches.
- Bring the water to a high simmer, around 180 to 200˚ F. Let the chicken poach for 2 hours or until cooked thoroughly. Remove the chicken from the pot, then cut open the bag, being careful not to lose the juices. Let the chicken cool. Once it’s cool enough to handle, remove the skin and pick the meat from the bones.
- For the salad dressing, combine the juice from the lemon with the olive oil and broth or fat. Add the mustard and whisk to combine. Taste and add a pinch of two of salt and a few grinds of pepper. If it’s too tart, add more chicken broth or olive oil.
- With the exception of the blue cheese, combine the remainder of the salad ingredients in a bowl. Season the salad with salt and pepper. Toss to combine and then add the dressing. Toss again, top with the crumbled blue cheese and serve.
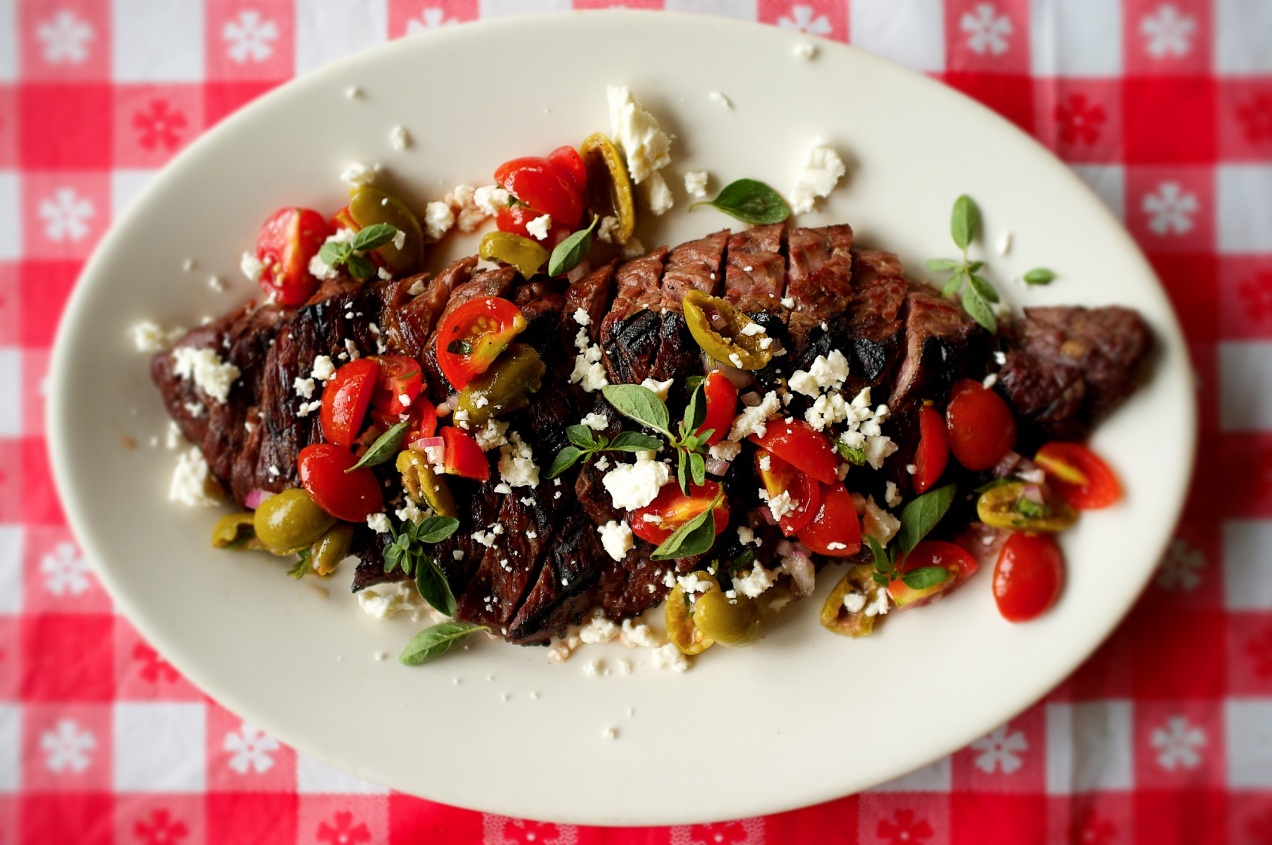
Grilling: Tips, Skirt Steak and more…

I use a pair of kitchen tongs and quickly flip a steak, pull back to let my hand cool for a split second before diving in again behind the safety of the tongs to flip another. The hair on my forearm recoils from the heat. Even with a long pair of kitchen tongs I can’t bear the sting of the glowing coals like I used too.
I have lost my commercial kitchen hands. The hands that could take the heat without flinching, the same hands that could grab thermonuclear plates, or could move steaks around on a grill without ever noticing the heat. The heat abused hands that were once this line cooks badge of honor.
The wind shifts, a wisp of white smoke blows back. My eyes catch a little before I can turn and shut them. The smoke underneath my eyelids stings and my eyes begin to water. Continue reading
 I was given an assignment and just like in high school I have blown it off. I procrastinated. In all actuality if this was school, the PR company my teacher, well, I failed with a big fat F.
Because my parents taught me right from wrong, I am going to complete my homework and turn it in. It is the right thing to do. I expect no mercy from the teacher. None.
I crack open a bottle of wine and pour a glass. What, that is what I would have done in high school, just kidding mom and dad. I never would have done that in high school. I was more a Jack Daniels and Coke kid. Did I just say that out loud? Continue reading
The Troublemaker Blend 6

A Drive-in Movie and Candied Lemon Sheet Cake
A lemon cake. That’s what I want. Something to replicate the Lemonheads from the snack bar at the drive-in movie theater. The sour pucker is perfect for the late summer heat. You could say I am fond of lemon. I always have been a borderline addict.
Sunday is family night and we are going to the drive-in again. We will make a picnic of it this time. I pack the 4Runner with food, sleeping bags, a couple of pillows, some lawn chairs, and bug spray. It isn’t a long drive to Mechanicsburg, over one state highway and up another. Other than the Welcome to Mechanicsburg sign, the drive-in theater is the only indication that you’re in a town. All the times I’ve been here, I’m still never sure whether there was ever anything more than the drive-in and one lonesome farmhouse. It’s all surrounded by cornfields — always cornfields.
There are ten or more minivans parked on the gravel road leading to the drive-in and everyone is waiting single file at the tollbooth-style gate. It’s always at this moment, waiting to get in, my elbow resting on the open window of the door, the sting of the hot sun on my already sunburned arm, that I look up at the two story, paneled movie screen and silently reminisce.


I remember the brightly colored muscle cars of the kids whose parents indulged them. My friends and I would wander the lot with sodas in to-go cups full of crushed ice spiked with Old Crow whiskey and bum cigarettes from each other. The noise of the B movies or horror flicks was background color to our youthful attempts at manhood. No one ever watched the movie; mostly we walked around, flirted with girls, and waited for a fight to break out because a fight always broke out.
The line starts to move and inside we follow the other cars, back in to our space, open the hatchback, and get comfortable. The scene could have come from the set of The Bevery Hillbillies: a red pickup truck with a bed full of people sitting in lawn chairs. Kids start playing tag, soccer, and Frisbee in the grass in front of the screen, passing away the time until it’s dark enough and the movie begins.
I set the cooler, which will also be our table, on the grass. The girls are off to look for their friends. Amy unfolds the chairs and we settle in for dinner and a movie. The herb roasted chicken legs, the potato salad, and the slaw are as good as always. Just as the movie starts I get out the pieces of lemon cake. It’s the real star of the show.


Serves 9 to 12
- 13 1/8-inch lemon slices, seeds gently removed
- 1 cup sugar
- 1 cup water
- strips of zest from 2 lemons
- 1 cup Bob’s Red Mill Gluten Free Flour Mix
- 3/4 cups sugar
- 1/2 teaspoon xanthan gum
- 1/2 teaspoon baking soda
- 2 tablespoons candied zest, minced
- 1/4 teaspoon kosher salt
- 2 sticks of unsalted butter, each gently melted in its own bowl and kept warm, plus more for greasing the pan
- 3 tablespoons powdered dry milk
- 2 large eggs, room temperature
- 3/4 cups whole milk, warm
- 1/2 teaspoon pure lemon extract
- 1/2 teaspoon pure vanilla extract
- 8 ounces powdered sugar
- 3 tablespoons heavy cream
- Pour the sugar into a saute pan large enough to hold the lemons in a single layer. Place the lemons and zest in a single layer on top and then add the water. Place the pan over medium heat and bring to a boil. Reduce the heat and simmer.
- Simmer the lemon slices until the sugar syrup has reduced by half or more and the pith and rind of the lemon appear transparent. Carefully remove the slices and zest to a piece of parchment being sure not to let the pieces overlap. Let them cool.
- Grease a quarter size sheet tray (9 x 13 inches) with butter. To make the cake heat the oven to 375 ˚ F. Combine the flour, dry milk powder, sugar, xanthan gum, baking soda, minced candied zest, and salt. Combine half the melted butter with the eggs, milk, and extracts. While whisking add the dry to the wet ingredients. Pour the batter into the prepared sheet tray. Make sure the batter is evenly distributed so it rises evenly. Bake for 30 to 40 minutes or until a toothpick inserted into the middle of the cake comes out clean.
- While the cake is baking, make the icing. Combine the powdered sugar, cream, and remainder of the warm butter in a mixing bowl. Whisk until smooth. Keep the icing luke warm.
- When the cake has finished baking remove it from the oven and let it cool right in the sheet pan for 15 minutes. When the timer goes off pour the warm icing over the top and spread it out evenly with a spatula. Lay on the slices of lemon and let the cake cool. Refrigerate or serve cold.

Kebabs Come of Age

Inside the house a Frank Sinatra record blares loudly from the phonograph, a big stereophonic console meant to look like a fancy sideboard. The family room windows of the atomic ranch-style house are open wide. The music makes its way through the open windows to the patio, soft enough to be background music for the adults socializing on the small concrete patio.
There are tall, slender glass pitchers of Tom Collins set on a picnic table bar next to a faux gold ice bucket, highball glasses, and an assortment of potluck appetizers. The parents sip cocktails and have lively chats. Their laughter can be heard four houses down at the babysitter’s, where all the children are being housed for the evening. Tiki torches release black citronella smoke meant to keep mosquitoes at bay, and in the belly of the kettle-shaped grill the coals glow the color of the suburban sunset. Continue reading
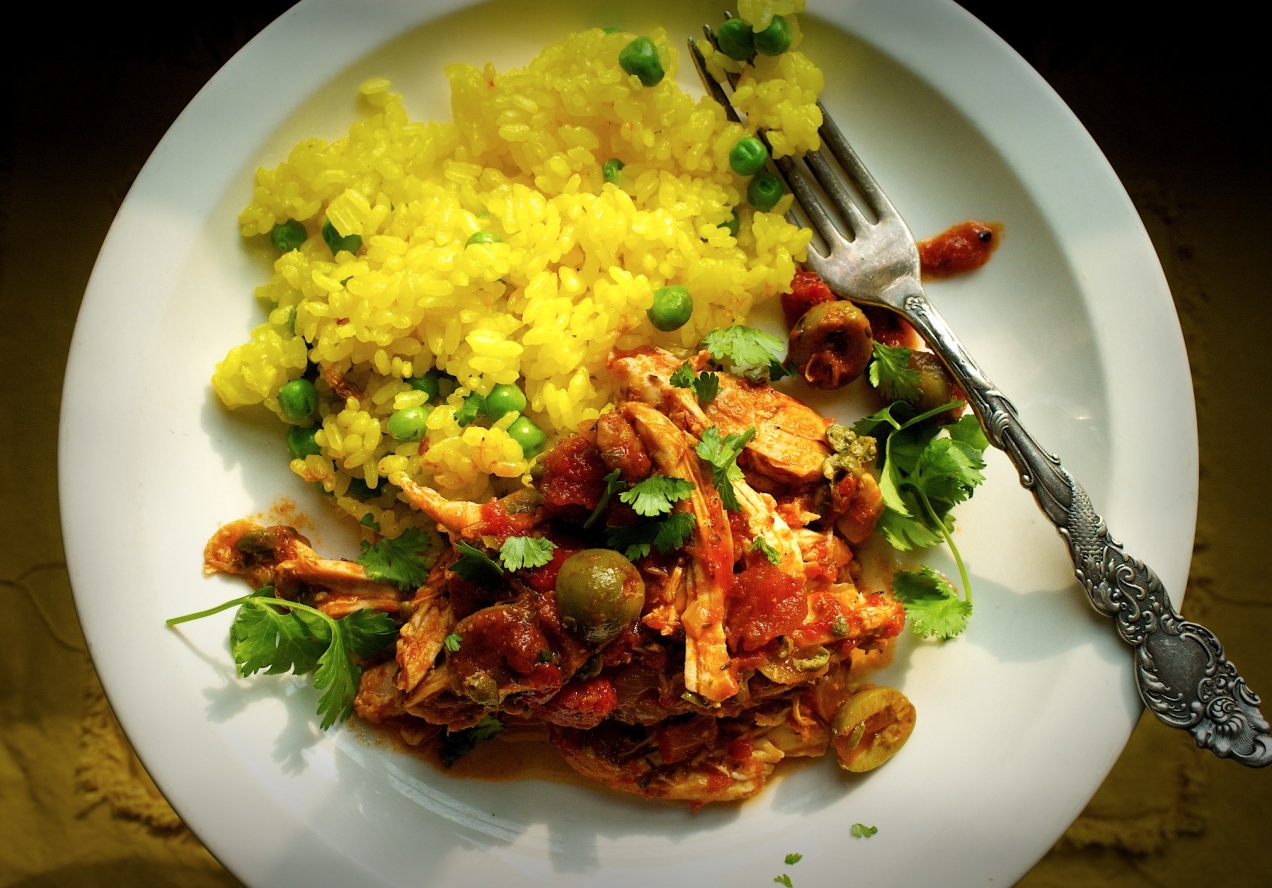
Island Style Chicken Fricassee
 In the summertime, I want food that is casual, soulful, and unpretentious — food that can double as a family meal and an intimate dinner for entertaining. Any dish that almost needs to be eaten with the hands (but not quite) or that can be scooped-up with röti, flatbread, or tortillas and goes well with ice cold beer is a grand slam. Suffice it to say, Caribbean food does all of these things well. And besides, I love island food.
Julia Child describes a fricassee as a dish somewhere between a sauté and a stew. Because this definition is so broad, it lends itself to a heated discussion over a cook’s creative latitude. Plant this culinary seed in an area with lots of islands and diverse cultural heritage and you end up with a menagerie of spectacular dishes. In the Caribbean alone I can think of several fricassees, like the Cuban classic Ropa Vieja or Jamaican Brown Stewed Chicken, which is more a fricassee then the name suggests.
A good fricassee is a rustic dish. It starts with browning the meat — usually bone-in to add flavor to the dish’s self-created broth — and then following with a heady dose of aromatics typically consisting of onions, peppers, garlic, and herbs. Depending on which island you’re on, a fricassee might either incorporate lots of peppery heat or be mild, but all will have notes of African or Indian flavors.

For my tastes, I like to add a tomato product, be it canned or fresh, and some sort of other acid, such as vinegar or wine. In the case of this particular dish, however, I replace the usual vinegar or wine with green olives and capers.
While I have stripped the meat from the bone, it isn’t necessary. Being a rustic dish, it would be perfectly acceptable to leave the cut chicken as is. You could easily add more heat or do as I did and separate a mild portion for the kids before adding some hot peppers to the adult portion. The amount of spicy heat is left up to the discretion of the cook who knows firsthand the preferences of the eaters.
Be it plain or with the addition of saffron and peas (as in my picture), rice is important to a fricassee. Generally speaking fricassees are not one-pot meals, but rather are served with rice, röti, and a vegetable. The rice shouldn’t outshine the main dish: the two should enhance each other in a sort of partnership. In some sense it is like this is like a pasta dish: the fricassee is used as a condiment to the rice in the same way that sauce flavors noodles.
I like dishes that don’t control my schedule. The final big plus to this kind of food is that cooking it in increments can even improve the final product. I rarely go to the kitchen anymore and cook something from start to finish in one session — most days, I just don’t have the time. Often, I find myself with snippets, 10 minutes here or an hour there, which I put to use. I may prep everything in between making the girls’ breakfast and getting them off to camp. After camp drop-off, I might run an errand before heading home to caramelize the meat and sear the veggies. If I have enough time, I’ll add the liquids and let the dish finish until the chicken is tender. Then, it can all go in the fridge until dinner, allowing the meal to be as casual as I like my summers to be.
Fricassee en Pollo (serves 6 to 8)
1 whole 3 pound chicken, cut into 10 pieces
1 tablespoon expeller pressed peanut oil
1/2 cup red bell pepper, small dice
1 cup onion, small dice
3 tablespoons fresh garlic, minced
1 tablespoon dried oregano
1 tablespoon dried thyme
1 tablespoon cumin, crushed
2 teaspoons paprika
2 bay leaves
16 ounces crushed tomatoes
2/3 cups green olives, halved
1/2 tablespoon capers, minced
kosher salt and fresh ground pepper
2 tablespoons hot pepper of your liking, minced
- Season the chicken with salt and pepper. Place a large heavy bottomed pot over medium high heat. Add the peanut oil and swirl it around in the pan to coat the bottom. When the oil is hot add the chicken skin side down and brown it deeply on all sides. Adjust the heat as necessary to avoid scorching the oil. Once the chicken is caramelized remove it to a plate.
- Add the onions, pepper and garlic to the pan. Sweat the vegetables until they just become tender then add the dried spices. Stir the spices into the vegetables and let them toast until they become fragrant. Add the tomato and a cup of water. Season the sauce with a pinch of salt and a few grinds of pepper reminding yourself that the olives and capers are salty so don’t season with a heavy hand. Taste and make adjustments.
- Add the chicken back to the broth and then bring the whole thing to a boil. Reduce the heat to a simmer. Cook until the chicken is just tender. If you plan to strip the meat from the bones remove it and place it on the same plate you used before. While it is cooling let the sauce reduce until it becomes unctuous.
- Cook your rice according to the instructions on the bag or box or however it works best for you.
- Add the pulled chicken (or chicken pieces) back to the reduced sauce. Add the olives, capers and any hot peppers your might want to add. Taste and add more salt if needed. Warm through and serve with rice.

Stanley Coats: An Introduction
 Stanley Coats, sprawled out in his overalls and dozing on the porch swing, knows he’s becoming the old dog with the saggy balls. The one beginning to get gray around the snout. At the sound of tires on gravel, he lifts his head a little. The dog dozing on the porch floor below him does the same, and they both crack an eye open to see who’s coming up the drive.
The searing pain behind his other eye has abated. Stanley refuses to believe it could have anything to do with a hangover and instead diagnoses himself with becoming his mother. He hopes it’s not terminal.
It’s not that he doesn’t love his mother. It’s the naps. For as long as Stanley can remember, sometime between two or three in the afternoon, his mother always took what he has come to call a twenty-minute sink-down. Continue reading

Honest Peach Pie
I always thought my friend Steven was lying when he told me that over the course of a few years he sold enough of his handmade old timey-looking leather fly swatters at the Indiana State Fair to pay for his log cabin and farm, until I myself moved to the country. Turns out he is a way smarter man than I because when you live on a farm, at some point during the summer, and especially if you have animals, flies are going to invade the house. It is inevitable and it is just a part of country life.
Like any man, I am always looking for the best tool for the job, and at day’s end I usually come back to the one I started with, because only after trying them all do I realize I had the right one to begin with. This is how I have come to understand that the fly swatter is an important time-honored, tried and true tool. One of those that works as well today as it did hundreds of years ago and is so simple even children like to use it.
So a couple of months back, when my KitchenAid stand mixer went down for the count it was like breaking a fly swatter, as far as I was concerned. But lo and behold, I was in the throes of Paul Bertolli’s Cooking by Hand, which I took as a sign. I just had to wonder what would happen if I didn’t run out and replace it immediately, but instead went without and cooked like I did when I first started.
You see, a KitchenAid is like having a bottle of bourbon hidden in the cupboard. I mean really, as long as the bourbon is there you aren’t going to stop drinking, just like if you have a KitchenAid you won’t not use it. But is a mixer better, was my question, than, say, your tried and true, time-honored hands?
A decision was made: I had the shakes, I would go cold turkey and I would cook by hand. Do it the old way. The “on the fly” theory, I would call it. Now don’t get me wrong — I am no blast from the past wannabe. I like my technology, my cell phones, computers, my gas stove and car — although the car is black. Nevertheless, I am not about to grow a beard sans mustache and ask you to call me Graber. (Full disclosure: I will, on the other hand, sometimes wear overalls because I am the anti-ass. Yes, when you are the anti-ass, overalls and outdoor labor make sense because when you have no butt you can never pull a belt tight enough to keep your pants from ending up around your ankles when working, and while I know overalls are not the best look — although I think they are making a comeback on Etsy right next to the Hobo Wedding — they are practical.)
So, as I was saying, I had always heard rumor that making doughs, breads and pastas by hand made them more tender, gave them a better rise in the oven or a more satiny feel in the mouth. I just needed to know.
I dove in head first and started out with a couple of yeast breads. One was a very dense whole grain bread and the other was my whole wheat farmhouse loaf. What I noticed right off was the difference in feel. The whole grain at the end of kneading felt like the wet green block of floral foam that you stick flowers into. You know how when it gets damp and you push on it, it gives a little but seems crunchy and sandy on your hand? The farmhouse loaf is somewhat of a sticky dough and what happened there, how I have come to know the right hydration, is you get barnacle hands. Sounds funny, but these little pieces of dough should sparsely spot your hands and, well, look like tiny barnacles. The wetter the dough, the more barnacles.
I quickly moved on to crusts and the resulting pies have been great. They are more tender, have a better crumb and they aren’t any more difficult to make, although you do need practice to get the feel of it.
The biggest benefit to cooking by hand though is the girls and I aren’t standing there looking at a paddle attachment go round and round, but instead we are getting our hands dirty and learning about different flours and dough. The elasticity, the hydration and all the other technical stuff which, once you know how a dough should feel, allows you to become more confident and more efficient in the kitchen and build an intimacy with your doughs that allows you to make adjustments by intuition.
While I have procured another stand mixer and will use it (probably not for crusts), the one thing I learned that was probably most important and something you will want to remember and just might be the best kitchen tip I can give is: people keep their best liquor hidden in the cupboard and sometimes, maybe that’s where the KitchenAid belongs too.
Tips for Making a Pie Crust by Hand
1. Never add all the water to the dough that a recipe calls for. Always stop short and, as you work the dough, you will know pretty quickly if it needs more.
2. Use a bowl that is three times bigger than you think you need to keep the flour from shooting over the sides.
3. Don’t over-knead the dough. There should be a quarter cup or so of crumbles that fall onto and around the crust when you dump it out of the bowl onto the counter. Knead the dough a little more to incorporate them and stop. It doesn’t have to be one homogenous and smooth mass. While the dough rests it will continue to hydrate and when you roll it out the rolling pin will bring it together.
4. Rotating the dough 45 degrees between each use of the rolling pin is key to ending up with a round crust.
5. Always place your rolling pin in the middle of the dough round and roll away from yourself, then put it back in the middle and roll/pull the pin towards you.
For the crust:
1 1/2 cup whole wheat flour
1 1/2 cup all purpose flour
1 teaspoon kosher salt
1/2 cup lard
1/2 cup unsalted butter, cubed and chilled
1/2 cup ice cold water
1. Sift the flour into a bowl and add the salt. Place the butter and lard into the bowl. Start by squeezing the flour into the butter and lard and then as things start to blend pick up clumps of flour between your hands and rub your hands together like you are trying to warm them up. Do this until the flour looks like course cornmeal. It is ok if there are some larger pieces of butter still in the mix.
2. Add the water and using your hands knead the dough right in the bowl until it comes together. Remove the dough from the bowl to a counter top and knead it two or three times. Divide the dough in half, pat it into two rounds then wrap in plastic wrap and put it in the fridge 30 minutes or more. If you let it sit in the fridge for two hours or more make sure you pull it out and let it warm up a little before trying to roll it.
3. To roll the crust first dust your counter top with some flour. I then dip one of the dough pieces into the flour bin itself and give it a shake. Place the dough on the counter top and starting in the middle of the dough roll with your rolling pin away from you then put the pin back in the middle and roll, backwards, towards yourself. Now turn the dough 45 degrees so it is oblong and horizontal. Roll with your pin, again, starting in the middle. Continue this process until the crust is 10 to 12 inches in diameter and about an 1/8 to 1/4 inch thick. Using the rolling pin for support roll the dough lightly around the pin, like a carpet, and place it into a 9 inch pie pan. Roll out the remaining piece of dough.
For the Filling and to Finish
6 to 8 peaches depending on their size, firm but ripe, look for free stone peaches, meaning the pit comes out easy. I used Indiana red havens which are semi-free and if they are
1/2 cup sugar
2 tablespoons cornstarch
juice of half a lemon
1/4 teaspoon ground cinnamon
1/4 teaspoon ground nutmeg
1 egg white mixed with 2 teaspoons of water
sugar for dusting
1. Heat the oven to 400˚ Fahrenheit.
2. Bring a large pot of water to a boil and blanch the peaches for 10 to 20 seconds. Remove them to a bowl. Leave the water on because as you are peeling the peaches you may find a peach that needs to be blanched a little longer. Slip the peaches from their skins, halve them, pit them and then slice each half into 3 pieces.
3. Place the peaches into a large bowl. Mix the sugar with the cornstarch. This will help to prevent the cornstarch from clumping. Combine the peaches with the sugar/cornstarch mix, cinnamon, lemon juice and nutmeg. Using your hands gently turn the peaches to distribute the sugar and spices. Remove the peaches and put them into the crust lined pie pan. Pour the juice over the top until it comes 3/4 of the way to the top. You may have more juice than you need. If you have less, don’t worry — it is fine.
4. Roll out the top crust and either cut it into strips for a lattice top or use it whole. Either way brush the edge of the bottom crust with egg white to help attach the top crust. Trim the excess crust. Crimp the crust. Brush the top crust with egg wash and dust with sugar. Place the pie on a sheet tray with edges just in case it bubbles over and because it will be much easier to get in and out of the oven.
5. Bake the pie for 20 minutes at 400 ˚F then turn the heat to 350˚ F and bake another 40 to 50 minutes or until the juices are bubbling and the crust browned. Remove and let cool. Slice and serve cold or warm, with cream or ice cream or just skip and go naked.
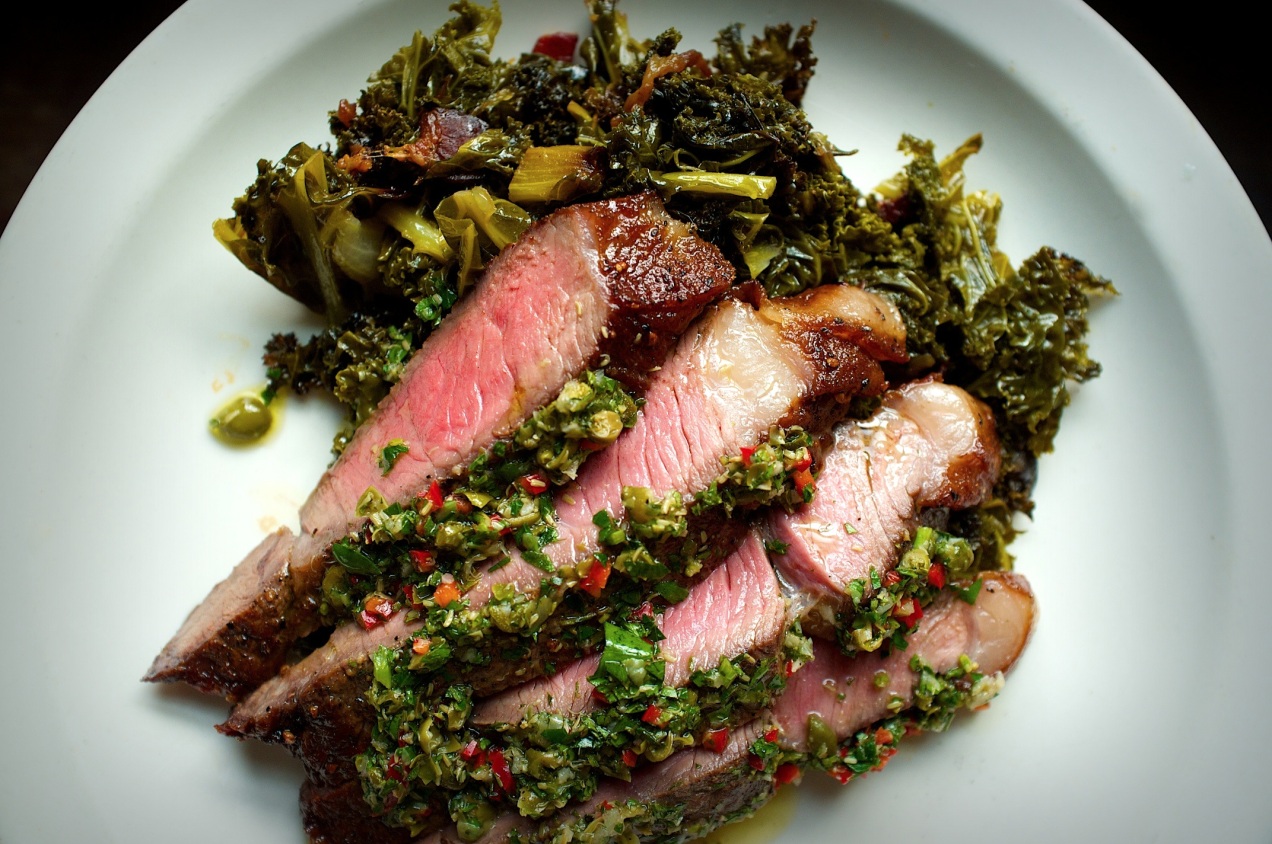
Using Herbs with Abandon
 If I didn’t already have a list of reasons I need lots of herbs in my life, Italian Salsa Verde (green sauce) alone would be enough to convince me. It’s delicious on almost anything. Take my dinner tonight: salsa verde is outstanding on steak and takes long-cooked kale up a notch. And when I got a little on my baked potato with sour cream, it was no longer a plain old baked potato. It was sublime. Continue reading
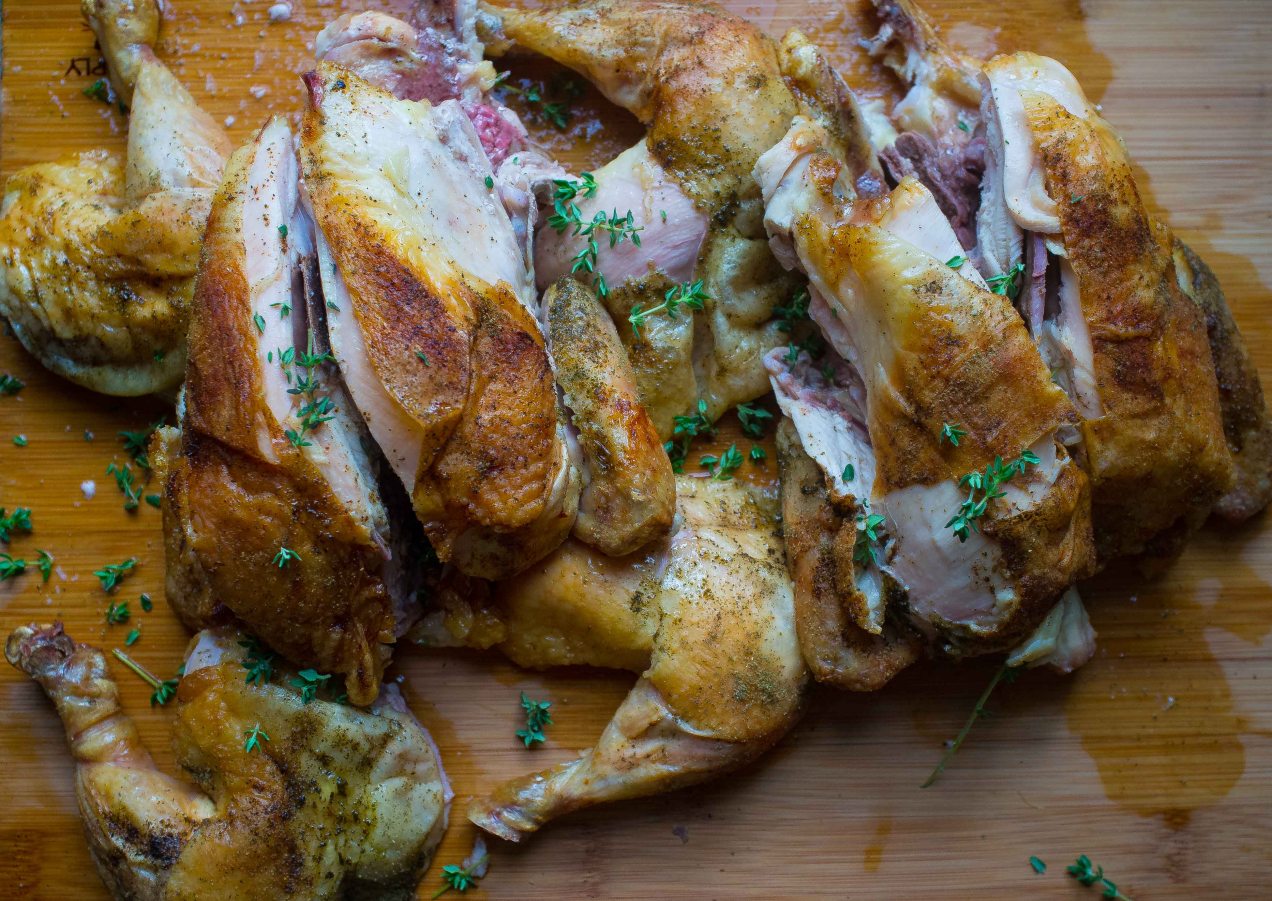
A Delicious Roast Chicken for Any Night
I have a simple rule, whenever I figure out what good restaurant cooks like to make at home I follow suit. It’s because most professional cooks like simple but deeply satisfying meals, roast chicken is one of those, it is a cook’s meal. When I say simple I don’t mean in flavor and not necessarily in ease of cooking but more that it falls into the category of not being fussy.
And really, that is it isn’t it, that roast chicken is delicious, very satisfying and not at all fussy. Most importantly though it is easy on the cook and that is always something to grasp hold of and learn how to do. So this is how I do it, I try not to complicate roast chicken, I use only a few dried spices and I try to follow some simple guidelines I have come to trust over the years.
Roast Chicken Know-How:
- Season the chicken with salt the day before you want to cook it. Then set it into a tray with sides. Place it uncovered into the refrigerator to dry out the skin and soak up the salt. This drying of the skin makes for a deeply colored crispy skin. The salt helps keep the chicken moist.
- Trussing the chicken helps the chicken to cook evenly. Besides we eat as much with our eyes so why not make it pretty.
- You can cook the chicken on top of vegetables if you like letting the juices drip down onto them making for a wonderful side dish. I do this as often as not but I never throw out the pan juices. The pan juices make a wonderful addition to all sorts of things from pasta to…well, anything.
- Adjust the top rack of your oven so the top of the bird is 5 to 7 inches from the top of the oven. If it is to close to the top it will brown the skin well before the meat is cooked.
- Avoid buying birds that are more the 4 or 5% juices added. The birds that are 12% are brined and they are very, very salty.
- Save any and all pan juices. Use them in a vinaigrette to dress a salad, in pasta or in chicken salad but don’t waste them.
Cost to roast a chicken: it depends on what kind of chicken and where you buy it but anywhere between 6 and 10 dollars for a 4 pound bird. It should feed four with the added bonus of making soup from the carcass.
To Roast a Chicken:
kosher
1 teaspoon fennel seeds
3/4 teaspoon dried thyme
1 teaspoon paprika
1/4 teaspoon black pepper
1 chicken, about 4 pounds
1. Salt the chicken the day before you want to cook it or at least 4 hours before you want to cook it. To do this sprinkle salt onto all sides of the bird including inside the cavity. Place the bird onto a tray with side and put it back into the fridge.
2. Crush the fennel seeds either using the bottom of a heavy pan to grind it or with a mortar and pestle. Combine the fennel with the rest of the spices and, again, sprinkle the spice rub all over the bird including the cavity.

I like to slice the chicken before serving. I like to slice the breast off the bone so I have a carcass for soup at the end of the night.
3. Let the bird sit at room temperature for a half an hour or up to an hour.
4. Heat the oven to 400˚ F. Place the chicken, still on a tray with sides, into the oven and let it roast for 30 minutes. Bast the chicken with the pan juices. Bake another 35 minutes. Check to see if it is done. I can usually tell by the legs. If the meat has pulled away from the knee bones then there is a good chance the rest of the bird is done. Wiggle a thigh. If it seems loose then you are probably good to go. Tilt the bird backwards and see if the juices running out from the cavity are red. If all three of these test are passed letting the bird rest will finish the cooking. Let the bird rest cover with foil for 15 minutes.
5. Carve and serve.
You can make meatloaf out of anything, from lentils to venison to duck. You can get fancy and have the three meat combo made from equal parts beef, veal and pork or even a seafood loaf made from salmon. The possibilities are endless.
From what you choose to make your meatloaf isn’t as important as how you make your meatloaf. The steps you use will ultimately influence the outcome of the final product.
Meatloaf, in technical cooking terms, is a forcemeat. A forcemeat comes in a few variations, from sausage to paté but is really nothing more then ground meat. Sometimes it is emulsified until it is smooth such as in hotdogs and other times it is left coarse as in Italian sausage. A binder is needed, bread crumbs, oats, rice might be typical and even eggs are sometimes used.
As you can see when making forcemeat you have options. The one option I don’t stray from though is the ratio of fat to meat. Without the right ratio for fat to meat you will more then likely end up with a dry meatloaf. While it probably would still be edible it would be less then desirable. So here is the ratio, 3 parts meat to 1 part fat.
Arguably this is tough to figure sometimes but generally grocery stores are good about marking such things as their ground beef with percentages of fat. After ground beef though it is up to you to figure out. I just apply a general rule of the thumb, the leaner the meat the closer to the ratio I stay. Venison for example is very, very lean. If I am making meatloaf from it I use 1 1/2 lbs venison to a 1/2 lb of pork belly. On the other hand if I want a pork loaf I just by pork butt and grind it, it always seems to be somewhere in the neighborhood of the ratio.
The other thing about meatloaf is it is designed to use less meat but feed more people or as we say it was meant to stretch out the protein and number of mouths it can feed. To do this a filler is added. Bread crumbs and oats are the first two that come to mind. I used to use only breadcrumbs but over time I switched to oats and have pretty much stuck with oats ever since. What the filler does is as important as how much fat you add. It absorbs the fat and juices as the meatloaf cooks, hence retaining moisture.
When it comes to seasoning I find 1 teaspoon of salt per pound of meat works pretty well. After salt you can spice your meatloaf however you want but I would be careful not to over spice it. You need to find a balance.
Turkey Meatloaf with Peas and Gravy (Serves 6 to 8)
Turkey can be tricky in that it can become very dry. I have found if I use equal parts ground thigh to breast meat it stays moist and succulent, of coarse the 1/2 and 1/2 soaked oats doesn’t hurt one bit either. This is currently my favorite go-to-quick-to-prep meatloaf. Here is why, more often then not I gently sauté any vegetables that will go into the loaf. I do so for several reasons but the main reason is because I don’t like half cooked veggies in my meatloaf. Sweating them before adding them to the meat keeps this from happening. The two main vegetables I add to meatloaf are generally onions and garlic. For this recipe I grated the onion and used garlic powder and it worked beautifully without any extra sautéing.
Note: of course you can add peas to the gravy along with the shoots or omit the shoots altogether and just add the peas.
1 pound ground turkey breast
1 pound ground turkey thigh
1/2 cup oatmeal, coarsely ground
1/2 cup half & half
2 teaspoons kosher salt
fresh ground black pepper
2 teaspoons sage
1/4 teaspoon marjoram
1 teaspoon thyme
1/2 teaspoon garlic powder
2 tablespoon grated onion, grated on the small whole of a grater
1/4 teaspoon nutmeg, freshly ground
1 quart homemade chicken or turkey stock or no salt store bought broth
2 tablespoons rice or wheat flour
2 tablespoons unsalted butter
kosher salt and fresh ground pepper
ketchup (for the crust)
Pea shoots
1. Heat the oven to 325˚ F.
2. In a 2 quart sauce pan melt the butter over medium heat. Add the flour and stir it constantly with a wooden spoon until it smells nutty and becomes tan in color. While stirring, and stirring is very important here to keep from getting lumps, add the chicken stock. Bring the stock to a boil, reduce the heat and let the gravy simmer till reduced by half. Taste the gravy and adjust the seasoning with salt and pepper.
3. While the gravy is reducing combine the cream and oats. Add the seasonings and stir. Now add the turkey and using your clean hands spend a minute or two mixing the forcemeat until everything is well combined. It will be sticky.
4. Making sure you pat out any air bubbles pack the turkey forcemeat into a 4 x 4 x 8 loaf pan. Top evenly with a layer of ketchup and bake the loaf in the oven for 1 hour and 15 minutes or until an instant read thermometer reads 165˚ F when inserted to the middle. Slice and serve with gravy.
Turkey Meatloaf with Peas and Gravy
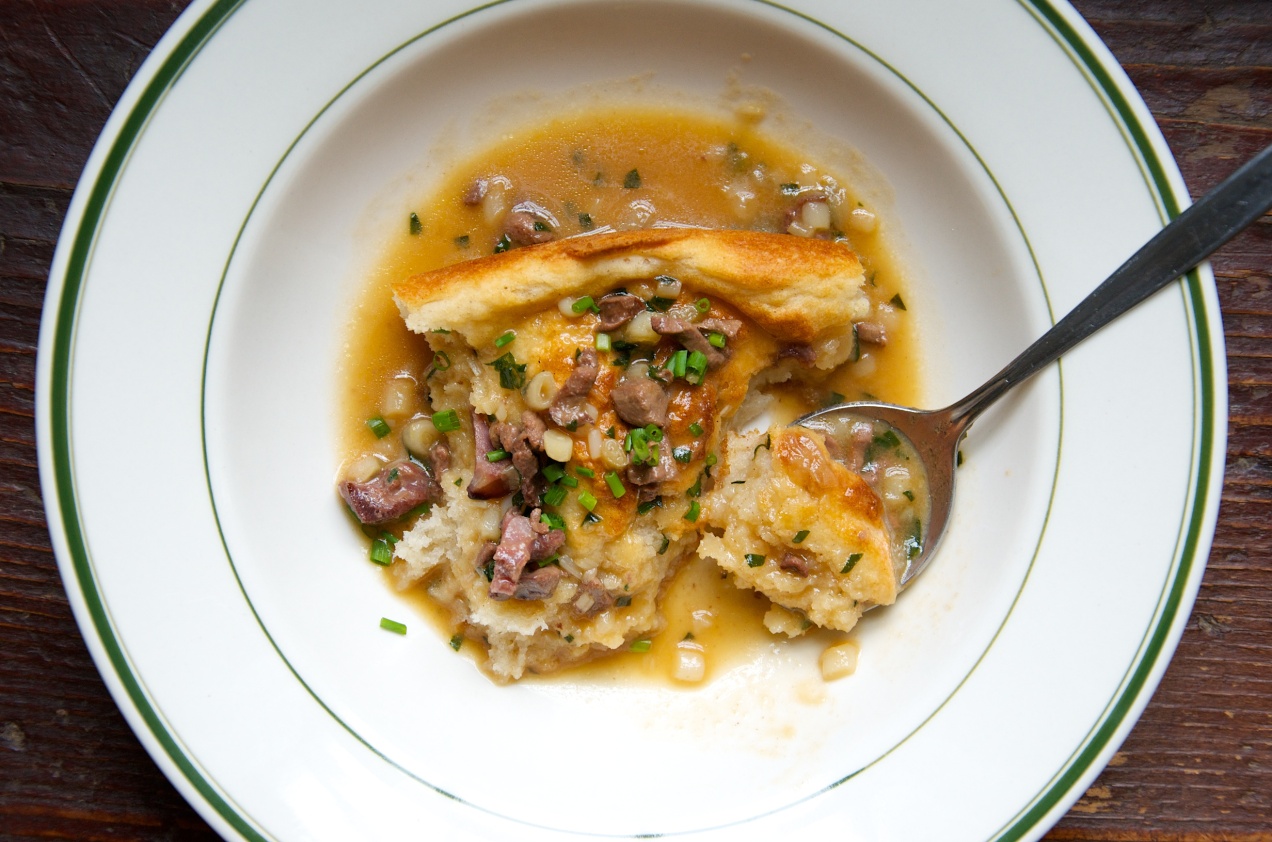
Biscuits with Ramp and Giblet Gravy

There are foods in each state that should be considered regional treasures. In Indiana the two that readily come to mind are breaded pork tenderloins as big as your head and biscuits and gravy. Here in my home state I have had lots of variations on both dishes. When it comes to biscuits and gravy though the variations only vary in what goes under the creamy sausage and peppery gravy. You can count on the gravy staying the same.
Now I have traveled. On my travels I have eaten in many mom and pop diners, hole in the walls, and everywhere in between and I have had subtle variations on the gravy. In New Mexico for example they use chilis. Still the base is a cream gravy.
There is a place on the outskirts of Nashville, TN called the Loveless Cafe and Hotel. I am sure it started as a mom and pop place but as it caught on, they make their own sausage, jams and biscuits by hand, with the Nashville stars it became busy. By the time I enjoyed a breakfast there the only star you might see was in one of the multitude of photographs on the wall.
Nevertheless the breakfast were good, a nice mix of rural Tennessee, and it didn’t take two seconds for me to know what I was ordering. They offered four different kinds of gravy for your biscuits and the one that caught my desire was the giblet gravy. It must run in my veins because I can’t not order a dish when it incorporates giblets.
So here is my Ode to Loveless. It is a spring dish, it is what we call Sunday brunch and it will channel your inner granny. You will be all the better for it.
Biscuits with Ramp and Giblet Gravy ( serves 4 )
For the gravy:
1 quart homemade chicken stock or unsalted store bought
2 tablespoons flour, rice or wheat
2 tablespoons unsalted butter
1 bunch of ramps, white parts only, cleaned and chopped
1 each poultry heart, liver and gizzard, chopped finely
salt
fresh ground black pepper
chives
1. In a 2 quart heavy bottomed sauce pan melt the butter over medium heat. Once it is melted stir in the flour with a wooden spoon. Use a wooden spoon sometime metal will react with the pot and you will get a gray gravy. Constantly stir the flour until it begins to color. Once it is tan, keep stirring to avoid clumps, add the giblets and ramps. Stir some more.
2. Add the stock, be careful it will bubble and spit. Stir the gravy until it comes back to a boil. Reduce the heat to low and let it simmer until reduced by half.
3. Make the biscuits.
4. Taste the gravy and add salt and pepper to taste and stir to combine.
5. When the biscuits are done and the gravy hot, serve topped with chives.
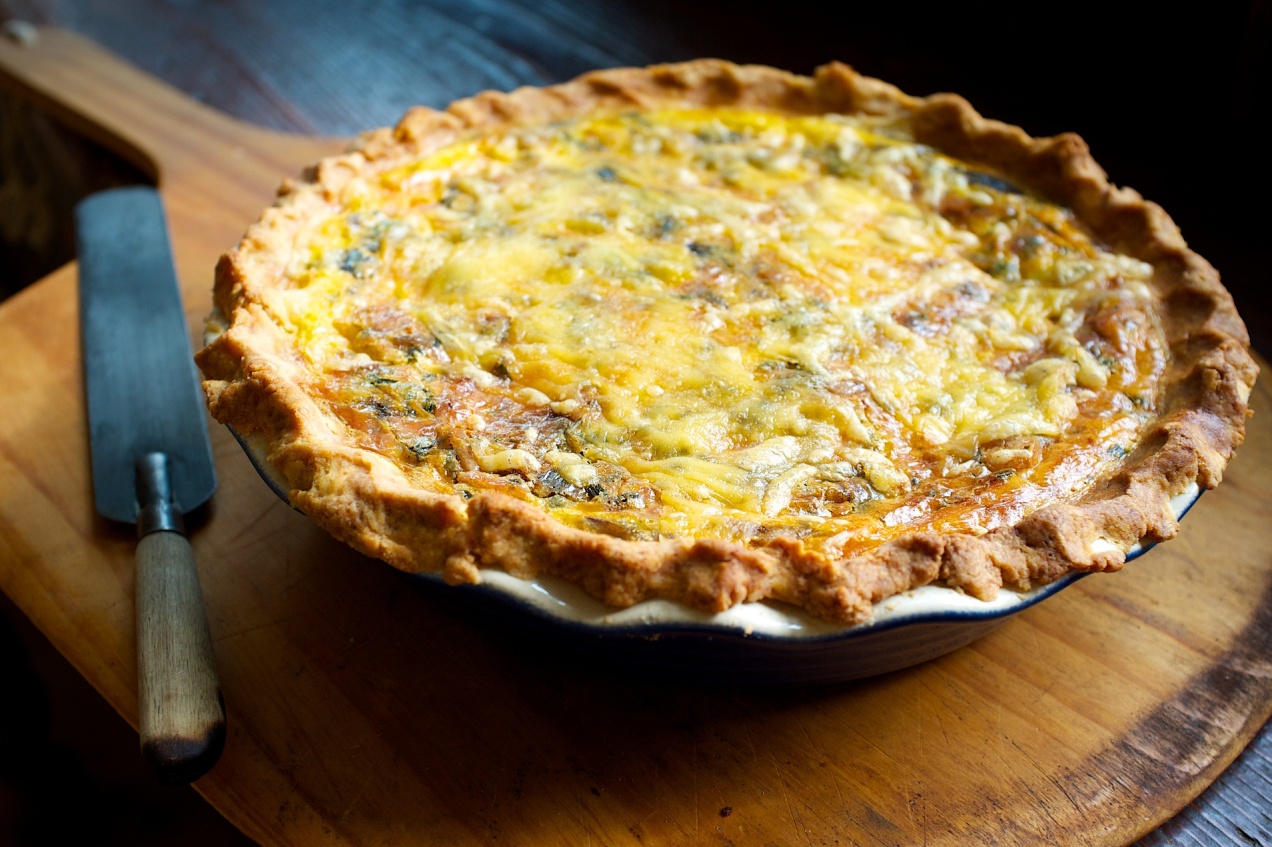
Pancetta Lardons, Sorrel and Mushroom Quiche
I grow sorrel every year. That’s not true, it’s a perennial so it comes back every year all on its own. So I am not so sure I grow it as much as just let it be. Either way I have access to it each spring. The thing is I rarely use it. It is one of those vegetables where you always say to yourself you will get around to it but never do. I guess for me sorrel is like when I lived in New York City and I always said to myself I need to go to the top of the Empire Stare Building or get out to the Statue of Liberty and then moved away before I ever did any of those things.
Last year though I started to make pesto from sorrel and I found it exciting and delicious but after that I found other vegetables and pretty much left sorrel at the side of the dance floor.
This year so far has been different. I have made a sorrel gratin, creamed sorrel and now this quiche. Maybe sorrel is a vegetable that takes time to get to know before you can become close kitchen friends. Continue reading
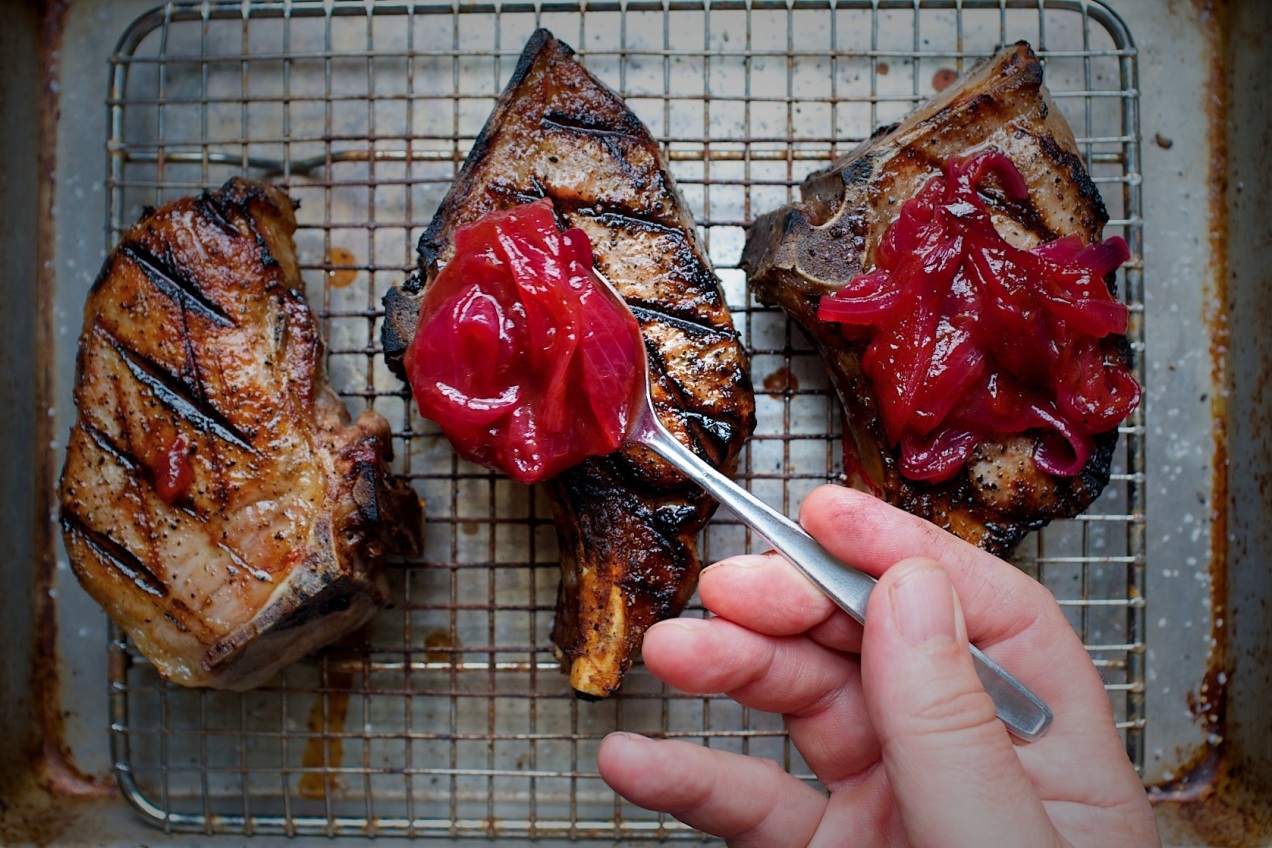
Red Onion and Rhubarb Fondue
I know, I know you are thinking cheese and you are right to do so. It is, after all, one of the many things fondue can mean but simply put it means “melted” but fondue is also used in other culinary applications beyond the Swiss national dish.
To fondue something is to sweat it over low heat until it becomes very tender. Vegetables are often used in fondue where they are left on the stove over low heat eventually breaking down into an unctuous mess of jam. It is looser then jam and while I am sure you  could preserve or can fondue I don’t. I usually don’t make a fondue in those quantities. I more or less consider it a quick jam or pickle, and much like a quick pickle it is something I will store in the fridge and use within week or so.
This particular fondue goes well with grilled pork chops, is better then great on beef quesadillas and is wildly good on hotdogs and brats. In other words you will want to have this little gem around for summer grill outs.

Three Onion Chowder
I really like chowders and really like French onion soup. This is the best of both those worlds. I don’t like pasty chowders so I didn’t thicken it except for the starch released from the potatoes. One tip I learned from Jasper White’s 50 Chowders is to let the chowder rest covered for thirty minutes. It really does make a difference when you allow the flavors to come together.
SERVES 4 TO 6
For the Soup:
For the Soup::
3 ounces pancetta, 1/4 inch dice
2 cups yellow onion, peeled and julienned
2 leeks, rinsed, white parts only, sliced into half moons
4 shallots, peeled and sliced
1/3 cup celery, 1/4 inch dice
1 1/2 tablespoon fresh garlic, minced
1 teaspoon fresh thyme, minced
1 bay leaf
2 cups chicken stock
2 cups half and half
3 russet potatoes, peeled and cut into 1/2 dice
1 tablespoon Italian parsley, minced
1 tablespoon fresh chives, chopped
Kosher salt and fresh ground pepper
1. In a 3 quart Dutch oven or sauce pan add the butter and pancetta and place it over medium heat to render the pancetta. Once some of the fat has been released add the onions, shallot and celery. Saute until they are just becoming golden. You don’t want them to brown too much or the soup will be brown. Add the leeks, garlic and thyme. Cook until the leeks are just becoming soft. Add the bay leaf and chicken stock. Bring it to a boil and add the half and half and the potatoes. Bring the soup back to a boil and then immediately turn off the heat and cover the pot. Allow it to rest for at least thirty minutes.
Parsleyed Oyster Crackers:
1 tablespoon unsalted butter
1 cup oyster crackers
1 tablespoon Italian parsley, minced
Fine sea salt and fresh ground pepper
1. Heat a small saute pan over medium high heat. Add the butter and once it has stopped bubbling but is not brown, add the oyster crackers and toss the crackers to coat with the butter. Season with salt and pepper. Stir in the parsley and toss the crackers gently in order to coat all the crackers with the parsley. Pour out onto a baking sheet and let cool.
2. To finish the soup reheat it but don’t let it boil. Taste a potato to check and see if it is done and adjust the seasoning if necessary. If the potatoes are not done then cook over low heat for 15 minutes. Stir in the parsley and chives and then ladle into cups or bowls. Top with a few oyster crackers and serve.
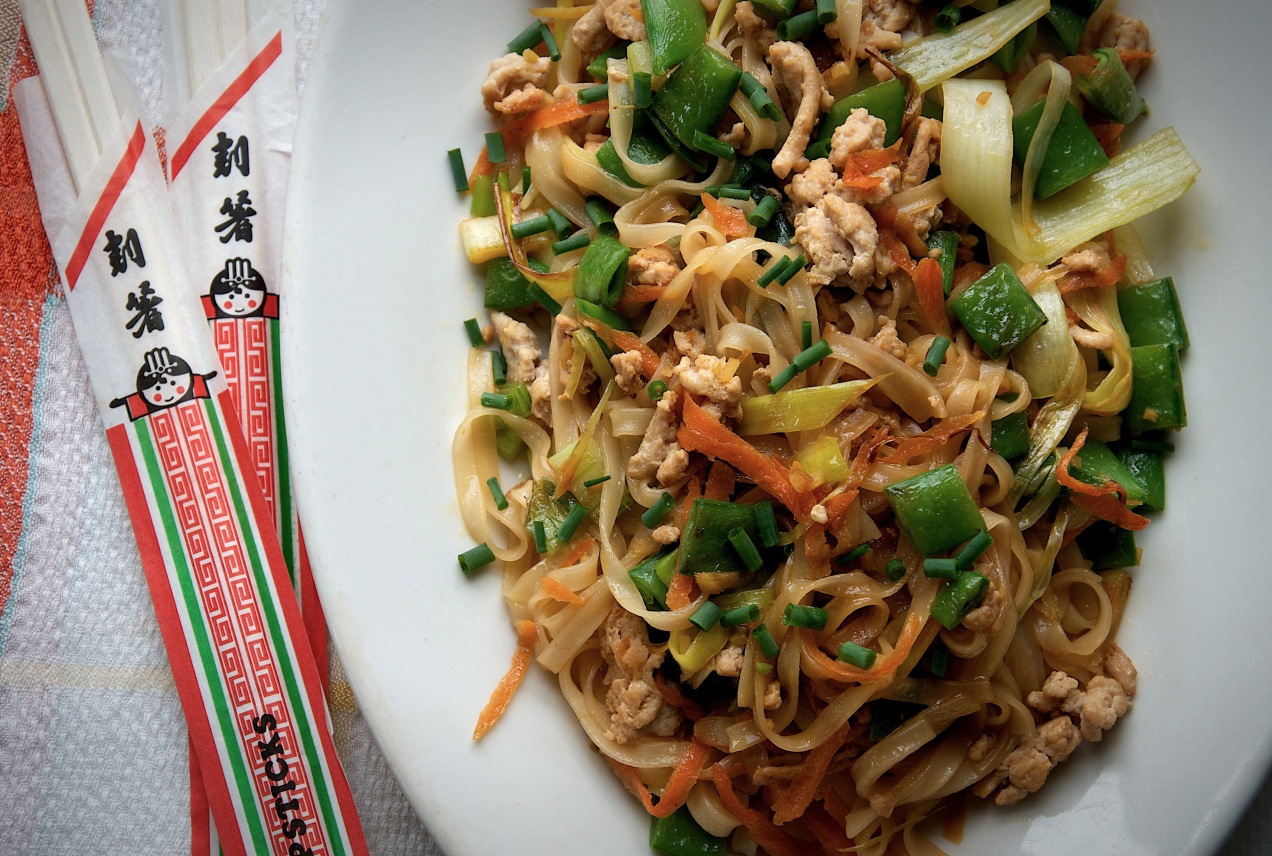
Stir Fried Noodles
There are two things I get hung up on when it comes to making Asian food at home — woks and procuring hard-to-find ingredients.
But I look at it this way: I make Italian pasta at home, so I know I can make any noodle at home.
There are a few technical issues that are really the key to stir-fry success. I need to get my pan hot enough, generally impossible to do with a wok because of the BTUs of American stoves and the thinness of the wok metal, but a non-stick skillet will do what I need it to do perfectly.
The other misstep is when I try to cram too many ingredients into the wrong-sized pan — this is my most common stir-fry failure because I get anxious or cocky. Easily solvable, with a little thing called patience.
How to Make Any Stir-Fried Noodles
Ratio: 1.5 parts protein, 1 part vegetable, 1 part noodle. For my 12 inch non-stick skillet this means 12 ounces of protein, 8 ounces of vegetables, 8 ounces cooked noodles.
1. Stir-fries cook quickly so act like a scout and be prepared. Cut all vegetables small enough that they’ll cook fast and line up all ingredients next to the stove in the order they’ll go into the pan. (Always dilute soy sauce in ratio of 1 part soy to 1 part water — when it hits the hot pan it will reduce, gaining back its strength.)
2. Choose your noodle. I find all noodles are good noodles as long as they are long. Cook them to al dente and cool them — I like to steep rice noodles instead of boiling them, which only takes about 10 minutes.
3. Cook the protein first, adding half the diluted soy after the protein has caramelized. Remove the protein to a plate, wipe out the pan and reheat it.
4. Sear the vegetables till tender. Be sure to add the vegetables that take the longest to cook to the pan first. Carrots first, ginger and garlic last.
5. Combine everything in the pan and toss just till it’s warmed through, adding the remaining diluted soy sauce last.
6. Add the garnish — here, chives and scallions — which in Asian food isn’t optional. It is an actual ingredient that needs to be added for flavor.
- Spaghetti noodles $1.05 for 16 oz.s-$o.53
- 12 ounces ground meat-$3.50
- vegetables-$4.00
- oil- $0.25
Total approx. cost for this recipe.$8.03
Ingredients ( Serves 4 when served with sides or 2 if you serve it only)
12 ounces ground beef, chicken or turkey ( I used turkey because I had it on hand)
8 ounces of veggies, I used 1 cup snow peas, small dice, 1 cup carrots, grated, 1 leek, about a cup julienned, 1 tablespoon each garlic and ginger, 1/4 cup green onions and 1 tablespoon of chives.
8 ounces of cooked and cooled noodles
1/4 cup of soy sauce diluted with a 1/4 cup of water
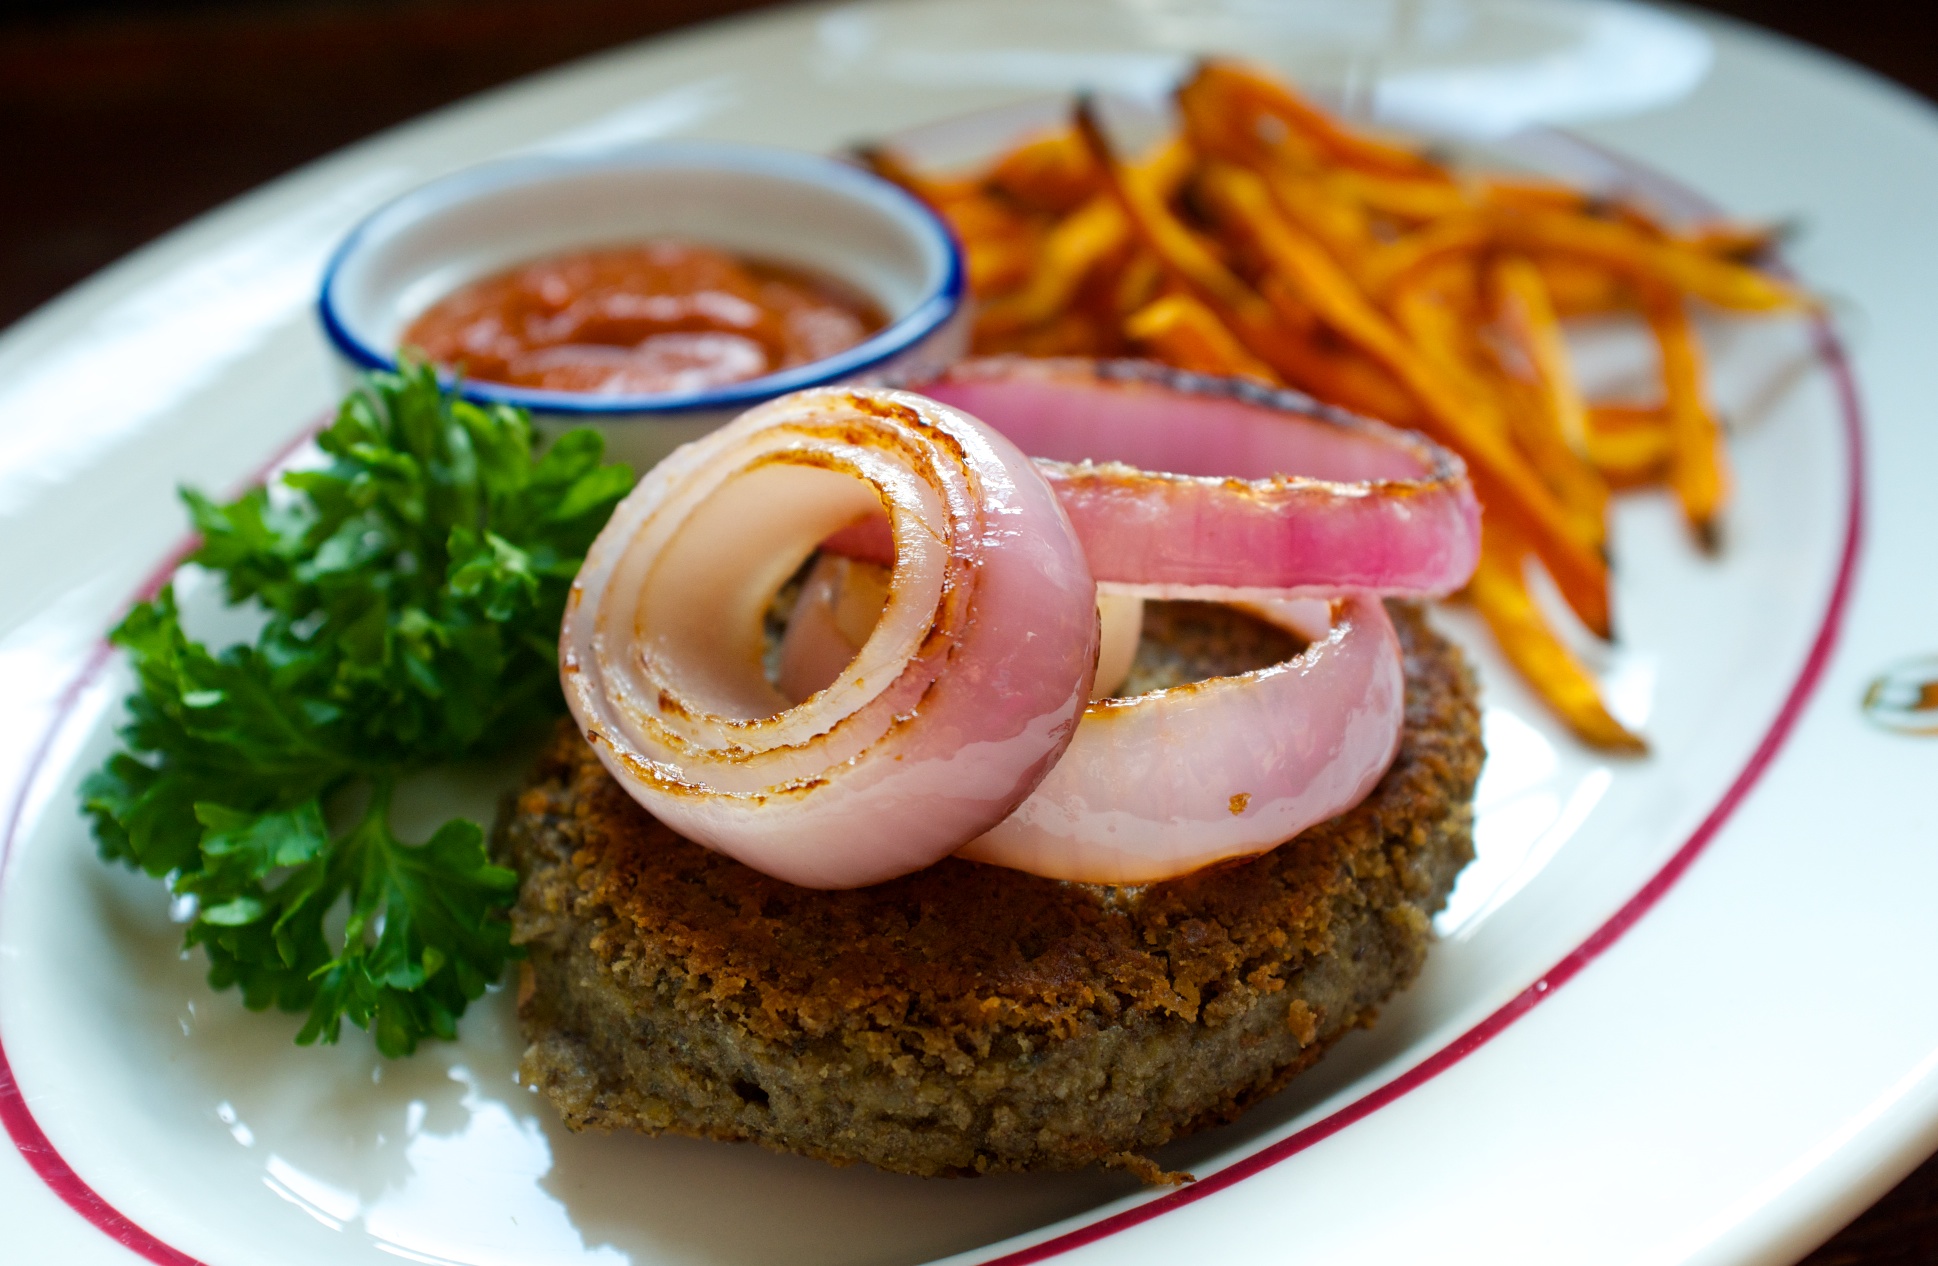
Everyday my diet pushes further in a vegetarian/vegan direction. I don’t know if it is because I am older, my tastes changing, or maybe I am I just tired of all the same foods I have spent life eating.
If I really think about it, which I am prone to do, I don’t think I eat this way to be healthy. While health is a byproduct and one I will take, I think it is because I am a lover of food. As one whose tastebuds have been around the block a few times I am always looking for the new and exciting to try. As my tastebuds gain experience it also becomes harder to get excited about food.
It might be connected to my garden too. I have been lucky enough to have a garden of some sort for well over 15 years now. With each passing year I get more excited about the growing season. It gets harder and harder to wait for the first produce. The other thing I know is the diversity of vegetables I grow has increased the diversity of my diet. For whatever reason and it does not matter to me, I have developed a fondness for vegan food.
I make these lentil patties often with my lentil patty tikka masala recipe. Today I cooked the lentils in cashew cream and added lemon juice and thyme.
Cost to make this dinner: under $15.oo
Get the lentil patty tikka masala recipe here.
For the Lentils(serves 4)
1 cup dried Lentil du Puy, rinsed and picked over for stones
1/2 yellow onion, small dice
1 tablespoon fresh grated ginger
1 tablespoon cilantro, minced
2 teaspoons garam masala
1/4 cup flour, I used millet flour
1 egg
3/4 teaspoons kosher salt
1. Place the lentils into a 3 quart pot and cover with water by two or more inches. Add the minced onion. Place the pot over medium heat. Slowly bring the lentils to a boil then reduce the heat to a simmer and cook the lentils until tender adding a pinch or two of salt in the last 10 minutes of cooking. This should take approximately 30 minutes.
2. Drain the lentils. Let them cool but puree them in a food processor while they are still warm. They will be easier to handle when warm.
3. Add the remaining lentil cake ingredients and pulse the cakes a few more times until the rest of the ingredients are combined into the mix. Taste the lentil puree then season the puree with kosher salt and a few grinds of pepper. Taste again and adjust the seasoning.
4. Let the cakes sit for a few minutes to hydrate the flour. Take a tablespoon of the mix and make a ball. Is it really wet or is it too stiff? You want the mix to hold its shape but not be overly stiff otherwise they can be dry when cooked. It should just hold its shape. Add more flour a tablespoon at a time if you need to letting the additional flour hydrate before testing. Divide the lentils into eight balls.
5. Add enough oil to cover the bottom of a heavy bottomed sauté pan by an 1/8 inch. Heat the oil over medium high heat. Test the oil by dropping a pinch of lentil to the pan. It should begin to sizzle right away but not violently sizzle and pop.
6. When the oil is ready take each lentil ball and smash it down gently forming it into 1/2 inch thick cakes and add them to the oil. Let each side brown nicely and then remove them to a tray lined with a brown bag to soak up the oil. Keep the cakes warm, either in a low, 200 degree oven or in a warm place on the stove.
For the onions:
1 large red onion, cut into four 1/2 inch slices the onion wheels left in one piece do not separate into rings
vegetable oil
For the sweet potato fries:
4 large sweet potatoes, peeled and cut into 1/4 to 1/2 inch julienne slices
oil
kosher salt and fresh ground pepper
- Heat the oven to 425˚ F.
- While the oven is heating place a saute pan over medium heat. When the pan is warm add a couple of glugs of oil. Add the slices of onion and saute them until they have browned. Remove from the heat.
- Toss the sweet potatoes with oil. Season them with plenty of salt and pepper and toss them again to mix in the seasoning. Lay the fries out onto a baking rack set over a baking sheet. This will allow the heat to cook the fries from all sides(do this step or you will have limp fries). Bake the fries until they begin to brown and blister, about 20 minutes. Remove one of the largest fries and test it to see if it is tender on the inside. Be careful sweet potatoes burn easily so keep an eye on them. Warm the onions in the oven.
- Top the patties with the onion rings, serve with fries and curry ketchup!
Lentil Cakes, Red Onions and Sweet Potato Fries
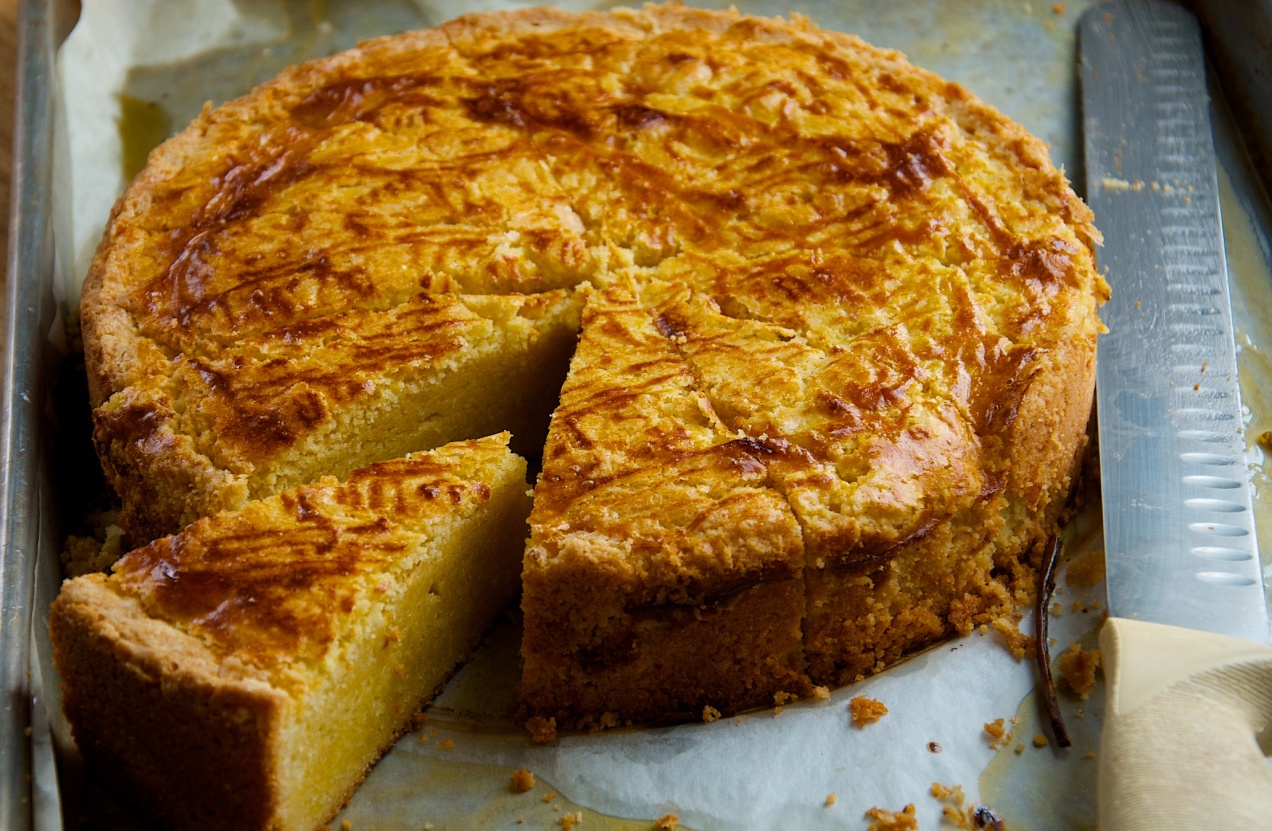
Breton Butter Cake

This morning little Lynnie keeps yelling and pointing in excitement at the cake I made for last night’s Sunday dinner. She is telling me she wants it for her birthday. The heels on the last three slices of the cake have been nibbled. Last night she kept slipping her little hand in and under the wrap so she could pinch and sneak little pieces off. The edges now look like we have a mouse in the house, and I finally had to move the cake to higher ground.
We had guest last night for dinner and while making dessert yesterday I recalled making a promise this year to make more desserts. I haven’t been. So I started thinking about this commitment while making this cake. I figured I need to sort out my likes and dislikes. Set some parameters and set myself up for success.
Most of the time I don’t want anything sweet. I am not a big sweets person. When I do a simple, small piece of dark chocolate usually suffices. I don’t want anything overly sweet.
Not only that, but as with many chefs I have a certain disdain for making desserts. It’s not that I don’t like to make them but that these grumblings occur because I usually wait till everything else is done before I think to make something. It is like opening the dishwasher to to put in dirties only to find you haven’t yet put up the clean ones. I have no explanation for this other than I think it comes with the toque. It’s why the gods made pastry chefs.
The idea of a dessert that holds the potential of a coffee or tea break snack but can double as an after-dinner treat always appeals to me. I am always out to kill two birds with one stone.
I have made this cake multiple times but I haven’t made it since I became gluten-free, so I figured now would be as good a time as any. Knowing the kind of cake it is — a very buttery shortbread — I figured it would make the conversion without suffering. It did. In all honesty I think I like it better gluten-free. The rice flour really gives it a quintessential butter cake texture in a shortbread way.
There are technical things I like about it too, or maybe I should say, the lack of technical things. It is a put-all-the-ingredients-into-a-bowl, mix, dump and bake affair. Not a lot of extras to clean up.
It holds well too. It is on day three, still on the sheet tray, covered with plastic wrap and pieces keep disappearing.
It is a cake of no regrets and, if this afternoon I do have any, they are gone by the time I have finished my last delicious bite and sip the last sip of coffee from the cup. Again, two birds with one stone.
Breton Butter Cake (Makes 12 pieces)
- 600grams King Arthur all-purpose gluten-free flour
- 30grams corn starch (1/4 cup)
- 395grams sugar (2 cups)
- 448grams salted butter, yes salted, soft (4 sticks)
- 140grams egg yolk (7 yolks)
- 22grams rum (2 tablespoons)
- 1egg yolk mixed with one tablespoon of milk
- Heat the oven to 400 degrees F.
- Sift the flour and cornstarch into the bowl of a mixer. Add the sugar and butter. Use a rubber spatula and scrape every bit of butter off the butter wrappers and put it into the bowl too. Then, using the paddle attachment, mix until combined. Add the yolks and rum. Mix till smooth.
- Using one of the butter wrappers grease the inside of a 9 inch ring mold that is 2 inches deep or spring form pan. If you use a spring form pan, dust it with flour after greasing and tilt and shift the pan so you get the sides dusted too. Shake out the excess.
- Using a spatula, scoop the batter into the mold then spread the batter out evenly. You may need to moisten the spatula with a little water to keep the dough from sticking to it.
- Using the tines of a fork make a cross hatch pattern on the surface of the cake. Using a pastry brush gently paint the top of the cake with the yolk and milk wash.
- Bake the cake for 45 minutes. Keep an eye on it and if it starts to brown to quickly reduce the heat. The top should brown and it should be firm to the touch. Remove the cake from the oven and let it cool completely before removing the ring.
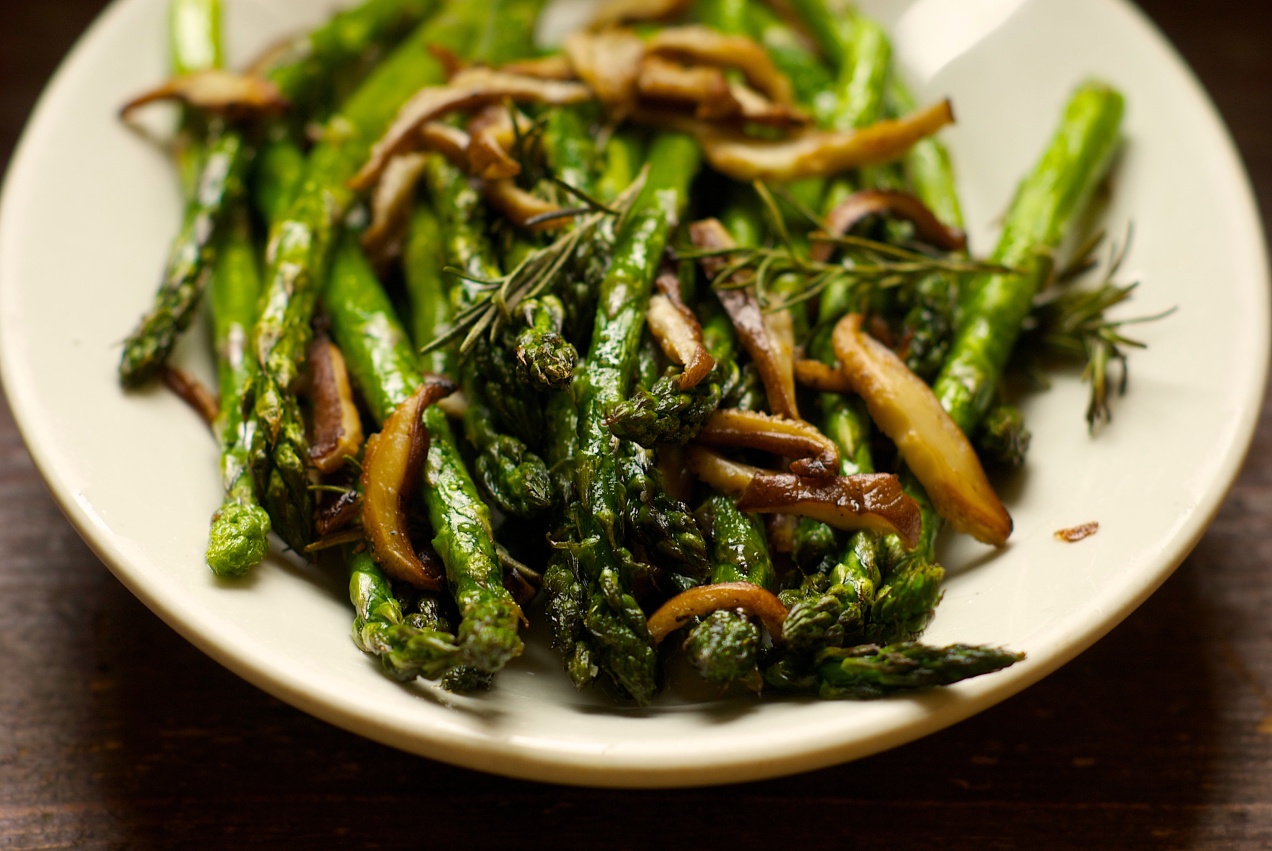
The Asparagus Has Not Sprung


The rain is really coming down now.
On the few days it has been nice I have been to the garden looking for the tiniest hints of spring. Maybe thin asparagus tips might be peeking at me through the damp dirt. The tarragon is growing, so is the sorrel and savory. The purple chive blossoms are ready to burst open and there are strong whiffs of lovage. I have already made my beloved lovage cream cheese spread even if it is only beloved by me.
I know I could go to the store and buy asparagus. I know it would taste good. I have already seen countless asparagus recipes tempting me, one for an asparagus tart that looks amazing.
The mustard greens are blooming now, a toad has dug his way up from the mud. Around dinner time he wrestles himself in between clumps of dirt getting himself as close to the earth’s warmth as he can. He needs to protect himself from the night time cold. During the heat of the day a snake is searching the compost pile for mice. Soon…I think to myself…soon you will get to taste the sweetness of the asparagus that only happens when you grow your own. Continue reading

If my extended family’s eating habits are an indication as to what the preferred meat was on my grandparents and great grandparents farm then it is obvious to me I come from a long line of pork eaters. It’s not as if this matters or that I need some sort of familial approval for my love of the beast because I don’t. I claim it as my heritage after all but I’ll just say it anyway for clarity, I…love…pork.
I love pork for its possibilities, its versatility, and most importantly, it’s flavor. From snout to hocks or bacon to ham there are more uses for the pig then any other animal I know and one of my favorite uses is as a seasoning. My definition and what I mean by seasoning is not simply tossing a couple of strips of bacon in with the green beans and calling it a day. No, the pork isn’t there for a cameo but instead has an important supporting role, one in which it could be nominated for an award.
Don’t get me wrong I enjoy a good pork dinner, something like Edna Lewis’s Boiled Pork (think Pot eu Feu) really floats my boat but as I try to reduce the amount of animal protein I consume I often look to the example of Italian ragus or Asian dishes where animal protein, quite literally, plays second fiddle to the grains or noodles on the platter. The pork is there to enhance and flavor the dish. Sure this is done for economy, just like adding bread or oats to meatloaf, and who doesn’t like save a few bucks or at the very least feed more mouths for the same price. Not only that but if you buy less quantity then you can afford better quality, at least this has always been my way of thinking.
When it comes to pork quality matters. If you buy pork that is enhanced with sodium triphosphate, a common practice at big box stores, it won’t caramelize very well and honestly the pork tastes bland. It is done to help the meat retain moisture but they add it because the producers have made pork to lean. If you buy pork with a little higher fat content you don’t need the moisture retainer. Not only that but when pork is raised in a more sustainable fashion it just taste better. It taste better because of what the animals eat. It is about the animals diet after all. I am all about how my food taste and if sustainability happens to be a byproduct then, wonderful. I mean when I bite into good pork it immediately transports me to my grandparents farm, sitting outside under a shade tree eating a farm dinner on a beautiful summer’s eve and it reminds me exactly how pork is supposed to taste.
Over the years I have had different fascinations with different types of cured pork. I mean the list of possibilities is big, you have bacon, ham, Tasso, Serrano, prosciutto, pancetta, guanciale all on top of any number of sausages. All used as seasonings and all just a few of the options that can confront you. The wonderful thing is there are many books that will teach you how to cure many of these products at home (Michael Ruhlman’s Charcuterie comes to mind) and many of the processes are surprisingly simple. In fact no special equipment is required other then a good sharp knife(which I don’t consider special equipment).


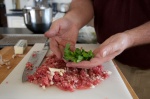

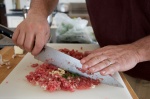
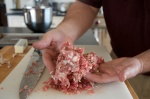
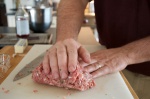
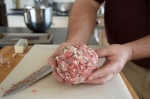
Polenta with Peas and Sausage (serves 6)
one recipe of Carlo Middione’s Polenta Facile
10 ounces pork tenderloin, sirloin or loin
4 to 5 ounces pancetta
2 teaspoons red wine vinegar
a scrape or two of whole nutmeg
a handful of parsley leaves
3 cloves garlic
2 tablespoons tomato paste
1 teaspoon dried thyme
1/2 teaspoon dried rosemary
1 bay leaf
kosher salt
fresh ground pepper
1 garlic clove, minced
1/2 cup carrots, small dice
1/2 cup onion, small dice
1/2 cup white wine
2 cups pork stock or chicken stock
1 1/2 cups fresh peas or frozen
chopped chives and parsley
1. Lay your pork out onto a large cutting board. Cut the pork and pancetta into thin strips then into cubes. Spread the pork out so it is flat instead of in one big pile. It’s ok if it isn’t in one single layer you just don’t want a big pile. Place the palm of you hand, as shown in the picture, across the blade of the knife making sure to keep your fingers up and you hand flat. This will keep you from cutting your hand if the knife slips. So fingers up! What you are doing is creating a hinge of sorts because you want to keep the tip of the knife on the board and in doing so it lets you apply more cutting force. Run the knife through the pork several times and until you have minced it to a coarse mince.
2. Add the garlic cloves, parsley, a teaspoon of salt, a few grinds of pepper and the nutmeg. Mince the seasonings into the pork until you have a fine mince. Add the red wine vinegar and knead it into the sausage. Ball up the sausage, put it in a bowl and let it get funky in the fridge for an hour or two.
3. Start the polenta. I let my polenta cook for almost three hours. I was using an heirloom corn I grew last year called Henry Moore. It took a long time to cook but it was creamy beyond my wildest expectations. So take your time with the polenta, cook any bitterness out of it and let it do its thing.
4. When the polenta is close to being finished start the sauce by placing a large 12 inch saute pan over medium high heat. When it is hot add a glug or two of oil to coat the bottom of the pan. Brown the sausage. Once the sausage is brown remove it to a plate. Be careful not to burn the fond on the bottom of the pan. Add the onions and carrots and cook them gently until they just begin to wilt.
5. Add the tomato paste, dried thyme, rosemary, garlic and bay leaf. Stir until fragrant then add the white wine. Let the wine burn off the alcohol and then add the stock. Season and taste. Bring it to a boil and reduce it by half. Taste again and adjust the seasoning.
6. Add the sausage and peas. Heat until the peas are warmed through. Taste and adjust the seasoning. Add a tablespoon of chopped chives and parsley. Stir.
7. Spread the polenta on a platter, top with the peas and sausage, and serve.
Seasoning with Pork: Polenta with Peas and Pork Sausage

When I used to go to the bookstore looking for cookbooks to add to my collection I could spend hours flipping the pages of different books. It was much like when I was younger and I would buy albums, then CDs, flipping through the alphabetized record bins searching for disk in hopes of finding something new and even more importantly, something exciting. As such I am the owner of an extensive cookbook library, or at least it feels like it to me. Not as many books as in some peoples collections but enough none the less. Back when I was really buying I would head to the bookstores and it was nothing to buy two to five new books at a time.
When I got home with my finds I would take them to my night stand and set them down. I would go about the rest of my days business but every night before bed I would thumb through the books looking for the must make recipes. Sometimes straight away I wanted to get out of bed and head into the kitchen. It was hard to contain my excitement and wait until the next day to make a new dish.
In time though I began to experience the law of diminishing returns. It began to feel as if the content of the cookbooks I was purchasing was all the same. A trend would hit and everyone would follow suite. Authors would add their little twist to the fad of the moment and publish. The fads would last about two years only to be followed by the next hot trend. Duck comes to mind, slow food, then bacon and now simple scratch cooking, vegetarian and vegan. The later, repentance for our foodie excesses I suppose.
All in all, this phenomena is what I have termed the “gold rush syndrome”. It is where food professionals scurry from one region, type or style of food to the next looking for a nugget in the terroir. One person strikes gold and everyone mines it until it runs dry. This syndrome came to reflect the foodie mentality for me and I just can’t do it anymore. It is tiring, the chase isn’t fun anymore, and once my palette became more experienced it became harder to please. Even so, there are still books being created that stand out and when I do find gold it is not hard to champion or to shout encouragement and praise. Especially when, from cover to cover, a book is full of useful wisdom.
There is no doubt April Bloomfield’s A Girl and Her Pig is one one of these great books, one of the best in this years cookbook class and upon giving it a closer look I discovered it is much more. A Girl And Her Pig resonates with libertarian resolve. It is apparent Bloomfield is someone who has taken responsibility for herself and her food and harbors no apologies. The cover is as punk as punk ever was. It is Abbey Hoffman. It is Che Guevara. It is Frieda Kahlo.
It resonates with the soul of a chef but it is a book in which a wonderful chef does what really wonderful chefs do, they please. Which is rare in theses days of pop star chefs. If Bloomfield has an ego she checked it at the door. She never leaves you with the impression she is better then you but instead you feel she is one of you. Bloomfield uses a mix of classic recipes that, with time, have become her own and then she laces the pages in-between with food she loves. Simple dishes like bubble and squeak and chicken in adobo are obviously a few of her favorite foods but they go well with the restaurant dishes too. What Bloomfield has done is spend time in the kitchen perfecting classic recipes, using her professional knowledge to create food to her liking and with her touch. It is this dedication that makes the food in this book so special.
Not surprisingly as you get to know her food you get to know Bloomfield. The pages are laced with personal tales of cooking and career and with each turn of the page her passion, which is quietly infectious, builds only to remain with you long after you closed the cover. As such Bloomfield becomes a wonderful voice to have floating around in your head while you are in the kitchen much like a favorite song that always resonates deep within your soul.
-
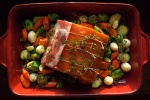
- A pork rib roast with fall vegetables ready to go into the oven.
A Girl and Her Pig
Chickpeas in a Spicy Tomato Gravy
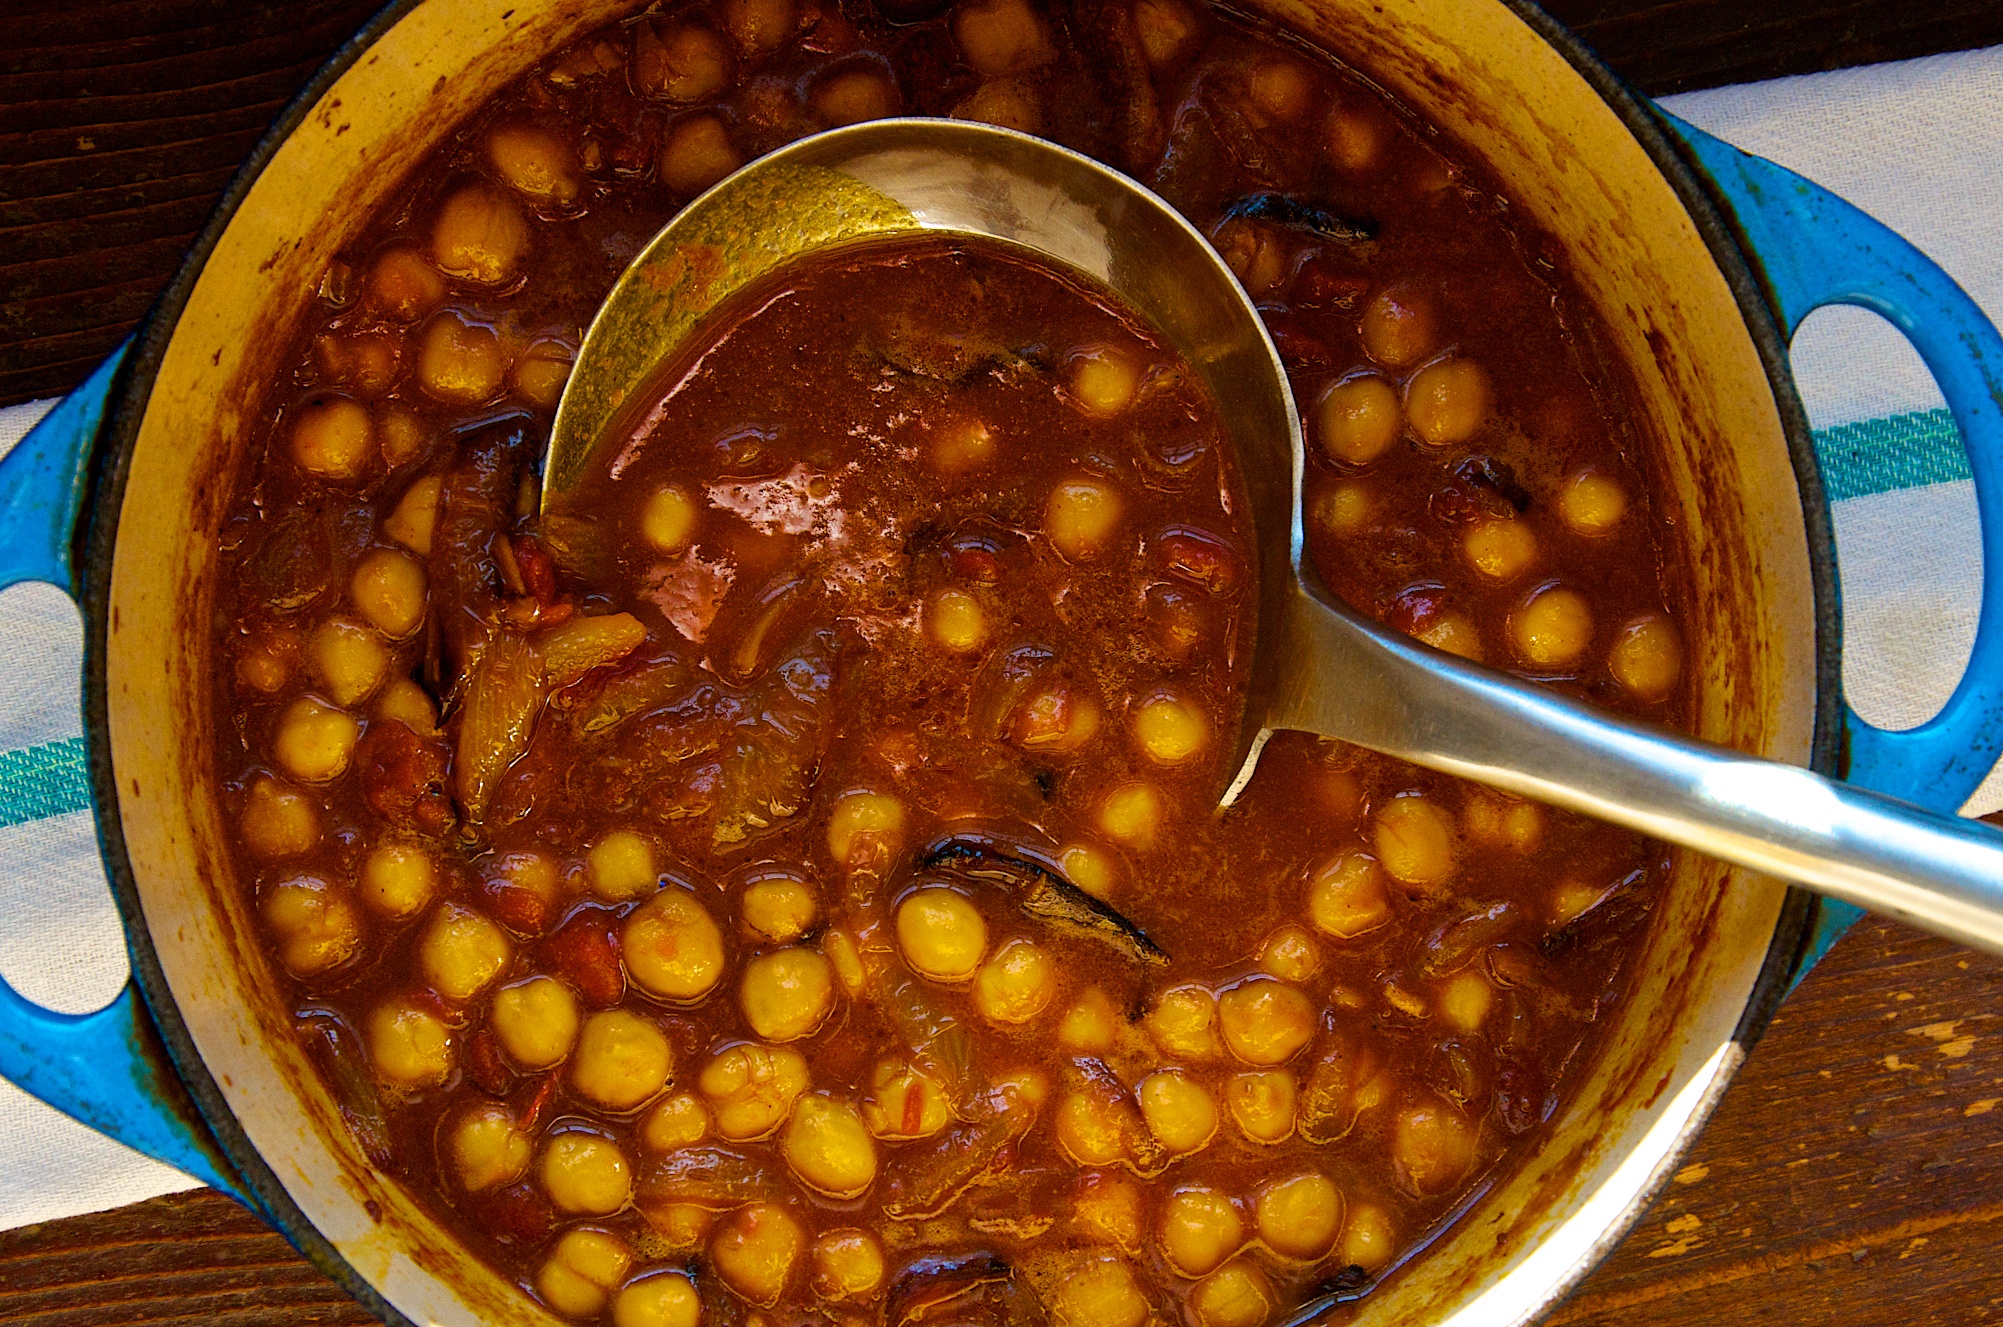
A wonderful blend of deeply caramelized onions, spicy tomato broth and creamy chickpeas. Khatte Channe, as it is know in India, is traditionally served with a flatbread but as it is cooked in this recipe it has lots of sauce so it makes sense to serve it with simple steamed rice and some sort of green vegetable.
I don’t like to use a lot of canned goods but beans are one that I rely on. They are no fuss, no standing over the stove stirring or adding liquid because they are already cooked. In fact I think this dish benefits from canned because the peas stand out by not absorbing all the gravy flavors that long cooking would have infused in them .
There is some extra expense in buying spices for the dish but if you have an ethnic grocery nearby, either Asian or Indian, you should be able to find the ingredients. Buy the smallest amount they sell and if you like the spices and find yourself using them to make other dishes then buy bigger quantities.
The thing I really like about this dish and these kind of bean dishes is even though it is of Indian descent it still feels familiar, I think of it as soul food. It is warm with a hint of spice and very much like bean dishes from Central America and Mexico. The dish is comfortable.
Cost to make this meal:
- three 14oz. cans organic garbanzo beans $1.49 each or $4.47
- 2 large onions .74 cents
- one 14 ounce can crushed tomatoes .99 cents
- at my local Indian grocery an 8 ounce bag costs $3.oo dollars or 2 teaspoons .12 cents
- 1 head of garlic .99 cents 4 cloves about . 50 cents
- fresh ginger 3.99 per pound 2 ounces at .48 cents
- 48 oz vegetable oil $2.99 or 3 tablespoons at .10 cents
- cumin seeds vary in price greatly depending on where you purchase them 1 teaspoon at .25 cents
- my recipe calls for tamarind but substitute a 2 tablespoon of vinegar to give the dish its sourness
Total cost range is from $7.65 to $9.00 and if you are only serving 4 you should have a couple of lunches.
This recipe is adapted from Julie Sahni’s Classic Indian Cooking. If you enjoy Indian food her books are a must for you shelf.
Makes 8 to 10 servings
3 (14.5 oz.) cans chickpeas/garbanzos (drained and liquid reserved)
2 tablespoons tamarind paste mixed with half a cup of water (or substitute 2 tablespoon of vinegar with no water)
3 vegetable oil
2 cups yellow onions, peeled and thinly sliced
2 tablespoons garlic, peeled and minced
1 teaspoon turmeric
1/2 teaspoon cayenne pepper
1 (14.5 ounce) can crushed tomatoes
1 tablespoon fresh ginger, peeled and minced finely
2 teaspoons curry powder
1 teaspoon ground cumin, toasted
kosher salt and fresh ground pepper
1. Place a 3 1/2 quart heavy bottomed pot over medium heat. Add 3 tablespoons of oil to the pot and then the onions. Season the onions with salt. Cook the onions, patiently, until they begin to brown and become deeply colored. Stir them often enough that the onions on top brown at the same pace as those on bottom. Don’t do this to fast you want melted gooey onions not seared. Take your time it takes a while.
2. Once the onions are browned to your liking add the garlic. Once you smell the garlic add the turmeric and cayenne pepper. Give it a stir then add the tamarind, tomatoes and ginger. Reduce the heat and let the tomatoes simmer.
3. Add 1 cup of the reserved bean liquid along with the cumin and curry powder. Bring the liquid back to a boil reduce the heat and add the beans.
4. Cook the rice.
5. By the time you finish the rice the beans will be warmed through and the flavors will have come together nicely. Taste the peas and adjust the seasoning. Serve over the rice.
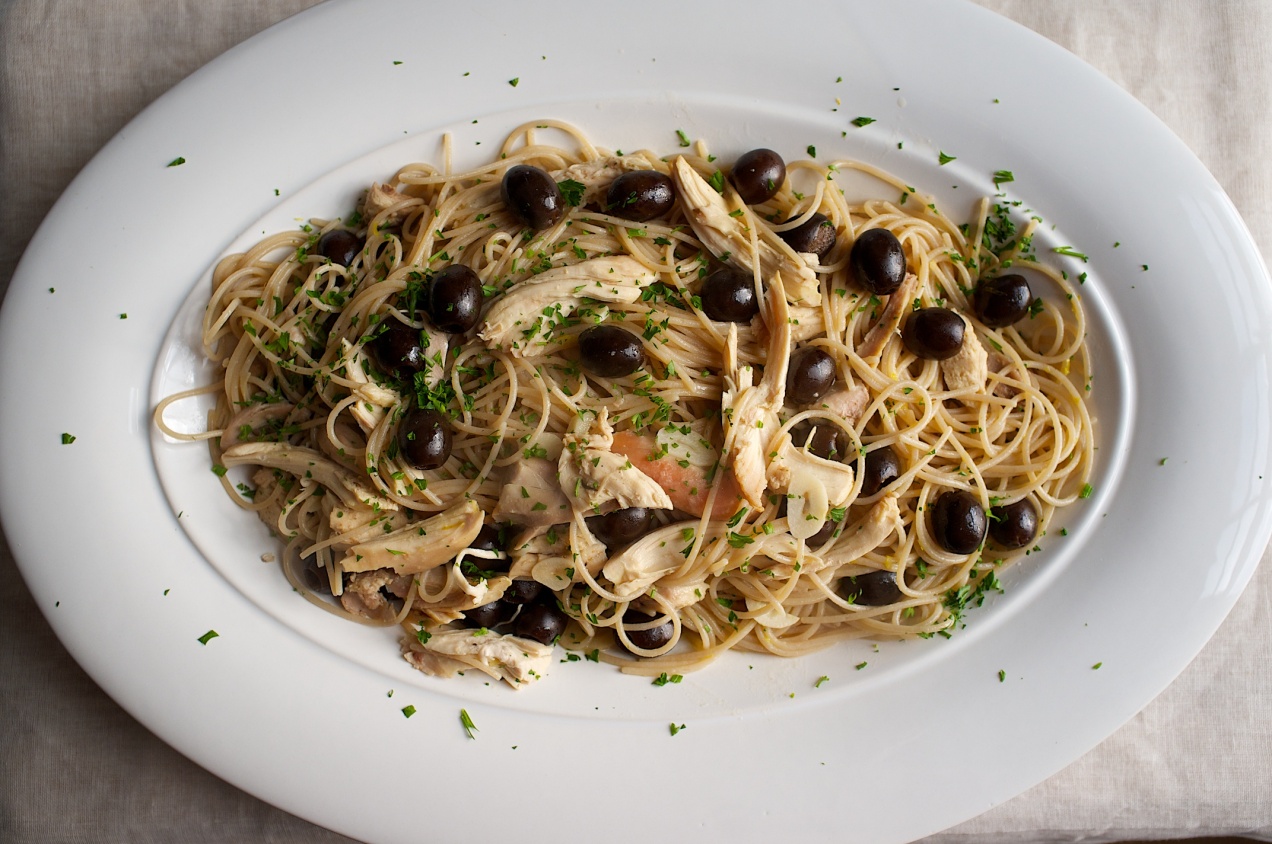
The Unctuous Possibilities of Pan Juices
 We all know gravy or pan sauce in large quantities might be good for our soul but it isn’t so good for our heart health. After all we are doing nothing more then adding flour or cornstarch to the fat in the bottom of a roasting or sauté pan to thicken it and adding back some stock, wine, or cream for volume. So we have deemed it less healthy which to me means it is an occasional treat and as such we reserve serving gravy for holiday feasts or occasional celebrations, and rightly so.
So why then when I look into the chicken-less roasting pan that held tonights dinner only a short time ago and I see those beautiful glistening juices that are on the edge of coagulating do I feel like I am throwing the baby out with the bathwater. Don’t get me wrong I am no health nut. In fact I have this beautiful physique that could make me the poster child for a Bittman campaign on obesity. I am sure it goes back to my waste not want not way of thinking. Nevertheless all this made me think. 
When I make my own stock I always cool it down, put it in the fridge and then the next day I lift the disc of fat off the top. I know the stock is pretty fat free, although I haven’t calculated it and I have know idea how to do so, but it has to be pretty lean and I also know it has very little salt because I didn’t add any. So looking at it in this light I started refrigerating the roasting pan and the next day I remove all the fat cap and what is left is the reduced intensely rich jelly. I use a rubber spatula and scrap all the jelly up and into a small Ball jar. I have already made a plan for its use, did so before I even roasted the pork, beef or chicken, so I know when I store it in the fridge it will be used up in a day or two. I could freeze it but I don’t like to collect things like this and my motto is use it or loose it.
The jelly is infinitely better then bouillon cubes or stock base and can be used in all sorts of ways. Sometimes I like the jelly to have lots of debris(meat bits and spices) and other times I don’t but it is easy to heat and strain, if you need too, just before you want to use it. While you don’t have too I often try to keep in mind the flavors of what I roasted with the flavors of what I am going to make with the pan juices just to make sure they coincide.
Pan juice possibilities:
- Of course it is always good to use the pan juices in soups. Added to the broth it can give a flat soup the kick it needs.
- Pasta or noodles of all kinds.
- For chicken pan juices: Make a simple fresh lemon juice and olive oil vinaigrette with salt and lots of fresh ground pepper, take a couple big hand fulls of baby Bibb lettuces and toss it with the dressing. Just before serving heat the pan juices and drizzle over the salad for a “healthier” wilted salad.
- For beef: You could make Grits and debris. Make a bowl of grits, pour on the warm pan juices and top with a fried egg.
- For pork: Ramen noodles.


Pasta with Chicken, Black Olives and Lemon
(serves 4)
12 or 16 ounce box of spaghetti noodles
extra virgin olive oil
half a can of black olives, drained
1 1/2 cups cooked chicken meat
4 cloves of garlic, trimmed, peeled and slivered
1 1/2 teaspoons lemon zest
1/4 cup dry white wine
1 tablespoon fresh lemon juice
2/3 cup chicken stock
2 to 3 tablespoons pan juices
1 tablespoon parsley, minced
parmesan cheese
1. Place a large pot filled with 4 quarts of salted water over high heat.
2. While you are waiting for the water to come to a boil place a sauté pan over medium heat. Add a good glug or two of extra virgin olive oil. Add the garlic and let it gently cook until it just begins to turn golden, be careful because browned garlic can be very bitter. Add the white wine and let the alcohol burn off. Now add the lemon juice, stock and pan juices. Bring them to a boil and season with salt and pepper. Taste and adjust the seasoning. Reduce the heat and let the liquid reduce.
3. When the water is at a roiling boil add the spaghetti. Cook according to the directions on the box, I am guessing 10 minutes or so. Once the pasta is just tender remove a cup of pasta water and reserve it, drain the pasta and immediately add it to the pan along with the chicken, olives and lemon zest. Season the pasta with salt and fresh ground pepper. Taste and make the necessary adjustments. If it is to dry add a little bit of pasta water. This is the kind of pasta that should have a broth. Toss to combine and once the chicken is hot add the parsley toss again and serve with lots of parmesan.
Potato Cake
 What thrills me the most about potato cakes like this is the crispy top and creamy interior. If you use good potatoes the flavor is unbeatable and if you are creative you can even layer the interior with things like roasted garlic, wilted onions, green onions or even chopped frozen broccoli that has been thawed and drained of excess moisture.
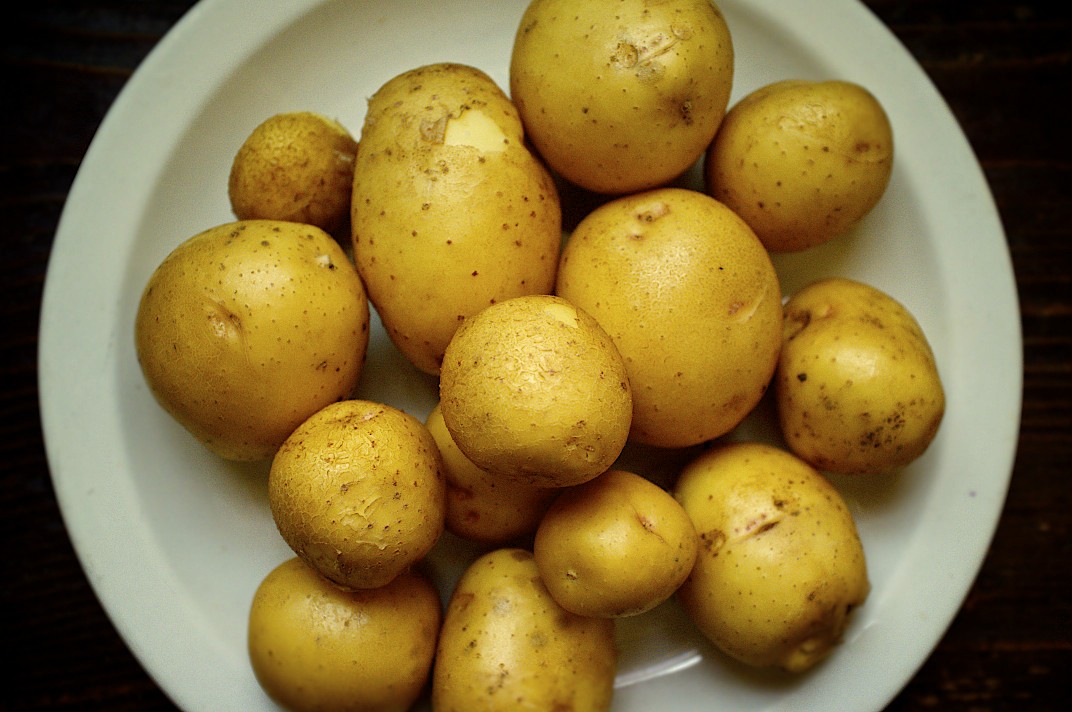
Yukon Golds
There are few products that I recommend, or in this case don’t recommend, and those are conventional potatoes and canned tomatoes. I don’t like conventional potatoes because they spray them with an anti-sprouting spray which means they have a longer shelf life. I don’t know if the spray is good for you or not but I want potatoes that aren’t far from the harvest because I want fresh potatoes. They taste better and I know they do, it’s that simple. Organic potatoes can’t lollygag around and therfore are generally fresh.
The two types of potato most readily available at most groceries that would work for this dish are Russet Burbanks(Idaho) or Yukon Golds. Both brown up nicely and both create a creamy interior.
As for tomatoes, I don’t like canned tomatoes because the acid leaches out the chemical from the liner of the can. I only by tomatoes in glass or those nifty carton type boxes.
Cost to make the potatoes:
- one bag of organic russet potatoes $3.49 about 10 per bag or $1.75
- unsalted butter .10 cents
- canola oil and salt .10 cents
Total cost to make this dish: $1.95
Serves 4 as a side dish
5 good sized russet potatoes, scrubbed under cold water with a brush
1 tablespoon butter, room temperature
1 tablespoon canola oil
kosher salt
white pepper if you have it
1. Smear the bottom of a 10 inch non-stick skillet with soften butter. Make sure to spread it evenly across the bottom. Drizzle the oil into the pan too.
2. Slice the potatoes into very thin slices, a 1/16 of an inch would be great but no more then an 1/8 inch.
3. Starting in the middle of the pan spiral the potatoes by fanning them. They should overlap about half the potato before them, if that makes since or you should cover the potato before the one you are putting into the pan by half by the one you are putting into the pan.
4. Lightly season each layer of potato with a pinch of salt. Once the first layer is down you can layer the rest of the potatoes into the pan without detail to fanning them.
5. Heat the oven to 350˚ F. Place the pan over medium heat to begin browning the bottom layer. This always takes longer then I expect. I also have a baking stone that has a permanent spot in my oven so I also know then the pan goes into the oven it will continue to brown the potatoes.
6. Once the bottom is browned nicely cover the pan and slide it into the oven. Bake until the potatoes in the middle are tender. Depending on how many layers you created anywhere from 25 to 35 minutes.
7. Remove the pan from the oven with a oven mitt or towel. Place a pizza tray or the bottom of a sheet tray across the top of the pan. In one swift motion invert the pan and tray. Place the tray into the oven and let the cake bake another 5 to 10 minutes to crisp the top. Serve.
This time of year potatoes are a shot glass full of sunshine, they are the break-up song I can’t stop listening to, they are my noodle, my rice, and my comfort. They are soothing in the way a pacifier is to a child and they get me through the edgy emotions of late winter.
They are one of those rare ingredients that selflessly put other ingredients on a pedestal. They make butter better and cheese cheesier and we all know potatoes are versatile by the vast number of ingredients you can pair with them.
You can bet come Sunday when I want something comforting for dinner, they will make an appearance at the table. Most of the time they aren’t fancy. Something simple will do. But on occasion they get dressed up and this is one of the many things I like about potatoes: they adapt to any occasion. They can even go solo and be the meal themselves.
 While I am not particular so much about potato dishes I am particular about my potatoes, really particular. But I didn’t become so until I grew them in my garden. Not until then did I understand what fresh, good potatoes were about. I grow fingerlings, purple, Irish cobblers, Kenebec, and Yukon golds. All are unique, and all have peculiarities the cook needs to understand.
Like which potatoes to use for which dishes: the Russet Burbank, for example, is perfect for mashed potatoes because, when cooked, the grains in the potato swell and separate, making for a light and fluffy mash. On the other hand, when you want to make a nice vinegary French herb potato salad, it is nice to have French fingerlings or Russian Bananas because the waxy make-up of the potato keeps them from falling to mush.
I have a film changing bag in which I store my potatoes. It is a relic from, yeah, the days of film but it is light-proof, which makes it great for storing potatoes. And this is where I get picky. I will use potatoes if they are just beginning to sprout but I won’t use them if I see any signs of green. Storing potatoes in complete darkness keeps them from getting green. I know you can cut off the green but I also know different people have different reactions to the glycoalkaloids. This is the chemical in potatoes that causes stomach issues for some and, while the green isn’t the glycoalkaloids, it is a sign they are abundant. So I simply won’t use green potatoes.
I also like to keep the skin on. I think they add so much flavor and extra nutrients, but obviously this recipe-dependent. Because of this, once my potato stash from the garden runs dry I only buy organic potatoes. They have a higher turnover rate because they sprout and turn green while the conventional are sprayed with a sprout suppression spray. I know the organic potatoes are fresh, good potatoes because they just can’t hang out like the conventional.
Click here for the Potato Cake recipe.


Potato Tips:
1. If the pile of 10-pound potato bags at the store looks messy, it’s because I was digging to the bottom to find the bag of potatoes that has absorbed the least amount of sunlight.
2. Smell the potatoes. They should smell like good soil, not mold.
3. Squeeze the potatoes. They should be firm, with no give.
4. When making mashed potatoes, let the potatoes sit in the colander after having been drained and let them steam off any extra moisture. Then add the butter first and mash it in before any of the other ingredients. Let the starch absorb the fat.
5. If you are making potato salad, dress the potatoes while hot. If making a vinaigrette, add the vinegar and herbs first, then the oil.
6. Waxy potatoes like fingerlings or German butterballs make the best roasted potatoes.
7. Duck fat or lard might be the best choice of roasting fat, and will brown the potatoes deeply and create a crispy exterior with a creamy interior.
8. If you want to roast potatoes in butter start off by roasting the potatoes in canola oil, then during the last 15 minutes of roasting time, stir the butter into the hot potatoes and finish roasting them. This will keep the butter from burning.
9. If your potatoes have begun to sprout but aren’t green, bake them till tender. Then let them cool and store them in the fridge to make hash browns or rösti. About five potatoes makes a nice dinner-sized rösti for two. The baked potatoes will last about 5 days in the fridge.
Everyday Potatoes

Turkey Burgers with Lemon Parsley Butter
These burgers are great bun or no. The key here, at least for me, is not to use breast only ground turkey which really dries out but a combination of ground thigh and breast. Read the labels on the packages carefully.
Lemon parsley butter is a natural for these. While you make more butter then you need, through out the week you can easily use it up. Simply use the compound butter in all sorts of things like sauteed green beans, broccoli or Brussels sprouts. It is delicious way to finish off veggies and all you have to do is add it at the end of the cooking time, stir it around to just melt it, and voilà, an extra punch at the table.
Cost to make the burgers:
- Ground turkey $4.29
- Curley leaf parsley .69 cents
- Dried herbs and lemon $1.50
- Butter $2.99 per pound or 1 stick @.75 cents
Total cost: $7.23
Makes 4 six ounce patties
For the patties:
1 pound 3 ounces ground turkey, a mix of breast and thigh
2 teaspoons curly leaf parsley
2 teaspoons lemon juice
1/2 teaspoon dried thyme
1/2 teaspoon garlic powder
a heavy 1/2 teaspoon salt
canola oil for sautéing
For the butter:
1 stick unsalted butter at room temperature
2 teaspoons fresh lemon juice
2 teaspoons lemon zest
1 tablespoon curly leaf parsley, minced
two finger pinch of salt
1. Combine all the patty ingredients in a mixing bowl. Using your hands need it all together until it is well mixed. Let the mixture sit, refrigerated for at least an hour.
2. While the turkey is melding, combine all the butter ingredients and mix well. Set aside.
3. Form 4 patties of equal size.
4. Heat a heavy bottomed pan over medium high heat. Add a glug of oil to coat the bottom of the pan. Add the patties and brown them on each side. Adjust the heat as necessary so you can brown them but also cook them through without burning them. Serve topped with a dollop of lemon parsley butter.
Pickled Green Onion Ranch
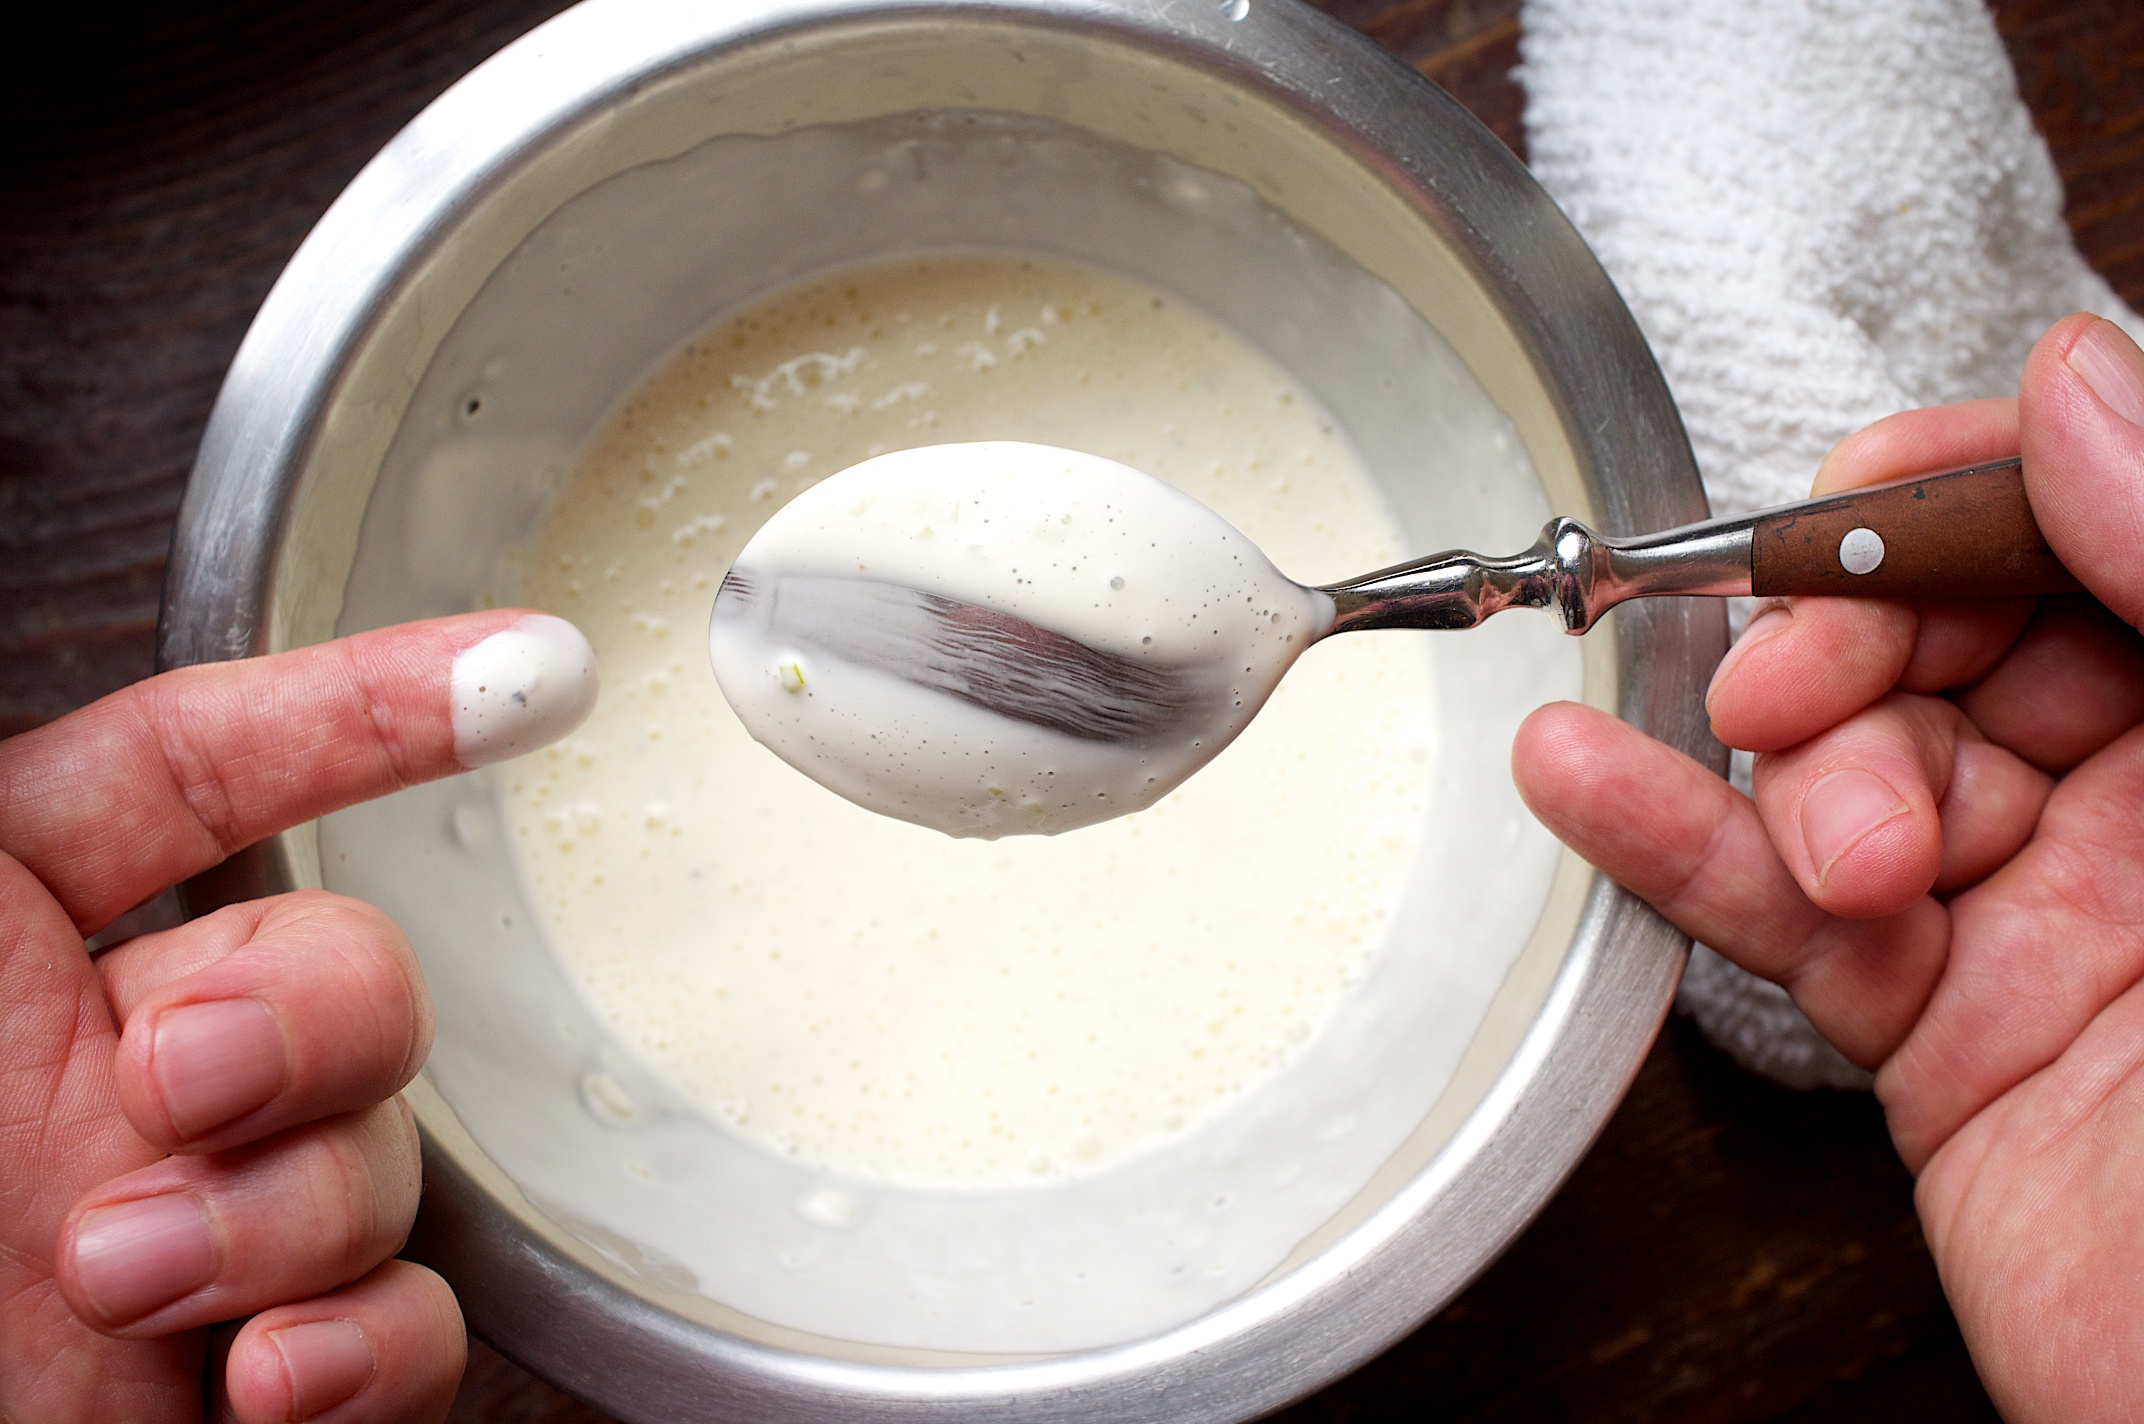
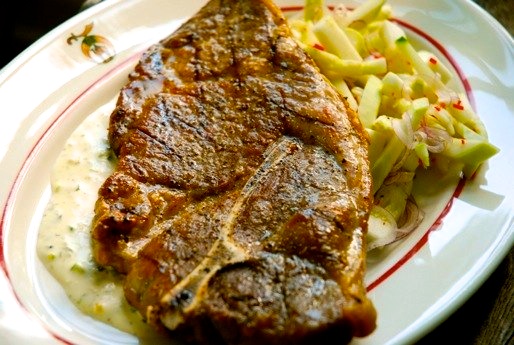
Grilled Pork Steaks with Ranch Dressing is yet another great use for the dressing.
The only way buttermilk will go to waste is if you if you have a lack of ideas for using it and because of this don’t. It can hang out longer then regular milk because of the live culture but it will eventually go bad.
This dressing alone can be used as a base, minus the green onions, and you can make parmesan black peppercorn or fresh herb ranch. Then there are all the other products too, real Southern cornbread, buttermilk pancakes, bread and of course biscuits.
Buttermilk is full of probiotics. Rumor has it the beneficial bacteria will help you to maintain a healthy stomach which helps in fighting off other sicknesses. This, though, is if you drink it or use it uncooked. The label should read live active culture in order for you to get the benefits.
There is a term in cooking, and at culinary school, that asks for you to cook a liquid or combine ingredients to a thickness that will coat the back of a spoon. You go about this by dipping the spoon into the liquid and then, while holding it sideways, run your finger across the convex side. The liquid should hang there for a second or two before closing the gap your finger created.
Cost:
- 1 head of garlic .42 cents
- 2 bunches of green onions $1.49
- 1 quart Organic Valley buttermilk $3.25 or .40 cents per 1/2 cup
- 30 oz. Hellman’s Real Mayonnaise $5.49 or $1.46 per cup
- 12 oz. rice vinegar (do not buy seasoned rice vinegar) $1.48 or .25 cents per 1/4 cup
Total cost to make the dressing: $4.02 for 12 ounces
Makes 1 1/2 cups plus
10 to 12 green onions, trimmed of roots
1 garlic clove, minced
1/2 cup water
1/4 cup rice vinegar
3 tablespoons sugar
1 heaping teaspoon kosher salt
2 teaspoons fresh lemon juice
1/2 cup buttermilk
1 cup mayonnaise
1 1/2 tablespoon pickling liquid
fresh ground black pepper
salt
1. About three inches from the root end cut the green onions. Reserve the green tops for another use (buttermilk green onion smashed potatoes comes to mind). Place the green onions and garlic into a small heat proof container.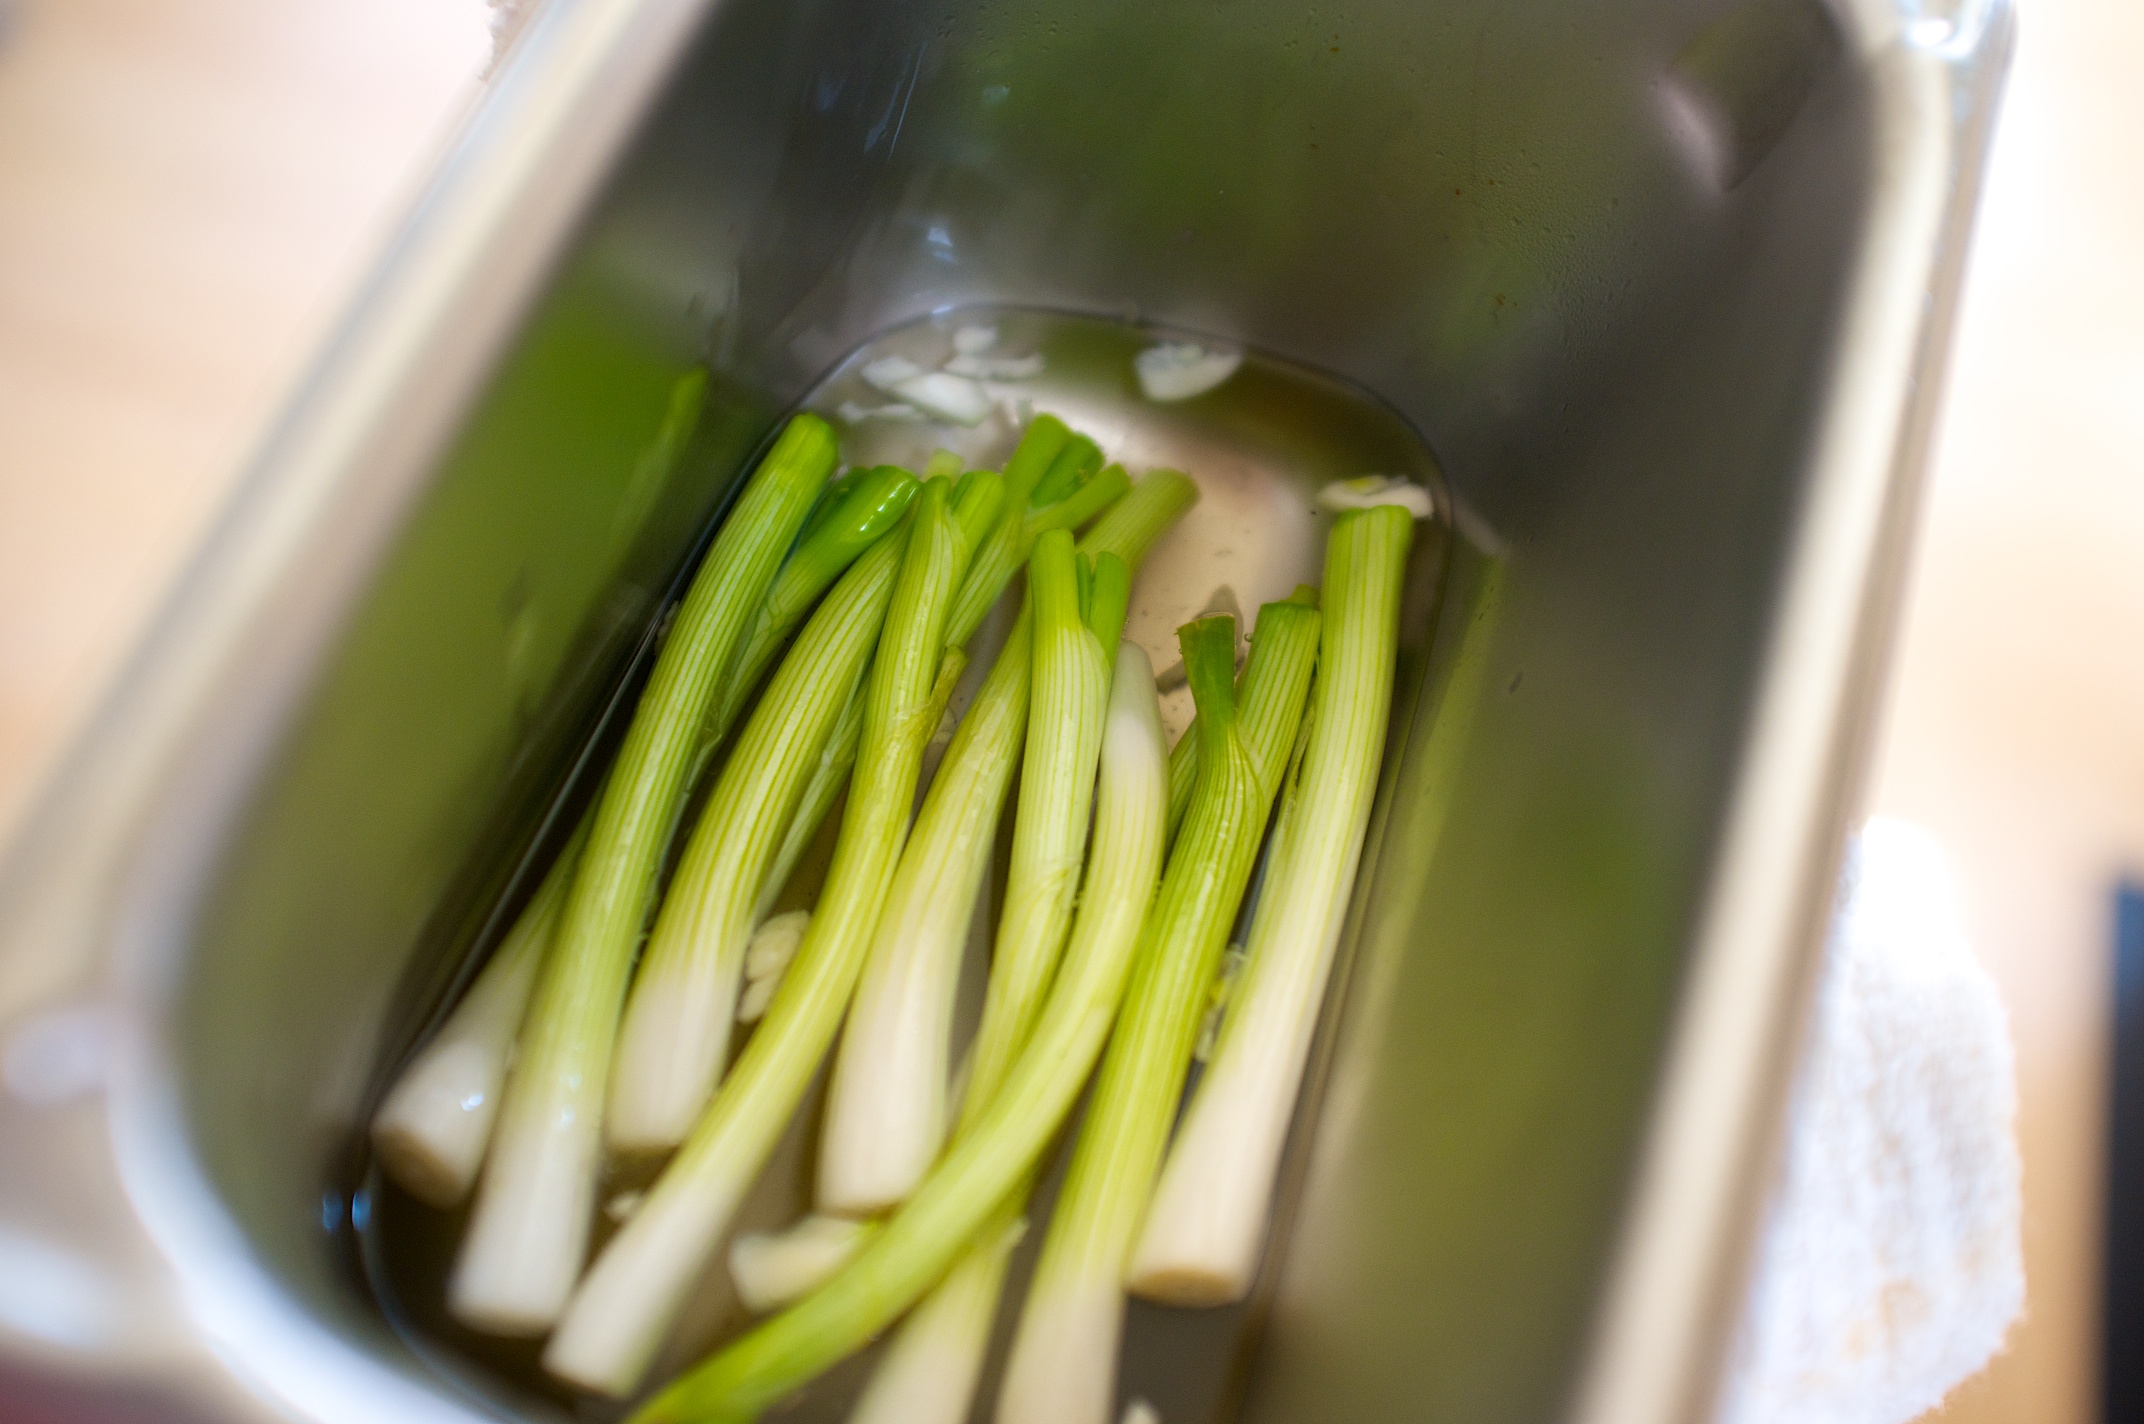
2. Heat the water, vinegar, salt and sugar in a small sauce pan set over high heat. Bring it to a boil and let the salt and sugar dissolve.
3. Pour the hot liquid over the green onions and garlic. Let the onions pickle for at least two hours.
4. Once the green onions are olive drab and soft remove them and the garlic from the liquid. Mince them fine.
5. Combine the mayo, buttermilk, reserved 1 1/2 tablespoons of pickling liquid and lemon juice in a mixing bowl. Add the green onions and garlic along with fresh ground black pepper to taste.
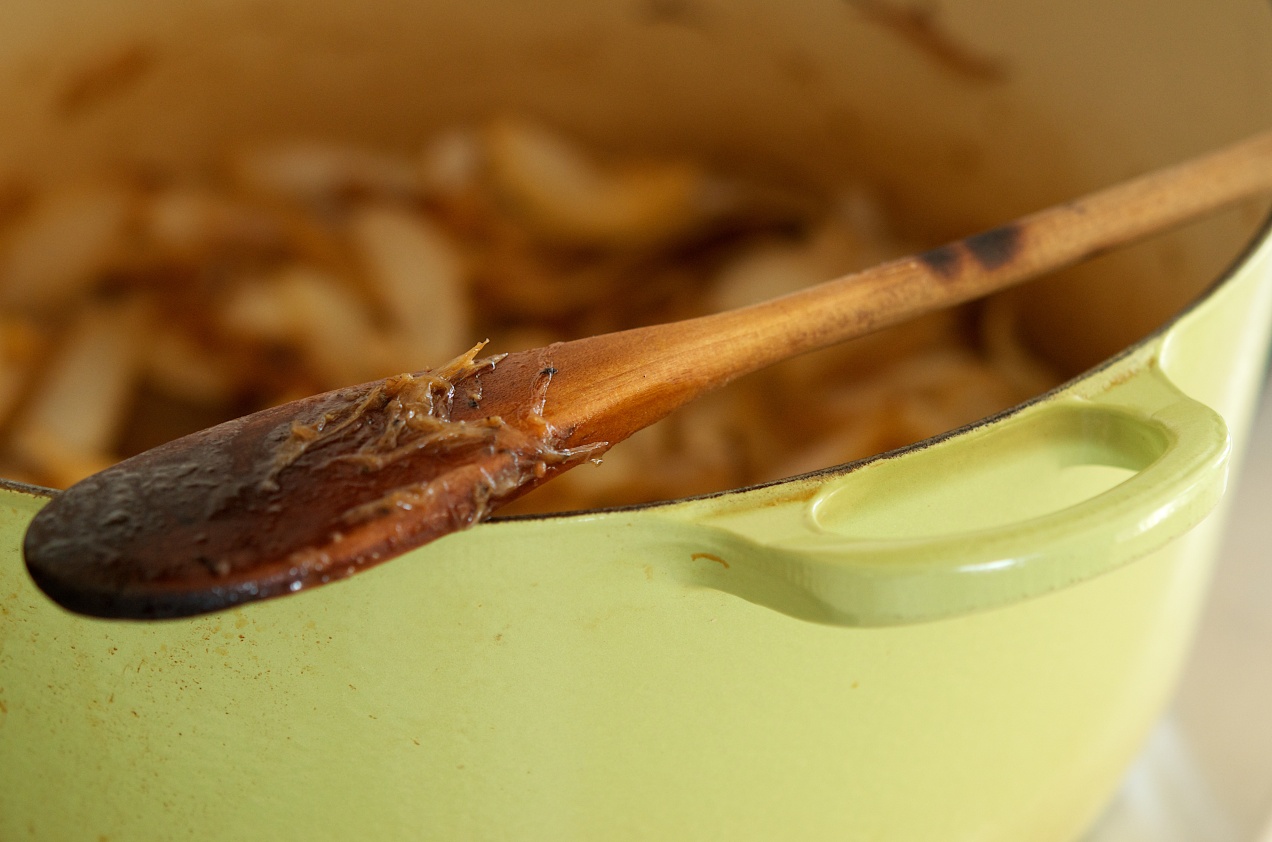
Smothered Chicken
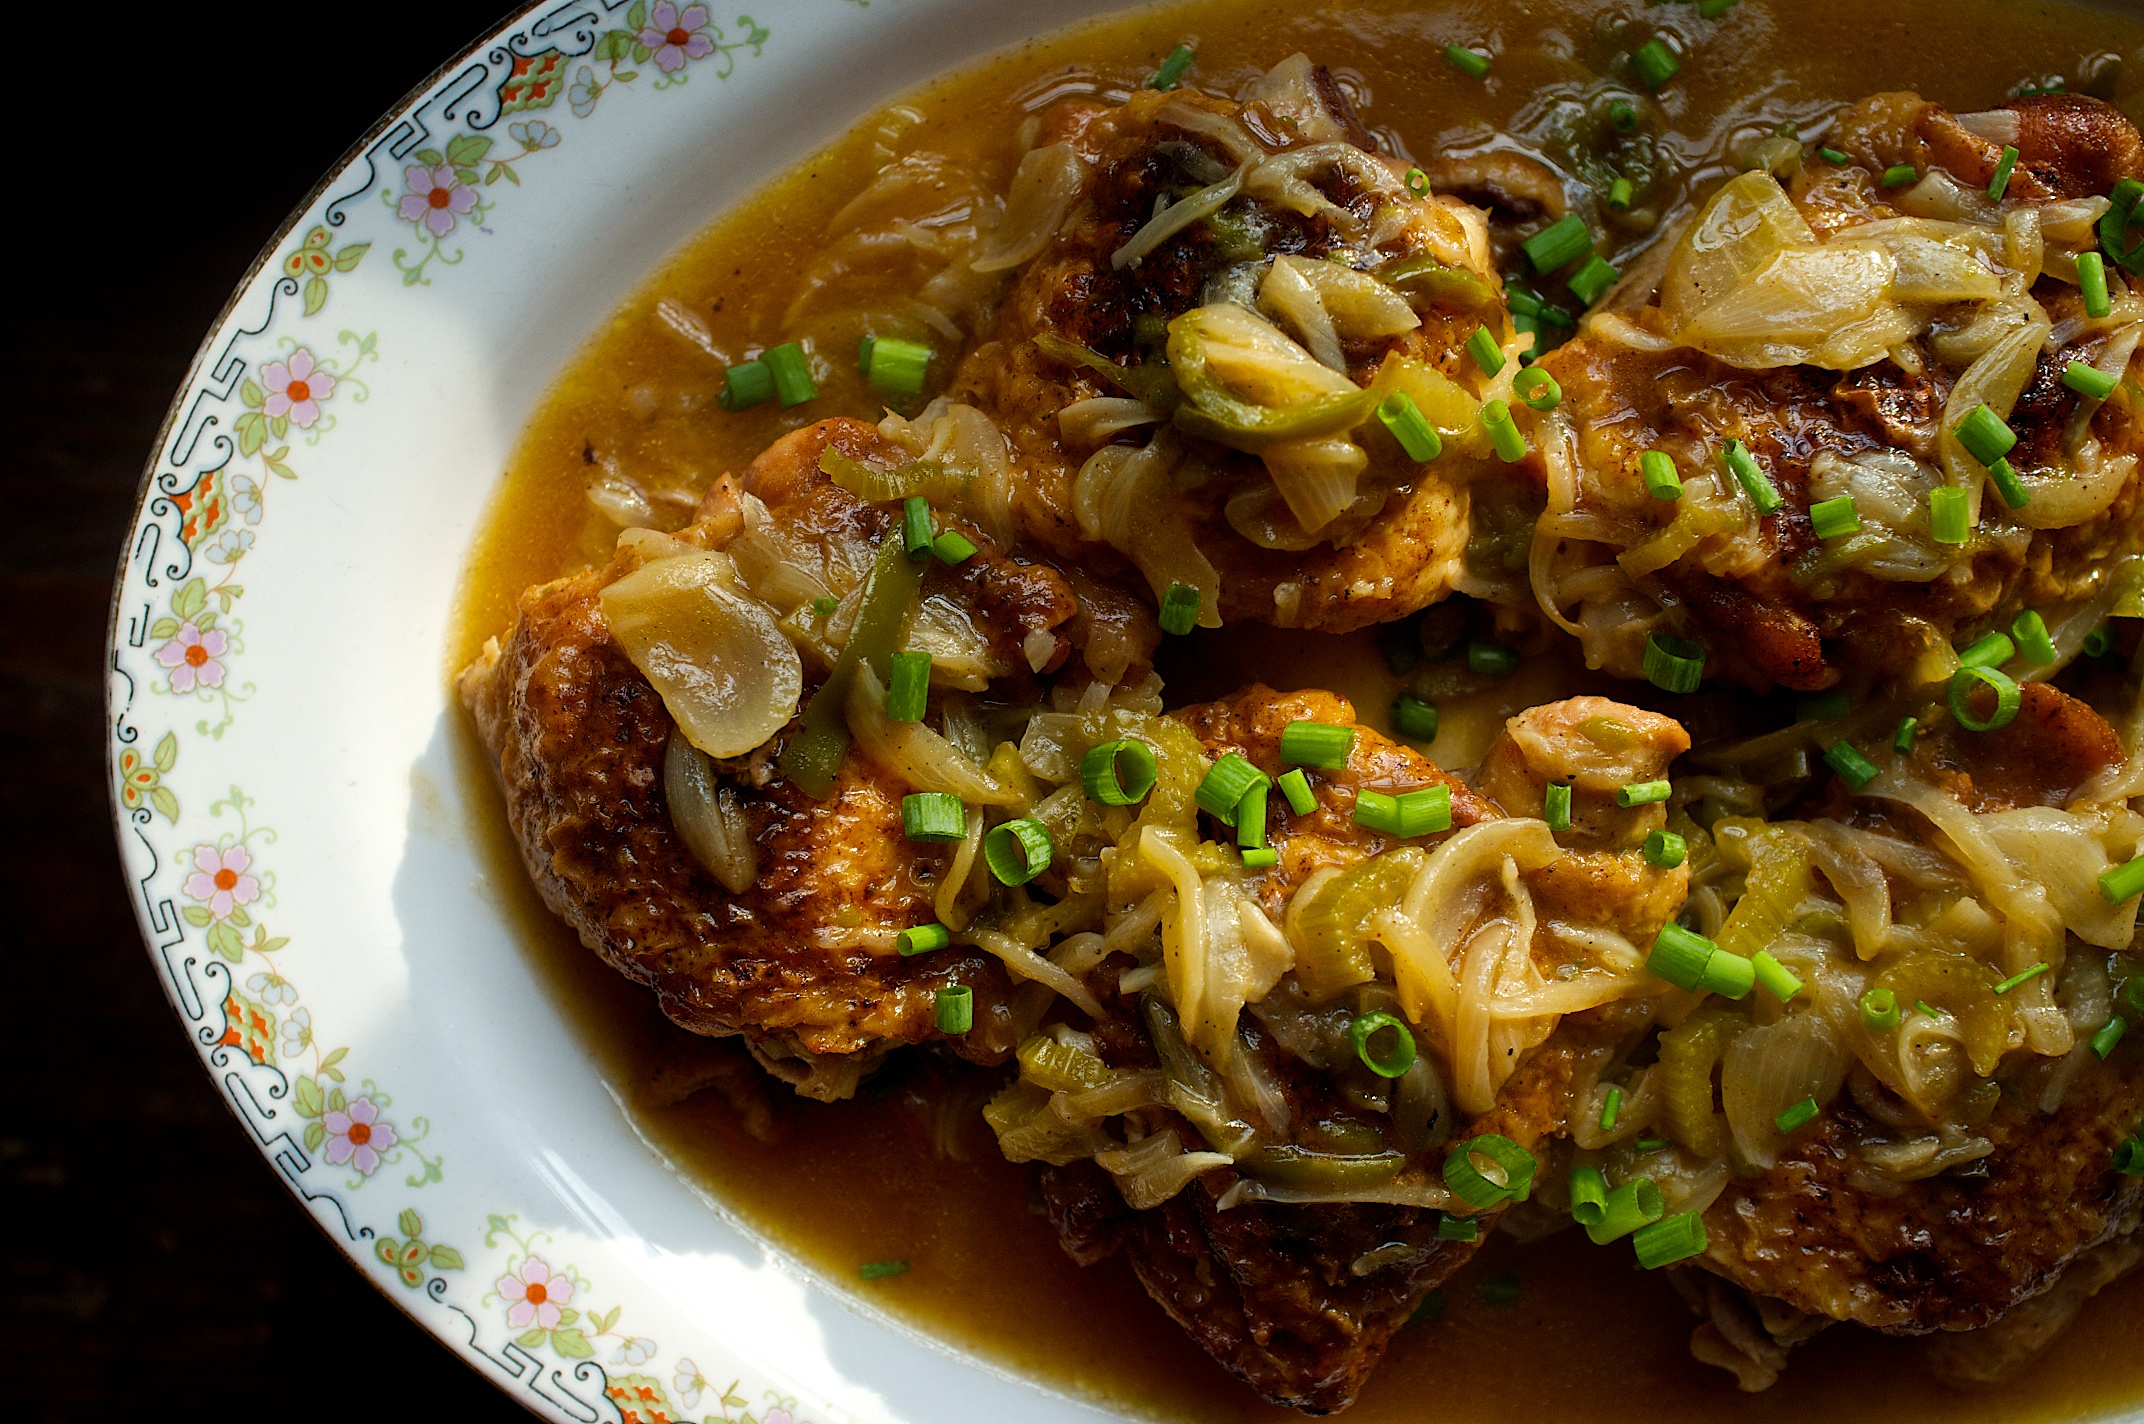 Serves 4
Smothered chicken makes for a comforting Sunday dinner. It’s the kind of dinner that will bring the kids back on Sundays after they have left home to be on their own. The combination of peppers, onions and celery (known as the trinity in cooking) is very warming and homey.
It is a great dish to serve over boiled rice and if you were to serve green beans and biscuits with it you would, or at least I would, be in heaven.
Cost to make this dinner entree:
- package of 8 chicken thighs $4.83
- 1 bunch of celery $1.29
- 2 onions .74 cents
- 1 head of garlic .49 cents
- 1 bell pepper $1.00
- Loose cost of vegetable oil, spices, salt and flour $1.00
- Total cost to make the dinner: $9.35
For the spice mix:
2 tablespoons paprika
1 teaspoon garlic powder
1/2 teaspoon black pepper
For the chicken:
6 to 8 bone-in skin-on chicken thighs
2 cups yellow onions, julienned
3/4 cups green bell peppers, julienned
3/4 cups celery, julienned
water
kosher salt
fresh ground black pepper
1/4 cup green onions, chopped
2 1/2 tablespoons flour
vegetable oil
2 garlic cloves, peeled and minced
1. Combine all the spice ingredients in a small bowl. Season the chicken thighs on all sides with salt and then with the spice mixture. You may or may not have extra spice depending on how heavy your hand is and whether or not you season 6 or 8 thighs.
2. Place a heavy, large sauté pan over medium high heat. Add enough oil to the pan to easily coat the bottom completely. When it is hot add the thighs skin side down and brown them deeply. Once they are brown do the same to the other side.
3. Remove the thighs to a plate. Add the onions, bell pepper and celery to the pan. Season them with salt and pepper. If the pan is to hot turn down the heat and cook down the vegetables until they are brown and soft. Add the flour and sauté everything for a bit longer to cook out the flour flavor.
4. Add the garlic cloves and give the veggies a stir. Add the chicken thighs back to the pan and add enough water to cover the thighs by three quarters. The crispy tops should just be peeking out of the gravy. Add all but a tablespoon of the green onions to the sauce.
5. When the gravy comes to a boil reduce the heat and simmer until the chicken is cooked through and tender, this should take about thirty minutes. Season the gravy, stir and taste.
6. If the gravy is reducing to fast and getting to thick add more water and stir. If you added more water bring the sauce to a boil and serve.
Saving Grace Biscuits

Back when I thought I could eat gluten I was a biscuit hound. It was nothing for me to scarf down two or three. I have been known to forgo the rest of dinner for a good biscuit. I always considered myself a connoisseur, from angel biscuits to crescents or buttermilk to sweet potato I think I have made them all. Some of them were more fussy to make then others and all always in need of a light hand and a quick touch to keep them from being tough.
This biscuit is what I call a redneck biscuit and I call them this with fondness. They are a working mom’s weeknight biscuit. They come together quickly and without worry and they lack nothing other then fussiness. There is nothing in the instructions about overworking the dough, you don’t need to look for a cornmeal texture in the flour, there is nothing about spacing the biscuits perfectly or about flakiness or making sure you cut the edges cleanly for a good rise. No they are pretty much cream, add the liquid, stir and scoop.
They are inspired by Shirley Coriher’s Touch-of-Grace biscuits which I started making just before I found out I couldn’t eat gluten. They are the kind of biscuits that are gooey in the middle, they aren’t layered but are tender and airy. They are the kind of biscuit you might find at a really good diner. You can imagine this old dogs disappointment when I had to stop eating them. The thing is about 4 months ago I started playing around with and making gluten-free biscuits. While I found many I liked, I went nuts for none.
Then I got a burr up my craw and decided I wanted to make Shirley’s biscuits but gluten-free. It wasn’t all that tough, or I should say, maybe I got lucky. I found a recipe on Bob’s Redmill and, using it as a base and replicating what I knew about Mrs. Coriher’s biscuits, well, low and behold I struck biscuit gold.
In all honesty I like the flavor of this biscuit better then the original. The sorghum flour has such a great flavor. One of the big bonus’s if there are any left, which is a rarity around here, is they hold well into the next day or two.
Saving Grace Biscuits (inspired by Shirley Coriher’s Touch-of-Grace Biscuits)
1 cup white sorghum flour
1/2 cup potato starch
1/2 cup tapioca flour
1 teaspoon sugar
1 1/2 tablespoons baking powder
1 teaspoon kosher salt
1/2 cup unsalted butter
1 1/2 to 1 3/4 cups buttermilk
1. Heat the oven to 450˚F.
2. In a bowl combine the dry ingredients.
3. Cube the butter and add it to the flour. Using your hands work it into the flour until there are no big hunks of butter left.
4. Add the buttermilk and stir with a wooden spoon, The batter will be very loose, it should barely hold its shape before slowly begins spreading.
5. Liberally butter an eight inch cake pan. Using a half cup ice cream scoop, scoop up a ball of dough and turn it out into the pan close to the edge. Continue turning out biscuits working your way around the outside first leaving room for the seventh and final biscuit in the middle.
6. Bake the biscuits for 23 minutes or until browned on top. When you remove them from the oven they will drop. That is OK.
7. Serve with lots of butter.
Good Food on a Tight Budget

Click on the pamphlet to get the PDF
I watched a movie about hunger a few days ago and I saw a report on kids, families really, going hungry in America. It caused me concern, “this is America after all,” I thought.
I got online and started to look around. I found this wonderful pamphlet to help anyone who wants to reduce their food costs and eat in a healthier fashion. I like this pamphlet a lot. So much so I started talking to my wife about it.
The pamphlet is put together by the Environmental Working Group in collaboration with Cooking Matters. I don’t know much about any of these groups but I like what they are doing here, which is trying to help.
As a chef this is what I can do too, is try to help. I plan to post recipes that fall within the budget put forth by EWG. They will be delicious and, for the most part, good for you. I say for the most part because I am sure there is someone, some group, out there who will disagree with me and that is fine. I want to pass along as much knowledge as I can in an attempt to help people make informed decisions about their kitchen.
Mostly though, the goal is to provide recipes for low cost good eats.
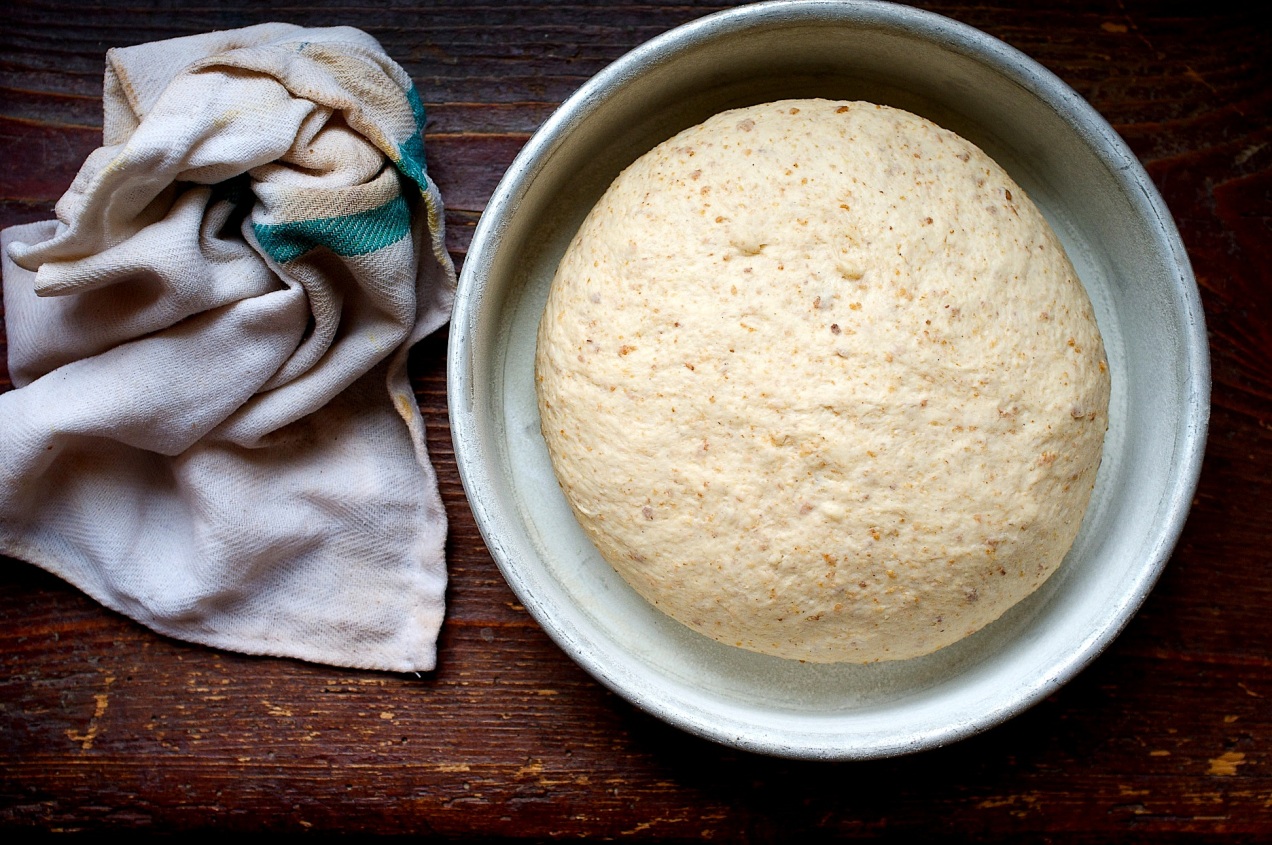
Daily Bread
I like this bread because it uses leftovers. What do I mean by leftovers? My girls don’t like heels and crusts. Sure I could force them to eat them, could throw them out or I could trim them off and save them for other uses. I could make bread crumbs or, for instance, I could make this loaf of bread.
It is pretty amazing when you think about it. Bread never wears out, you can use the same crumbs again and again in this loaf and its structure is always the same.
As long as you dry it properly, use breads without seeds, fruit or nuts, the uses of bread become endless but I really like the fact that I am not wasting anything.
It takes time to learn how to make a good loaf of bread. The good news is if it doesn’t work out perfectly the loaf is more then likely still really delicious and good to eat. So jump in and start practicing.
Recipe based on a recipe by Peter Reinhart in his book Brother Juniper’s Bread.
- King Arthur Bread Flour $3.98 for a 5 pound bag = 28 cents per cup
- 1 packet instant dry yeast = 24 cents
- total cost to make this loaf of bread = $1.00
Makes one 2 pound loaf
2 cups dried stale old bread crumbs
2 cups water
1 .25 oz. packet instant dry yeast or 1 tablespoon
1 tablespoon kosher salt
2 1/2 cups bread flour
1. In a large mixing bowl combine the bread crumbs with to cups of water. Let the bread soak up all the water. This will take about an hour and you can let it soak for 4 hours. Make the bread fit your schedule.
2. Sprinkle the yeast over the top and then stir it around and into the damp bread crumbs. Let is sit for 2 to 5 minutes to hydrate the yeast. Add the salt and bread flour.
3. Using a heavy duty wooden spoon mix the flour and crumbs until it forms a ball. Dump the ball onto the counter and start kneading. Knead the dough until it becomes smooth and elastic. This will take at least 5 minutes.
4. Form the dough into a ball and put it back into the mixing bowl. Cover it with a damp towel and set the bowl in a warm draft free place. The back of the stove is usually good.
5. Set a timer for 1 hour. At the end of the hour the dough should have doubled in size. If not let it proof a little longer. Remove the dough to the counter and knead it to degas it then shape it into a ball.
6. Place the dough into a 8 inch cake pan that has been oiled and dusted with flour. To dust the pan smear a small amount of oil onto all interior surfaces of the pan. Add a tablespoon of flour and shake it around and tilt the pan to get the flour up the sides. This will keep the bread from sticking to the pan. Cover the bread and put it back in the warm place you had it.
7. Let the bread rise until it is peaking over the top of the pan by an inch. This will take 30 to 40 minutes. About 15 minutes into the final rise turn on the oven to 375˚ F.
8. You can dust the top of the loaf with flour, cut a slash in it or just put it in the oven and bake it for 50 minutes. Remove it from the oven then remove it from the pan to a cookie rack. Let the bread cool completely. Slice and serve.

I spent the better part my early years learning to capture moments on film and to see as a photojournalist. Now I can’t escape seeing this way and I don’t want to either. The reality is I enjoy it. I can see things in a way most people can’t. I have a different view, my own view, of the world. One that comes in fractions of a second.
It may seem odd but I set my cameras down and walked away from photojournalism almost twenty years ago, nevertheless throughout those camera-less years I continue to see and continue to record. Now I do it with words.
On a daily basis decisive moments are captured and processed with my eyes. As a photographer, I continued to capture the moments. As a writer, however, I let the moments dissipate and simmer and roll around in my head.

Over the years, decisive moments switched from concrete images or snippets to ethereal feelings that turn and juxtapose the lives and scenes in front of me into lead sentences and paragraphs. I found myself using words to capture what is suggested, but often unseen, in decisive moments
Words allow me to capture the things photographs can’t. Actually it is more like the words complete the photographs I always want to take. I am pretty sure this is the reason I gave up defining myself only as a photographer. No matter how hard I tried I could never complete the story as I saw it because the pictures I was seeing didn’t exist and couldn’t exist without words.
When these two parts finally came together the images I was seeing could finally be captured. I could get at the whole story and tell it in a way that felt complete. continue reading Continue reading
Soul Mates
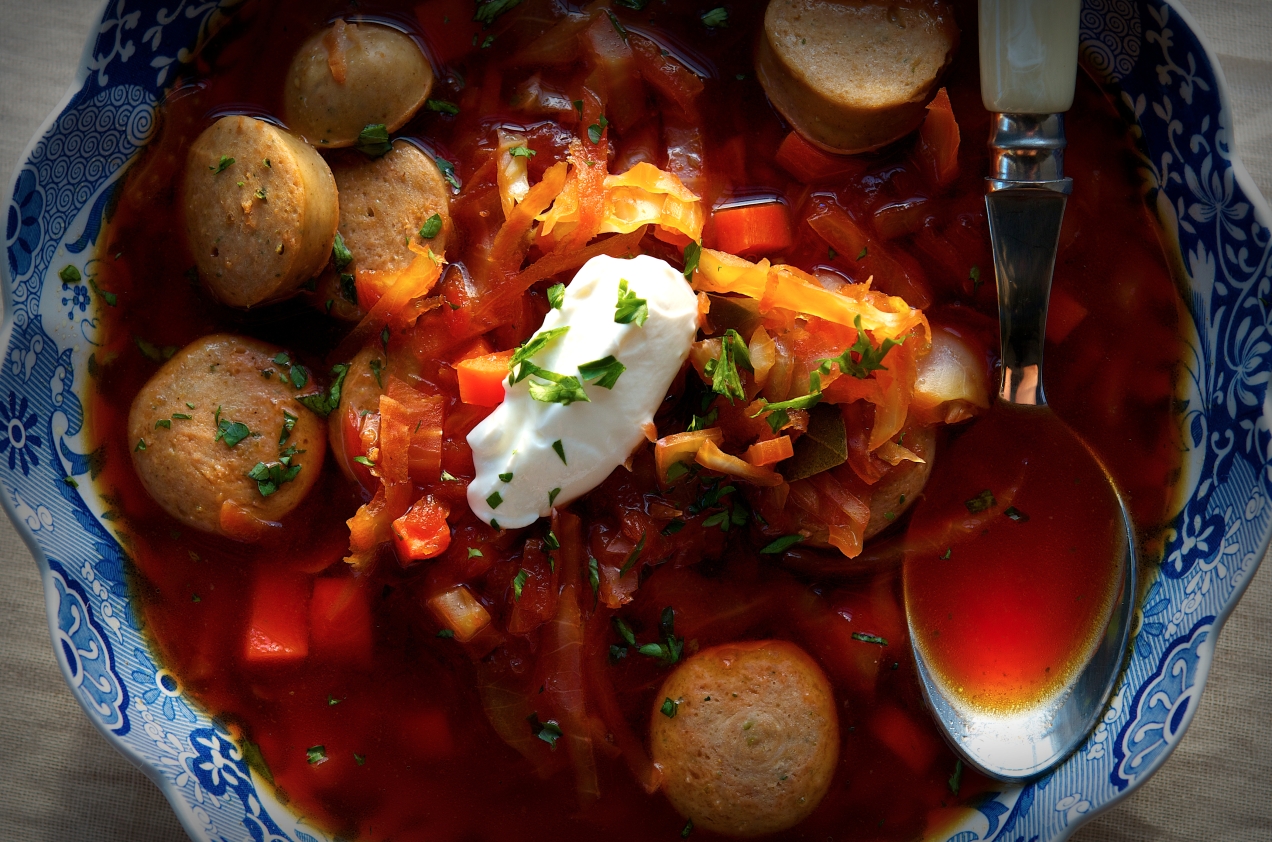
Karilean Borscht with Resolution
 It is shortly after all the present opening hullabaloo, when I look up from cutting peanut butter and jelly sandwiches in half, that I see the look on Vivian’s face. I catch a glimpse of disappointment in her eyes and it is very clearly the look of self pity caused by not getting everything she wants for Christmas.
I know exactly how she feels. I remember the first time I felt the same way. I also remember the shame I felt for being selfish and while I know which feeling is right at her young age, I am still not sure which feeling is worse.
Oddly, I guess with age I have come to have similar emotions about New Year’s.
For instance, each year when I take stock of myself in the time between Christmas and January 1st, I am always looking back in disappointment at the things I wanted to happen but didn’t, the things that went wrong, or the things that I will have to deny myself to make the coming year presumably better. It seems silly.
After all, it doesn’t take a rocket scientist to point out to me that I am a very blessed person, and really, I want for nothing. Well, I suppose I could stand to lose a few pounds, and proudly I have lost a lot this year, but a few more wouldn’t hurt. Even so, I don’t really need to deny myself. I just need to eat differently. Continue reading
Laotian Beef Salad (Larb)
 I really enjoy making and eating the foods of Southeast Asia. I make trips to the Asian grocery and buy up all kinds of different produce that aren’t found in my garden or at the local grocer. I don’t really drive but an extra five minutes to get there, the groceries cost less which makes up for the extra in gas and I usually find some gem of a new product that I have never eaten, cooked with or sometimes never even seen. It is always an adventure. This time I happened in a day or two before the Chinese New Year and in honor of the holiday they gave Lynnie a box of the funkiest most savory cookies ever. I couldn’t eat them but she loved them and this from the little girl who finds Chinese food sour.
I did something different here, something I wouldn’t normally do. Usually I would get the pan smoking hot and sear the protein but I didn’t get the wok hot enough and when meat hit metal it cooled down right away. It became a happy mistake. Instead of panicking I just let it sit. I watched as all the beef juice bubbled up around the meat and then slowly subsided until it was gone. Then the skirt steak caramelized really well and the fond, the sticky delicious stuff on the bottom of the pan, added tons of beefy flavor to the final dish.
It’s a great dish to serve with rice and a couple of nice vegetables.
Serves 4
canola oil
1 pound 2 ounces skirt steak, sliced then minced
6 garlic cloves, minced (about 2 tablespoons)
1 1/2 tablespoons lemon grass, minced
1/2 cup shallots, julienned
3 red Thai bird chile, minced
1 tablespoon fish sauce
1 tablespoon soy sauce
2 tablespoons water
1/3 cup mint leaves, torn
1/3 cup cilantro leaves, torn
1/3 cup green onion, thinly sliced
1/4 cup peanuts, smashed
1. Heat a large wok or skillet over medium high heat. Add a tablespoon of oil to the pan and when it is warm add the minced skirt steak, garlic, lemon grass and shallot. It should cool the pan down and as it cooks liquid should release from the protein. Let it gently bubble while you occasionally stir. As the juice begins to evaporate stop stirring. Patiently wait for the meat to brown and the fond to build on the bottom of the wok or pan.
2. Add the fish sauce, soy and water. Stir the larb to combine and until almost all the liquid is absorbed. Using a spoon taste the larb and add a little salt if necessary. Stir then remove the pan from the heat.
3. Once the steak isn’t so hot but still warm stir in half the chili, mint, cilantro and green onion. Plate up the salad and then top with the remaining herbs and the peanuts. Serve.


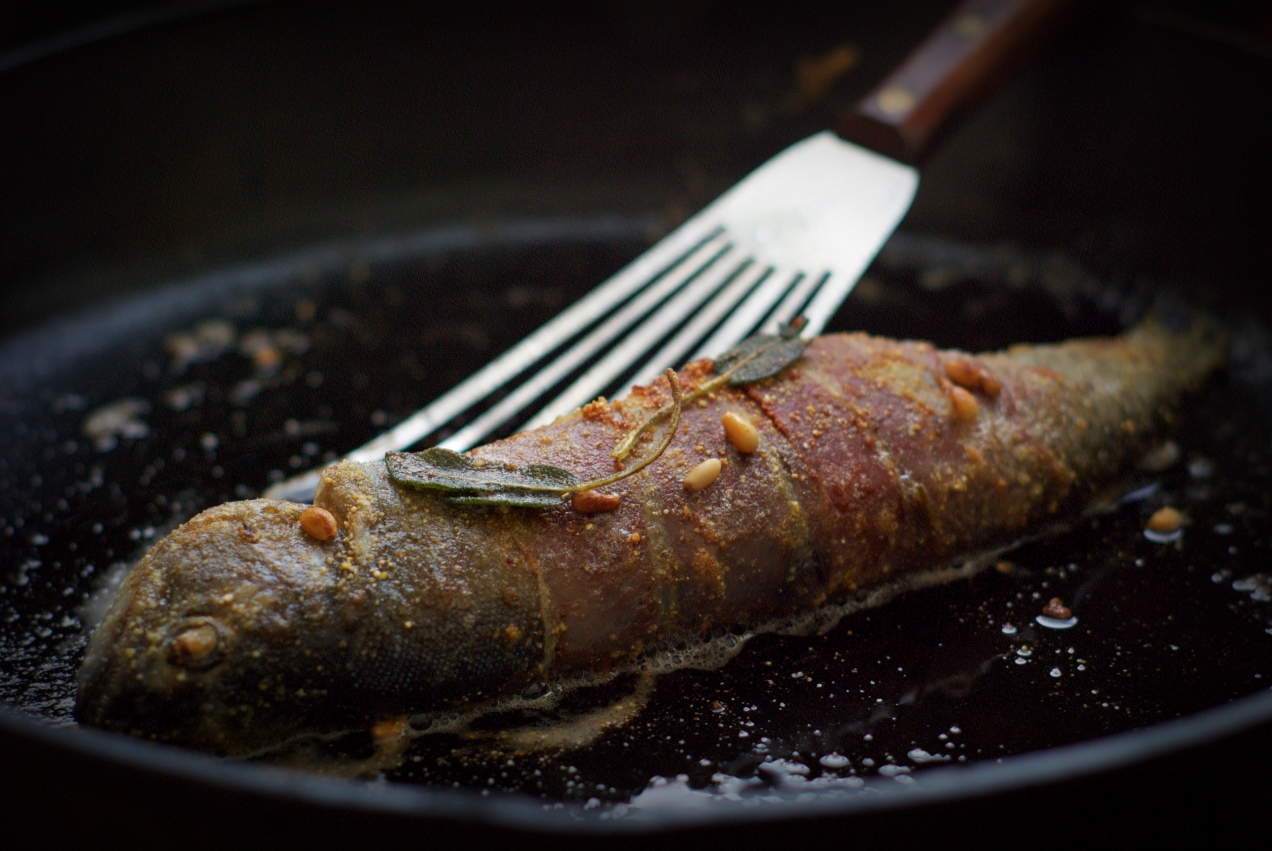
Pan Fried Trout with Prosciutto, Crispy Sage and Pine Nuts
There is something special about trout that goes beyond just eating. They are one of only fish that have a whole culture built around them. They are a freshwater game fish, they are skittish and will jump at their own shadow. They only thrive in cold water and need lots of oxygen provided by a stiff current. When they feed they feed only on what is abundant at the moment. Wild trout make for difficult prey.
In the high altitude lakes of the Grand Tetons you are likely to catch cutthroats the size of your hand while watching the sunrise in, hands down, one of the most beautiful places in the world. When you get back to camp you cook them up for breakfast with pancakes and eggs.
On the other hand you might spend the afternoon in the Catskills on the banks of the Beaverkill reading Hemingway or Fitzgerald. Legendary fisherman like Lee Wulff and Lefty Kreh coming to mind as you are thinking about the evening fish and having high hopes for a Green Drake hatch. You might even doze off for an hour.
Then just as the evening hours begin you pull on your waders and out into the rushing stream you go. It doesn’t seem like hard work from the shore but standing in rushing water up to your midsection takes effort. You wrestle the current to get to the spot you want. You look down at the water to see if there are any bugs floating by that might give you an indication of what the fish are eating tonight. You light a cigar and smile.
You see the transparent wings of a pale evening dun float by. You reach into your fly box and pull out a number 20. The fly you saw go by didn’t seem any bigger. You tie the fly to the tippet. You drop the fly into the water and strip out some line.
You draw back the rod in a gentle sweep and the fly draws past your ear and then you rocket it forward aiming upstream of an eddie that lies just behind a big rock. You watch as the fly floats downstream, you gather excess line, and as it passes the eddie you hope you hear and see a strike as a rainbow trout breaks the surface grabbing your fly. If you had a good night and matched the hatch you will be in camp cooking up a couple of nice rainbows for supper but only after a nice Scotch.
Serves 2
2 trout, boneless 12 to 16 oz.
4 pieces prosciutto, thinly sliced
a handful of sage leaves
1/4 cup grape seed oil
1 tablespoon of butter
1/4 cup pine nuts
kosher salt and fresh ground white pepper
cornmeal for dredging
1. Season the inside of the trout with salt and pepper. Carefully lay out two pieces of prosciutto letting the long side overlap by 1/4 inch. Lay a trout across the short sides of the prosciutto and wrap it in the prosciutto.
2. Heat a 14 inch skillet over medium high heat. Dredge the trout in cornmeal and shake off any excess. Add the oil to the pan. Sprinkle in the half of the sage leaves and let them deep fry. when they have crisped remove them from the pan.
3. Gently lay the trout into the pan, reduce the heat to medium and cook until the pancetta is crisp and caramelized, about 5 minutes. Gently turn the fish cooking the other side. It will take about ten minutes total for the fish to cook through so be patient and adjust the heat as necessary.
4. When the fish are done remove them to their plates. Drain the oil and put the pan back on the heat. Add the butter, the pine nuts and the remaining sage leaves. When the nuts have toasted spoon some of the pine nut sage butter over the top of the fish. Serve
Dear Mr. Pepin,
I made a recipe of yours last night. It wasn’t the first time I have made this recipe, in fact, I have made it several times but it has been far to long since it has graced our table, rest assured, this will not happen again. Just in case I haven’t been clear it was beyond delicious as always.
I remember the night I watched you make the gratin on TV. It must have been about three in the morning or somewhere around there. I was still working in the restaurant business and it had been a long night on the line. Now I was home, my wife fast asleep in bed, and I out in the living room and on the couch with a beer in my hand winding down. I was flipping through a food magazine and doing the same with the channels on TV.

Jacques Pepin’s Shrimp Gratin
At the time I had not seen but a couple shows in any of your many series because our local PBS station didn’t carry them or they were on at times when I wasn’t around. But here you were in the wee hours of the morning in front of the camera, your heavy French accent, broad smile, all as unmistakeable as the sparkle in your eyes. You caught my attention right away.
I watched as you peeled shrimp and even went so far as to show me how to pinch the tails between my thumb and forefinger, then wiggle, and finally you gently pulled and I watched as all the tail meat slipped out of its casing without any waste. Then you sliced a handful of the freshest white mushrooms with such speed and accuracy it could have been a magic trick. You wasted no time doing the same with a couple of green onions. Continue reading
Chicken, Sausage and Red Pepper Paella
 Paella to me is the ultimate one pot meal. It also is the time of year where I am not ready for a stew but want something more substantial than the usual summer fare. Paella is a great answer. Although paella is considered Spanish I think this one is more Mediterranean. I use Italian sausages but fresh chorizo would be good, the important part is that the sausage isn’t dry cured or it would just be drier in this case. I also use arborio rice, but you could use the Spanish version of this as well.
SERVES 4-6
2 bell peppers
1/4 cup extra virgin olive oil
2 chicken legs, seasoned with salt and pepper
2 Italian sausages
2 chicken thighs, seasoned with salt and pepper
1 onion, julienned
1 fennel bulb, tops trimmed, core removed and sliced very thinly
1/4 cup garlic, peeled and thinly sliced
2 bay leaves
3 1/2 cups warm water
pinch of saffron, crumbled
3 Roma tomatoes, cut in half from top to bottom, and grated, large whole of a box grater, leaving the skin behind
1/4 cup dry white wine
2 cups arborio rice
1 1/2 teaspoon aleppo pepper
1 tablespoon flat leaf parsley, minced
2 tablespoons green onions, sliced into thin rings
kosher salt and fresh ground pepper
- Sometime during the day or when ever you have time, turn a gas burner to high. If you don’t have a gas burner turn your oven to broil and place a rack at the highest level you can. Char the peppers, top, bottom and all on sides. The idea is to char or blacken the skin without cooking the pepper through.
- Place the peppers into a container with a lid. Set aside for at least 20 minutes. Crumble the saffron into the warm water.
- If you roasted them properly the skins will easily peel right off with out running them under water.
- Peel, seed and core the peppers and then julienne them into thick strips.
- Preheat the oven to 400 degrees. Place a 16 inch paella pan or a 14 inch saute pan over medium high heat. Add the olive oil and once it is hot add the chicken, skin side down, and then the sausages. Brown them thoroughly and then remove them to a plate. You do not want them to cook all the way through. They will finish cooking in the oven so you just want to brown them.
- Turn the heat to medium and add the onion and fennel. Season them with healthy pinch of salt and pepper. Cook until they start to soften. Add the garlic, aleppo pepper and bay leaves, once fragrant add the white wine and grated tomatoes and cook for a minute or two letting the alcohol burn off. Add the saffron water and rice. Season again with a healthy pinch salt and pepper. Gently shake the pan to level out the rice. Place the chicken into the pan and arrange the red peppers around the chicken.
- Bring to a boil, place the pan into the oven and set the timer for 15 minutes. Cut the sausages in half. Once the timer goes off add the sausages and place the pan back into the oven. Set the timer for 10 minutes.
- Once the timer goes off remove the pan from the oven and place a clean towel over the top. Let the dish rest for five minutes, remove the towel and garnish with parsley and green onions, then serve.

Reviewing a website isn’t something I would normally do. In this case it isn’t the website but a feature on the site itself. You all know I call Food52 home(that is a full disclosure). I would give the site itself a triple A rating but my aim here is to call attention to a feature within the site, Genius Recipes.
If I were new to the kitchen, or an inexperienced cook, even a seasoned pro this is where I would go to get a bag full of genius recipes. It is where senior editor Kristen Miglore will make you feel and look good so your dinner guest will thank you and your children will brag about you.
I can assure you once you start cooking with these recipes you will find yourself going back time and time again because they work, are dependable and because the recipes are ridiculously delicious.
The real bonus here is they are minimally invasive. What that means is there are only a few steps and ingredients involved in getting the dish to the table. What’s the take-away? In short, it means there is no excuse not to make these recipes throughout the week. And even if you can’t the Wednesday publishing of the posts allows you to collect the ingredients and prep the recipe for the weekend.
The author behind the feature, Kristen Miglore, does all the hard work for you. Whats not to love about that? Fortunately for her readers she brings us a five star recipe each week and then sets it up for success. She tests the recipes and navigates you effortlessly through the steps as if you were following the blue dot on Google maps to a dive restaurant. People, she gives you the keys to the Mercedes, I mean how awesome is that.
So you have a great writer giving you the low down on why this recipe is so good with her fast paced prose, sprinkled with a pinch of humor and it’s always concise. If asked she will be humble and give all the credit to the community members who pass along recipes but in the end it is Miglore who spots the winners and it is not always easy to recognize great recipes. She has mad skills is all I can say.
I will vouch for any of these recipes and I can say many have fallen into the weeknight rotation of family favorites. The Al Forno Penne with Tomato Cream and 5 Cheeses is one of my and the girls favorites. Nobu’s Fried Asparagus with Miso Dressing became a regular this summer substituting in yard long beans, walnuts and shallots. In fact, I can’t wait to plant yard longs in the garden again just to make this one recipe. The Domino Potatoes scored big when the juices from the resting lamb chops co-mingled into the buttery potatoes to create one of the easiest best potato sides ever. Most recently I have been making Momofuku’s Roasted Brussels Sprouts with Fish Sauce Vinaigrette and alternating in an oyster sauce. I have also deep fried the sprouts and wow, if you care to take the extra step, do.
Next up will be Nigella Lawson’s Dense Chocolate Loaf Cake. I am making two of them, one for home and one for the school bake sale and while I am sifting the flour I will be thanking Kristen for sifting through all these recipes and pointing me in the direction of the truly genius ones.
Need more genius? Click here.
Deep Fried Brussels Sprouts with Oyster Sauce
1 pound Brussels Sprouts, trimmed and halved
vegetable oil for frying
2 1/2 tablesoons oyster sauce
1 1/2 tablespoons tamari soy sauce
1 tablespoon water
1 1/2 teaspoons fresh ginger, very finely minced
1 1/2 teaspoons garlic, very finely minced
1 tablespoon green onions, minced
1 tsp honey
1. Combine the oyster sauce, soy, water, ginger, garlic, green onions and honey in a large mixing bowl. Whisk to combine it all. Set aside.
2 Add enough oil to a heavy bottomed 4 quart pot ( I used an enameled Dutch oven) to come no more then a third up the sides of the pot. Turn the heat to medium high.
3. Test the oil by dropping in a sprout leaf. There should be a pause, then, it should rapidly sizzle.
4. Add half of the Brussels sprouts carefully, they will bubble and pop, then add the rest of the sprouts. Fry until brown. Remove them from the oil to drain on a paper towel lined plate. Toss the sprouts with the oyster sauce and serve immediately.
 Sort of a cross between mush and sausage scrapple has been called many things, including “everything but the squeal.” In other words it gets a bad rap. If you look at the ingredients list below you will find, first and foremost, it is nitrite free, sugar free, and gluten free.
It is true when it comes to pig parts scrapple could be anything but the squeal but then that is up to the person making the dish. As with most charcuterie you are dealing with head to tail anyway so it is not a big jump to figure it is going to use pork liver. You don’t have to use pork liver but without it I am not sure you get the real gist of what is going on with the flavor and texture of scrapple. Generally after the liver the parts used are usually very flavorful cuts that need picked after being cooked and therefore wouldn’t normally be used except maybe in stews. Things like the cheeks or the snout. Pork ribs were used here because they are the most readily available to the general public.
Spicy, crispy, creamy and chock full of whole grain goodness. Give it a go and you won’t be disappointed.
Makes one 8 x 4 x 3 loaf
1 lb. meaty pork short ribs
6 oz. pork liver, if you can’t find it add more pork ribs
1 small carrot, peeled and sliced
2 green onions
1/4 cup yellow onion, chopped
4 cups water
2 teaspoons dried sage, toasted
1 teaspoon dried thyme
1 1/2 teaspoons fresh ground black pepper
1/2 cup cornmeal
1/3 cup buckwheat flour
a healthy pinch ground clove
kosher salt
1. Place the ribs, liver, carrot, green onions, and onion into a sauce pan where they will fit snuggly. Cover with the water and add pinch of salt.
2. Bring the liquid to a boil and reduce the heat to a simmer. Skim any foam that rises to the surface.
3. Simmer, covered, until the ribs are fall apart tender. Probably 2 hours, maybe 3.
4. Remove the meat to a tray. Strain the stock and measure it out. Wash the sauce pan. You will need 1 1/4 cup of liquid. If you have more than 1 1/4 cup put the broth back into the sauce pan reduce the liquid over high heat. If you have less add water to make 1 1/4 cup.
5. Pick the meat from the rib bones. Place half the rib meat and the liver into a food processor and grind it till it is finely chopped. Chop the rest of the rib meat with a knife so it is coarse but not big chunks.
6. Add 1 teaspoon of kosher salt, the broth and the spices to the sauce pan and bring it to a boil. Reduce the heat and while whisking add the cornmeal and buckwheat flour. Whisk until smooth.
7. The scrapple will thicken a lot at this point. Add the meat and mix it in while still cooking the scrapple. If it is really stiff you may want to add a tablespoon of water but don’t make it to thin.
8. Dump the mixture into a greased 8 x 4 x 3 loaf pan and smooth down the top with a rubber spatula. Push on it firmly with the spatula to get rid of air bubbles.
9. Place a piece of plastic wrap right on top of the scrapple and then wrap the pan. Place the scrapple in the fridge overnight.
10. When you are ready to fry it cut slices and either dredge it in cornmeal or flour. Shake off the excess and saute it in butter over medium to medium high heat until the exterior is crispy and brown on both side and the interior is hot. Serve
Note: excess scrapple can be frozen but when you go to fry it it won’t stay together in a nice block. It will not taste any different the shape is the only thing different.
Scrapple
Obviously we are proud of our accomplishment. We want to share it with you but we also want to give you a little inside peek at what is between the covers.
What is FOODQUARTRERLY? Honestly, if I were to put words to it, and this shows my age, it is what in old school rock-n-roll would have been called a “concept” album. It is a larger look at a particular style of food that has captured my interest. The content, to me, doesn’t lend
itself to a blog and I felt it should be presented in a longer form. This issue focuses on the American farm, the next will be on Summertime Rites of Passage and from there it is all hush hush because we don’t want to spoil it.
Inside you will find stunning photography, great stories and fantastic recipes. We like to keep with our motto. I hope you enjoy it.


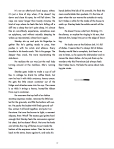


The difference between Edna Lewis’ book The Taste of Country Cooking and countless other cookbooks is she truly celebrates food. Not only is it a celebration but it is the gospel of farm to table eating, a hymn of fresh, great tasting, whole food that should be sung loudly as the new testament of eating seasonally. In short, it just might save your soul and at the very least it is extremely soul satisfying.
What drew me in the first time I opened the book was a breakfast menu that simply read Fall Breakfast and the second item listed in the menu was smothered rabbit. As if this wasn’t enough the first time I made Miss Lewis’s pear preserves I became teary eyed because it reminded me of the taste of a long-forgotten-that-was-now-brought-to-mind memory of my grandmother and the pear preserves she made.
When you realize this was published in 1976 it becomes apparent this is a last bastion to how rural America once ate. It isn’t the French influenced food made in a California restaurant kitchen that now stands as the talisman of sustainable eating, but rather, it is 100% American food made with ingredients had on hand and in season. It was written at a time when women wanted out of the kitchen instead of in and the burger joint was still a treat but unfortunately fast becoming a standard.
The book is not a retrospective of days past and food that is dated by out of style trends but it is a classic that is as current and in touch today, maybe even more so, as it was when written.
Miss Lewis does nothing short of pen a rural American classic that treats food with respect and knowledge of how to use the ingredients at hand and get the most out of them. There is nothing fussy about her food and there needn’t be because its simplicity and freshness is what makes it delicious.
In short if you care about sustainable local food you should get yourself a copy. It will fast become your how to manual.
This recipe is based loosely on Miss Lewis’s fried chicken recipe.
Bacon Fried Rabbit
Serves 4
2 fryer rabbits, cut into 6 to 8 pieces
1 piece of slab bacon, cut about 1/4 inch thick
2 cups flour, seasoned with 2 teaspoons black pepper, 1 teaspoon each of thyme and paprika, and 1 teaspoon of salt
buttermilk
peanut oil
kosher salt
1. Season the rabbit with salt and set it aside to let the salt dissolve into the meat.
2. In a large cast iron Dutch oven add enough oil to come up the side by no more than a third. Add the bacon.
3. Turn the heat to medium high and place your fry thermometer into the oil. Place the seasoned flour into a plastic bag with the rabbit. Toss the rabbit around to give it a good coating. Remove the pieces from the flour and let them soak a in the buttermilk. Remove each piece and let the excess drip off. Put the pieces back into the flour for their final coat. Don’t do this to far in advance or the coating gets brittle when fried.
4. When the temperature gets to 350F˚ remove the bacon if it is crispy and start frying the rabbit until golden brown and delicious. If you need to do this in batches do. Don’t over crowd the pot or you will have a greasy mess. So to do this heat the oven to 250˚F. As the rabbit pieces come out of the grease place them on a sheet tray fitted with a wire rack and keep them in the oven till all are done.
5. Serve.
Edna Lewis: The Taste of Country Cooking
Celery Root and Potato Gratin


For some it might have been potato or green bean, but for me my gratin affinity began at an early age with macaroni and cheese. You know, the good old-fashioned kind with real cheddar and whole milk thickened with roux or egg yolks. The one that is baked until the correct ratio of crispy, crunchy top to creamy interior is achieved. It taught me early on in life just how fantastic a great food friendship is.
Then, as I came of age, somehow the gratin became any one-dish. It is tuna with the thin crispy onion rings baked on top or Chicken Divan with broccoli, cheddar, and crumbled Ritz crackers providing the crunch. There is the obligatory cottage pie, as done in the Midwest, topped with both cheddar and mozzarella, then browned. For a while, it was a multitude of eggy breakfast casseroles, all, of course, involving more cheddar.
It became neat, rectangular, and predictable. It served twelve. It was a 9×13 casserole world and I was living it.
I was fortunate. I got out. I went to college, I travelled, I ate.
With knowledge and experience came diversity. And we all know diversity makes the world a much better place. So I developed friendships with lasagna, cassoulet, moussaka, and the timballo, to name a few.
Through it all, and even though we didn’t see each other as much, the gratin remained my favorite.
What I realized is the gratin is the kick-ass cousin who went to college too. And when you reconnect at the family reunion you realize you hang with them because they are exciting, interesting, and you can rest assured that there is more depth to them than a spiky haircut and a couple of tattoos. You get each other in that way only family can.
I like the gratin’s quirks. I like its fondness for juxtaposition. I know that, without pretense, Tournedos Rossini can snuggle in next to a celery root gratin as easily as can Irish bangers and, regardless of which side of the tracks it finds itself, the gratin brings comfort to the table, weight to the unbearable lightness of being.
The thing is, the gratin comes by these traits naturally. But I also know that the things that make it stand out — the creamy interior and crunchy top — don’t just happen, that the building of flavors takes effort, and that without a true friend’s presence the gratin’s popularity might wane.
But then that is what true friends do, you know, bring out the best in each other, and relish in each others’ success.
Note: I have been making this recipe for years. It is based on a recipe in the Dean and DeLuca cookbook by David Rosengarten. I have always found it to be a lovely holiday side dish. It goes well with prime rib roasts and roast chicken. It is versatile and can be made ahead to be put into the oven when needed and also is easily doubled.

Serves 6 to 8
2 pounds russet potatoes, peeled and cut into 1/2 inch chunks
2 pounds celery root, peeled and cut into 1/2 inch chunks
Kosher salt and freshly ground white pepper
3/4 cups heavy cream
1 tablespoon garlic, minced
1/4 cup unsalted butter
1/8 teaspoon saffron, crushed
1 1/2 cup gruyere or comte cheese, grated
1. If you plan to cook the gratin right away heat the oven to 400 degrees. Otherwise move on to step two.
2. Place the potatoes and celery root into separate large pots. Cover by two inches with cold water and add a teaspoon of salt to each pot. Bring the pots to a boil over medium heat. Cook the vegetables until tender.
3. Once the vegetables are tender, pour them out into a colander set in the sink. Drain the vegetables and let them sit for a minute or two steam-drying.
4. Rinse out one of the pots and add the cream, garlic, butter, and saffron. Bring the cream to a boil over medium heat. Add a hefty pinch of salt and a few grinds of white pepper. Add 1/2 cup of the cheese. Stir it into the warm liquid till melted.
5. Place the celery root and potatoes into a mixing bowl (or the other blanching pot if it is big enough) and smash the mix with a potato masher. Add a pinch of salt then add the cream and saffron mix. Stir to combine. Taste and adjust the seasoning, adding more salt or pepper if necessary.
6. Use a little softened butter to grease an 8-inch oval gratin (12 inches long). Spread the rustic chunky mash out into the pan. Smooth the top with a spatula, then crosshatch the top with the tines of a fork. Spread the remaining cheese out over the top.
7. Bake until the cheese is browned, about 30 minutes. Let the gratin cool for 5 minutes, then serve.
The Chess Game

There is never a good time for bad news, but there it is, right in front of me, plain as a shadow on a sunny day.
She breaks the news the minute she is in the car. I’m trying to get her in her car seat and the buckle hasn’t even clicked when she blurts it out:
“Dad, I think I want to leave home.”
I move back, still leaning over her. I try to get her freckled little face, her blue eyes, in focus. I don’t have my glasses on. The back of the front seat keeps me from moving back far enough, so I have to squint to see just how serious this statement, this bomb, is.
No hint of a smile; if she isn’t serious, she should win an Oscar.
“Ohhh-kay,” I say.
I walk around the car and wave to Mrs. Davis, Vivian’s kindergarten teacher. I drop my chin, looking down at the pavement and smile. She cast the hook and I’m going to run with it. It’s a good opportunity to connect. Lynnie is at preschool for a couple more hours, I’ve made Vivian’s favorite, chicken noodle, for lunch, and this plan to leave home will make for good conversation over soup and crackers.
It started out as an ordinary day. We all woke up at the usual time; no crying, no wrong-side-of-the-bed. They ate their pancakes, had their juice, and were dressed and ready to go to the bus stop without any of my deep-voiced “matching socks, girls” or you need your gym shoes today”–not even the requisite “if we miss the bus…” threat. I don’t need any of those stern words, meant to teach them that a sense of urgency is sometimes necessary, because for once they got ready before they started playing. Actually, I guess it started as an extraordinary day.
Now, on the way home from school, Vivian and I ride in silence. I’m trying to figure out where this “leaving home” thing is coming from, and she, I am sure, is using the silence as a negotiating tool, to bring her opponent to the table first. It is a short drive home, and I decide not to bring it up again. It’s up to Vivian.
As I open the screen door to the house, I get a good whiff of the chicken stock on the stove. I mention that I made chicken-noodle soup for lunch and ask if she would like a bowl.
“Oh, not now, Daddy–I need to pack,” she says.
“It’s hot and yummy, and you’re going to need your strength,” I reply. Besides, you have plenty of time.”
She consents to lunch. Continue reading
The iPad Stand

The iPad mini is great to have in the kitchen. Is that the cover for the next issue of FOODQUARTERLY?
I am not perfect and don’t plan to be anytime soon. I buy to much when I should do with less and I always seem to waste more then I think I should.
I try to do better.
I compost because I have a garden, I use glass cups instead of plastic, I don’t do tupperware, and my kids use real plates and glass (in 6 years I can count the broken dishes on one hand) and we are trying to go paperless.
As an old dog I understand my bad habits will probably not change, at least not much. I may become resolute for a week or two about some sort of waste and how we as a family should do better. Then it seems we slip back into our old routines. But we have made permanent changes.
One of those changes is to reuse or re-purpose as much as we can. I got an iPad mini for Christmas. I have so many charging cords already that a docking station seems pointless but I knew I needed something to keep it off the counter. After all, I plan to use it for iBook cookbooks and recipes and didn’t want it easily ruined when drenched by the first spill.
I went to the garage and luckily, in a light bulb moment, I spotted an old round wood cutting board. It was perfect. I got out the saw and cut off the end. Then I cut a slot wide enough for the iPad to fit with a little wiggle room so it would angle back for better reading and, voilá, I have a stand. It works so good I made three more and have them in different places around the house.
If you are handy, or someone in the family is, you can knock these out in minutes with a saw.
The wonderful thing is, since it is made from a wood cutting board, it fits in nicely with the decor of our house.
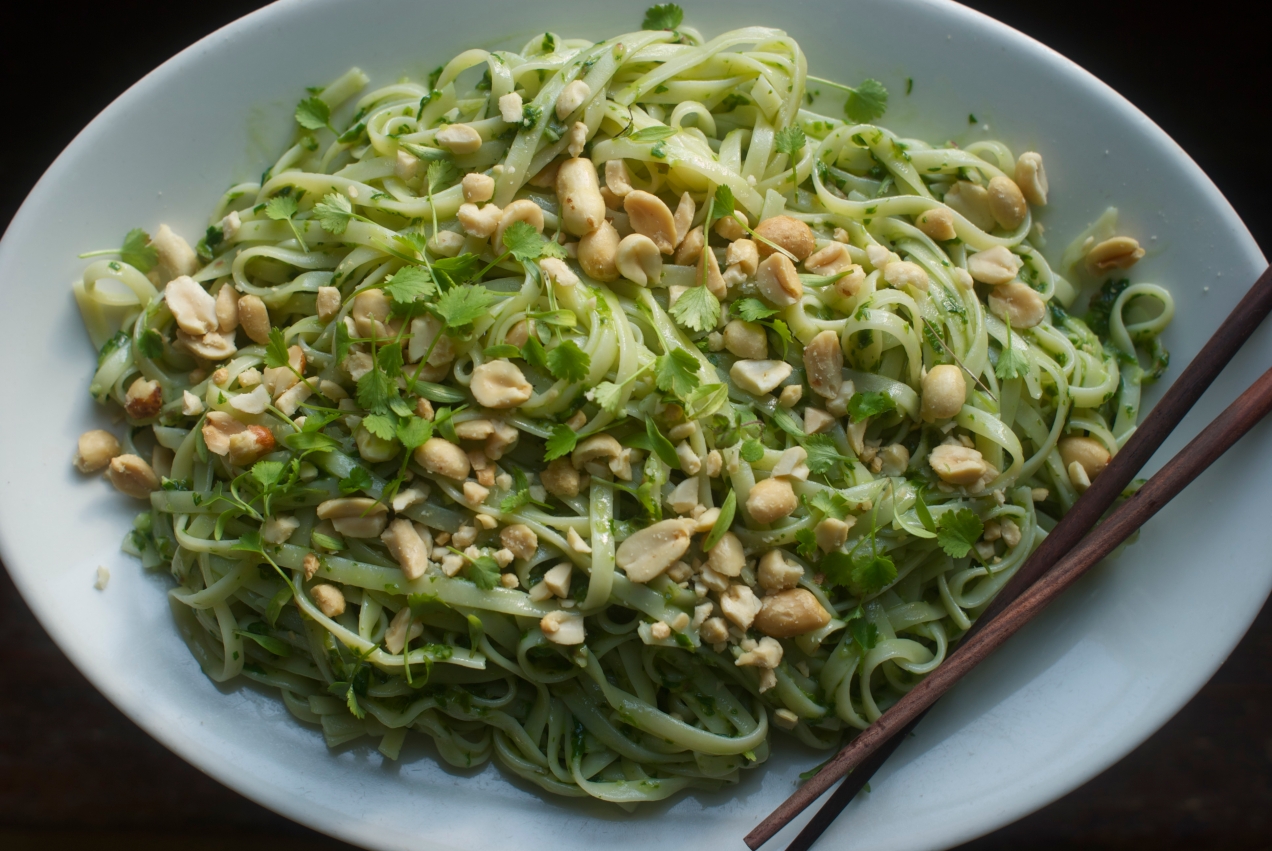
Thai Pesto with Brown Rice Noodles

This dish has a history that is connected to two other dishes. The two dishes were last summer favorites and they were a pesto recipe from Saveur magazine, Trofie al Pesto, that called for green beans and potatoes. It is, and still is, by far my favorite Italian pesto dish. The second dish comes from Momofuku, a favorite cookbook, and it is a recipe called Scallion Noodles.
What both dishes do is chop or process the pesto ingredients fine enough that when tossed with hot noodles they cook. One of the things I don’t like about most pesto dishes is the raw garlic taste that you carry with you the rest of the meal and maybe even the rest of the day. These two recipes have solved that problem.
The pesto created here carries on with the finely chopped tradition but is also packed with a little more unami by its use of the traditional Thai flavors of fish sauce and lime.
If you want to round out this meal a steamer tray full of potstickers and a Thai style salad would definitely do the trick. Continue reading

Lamb Meatballs with a Broken Yogurt Saffron Sauce
 At 2am I got out of bed and went to the kitchen to write down a recipe idea for a lamb, blood orange, feta and mint tapas, after all I had been in the mood for North African influenced food. Yes, 2am, if I have an idea and I don’t write it down it is apt to disappear. I will stop anything I am doing to write down a recipe. I went back to sleep and on Sunday I started working on my new idea. Made it, loved it and its many layers of flavor. I photographed it and went about my day. The recipe makes 16 meatballs so there were leftovers and now it was dinner time. This was a spur of the moment creation that happened at the stove and it, at least to us who ate it, is amazing. Continue reading
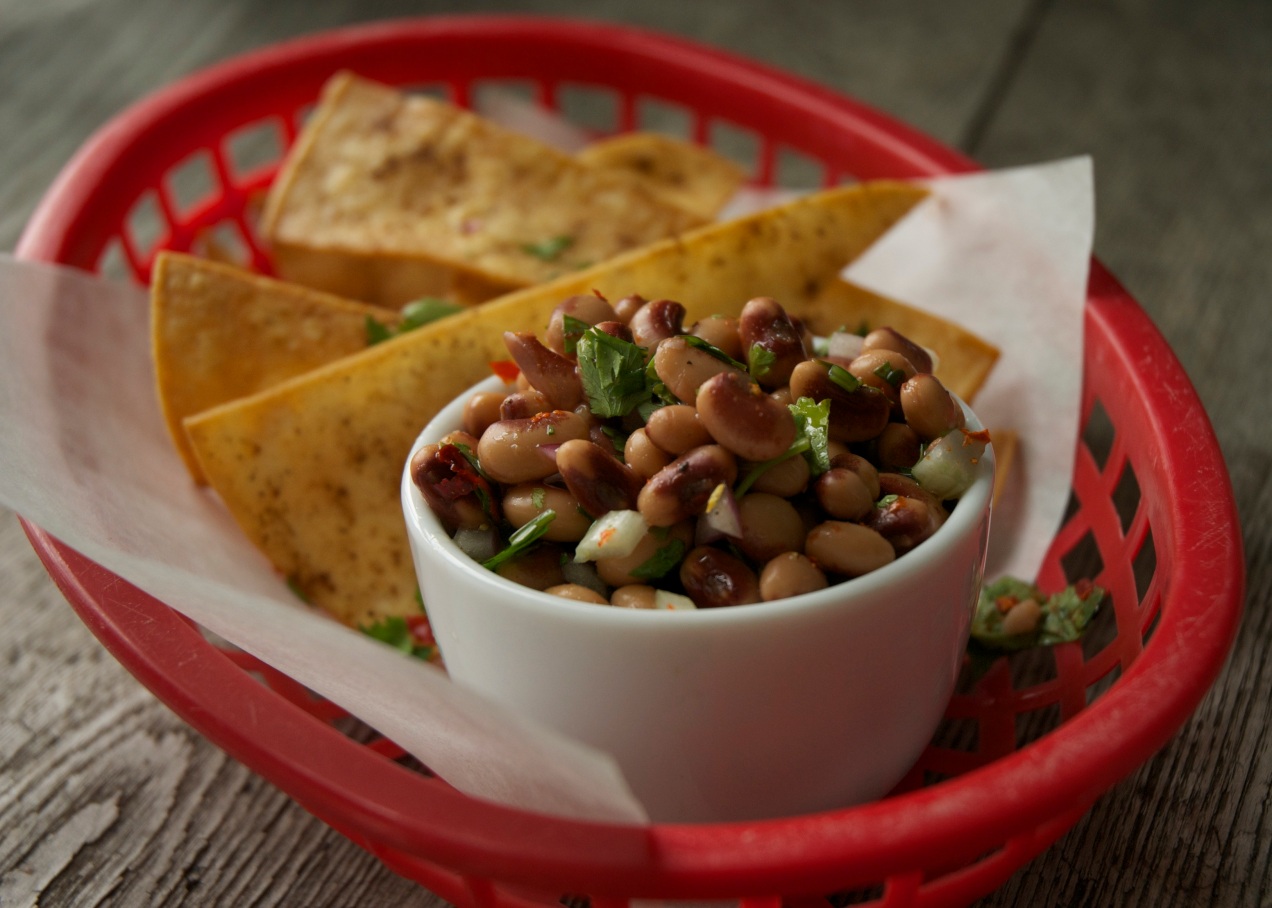
Update: Get Your Free Issue Here!

Click here to download FOODQUARTERLY!
Celery Root and Potato Gratin
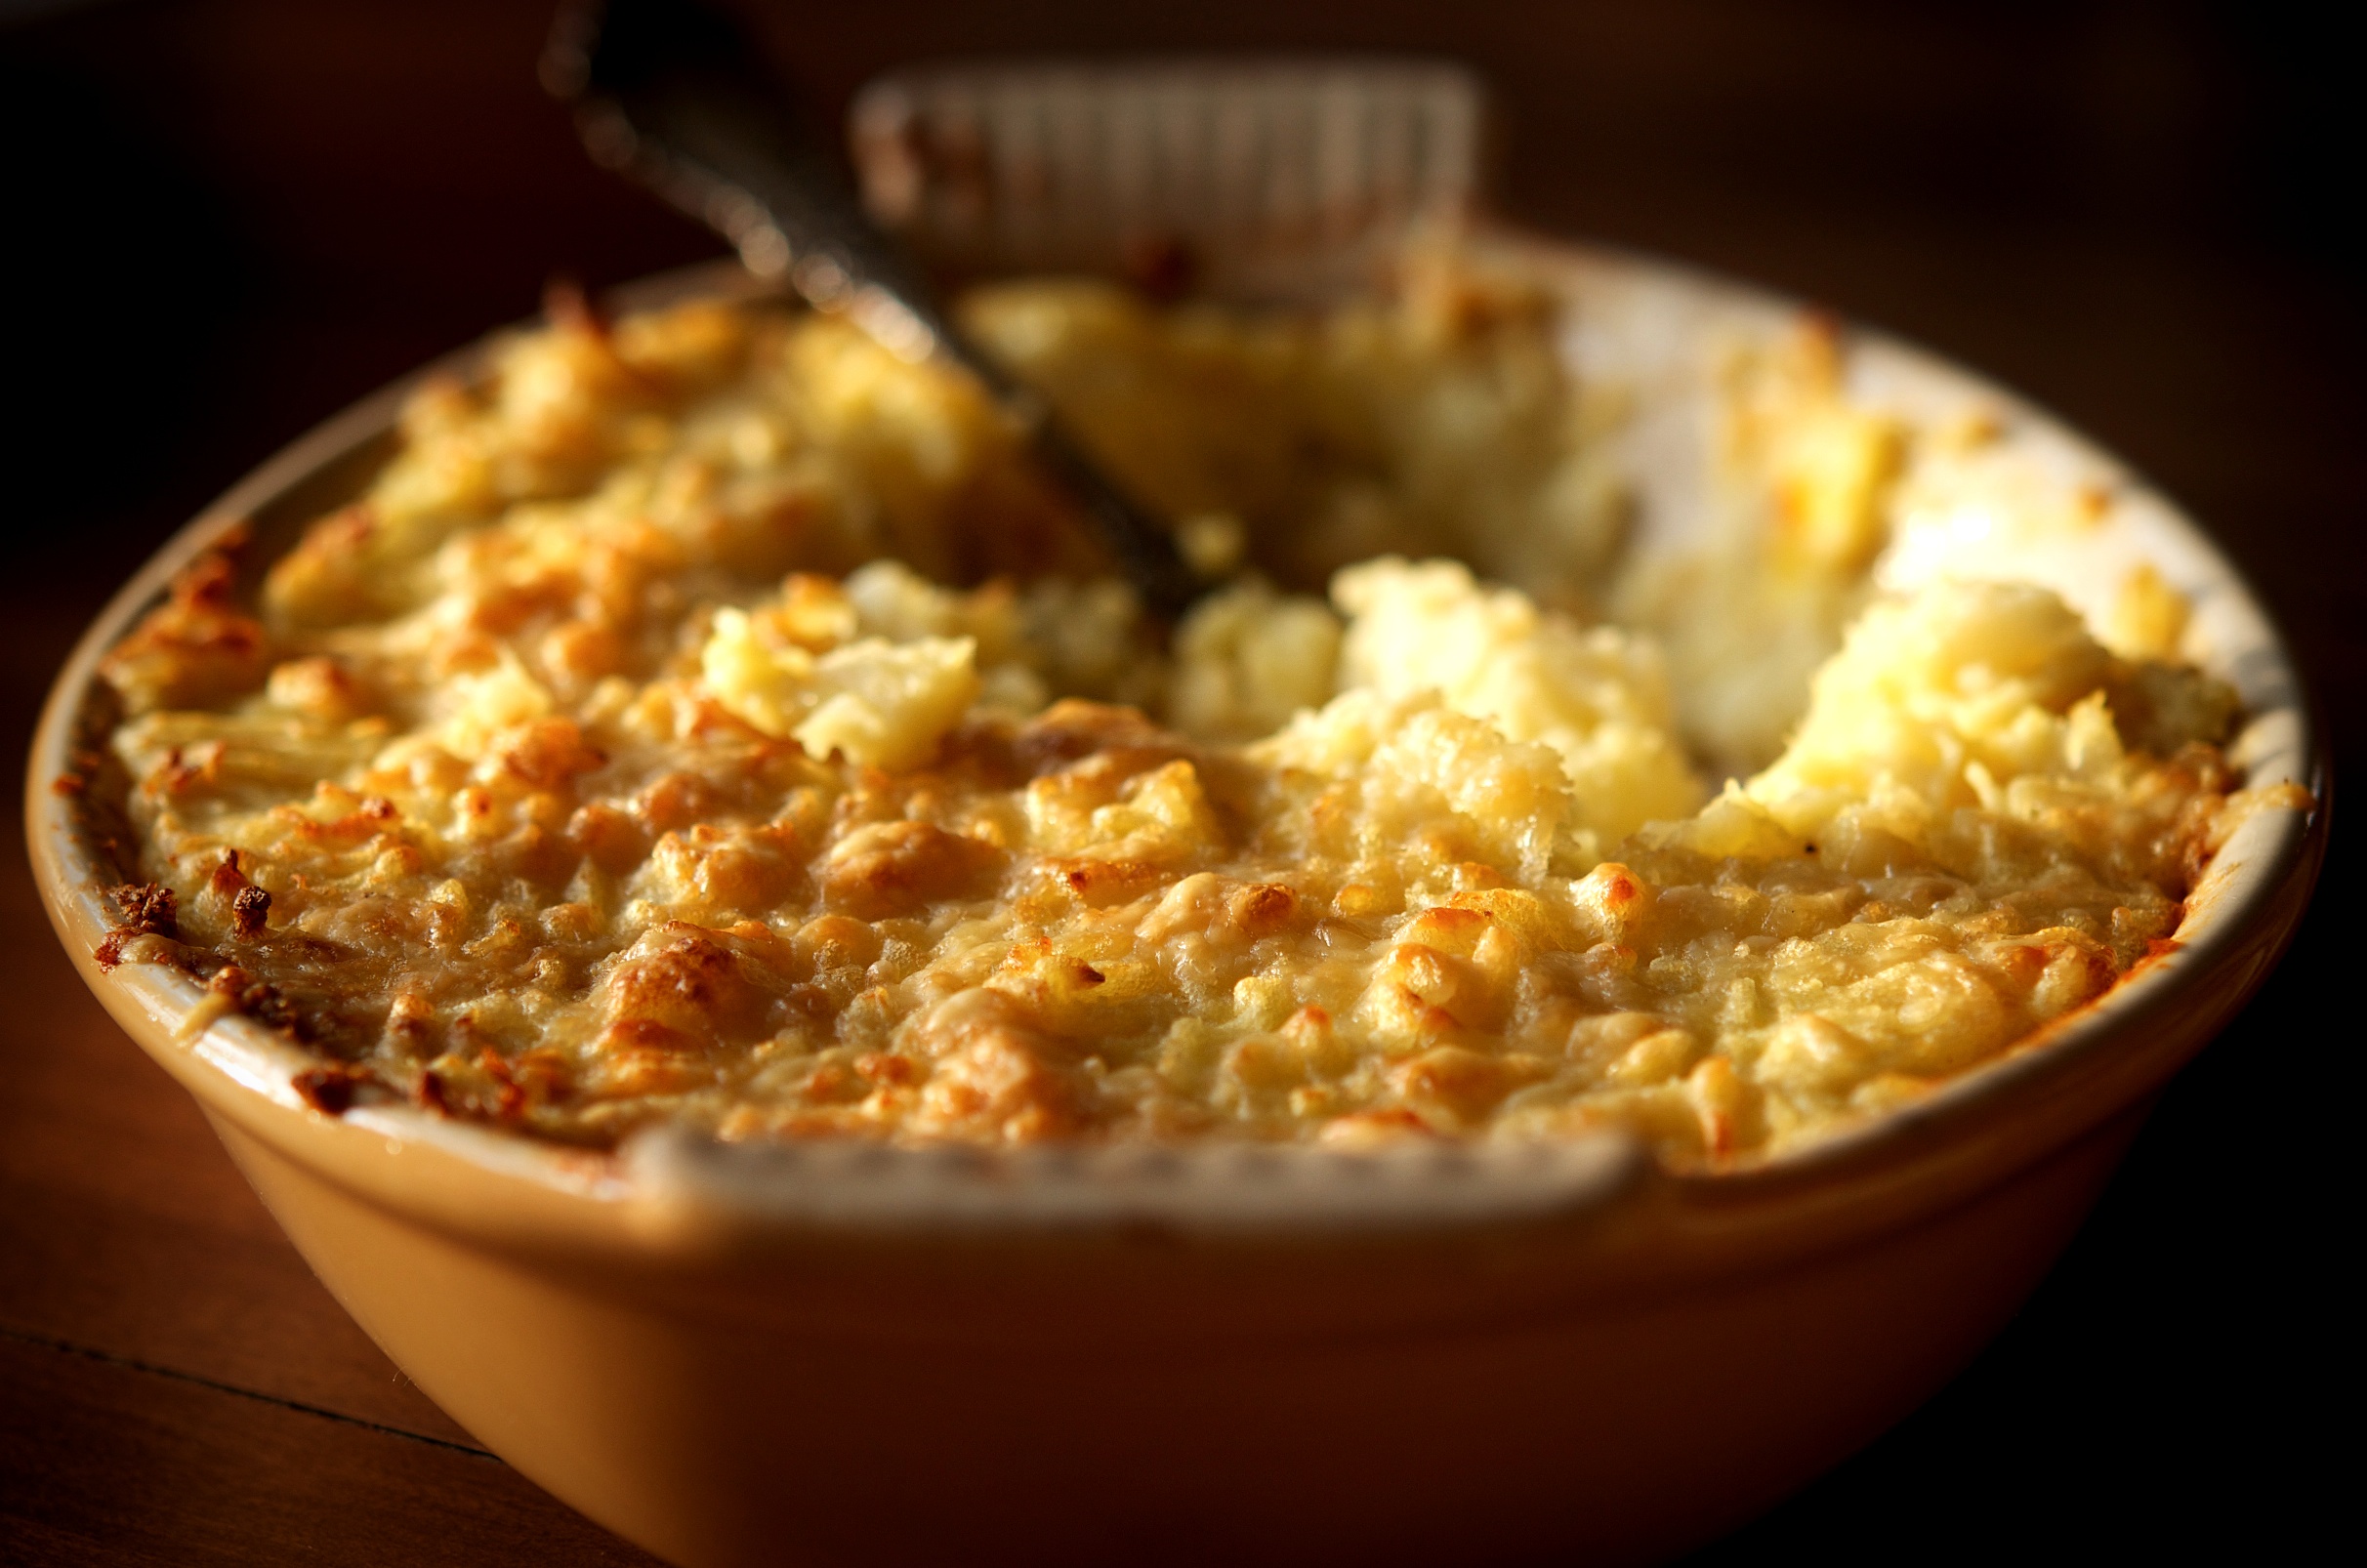
For some it might have been potato or green bean, but for me my gratin affinity began at an early age with macaroni and cheese. You know, the good old-fashioned kind with real cheddar and whole milk thickened with roux or egg yolks. The one that is baked until the correct ratio of crispy, crunchy top to creamy interior is achieved. It taught me early on in life just how fantastic a great food friendship is.
Then, as I came of age, somehow the gratin became any one-dish. It is tuna with the thin crispy onion rings baked on top or Chicken Divan with broccoli, cheddar, and crumbled Ritz crackers providing the crunch. There is the obligatory cottage pie, as done in the Midwest, topped with both cheddar and mozzarella, then browned. For a while, it was a multitude of eggy breakfast casseroles, all, of course, involving more cheddar.
It became neat, rectangular, and predictable. It served twelve. It was a 9×13 casserole world and I was living it.
I was fortunate. I got out. I went to college, I travelled, I ate.
With knowledge and experience came diversity. And we all know diversity makes the world a much better place. So I developed friendships with lasagna, cassoulet, moussaka, and the timballo, to name a few.
Through it all, and even though we didn’t see each other as much, the gratin remained my favorite.
What I realized is the gratin is the kick-ass cousin who went to college too. And when you reconnect at the family reunion you realize you hang with them because they are exciting, interesting, and you can rest assured that there is more depth to them than a spiky haircut and a couple of tattoos. You get each other in that way only family can.
I like the gratin’s quirks. I like its fondness for juxtaposition. I know that, without pretense, Tournedos Rossini can snuggle in next to a celery root gratin as easily as can Irish bangers and, regardless of which side of the tracks it finds itself, the gratin brings comfort to the table, weight to the unbearable lightness of being.
The thing is, the gratin comes by these traits naturally. But I also know that the things that make it stand out — the creamy interior and crunchy top — don’t just happen, that the building of flavors takes effort, and that without a true friend’s presence the gratin’s popularity might wane.
But then that is what true friends do, you know, bring out the best in each other, and relish in each others’ success.
Note: I have been making this recipe for years. It is based on a recipe in the Dean and DeLuca cookbook by David Rosengarten. I have always found it to be a lovely holiday side dish. It goes well with prime rib roasts and roast chicken. It is versatile and can be made ahead to be put into the oven when needed and also is easily doubled.
Serves 6 to 8
2 pounds russet potatoes, peeled and cut into 1/2 inch chunks
2 pounds celery root, peeled and cut into 1/2 inch chunks
Kosher salt and freshly ground white pepper
3/4 cups heavy cream
1 tablespoon garlic, minced
1/4 cup unsalted butter
1/8 teaspoon saffron, crushed
1 1/2 cup gruyere or comte cheese, grated
1. If you plan to cook the gratin right away heat the oven to 400 degrees. Otherwise move on to step two.
2. Place the potatoes and celery root into separate large pots. Cover by two inches with cold water and add a teaspoon of salt to each pot. Bring the pots to a boil over medium heat. Cook the vegetables until tender.
3. Once the vegetables are tender, pour them out into a colander set in the sink. Drain the vegetables and let them sit for a minute or two steam-drying.
4. Rinse out one of the pots and add the cream, garlic, butter, and saffron. Bring the cream to a boil over medium heat. Add a hefty pinch of salt and a few grinds of white pepper. Add 1/2 cup of the cheese. Stir it into the warm liquid till melted.
5. Place the celery root and potatoes into a mixing bowl (or the other blanching pot if it is big enough) and smash the mix with a potato masher. Add a pinch of salt then add the cream and saffron mix. Stir to combine. Taste and adjust the seasoning, adding more salt or pepper if necessary.
6. Use a little softened butter to grease an 8-inch oval gratin (12 inches long). Spread the rustic chunky mash out into the pan. Smooth the top with a spatula, then crosshatch the top with the tines of a fork. Spread the remaining cheese out over the top.
7. Bake until the cheese is browned, about 30 minutes. Let the gratin cool for 5 minutes, then serve.
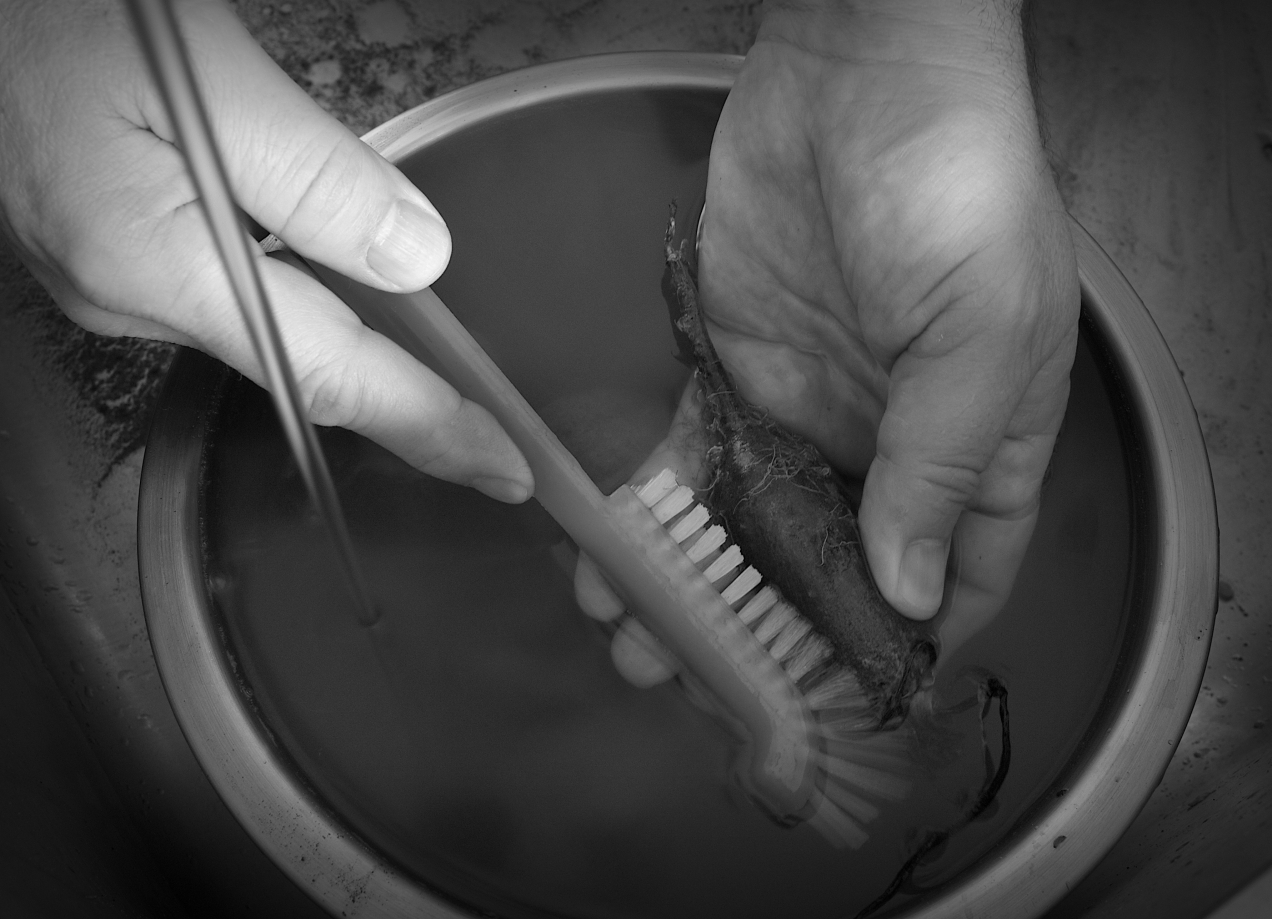
Scrub Those Veggies

Don’t think because the package says it was washed three times that you don’t have too.
I make one assumption when it comes to vegetables. I assume a herd of cows walked through the veggie patch right before someone picked my food. Keep in mind cows are not discrete. Their bathroom is the great wide open and they don’t care t if that bathroom is located on top of your food. It is buyer beware and it is up to you to wash your vegetables.
My point is, wash that shit. I know, I know, you hate how it splatters all over the new white shirt you are wearing or how it always seems to spray over the back of the sink but it doesn’t have too.
Submerge the vegetables underwater and then scrub them! Seriously, it keeps the dirt and crud from splattering everywhere.
I place a large mixing bowl right under the water, leave the water trickling, then fill the bowl no more then halfway with the potatoes, carrots, beets or whatever root vegetable and it still allows me room to scrub with my hands, the brush and veggie, all submerged. Also by letting the veggies soak in the bottom of the bowl it loosens the dirt and crud, a prewash so to speak.
I use a baby bottle brush because it washes well in the dishwasher, I like the design because it makes it easy to get into the crooks and crannies and, finally, because the bristles aren’t so stiff as to take the skin off a potato when scrubbing. I also use a salad spinner for all kinds of things. Wash those herbs and give them a spin, broccoli and cauliflower too.
The thing is water and a quick rinse alone will lessen your chances of any food borne illness. Give the veggies a soak, scrub and rinse and you can pretty much eliminate the chances. You don’t need to get fancy with the chemicals either water does a great job, was designed in fact to do this task and does it well all by itself.
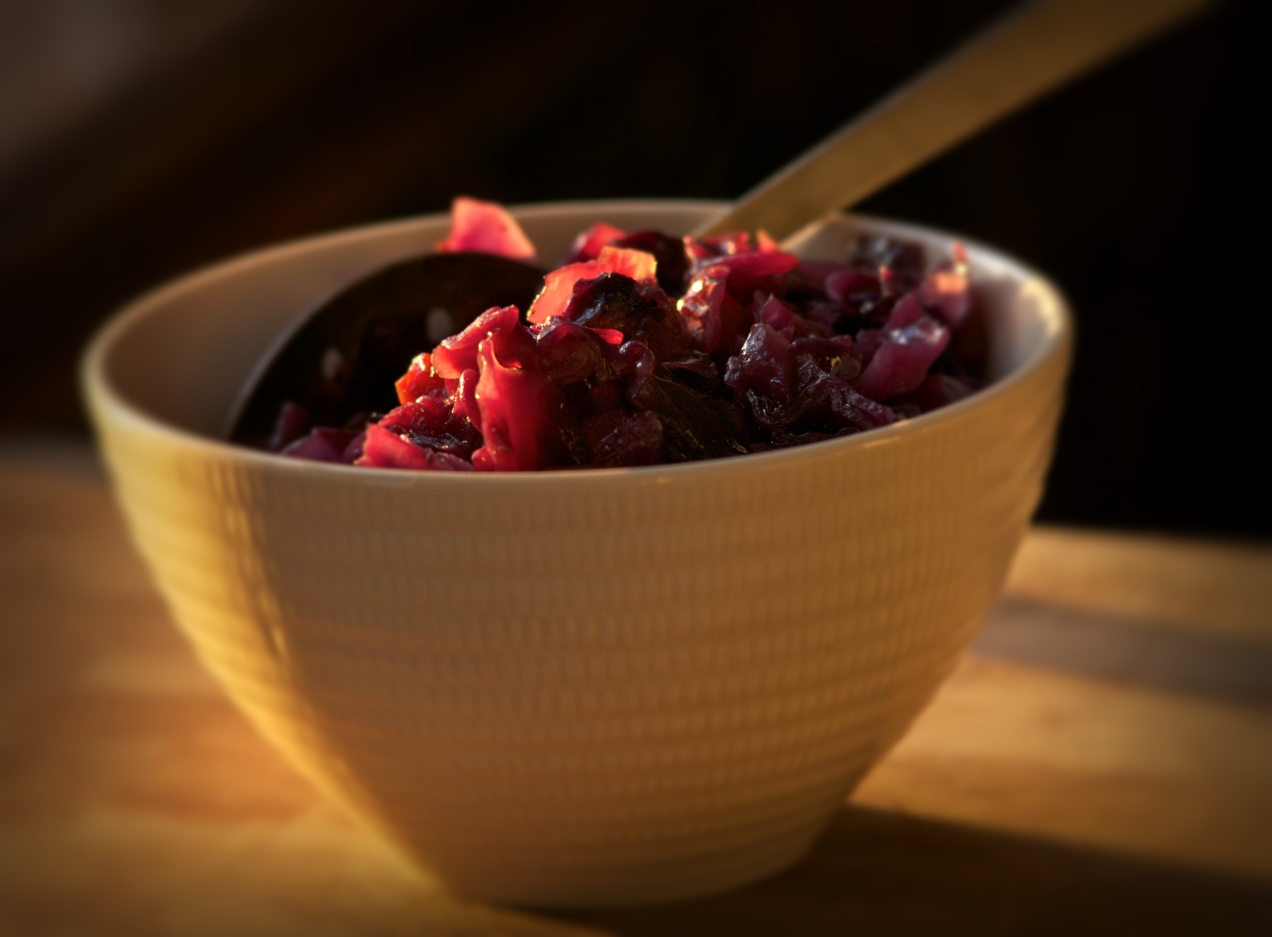
Braised Red Cabbage

This dish will not be the same without the duck fat but that does not mean it won’t be equally as good. Bacon, bacon grease and even butter would all be good choices since I know most people don’t keep duck fat around or have access to it.
If planted midsummer red cabbage will mature just about the time of the first frost. As long as it is harvested before the first hard freeze it will last in storage until about the beginning of the year. Depending of the variety and the conditions under which it is stored it might last a little longer.
Whether you grow it or buy it red cabbage is a great winter vegetable that is under utilized by the home cook. It can easily be whipped into a tasty Asian slaw, turned into a comforting bowl of borscht or a wonderful braised red cabbage. This dish is perfect with pork chops or pork roasts and is also a fine accompaniment to ham or cured and smoked pork chops. Continue reading

Non-Slip Drawer Liners

Sure, I know, every chef says you should just wet a kitchen towel and put it under your cutting board, or bowl or whatever you don’t want to slide around. Well that is easy to say when you have an industrial laundry service and who wants a wet towel sitting under their cutting board anyway. If it’s a wood cutting board it will warp and then weaken the glue joints. So here is your new best friend, non-slip drawer lining.
Ever make Hollandaise sauce? Need an extra hand while whisking the butter into the eggs but no one is around? Put that non-slip liner under the bowl and you can go hands free. Why not just get the mixing bowls with the rubber bottoms? Well, sometimes I have good reason to put my mixing bowls right on the stove over low heat, or I need to make an ad hoc double boiler so the rubber bottom is out of the question for me.
Got a Kitchen Aid stand mixer that likes to walk across the counter. Keep it from wandering with the non-slip liner.
Keep your couch from dancing around the wood floor every time someone sits down.
Got any other non-slip liner tips? Post them here.
You can wash the liners by placing them flat in the sink and spraying them off with the sink sprayer or by using a soft sponge. Hang them over the sink divider to drip dry.
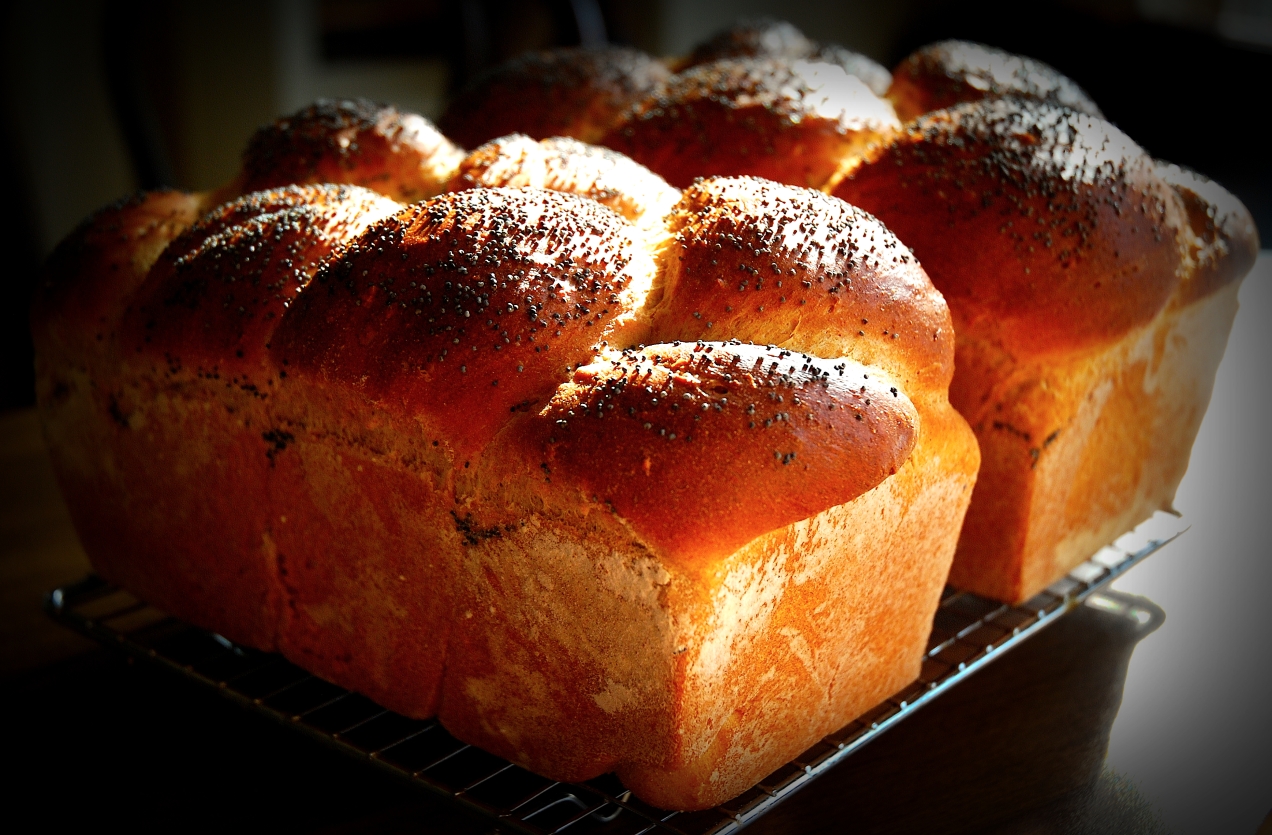
Farmhouse Whole Wheat
There are so many different kinds of bread. You could make sourdough where you feed a starter flour to grow it and keep it alive, you can retard loaves in the refrigerator overnight, there are paté fermentes, bigas and all kinds of other preferments and sure it is great to have knowledge of all these breads but at the same time it is nice to have a tried and true everyday bread. A bread with some shelf life, a bread that little kids like and one that is good with which to make a variety of sandwiches.
For me this is that loaf. It debunked the idea that my two girls would only eat white bread. They love it. It fits into my notion that I won’t make bread that isn’t at least 75 percent whole wheat. It makes two loaves that will be around just long enough that you won’t need to throw it out because it is old.
Be sure to buy a fine grind whole wheat flour and make sure to buy it at a store with high turnover of its whole wheat. Countless times I have brought a bag home only to open it and it is rancid. Whole wheat flour should smell like a wheat field not rancid oil or some other off smell.
I like to braid this loaf for two reasons. One it looks pretty and two, when I make this loaf on a Sunday it is nice to bake it about two hour before dinner, remove it from the oven to cool a little, then serve it warm and let people tear off a hunk. It will tear at the braids like dinner rolls would. Continue reading

Yellow Corn Tortillas
 These are home made corn tortillas. A skill every cook should learn and teach their family. These little disks of goodness have fed countless billions over the centuries. If you have ever seen someone make these by patting them out into perfect rounds using their hands you will be fascinated and then appalled that these kinds of skills and cultural heritage are being lost to kitchens daily. Continue reading

Pork Pazolé
Chili is great, and a favorite, but sometimes it is nice to find an alternative. This is a nice change for sure. The sourness of the tomatillos cuts the richness of the pork while still letting the pork taste rich. The other thing about the tomatillos is the juice from them thickens the broth. The whole thing comes together easily and could even be pulled off on a weeknight by the ambitious.
Serves 4
2 tablespoons lard
2 1/2 lbs. pork shoulder, cut into 1 inch cubes
1 cup yellow onion, small dice
1 lb. tomatillos, paper skins removed
1/4 cup coarsely chopped garlic
2 teaspoons Mexican oregano
1 tablespoon dark chile powder
1 tablespoon tomato paste
one 14.5 ounce can yellow hominy
kosher salt and fresh ground pepper
1/4 cup cilantro, chopped
toppings: more cilantro, shredded cabbage, lime wedges, red onion, sour cream and cheese
1. Preheat the broiler. Place the tomatillos onto a sheet tray with sides, they will exude lots of juice, and broil them until they are charred nicely. Remove them from the oven and turn the oven off.
2. Season the pork with salt and pepper. Heat the lard over medium high heat in a 3 1/2 quart Dutch oven and add the pork. Brown it deeply on all sides taking care not to not to burn the fond forming on the bottom of the pot and reducing the heat if necessary.
3. After the pork has browned remove it from the pot to a plate. Add the onions to the pot and saute them until they start to become tender. Add the garlic, chili powder, tomatillos with all their juice, and the tomato paste. Stir to combine and let the mix become fragrant.
4. Add the pork, and accumulated juices, back to the pot and enough water to come just to the top of the pork. Let the pozole come back to a boil and then reduce the heat to a simmer.
5. Simmer until the pork is tender, about an hour, then add the hominy and the chopped cilantro and cook another 10 minutes. Ladle into bowls and serve with additional toppings and lots of home made corn tortillas.
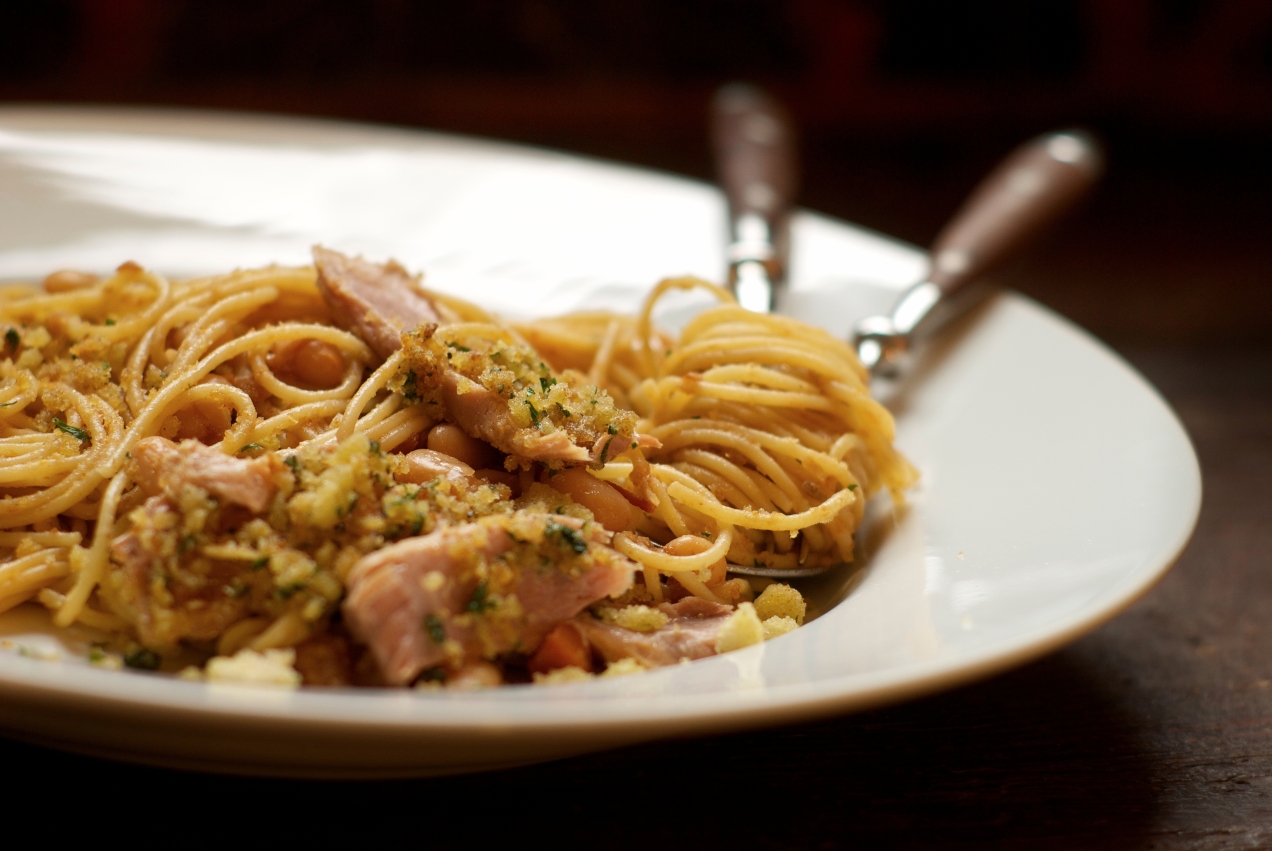
Tuna with White Beans and Spaghetti
White beans and tuna have always been combined in salads and pasta and have long been purveyor’s of pantry dinners in Italy. I have taken up the habit of pantry pasta myself and while I don’t keep many canned goods I do keep tomato sauce, tuna in olive oil, dried beans and pasta on hand.
The cheese rind is imperative here. It is to the broth what bones are to stock. Besides you know it makes you mad to have to pay for this usually unusable part. So here is your opportunity. I Always try to have at least one cheese rind on hand and just store it in the fridge amongst the other cheeses.
This is not a skillet pasta but a long simmering sauce because it takes some time to build the flavors in the beans. As with all beans everyone has their own method to their bean madness. I have tried many and the one I use yields a tender beans with tooth. That is not to say it is crunchy or undercooked but what it means is it holds its shape while being tenders. I want to know I am eating a bean when I bite into one.
I also don’t make home made pasta for this dish because this is one time were store bought spaghetti noodles are the right choice.
I served this with a green side vegetable and after the pasta served a salad, as the Italians would.
Serves 6 to 8
2 heads of garlic, the top 1/4 inch of which has been sliced off
1/2 pound white beans
4 whole cloves of garlic, peeled and trimmed
10 sun dried tomatoes (dried, not in olive oil)
water
1/2 cup yellow onion, small dice
1/4 cup carrot, small dice
1/4 cup celery, small dice
1 1/2 teaspoons fennel seed, ground
1/4 to 1/2 teaspoon red pepper flakes
2 bay leaves
1/2 cup strained tomatoes or tomato sauce
1 each 2 x 2 inch parmesan cheese rind
olive oil
kosher salt and fresh ground pepper
1/3 cup bread crumbs, toasted in olive oil then seasoned with salt and pepper then mixed
with 1 tablespoon of minced parsley
12 oz. tuna in olive oil
1 pound spaghetti, cooked according to the instructions on the box
- Preheat the oven to 300˚F. Place the heads of garlic in a small ovenproof dish and drizzle each with olive oil then season them with salt and pepper.
- Cover the dish with foil and bake the garlic for 1 hour. At the end of the hour make sure they have taken on alight tobacco color and are tender. Cook them another 15 minutes if you need to. Once they are done remove them from the oven and set them aside.
- Place the beans, garlic cloves and the sun dried tomatoes into a sauce pan and cover by at least 2 inches of water. Place the pan over high heat and bring it to a boil and let it boil for 2 minutes. Cover and remove the pan from the heat and let it sit covered for two hours or longer.
- At the end of two hours drain the beans. Rinse out the pot. Remove the sun dried tomatoes and chop them. Place the pot over medium heat and add a good 2 tablespoons of olive oil. When it is hot add the onion, carrots and celery and let them saute until they begin to become tender. Add the fennel, bay leaves and red pepper and saute until fragrant. Add the beans, sun dried tomatoes and garlic back into the pot. Cover the beans with water by 1 inch. Add the tomato sauce and cheese rind.
- Bring the pot to a boil then reduce the heat so the liquid is at a lazy bubble. Season them with pepper. Stir occasionally to keep anything from sticking to the bottom of the pot.
- Near the end of the cooking season the beans with salt to taste and take the roasted garlic and squeeze out the garlic paste then add the paste to the beans. Stir it all in and taste. Adjust the seasoning.
- When the beans are tender cook the pasta. Once the pasta is done drain it and immediately toss the pasta with some of the oil from the tuna. Toss the beans and pasta together.
- Put the pasta into a serving bowl, top with tuna crumbles and then the bread crumbs. Serve immediately.

Plastic Dough Scrapers

Plastic dough scrapers make one of the best dirty dish cleaning tools around. For my pans they are non-scratch, get into the crooks and crannies removing all the stuck on stuff in a jiff. I always have two on hand just for dirty jobs like getting the ring of crud around the top of a pot knocked loose, or that thin layer of cake stuck to the bottom of the cake pan. They are bendable, have different shaped edges for different jobs and big enough you can get a good grip on them. This is a great tool to have when you need it and they are cheap, 99 cents or so.
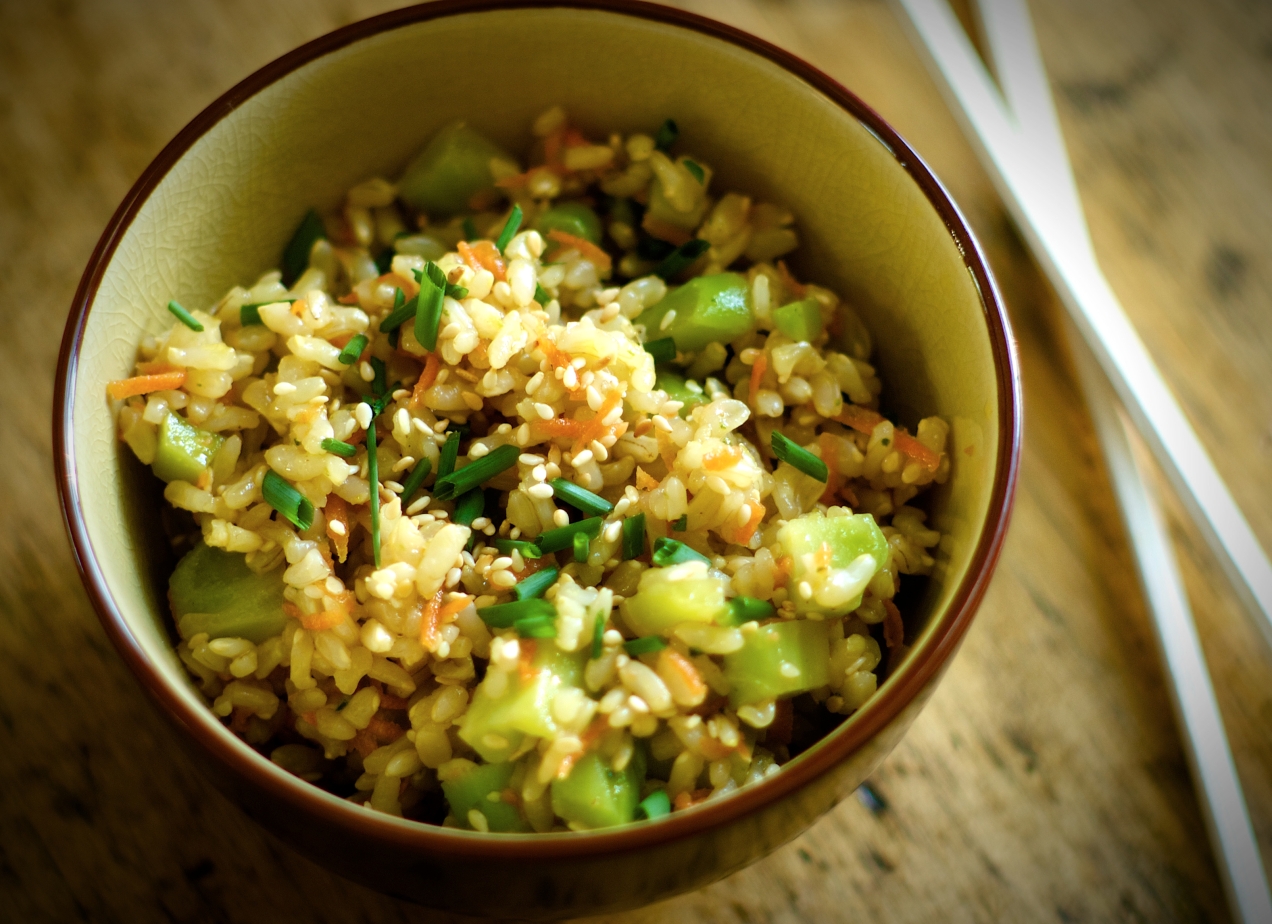
Stems and Seeds

Hippy food has long been a bastion of vegetarian eats for many reasons. Some political, some personal but in all honesty mostly because it is cheap and often utilizes every last morsel sharing some of the same philosophy as head to tail eating, ironic?, well, yes. Never mind the reasons though because that doesn’t mean it doesn’t taste great and utilizing every part means new tastes and textures from veggies you have long grown tired of.
There is nothing better than to take a bite of something and not only have it taste good but when it feels good, or nutritious, as you eat it it is all the better. Having said it time and time again there are certain dishes that hit that button and, man, there is no better eating. This salad hits that button.
So get out your tie dies and put on your birks, crank up the Dead and get in touch with your inner vegetarian, oh, and make extra because the nice thing about this salad is it is no worse for the wear the next day.
The soy ginger vinaigrette in this recipe was adapted from Jean-Georges Vongericthen’s Simple Cuisine. Learn this recipe you because will find yourself using it on everything. It is a genius recipe.
Makes 4 servings
For the vinaigrette:
2 1/2 tablespoons soy sauce
2 tablespoons lemon juice
1 teaspoon ginger, finely minced
1/3 cup canola or unflavored oil
1/3 cup extra virgin olive oil
kosher salt and fresh ground pepper
1 1/2 tablespoons water
Put all the ingredients into a pint mason jar and screw the lid on tightly. Shake the hell out of it. Set the dressing aside.
For the salad:
1 to 1 1/2 cups blanched broccoli stems, 1/4 inch dice
1/2 cup carrots, grated
3 cups cooked brown rice
1/4 cup sesame seeds
1 1/2 tablespoon chives, minced
soy ginger vinaigrette
kosher salt and fresh ground pepper
1. Place all the ingredients, except the dressing in a large bowl and toss to combine. Add 1/3 of a cup of the dressing and combine everything. Taste, adjust the salt and pepper and add more dressing if you like.
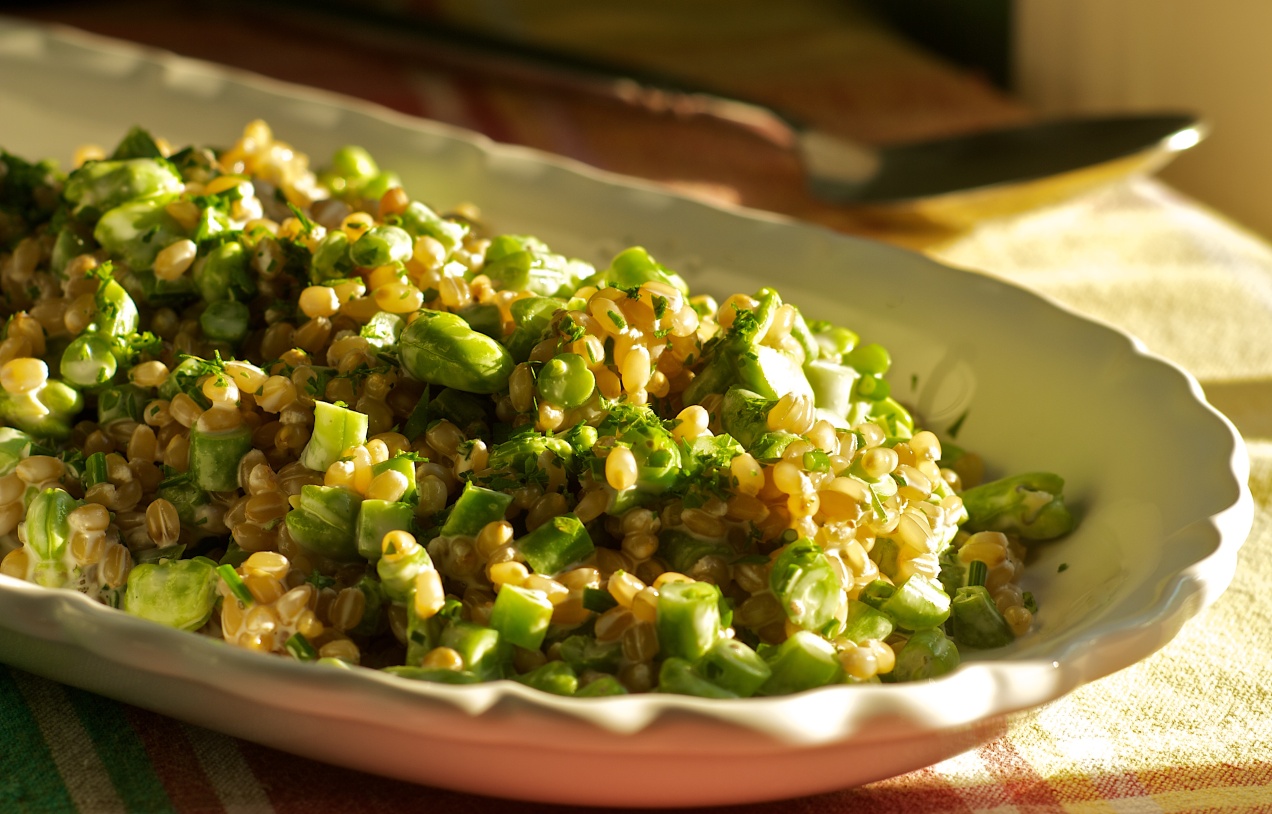
White Wheat Berry Salad with Fresh Beans
 If you have ever had fresh raw fava beans then you know the wonderful tender pop, the tender chew and the juicy flavor. It goes wonderfully here with the green beans and the dressing.
Wheat berries are another wonderful addition to your repertoire. They add a subtle chew and give the dish a pasta flavor while digesting at a lower glycemic level because they are a whole grain.
This is one of those dishes that is here because it is delicious and, luckily, it just happens to be very good for you too.
Serves 6 as a side dish
1 cup soft white wheat berries, rinsed
3/4 cup green beans, blanched and chopped into 1/4 inch pieces
1 cup fresh fava beans, lima, or edamame, shells and outer skin removed
1 1/2 tablespoons chives, chopped
2 teaspoons fresh thyme, minced
1/4 cup mayonnaise
1/3 cup buttermilk
2 teaspoons lemon juice
kosher salt and fresh ground pepper
1. Place the wheat berries into a large pot and cover them with cold water by two inches. Place the pot over high heat and bring it to a boil. Boil for two minutes then turn off the heat, cover the pot and let it sit for two hours.
2. After two hours add a couple of pinches of salt and then place the pot back over the heat and bring the berries to a boil again. Now reduce the heat to medium and let them simmer until soft, or the texture you want, about 15 minutes.
3. Drain the berries in a colander and let them cool to room temperature.
4. In a large mixing bowl combine the mayo, buttermilk and lemon juice. Season it with salt and pepper then add the thyme and chives. Add the rest of the ingredients and mix to combine. Taste and adjust the seasoning. It is nice if you can let it sit for at least a half hour to let the flavors meld and even overnight is good.
5. Serve
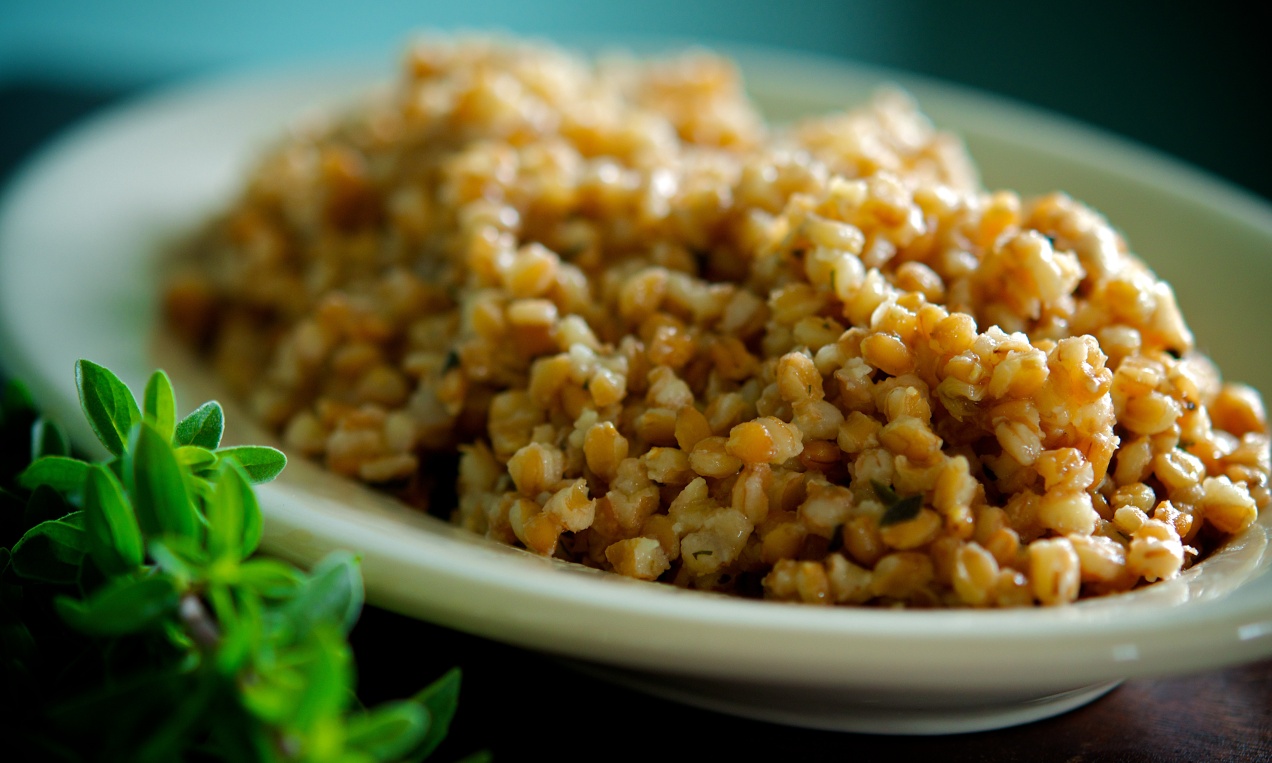
Farro and Roasted Garlic Pilaf
 The term farro can be very confusing. If you look it up you will see no one really wants to pin the tail on the donkey, and as such, all the authors of the articles seem to want to avoid naming a specific grain as farro.
People really want spelt to be farro but I can say spelt is not farro. Spelt is much larger and has a sweeter flavor to me. What I have found is farro can come in different sizes, roasted, and for lack of a better term, par cooked or pearled which means it cooks quicker.
In this recipe I use piccolo farro from Anson Mills. It is easy to cook, is extremely delicious and quite honestly I have become enamored with it as well. I think I can say with all clarity it should be spelled Pharroh because it is the food of gods. It feels nourishing to eat and is such a refreshing change, or I should say replacement, from rice or potatoes.
I always cook extra and use the grain, plain, when baking bread and I plan to save the cooking water next time and use it as well.
Serves 4 to 6
1 cup farro piccola
2 heads of garlic
1 stick unsalted butter
1 tablespoon marjoram
kosher salt
fresh ground pepper
1. Preheat the oven to 325˚F. Slice the heads of garlic across the top at a point where you will remove enough to expose as many cloves as possible but not so much that you loose a lot of the head. Usually I slice off about the top third of the head. Place the heads in a small ovenproof gratin or some other dish. Smear the heads with 1/2 teaspoon of butter and then salt and pepper them. Cover tightly with foil and bake the garlic for one hour. At the end of the hour remove the foil and bake another fifteen minutes to brown up the cloves.
2. Using a strainer rinse the farro under cold water. Place the farro into a 3 quart heavy bottomed sauce pan with a lid. Cover the farro with cold water to cover by two to three inches and add a two finger pinch of salt.
3. Place the pan over high heat and bring it to a boil. Turn off the heat and cover the pan. Let the farro sit in the pan for an hour to two or until the grains have popped.
4. Use a large strainer or colander and drain the farro.
5. Wipe out the pan and put the pan back on the stove over medium low heat. Add the remaining stick of butter. Let it melt gently and then add the drained cooked farro, marjoram and squeeze the roasted garlic into the pot. Stir in the creamy soft garlic smearing it into the farro. Season the pilaf with salt and pepper to taste.
6. Once it is hot, bowl it up, and serve.
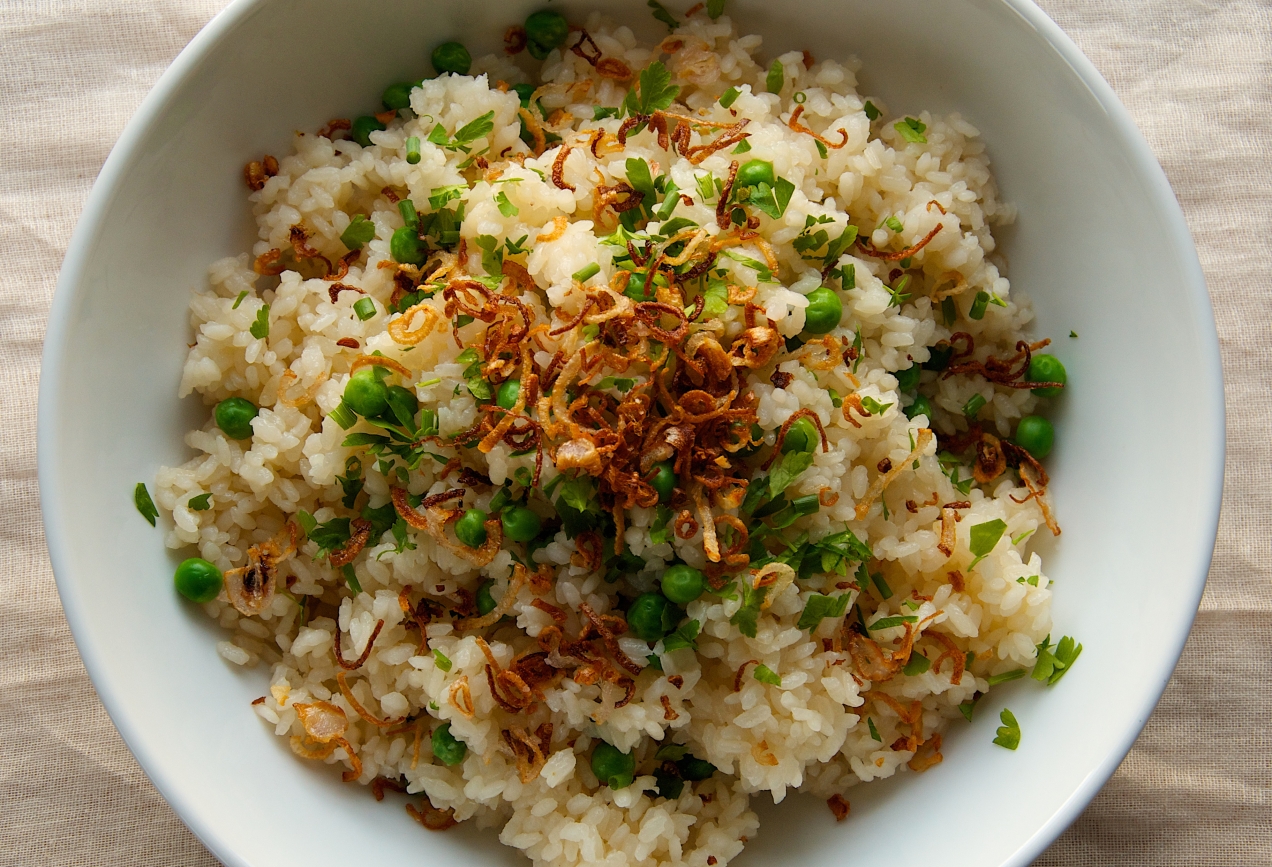
Peas and Rice with Crispy Shallots

I never feel like people like to cook rice unless of course they are from a country or region where it is a staple. I will say it took me a while to get the hang of it. Even after culinary school, because I didn’t cook rice often, it was a struggle. It seemed like it would either be a gooey mess, or dry and not cooked all the way through. Some recipes seemed to work one time and the next they failed.
It wasn’t until I started to look for a rhyme and reason that it started to get better for me. I stopped buying different brands, types and kinds of rice for regular use and narrowed my selection down to two. I use medium grain brown rice from Lundberg farms in California and a kapika short grain white rice from Japan. For other dishes such as risottos or paella I use carnaroli.
For those not familiar with kapika it is a process where by the rice is polished using the grains themselves to remove the outer husk which also allows for greater water absorption. What I like about the kapika process is you do not need to rinse the rice before it is cooked and it has a stickiness to it that allows you to be able to eat it with chopsticks if you choose. Still there is more to kapika then just chopstick usability, there is the chew. It has, for me, the perfect chew it is tender with a spring.
I cook brown rice using a method that is wildly different from how I cook any other rice. I always parboil it in large quantities of lightly salted water, drain it and cool it much like you might pasta. They I use it in applications like fried rice, casseroles and pilafs.
I usually by larger quantities of white rice then brown. I love brown rice but brown rice can go rancid if left sitting around or because of lower turnover in the store, the rice is already old and needs to be used up before it goes south. It has an acrid smell to it when it is old. White rice like white flour has a longer shelf life.
Obviously brown rice is better for you because it is a whole grain but I am certain white rice is more soothing to my stomach.
For this recipe I could simply enjoy sitting at the table and eating it all on its own. I need no other dish alongside it but if it is going to be a side dish roast chicken is a real good choice as is rabbit.
My absolute favorite condiment for this dish is the gelatinous stock (not the chicken fat) that forms on the bottom of the roast chicken pan. If you have it available stir some of it in to the rice after it has cooked but before serving.
Serves 4 to 6
2 cups kapika rice
2 3/4 cup vegetable broth
1 cup peas, fresh or frozen
1/2 cup shallots, sliced into very thin rounds and separated
peanut or safflower oil
2 teaspoons fresh chives, minced
2 teaspoons parsley, minced
1. Place the rice into a 3 1/2 quart enameled Dutch oven with a heavy lid. Add the vegetable stock and a pinch of salt. Bring the broth to a boil over high heat. Immediately turn down the heat to simmer and put the lid onto the pot (I weight the lid with a two pound weight but that is up to you). Set a timer for 20 minutes.
2. While the timer is running place a 2 quart sauce pan over medium high heat. Add a 1/2 inch worth of oil to the pan. Once the oil is to temperature, you can test this by dropping in a shallot ring it should drop to the bottom then come back to the top all in slow motion, add the shallots. It won’t take long for them to brown so don’t leave the stove. Once they are brown remove them from the pan with a metal slotted spoon to a paper towel lined plate and season them with salt and pepper. Set aside.
3. When the rice timer goes of quickly lift the lid and add the peas. Don’t stir them just leave them on top to steam. Cover the pot and set the time for 10 minutes.
4. At the end of ten minutes remove the lid to the pot and with a fork fluff the rice which will also stir in the peas. Bowl up the rice, sprinkle on the herbs and finish it with the shallot garnish. Serve.
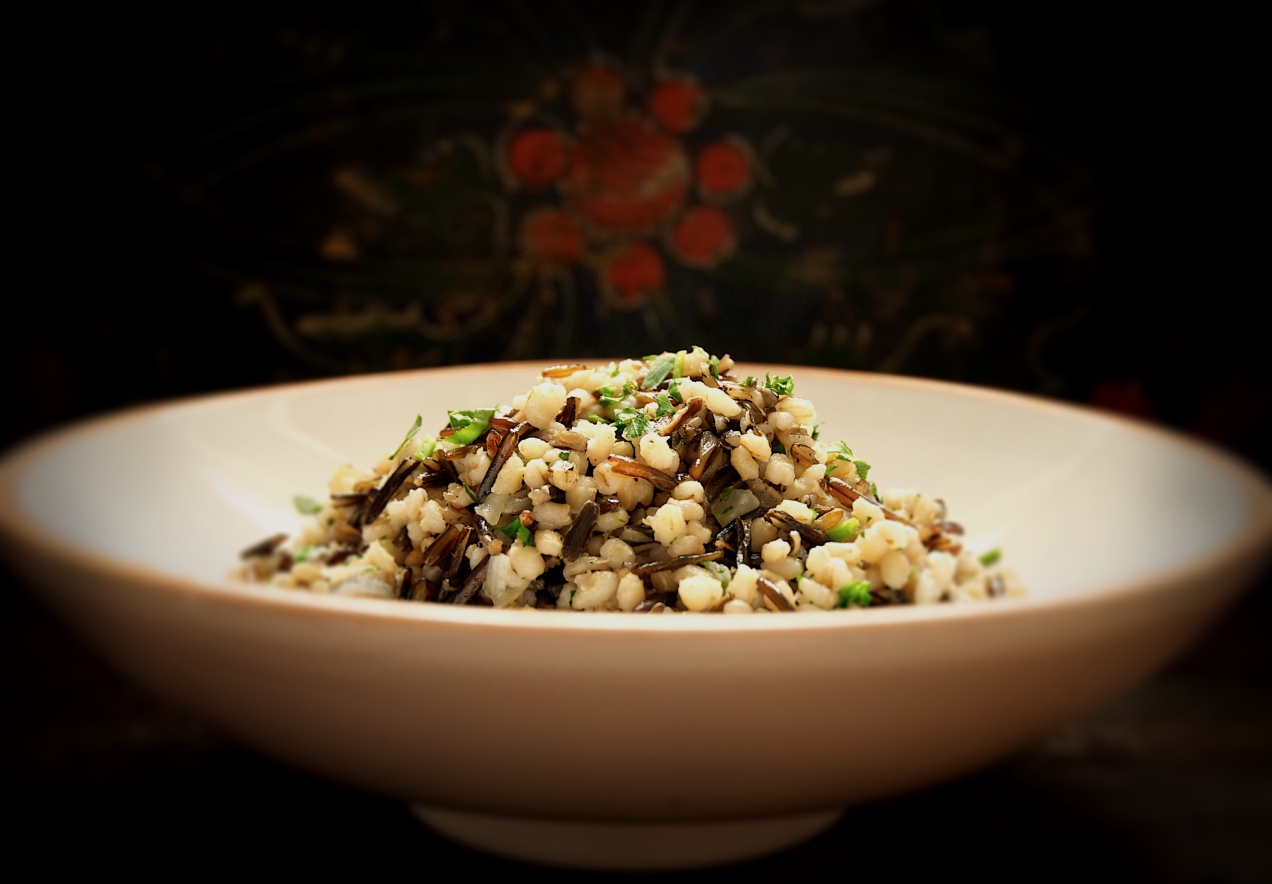
Wild Rice and Barley Pilaf
 This is so good for you you won’t even know it taste really delicious. Seriously good eats and a great side dish for roast birds of any kind and I’ll even throw salmon onto that list.
Yes, I know it uses two sauce pans but, please, neither grain leaves behind a sticky mess. You could almost just wipe the pan with a towel after emptying it of the grains. Don’t get any ideas I said almost.
Makes 6 to 8 servings
3/4 cup wild rice
3/4 cup pearl barley
1/2 cup yellow onion, small dice
1/4 cup flat leaf parsley, minced
3 to 4 tablespoons unsalted butter
kosher salt and fresh ground black pepper
1. Put the grains into two different sauce pans. Add water to cover by 2 inches and add a two finger pinch of salt to both pots.
2. Bring the water to a boil then reduce the heat to a gentle but continuous bubble. Cook both grains until they are tender. The barley should take about 30 minutes and the rice maybe 40. The rice will just begin to open up its pod.
3. Drain both grains. The dish can be done up to a day in advance at this point.
4. Put the larger of the two sauce pans over medium heat and add the butter. Once it has melted add the chopped onion and sweat it until it is tender. Add both grains and season everything with salt and pepper. I like lots of pepper but season to your liking. Heat everything until hot, taste, and if it needs more add more butter or even a dash of water. Stir in the parsley, plate it and serve immediately.
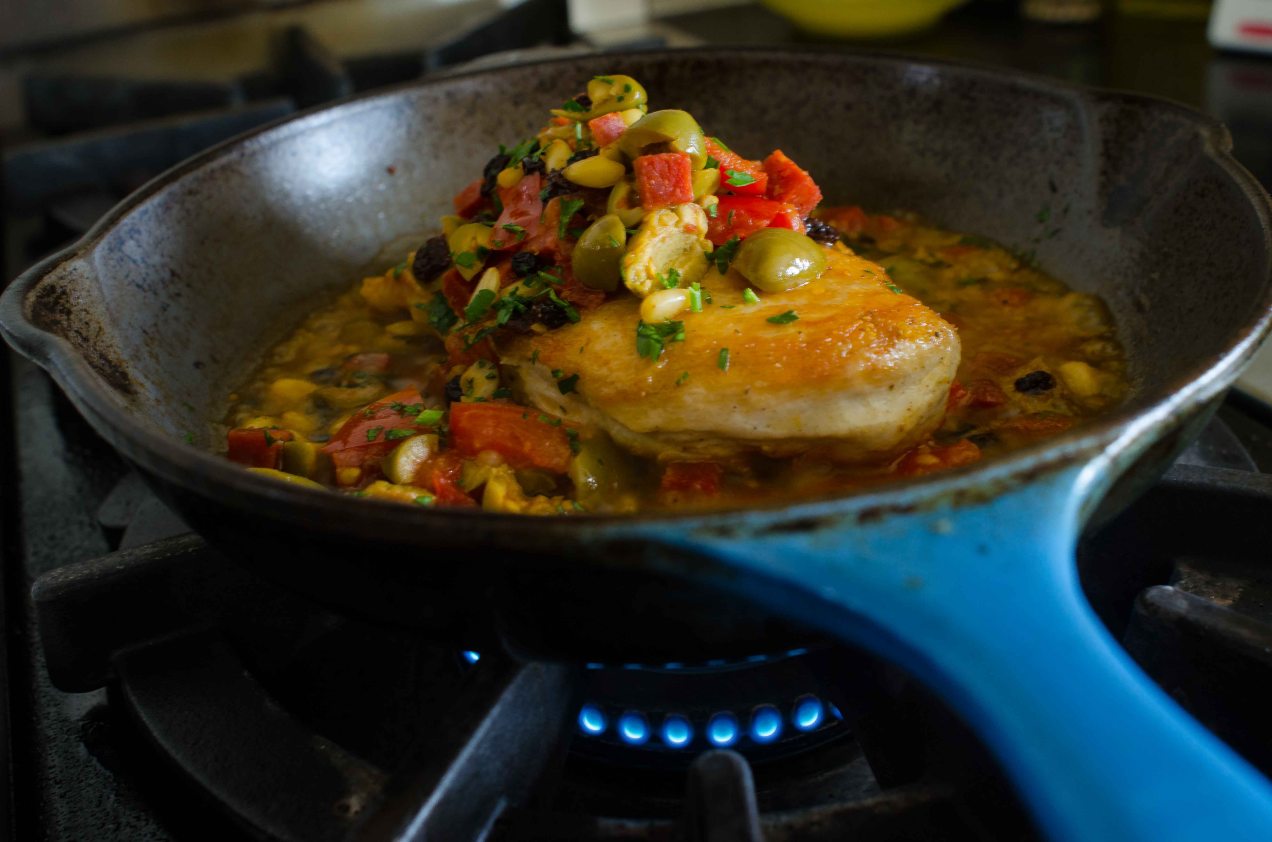
Sautéed Chicken with Pepperoni and Olives
I can tell you, with great certainty, how good a restaurant is going to be by the temperature of their plates. If I get a stone cold plate with hot food chances are the dinner will be average. If I get a cold salad on a warm plate just out of the dish machine, again, I know the rest of my dinner has more of a chance being bad then good. It tells me whether or not the kitchen cares.
When I worked in commercial kitchens it was a bone of contention with me and those who worked for me. Your plates needed to be hot for hot food and cold for cold food, period.
There was a time at home, back before we had kids, when I would always warm our plates in the oven. Probably sounds completely retentive, for all I know it might be, but I have never really given a rats butt what others think. I did it because my wife and I enjoyed being at the table together, taking our time eating, and having some quality conversation. Hots plates keeping your food warm is a nice touch.
We had this for dinner the other day, I warmed the plates.
Serves 2
olive oil
2 each 6 ounce boneless skinless chicken breast
1/4 cup pepperoni, 1/4 inch dice
1/4 cup Picholine olives, pitted and halved
1/4 cup tomato, diced
1/2 cup dry white wine
1 tablespoon pine nuts
1 tablespoon currants
2 teaspoons flat leaf parsley, minced
kosher salt and fresh ground pepper
1. Season the chicken on both sides with salt.
2. Place a heavy bottomed sauté pan over medium high heat. When the pan is hot but not smoking add enough oil to coat the bottom of the pan. Gently lay the chicken breast, what would be skin side down, into the pan being careful not to splash hot oil.
3. Brown the chicken on both sides. Adjust the heat as necessary to keep the oil from burning. Once both sides have caramelized remove them to a plate or pan and let them rest. Pour out any excess grease.
4. Meanwhile put the pan back on the heat and add the pepperoni, olives and tomato. Stir and toss it around until fragrant then add the white wine to deglaze the pan. Using a wooden spoon scrape up any brown bits from the bottom of the pan. Once the wine has reduced by half add the pine nuts and currants.
5. Give everything a stir and then place the breast back into the pan. If the liquid in the pan seems at all dry add a 1/4 cup of water. Braise the breast until they are cooked through which shouldn’t be long if you browned them well. Taste and adjust the seasoning, add the parsley and stir to combine.
6. Place the chicken breast onto warm plates skin side up, top with the sauce, serve immediately.
