dog-eared, Easy, Gluten-free, Grains and Legumes, op-ed, pressure cooking, Side Dishes, Vegetables, Vegetarian

The Best Corn on the Cob in the World

foodquarterlySomething as simple as good corn on the cob shouldn’t be elusive.  There shouldn’t be any big secrets but there is and it is this, the best corn on the cob in the world is cooked in a pressure cooker.   It couldn’t be simpler to do  and the results are divine.

I live in corn country.  If there was a vortex for the center of a corn universe I am at ground zero.  And if not the exact center I am still close enough that if it shook in the middle of the night it would knock me out of bed.  What I am saying is in the Midwest we know corn, and all you have to do is visit any state fair to know I am telling you the truth.

We roast it, boil it, we scrap it off the cob, we make it into pudding, make chowder out of it, we slather ears of it with mayonnaise and sprinkle it with any number of spices, and we even deep fry it like it is a corn dog.

But when a real treat is in order, in the heat of late-summer,  we set up a table under the shade tree, even put a table cloth on it along with plates and silverware.  Then we grill some thick cut pork chops, cut thick slabs of ripe homegrown tomatoes and lightly salt them, maybe a green salad with a sugary vinegar and oil dressing, and  we steam perfectly rip ears of sweet corn under pressure, slip the ear out of the husk from the stalk end and roll the perfectly steamed ears through sun softened sticks of butter.

Pressure cooking an ear of corn does something magnificent.  It gives the kernels a snap, and by leaving the husk on the ears develop a robust corn flavor, much like wrapping tamales in a dried husk.  It tastes like corn should, pure and simple.

This slideshow requires JavaScript.

The Best Corn on the Cob in the World

(serves 6 to 8 people)

When buying ears of corn look for husk that are vibrant and fresh.  It is also always best to cook sweet corn the same day you buy it.

8 ears of sweet corn still in the husk (buy ears that fit your cooker)

1 cup water

1 stick of unsalted butter

sea salt

fresh ground black pepper

Equipment: a 6 or 8 quart pressure cooker with a steamer basket

1. Set an ear of corn onto a cutting board.  Using a good chef’s knife trim the stalk end back so that there is no stalk showing just kernels, about a 2-inch piece.  Repeat with all the ears of corn.

2. Place each ear of corn cut end down into the steamer basket.

3. Place the cooker over medium-high heat.  Add 1 cup of water and bring it to a boil.  Slip the steamer basket with the corn into the pot.

4. When the water returns to a boil, lock on the lid, and bring the pressure to level 2, or high.  Once pressure is reached lower the heat while maintaining pressure.

5. Set a timer for 6 minutes.  When the timer sounds perform a quick or cold water release.

6. Remove the lid and use a pair of tongs to lift out the steamer basket.

7. Using a dry and clean kitchen towel grab and ear of corn by the silk and push the ear out of the husk toward the stalk end.  The silks should come along with husk and the ear should be clear of silk.  Repeat for all the ears.  Serve immediately with lots of butter, salt, and fresh ground pepper.

(A tangent: If you own a pressure cooker you are in luck, if you don’t then you are going to want one. So go buy one, I am serious, and I don’t peddle stuff on here.  Not only do pressure cookers cook things well they are going to help save the planet one meal at a time by conserving energy, water, and time.  If you like that sort of stuff, conservation, then you have to get one.  A 6 or 8 quart stove top cooker will feed your family delicious meals for years to come.)


Standard
Bread, Dinner, Grains and Legumes, Thanksgiving, Vegetarian

Dinner Rolls and a Bonus Southern White Loaf

I have been, and will continue to be a believer in simple good recipes that follow great technique.  I often feel as though complicated directions and hard to find ingredients set us up for disappointment and failure. Don’t get me wrong.  I understand the law of diminishing return.  That today’s worlds best recipe will be boring tomorrow.

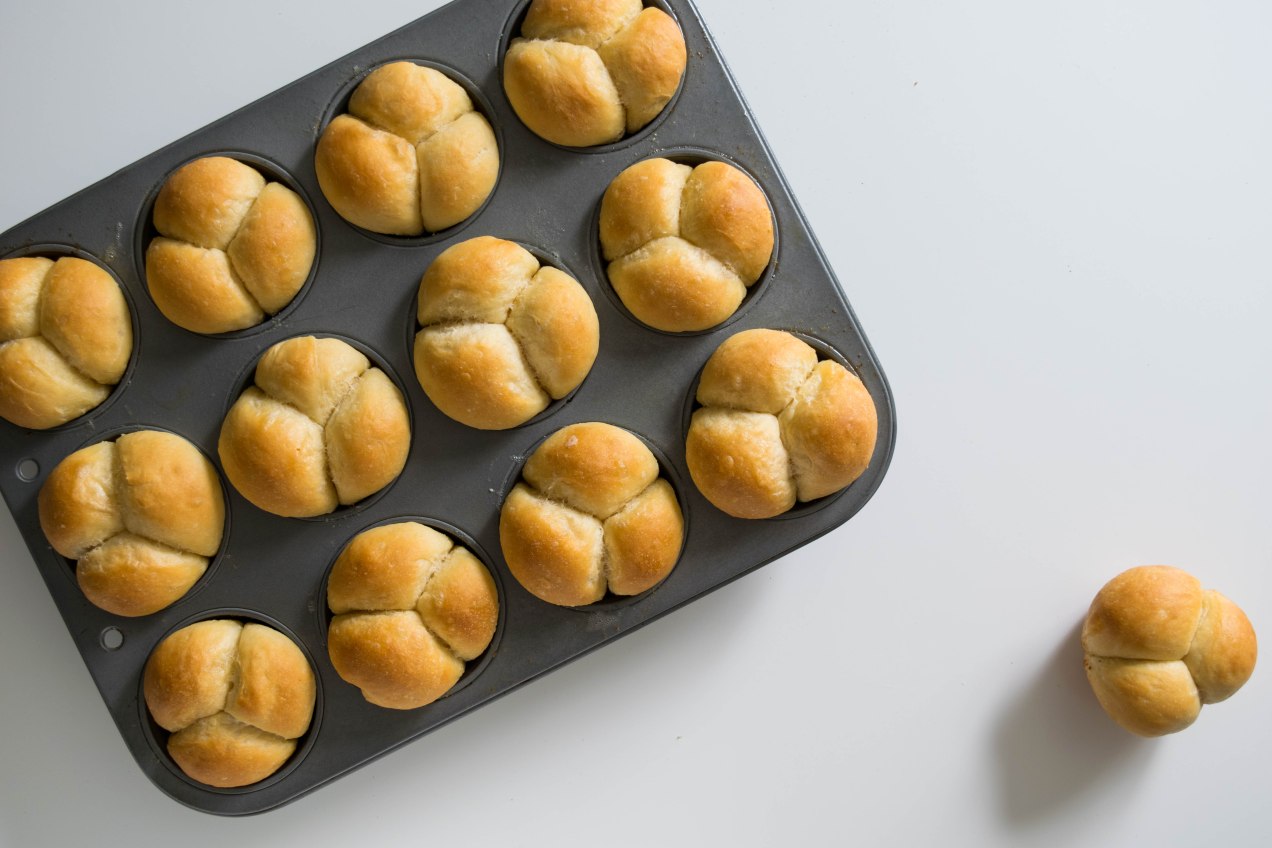
We need to search out new tastes, techniques and flavors but it is also important to return to the classics.  For me, I also like to share my childhood favorites with my children.  These rolls are a part of me.  They connect me to my past, and by sharing them, they connect me to my children. Continue reading

Standard
Dinner, dog-eared, Easy, Gluten-free, Grains and Legumes, Main Dishes, Meatless Monday, Medium Time, Moderate, Noodles, Pantry meals, Vegan, Vegetarian

Spicy Chickpea and Sour Tomato Curry with Pasta

Whenever a simple, delicious dish — like this spicy chickpea curry — is placed next to me at the table, it doesn’t just make me happy; I become protective of it in a selfish, rabid dog sort of way.

This recipe is based on Indian khatte channe, which is grounded on good Indian home cooking — but to be fair, it could also have easily been born out of a 1970’s hippie cafe in which cheap eats and a flair for the exotic were popular. In fact, Moosewood Restaurant and its cookbooks always come to mind when I cook this stew. But no matter where it came from or how it found its way to my table, I can tell you that there is a lot to like about this pasta, from the first forkful of twisted noodles loaded with tangy sauce to the last spoonfuls of creamy chickpeas.

I could start with the fact it is vegan, but that will scare some of you off, just as if I said it was gluten-free. In this case it is both, but the good news is that after you try this dish, it won’t really matter.

What does matter is how easily it comes together and the fact it can easily come from your pantry. When I make this, I head to the pantry with a tray in hand and begin by collecting all my ingredients and equipment.

What stands out during the pantry search-and-seizure is tamarind concentrate. It is a bit of an oddball ingredient, but one I always have on hand. Unlike tamarind paste, which requires soaking and straining, this concentrate dissolves easily in water. It has the consistency of molasses, and it gives this stew its characteristic tang. A popular substitute for tamarind is equal parts lime juice and brown sugar, but this only works when a small amount of tamarind is called for in a recipe, so it probably wouldn’t work here. If you like Pad Thai and ever wanted to cook it at home, tamarind really is an essential ingredient to have on hand.

When it comes to curry powder, I prefer Madras — I like the fragrance of kari leaves — but feel free to use your favorite. For more heat, you can add more cayenne; just be sure you know how hot your curry powder is before you get too crazy.

As always, when it comes to caramelizing onions, I don’t know how long it will take for them to become a deep, dark brown. It could be 15 minutes or 45, and maybe more depending on your pan, the heat, and the sugar content of your onions. I do know, however, that you shouldn’t cheat yourself; color them deeply, as they are essenial to this dish.

Assuming you have done your prep, once the onions are caramelized, this becomes a dump-and-pour procedure followed by a short simmering period just for good measure.

Spicy Chickpea and Sour Tomato Curry with Pasta

Serves 6

Two 14.5-ounce cans of chickpeas, drained

1 to 2 tablespoon tamarind concentrate mixed with 1/2 cup of water (more tamarind will make the dish more sour)

3 tablespoons olive oil

2 cups yellow onion, julienned

1 tablespoon fresh garlic, minced

2 cups tomato sauce

1 tablespoon fresh ginger, peeled and minced

1 teaspoon turmeric

1/4 teaspoon cayenne

2 teaspoons Madras curry powder, or your favorite kind

1 teaspoon cumin seeds, coarsely ground

Kosher salt and freshly ground pepper

Cilantro, green onion, or both

1 pound thin long noodles: wheat or rice or gluten free, use whatever floats you boat

1. Place a 3 1/2-quart heavy-bottomed pot over medium heat. Add 3 tablespoons of oil to the pot and then the onions. Season the onions with salt. Cook the onions, patiently, until they begin to brown and become deeply colored. Stir them often enough that the onions on top brown at the same pace as those on bottom. Don’t do this too fast; you want melted, gooey onions, not seared onions. Take your time; it takes a while.

2. Once the onions are browned to your liking, add the garlic. Once you smell the garlic, add the turmeric, curry powder, cumin, and cayenne pepper. Give it a stir then add the tamarind, tomatoes, chickpeas and ginger. Reduce the heat and let the sauce simmer. Taste the sauce for salt and adjust as necessary.

3. Cook the noodles.

4. Once the noodles are done, drain them, and put them on a platter. Top the noodles with the chickpea stew and top with green onions or cilantro or both. Serve.

Standard

Lentil Patties with Red Onions

Everyday my diet pushes further in a vegetarian/vegan direction.  I don’t know if it is because I am older,  my tastes changing, or maybe I am I just tired of all the same foods I have spent life eating.

If I really think about it, which I am prone to do, I don’t think I eat this way to be healthy.  While health is a byproduct and one I will take, I think it is because I am a lover of food.  As one whose tastebuds have been around the block a few times I am always looking for the new and exciting to try.  As my tastebuds gain experience it also becomes harder to get excited about food.

It might be connected to my garden too.  I have been lucky enough to have a garden of some sort for well over 15 years now.  With each passing year I get more excited about the growing season.  It gets harder and harder to wait for the first produce.  The other thing I know is the diversity of vegetables I grow has increased the diversity of my diet.  For whatever reason and it does not matter to me, I have developed a fondness for vegan food.

I make these lentil patties often with my lentil patty tikka masala recipe.  Today I cooked the lentils in cashew cream and added lemon juice and thyme.

Cost to make this dinner: under $15.oo

Get the lentil patty tikka masala recipe here.

For the Lentils(serves 4)

1 cup dried Lentil du Puy, rinsed and picked over for stones

1/2 yellow onion, small dice

1 tablespoon fresh grated ginger

1 tablespoon cilantro, minced

2 teaspoons garam masala

1/4 cup flour, I used millet flour

1 egg

3/4 teaspoons kosher salt


1. Place the lentils into a 3 quart pot and cover with water by two or more inches. Add the minced onion. Place the pot over medium heat. Slowly bring the lentils to a boil then reduce the heat to a simmer and cook the lentils until tender adding a pinch or two of salt in the last 10 minutes of cooking. This should take approximately 30 minutes.

2. Drain the lentils. Let them cool but puree them in a food processor while they are still warm. They will be easier to handle when warm.

3. Add the remaining lentil cake ingredients and pulse the cakes a few more times until the rest of the ingredients are combined into the mix. Taste the lentil puree then season the puree with kosher salt and a few grinds of pepper. Taste again and adjust the seasoning.

4. Let the cakes sit for a few minutes to hydrate the flour. Take a tablespoon of the mix and make a ball. Is it really wet or is it too stiff? You want the mix to hold its shape but not be overly stiff otherwise they can be dry when cooked. It should just hold its shape. Add more flour a tablespoon at a time if you need to letting the additional flour hydrate before testing. Divide the lentils into eight balls.

5. Add enough oil to cover the bottom of a heavy bottomed sauté pan by an 1/8 inch. Heat the oil over medium high heat. Test the oil by dropping a pinch of lentil to the pan. It should begin to sizzle right away but not violently sizzle and pop.

6. When the oil is ready take each lentil ball and smash it down gently forming it into 1/2 inch thick cakes and add them to the oil. Let each side brown nicely and then remove them to a tray lined with a brown bag to soak up the oil. Keep the cakes warm, either in a low, 200 degree oven or in a warm place on the stove.

For the onions:

1 large red onion, cut into four 1/2 inch slices the onion wheels left in one piece do not separate into rings

vegetable oil

For the sweet potato fries:

4 large sweet potatoes, peeled and cut into 1/4 to 1/2 inch julienne slices

oil

kosher salt and fresh ground pepper

  1. Heat the oven to 425˚ F.
  2. While the oven is heating place a saute pan over medium heat.  When the pan is warm add a couple of glugs of oil.  Add the slices of onion and saute them until they have browned.  Remove from the heat.
  3. Toss the sweet potatoes with oil.  Season them with plenty of salt and pepper and toss them again to mix in the seasoning.  Lay the fries out onto a baking rack set over a baking sheet.  This will allow the heat to cook the fries from all sides(do this step or you will have limp fries). Bake the fries until they begin to brown and blister, about 20 minutes. Remove one of the largest fries and test it to see if it is tender on the inside.  Be careful sweet potatoes burn easily so keep an eye on them.  Warm the onions in the oven.
  4. Top the patties with the onion rings, serve with fries and curry ketchup!
Grains and Legumes, Medium Time, Moderate, Pantry meals, Recipes, Vegetarian

Lentil Cakes, Red Onions and Sweet Potato Fries

Image
Easy, Grains and Legumes, Medium Time, Pantry meals, Recipes, Vegetables, Vegetarian

Chickpeas in a Spicy Tomato Gravy

Khatte Channe

A wonderful blend of deeply caramelized onions, spicy tomato broth and creamy chickpeas.  Khatte Channe, as it is know in India, is traditionally served with a flatbread but as it is cooked in this recipe it has lots of sauce so it makes sense to serve it with simple steamed rice and some sort of green vegetable.

I don’t like to use a lot of canned goods but beans are one that I rely on.  They are no fuss, no standing over the stove stirring or adding liquid because they are already cooked.  In fact I think this dish benefits from canned because the peas stand out by not absorbing all the gravy flavors that long cooking would have infused in them .

There is some extra expense in buying spices for the dish but if you have an ethnic grocery nearby, either Asian or Indian, you should be able to find the ingredients.  Buy the smallest amount they sell and if you like the spices and find yourself using them to make other dishes then buy bigger quantities.

The thing I really like about this dish and these kind of bean dishes is even though it is of Indian descent it still feels familiar, I think of it as soul food.  It is warm with a hint of spice and very much like bean dishes from Central America and Mexico.  The dish is comfortable.

Cost to make this meal:

  • three 14oz. cans organic garbanzo beans $1.49 each or $4.47
  • 2 large onions .74 cents
  • one 14 ounce can crushed tomatoes .99 cents
  • at my local Indian grocery an 8 ounce bag costs $3.oo dollars or 2 teaspoons .12 cents
  • 1 head of garlic .99 cents 4 cloves about . 50 cents
  • fresh ginger 3.99 per pound 2 ounces at .48 cents
  • 48 oz vegetable oil  $2.99 or 3 tablespoons at .10 cents
  • cumin seeds vary in price greatly depending on where you purchase them  1 teaspoon at .25 cents
  • my recipe calls for tamarind but substitute a 2 tablespoon of vinegar to give the dish its sourness

Total cost range is from  $7.65 to  $9.00 and if you are only serving 4 you should have a couple of lunches.

This recipe is adapted from Julie Sahni’s Classic Indian Cooking.  If you enjoy Indian food her books are a must for you shelf.

Makes 8 to 10 servings

3 (14.5 oz.) cans chickpeas/garbanzos (drained and liquid reserved)

2 tablespoons tamarind paste mixed with half a cup of water (or substitute 2 tablespoon of vinegar with no water)

3 vegetable oil

2 cups yellow onions, peeled and thinly sliced

2 tablespoons garlic, peeled and minced

1 teaspoon turmeric

1/2 teaspoon cayenne pepper

1 (14.5 ounce) can crushed tomatoes

1 tablespoon fresh ginger, peeled and minced finely

2 teaspoons curry powder

1 teaspoon ground cumin, toasted

kosher salt and fresh ground pepper

1. Place a 3 1/2 quart heavy bottomed pot over medium heat.  Add 3 tablespoons of oil to the pot and then the onions.  Season the onions with salt.  Cook the onions, patiently, until they begin to brown and become deeply colored. Stir them often enough that the onions on top brown at the same pace as those on bottom.   Don’t do this to fast you want melted gooey onions not seared.  Take your time it takes a while.

2. Once the onions are browned to your liking add the garlic.  Once you smell the garlic add the turmeric and cayenne pepper.  Give it a stir then add the tamarind,  tomatoes and ginger.  Reduce the heat and let the tomatoes simmer.

3. Add 1 cup of  the reserved bean liquid along with the cumin and curry powder.  Bring the liquid back to a boil reduce the heat and add the beans.

4. Cook the rice.  

5. By the time you finish the rice the beans will be warmed through and the flavors will have come together nicely.  Taste the peas and adjust the seasoning.  Serve over the rice.

Standard