One-pots, Recipes, Seafood, Short Time, Soup, Uncategorized

The Wonder Of Store-Bought Crackers

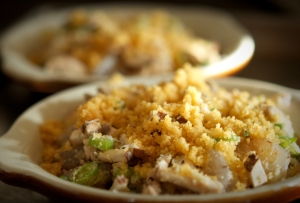
I have a deep affinity for crackers.  Not gourmet varieties, or even homemade, but good old plain Jane everyday crackers, be it Captain’s wafers, or saltines, and especially any kind that comes two-to-a-pack.  

I don’t think anyone needs a reason to like crackers  but my fondness, I am certain, begins with my childhood memory of inexpensive family restaurants and sit down pizza joints that bring cracker baskets to the table instead of bread.   I love the cracker basket and who in their right mind doesn’t?  They hold something for everyone after all.  Remember those crunchy breadsticky thingys, the sesame rounds, or the oblong townhouse crackers shaped like flattened capsules all wrapped up, by twos,  in cellophane.

Wandering along my merry way as we do in life,  I eat crackers.  I eat crackers without much thought.  I eat Club crackers wrapped in thinly sliced bacon and then baked, I learn it is okay to drink a martini with saltines topped with pickled bologna and American cheese because they are a match made in heaven,  I will never forget having Georgia cracker salad and realizing it is nothing more than a tomato, mayo, whitebread sandwich on steroids, and my favorite, I use all kinds of crushed crackers as croutons for my salad.  To this day every time I walk past a stick of butter I can’t help but want to drag a saltine down the length of the stick before popping it into my mouth, the perforations at the edges of the cracker leaving the soft butter to look like a perfectly raked zen garden. Continue reading

Standard
dog-eared, Easy, Gluten-free, Grains and Legumes, op-ed, pressure cooking, Side Dishes, Vegetables, Vegetarian

The Best Corn on the Cob in the World

foodquarterlySomething as simple as good corn on the cob shouldn’t be elusive.  There shouldn’t be any big secrets but there is and it is this, the best corn on the cob in the world is cooked in a pressure cooker.   It couldn’t be simpler to do  and the results are divine.

I live in corn country.  If there was a vortex for the center of a corn universe I am at ground zero.  And if not the exact center I am still close enough that if it shook in the middle of the night it would knock me out of bed.  What I am saying is in the Midwest we know corn, and all you have to do is visit any state fair to know I am telling you the truth.

We roast it, boil it, we scrap it off the cob, we make it into pudding, make chowder out of it, we slather ears of it with mayonnaise and sprinkle it with any number of spices, and we even deep fry it like it is a corn dog.

But when a real treat is in order, in the heat of late-summer,  we set up a table under the shade tree, even put a table cloth on it along with plates and silverware.  Then we grill some thick cut pork chops, cut thick slabs of ripe homegrown tomatoes and lightly salt them, maybe a green salad with a sugary vinegar and oil dressing, and  we steam perfectly rip ears of sweet corn under pressure, slip the ear out of the husk from the stalk end and roll the perfectly steamed ears through sun softened sticks of butter.

Pressure cooking an ear of corn does something magnificent.  It gives the kernels a snap, and by leaving the husk on the ears develop a robust corn flavor, much like wrapping tamales in a dried husk.  It tastes like corn should, pure and simple.

This slideshow requires JavaScript.

The Best Corn on the Cob in the World

(serves 6 to 8 people)

When buying ears of corn look for husk that are vibrant and fresh.  It is also always best to cook sweet corn the same day you buy it.

8 ears of sweet corn still in the husk (buy ears that fit your cooker)

1 cup water

1 stick of unsalted butter

sea salt

fresh ground black pepper

Equipment: a 6 or 8 quart pressure cooker with a steamer basket

1. Set an ear of corn onto a cutting board.  Using a good chef’s knife trim the stalk end back so that there is no stalk showing just kernels, about a 2-inch piece.  Repeat with all the ears of corn.

2. Place each ear of corn cut end down into the steamer basket.

3. Place the cooker over medium-high heat.  Add 1 cup of water and bring it to a boil.  Slip the steamer basket with the corn into the pot.

4. When the water returns to a boil, lock on the lid, and bring the pressure to level 2, or high.  Once pressure is reached lower the heat while maintaining pressure.

5. Set a timer for 6 minutes.  When the timer sounds perform a quick or cold water release.

6. Remove the lid and use a pair of tongs to lift out the steamer basket.

7. Using a dry and clean kitchen towel grab and ear of corn by the silk and push the ear out of the husk toward the stalk end.  The silks should come along with husk and the ear should be clear of silk.  Repeat for all the ears.  Serve immediately with lots of butter, salt, and fresh ground pepper.

(A tangent: If you own a pressure cooker you are in luck, if you don’t then you are going to want one. So go buy one, I am serious, and I don’t peddle stuff on here.  Not only do pressure cookers cook things well they are going to help save the planet one meal at a time by conserving energy, water, and time.  If you like that sort of stuff, conservation, then you have to get one.  A 6 or 8 quart stove top cooker will feed your family delicious meals for years to come.)


Standard
Gluten-free, Side Dishes, Vegetables, Vegetarian

Perfect Microwave Broccoli

_TJH7023Rarely do I use my microwave. I use it to take the chill off my coffee. I heat leftovers for lunch. Whenever a recipe calls for “butter, melted” onto the glass turntable the fat filled Pyrex measuring cup goes. I don’t cook with my microwave in any real culinary sense. I sometimes wonder why I have it, why I allow it to take up precious counter space when I know everything for which I use it can be done just as easily on the stove.

Of course there is also the fear that has been around as long as the microwave, that somehow it poses some sort of health risk. I don’t know if it does or not but if I error on the side of solid scientific research, it would tell me the microwave is harmless. Even so, I will lean on the side of caution and repeat the mantra I continually voice to my children, don’t put your face right up to the microwave door to watch as a cooking pizza pocket swells and shrinks, as if it is coming to life, and please, stand back an arms length.

I don’t believe the microwave has ever lived up to its original space age expectations. Nonetheless I read an article touting the healthy aspects of cooking vegetables in a microwave. Because it basically steams the vegetables, the vegetables retain a large portion of nutrients then if you used other cooking methods. It made sense, and I am buying in, or at least I want to and there are lots of reasons why. Continue reading

Standard
Pork

Farmhouse Chops in Wing Sauce


We love our wings in the Midwest but until I made wing sauce, equal parts real butter to hot sauce, I hadn’t had wing sauce. Sadly, and I know it is about cost, I doubt a single wing shop uses real butter in their sauce anymore. The good thing is you can have the real deal, easily, and without having to buy a pre-made version that is less then stellar. Continue reading

Standard
Desserts/Sweets, dog-eared, Fancy, features, Gluten-free

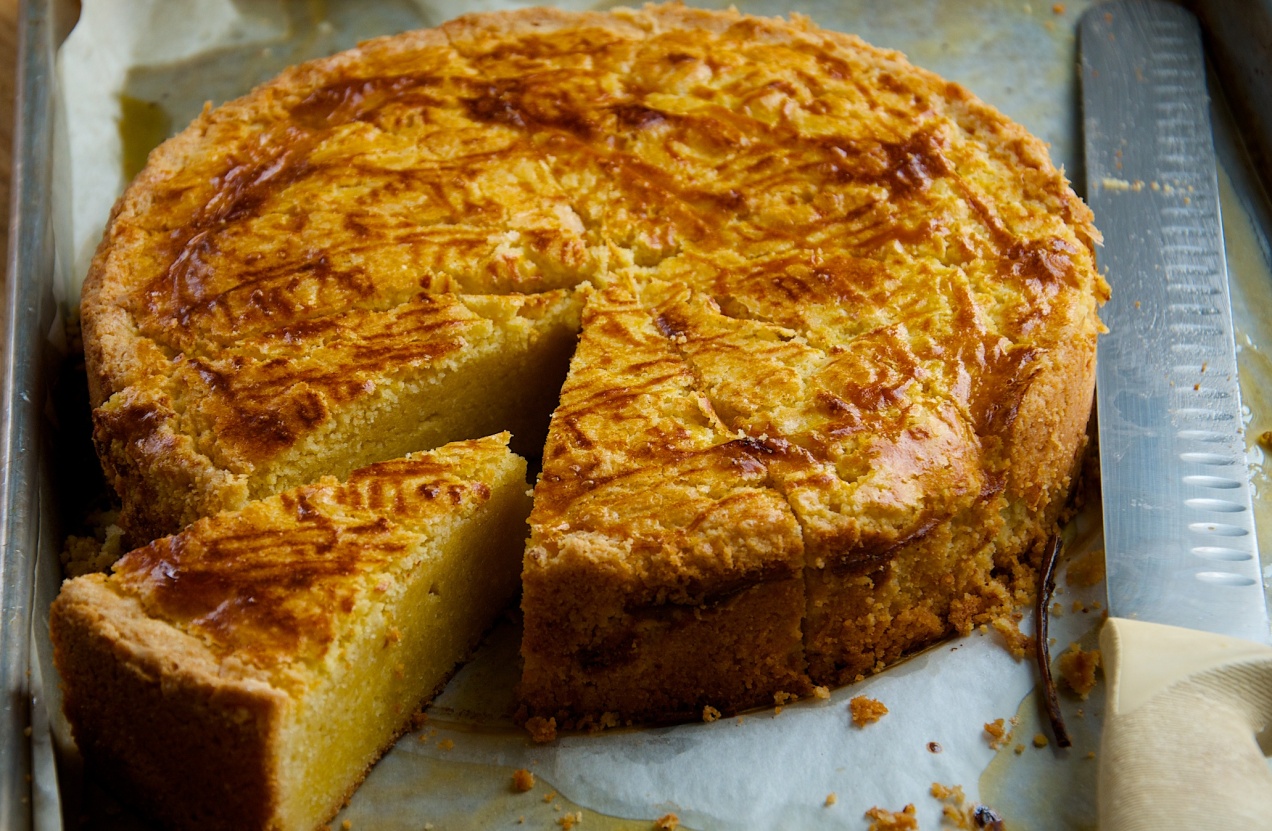
Breton Butter Cake

Breton Butter Cake

This morning little Lynnie keeps yelling and pointing in excitement at the cake I made for last night’s Sunday dinner. She is telling me she wants it for her birthday. The heels on the last three slices of the cake have been nibbled. Last night she kept slipping her little hand in and under the wrap so she could pinch and sneak little pieces off. The edges now look like we have a mouse in the house, and I finally had to move the cake to higher ground.

We had guest last night for dinner and while making dessert yesterday I recalled making a promise this year to make more desserts. I haven’t been. So I started thinking about this commitment while making this cake. I figured I need to sort out my likes and dislikes. Set some parameters and set myself up for success.

Most of the time I don’t want anything sweet. I am not a big sweets person. When I do a simple, small piece of dark chocolate usually suffices. I don’t want anything overly sweet.

Not only that, but as with many chefs I have a certain disdain for making desserts. It’s not that I don’t like to make them but that these grumblings occur because I usually wait till everything else is done before I think to make something. It is like opening the dishwasher to to put in dirties only to find you haven’t yet put up the clean ones. I have no explanation for this other than I think it comes with the toque. It’s why the gods made pastry chefs.

The idea of a dessert that holds the potential of a coffee or tea break snack but can double as an after-dinner treat always appeals to me. I am always out to kill two birds with one stone.

I have made this cake multiple times but I haven’t made it since I became gluten-free, so I figured now would be as good a time as any. Knowing the kind of cake it is — a very buttery shortbread — I figured it would make the conversion without suffering. It did. In all honesty I think I like it better gluten-free. The rice flour really gives it a quintessential butter cake texture in a shortbread way.

There are technical things I like about it too, or maybe I should say, the lack of technical things. It is a put-all-the-ingredients-into-a-bowl, mix, dump and bake affair. Not a lot of extras to clean up.

It holds well too. It is on day three, still on the sheet tray, covered with plastic wrap and pieces keep disappearing.

It is a cake of no regrets and, if this afternoon I do have any, they are gone by the time I have finished my last delicious bite and sip the last sip of coffee from the cup. Again, two birds with one stone.

Breton Butter Cake (Makes 12 pieces)

  • 600grams King Arthur all-purpose gluten-free flour
  • 30grams corn starch (1/4 cup)
  • 395grams sugar (2 cups)
  • 448grams salted butter, yes salted, soft (4 sticks)
  • 140grams egg yolk (7 yolks)
  • 22grams rum (2 tablespoons)
  • 1egg yolk mixed with one tablespoon of milk
  1. Heat the oven to 400 degrees F.
  2. Sift the flour and cornstarch into the bowl of a mixer. Add the sugar and butter. Use a rubber spatula and scrape every bit of butter off the butter wrappers and put it into the bowl too. Then, using the paddle attachment, mix until combined. Add the yolks and rum. Mix till smooth.
  3. Using one of the butter wrappers grease the inside of a 9 inch ring mold that is 2 inches deep or spring form pan. If you use a spring form pan, dust it with flour after greasing and tilt and shift the pan so you get the sides dusted too. Shake out the excess.
  4. Using a spatula, scoop the batter into the mold then spread the batter out evenly. You may need to moisten the spatula with a little water to keep the dough from sticking to it.
  5. Using the tines of a fork make a cross hatch pattern on the surface of the cake. Using a pastry brush gently paint the top of the cake with the yolk and milk wash.
  6. Bake the cake for 45 minutes. Keep an eye on it and if it starts to brown to quickly reduce the heat. The top should brown and it should be firm to the touch. Remove the cake from the oven and let it cool completely before removing the ring.
Standard
Dinner, Gluten-free, Grains/Legumes, Main Dishes, Pork

Polenta with Peas and Pork Sausage

If my extended family’s eating habits are an indication as to what the preferred meat was on my grandparents and great grandparents farm then it is obvious to me I come from a long line of pork eaters. It’s not as if this matters or that I need some sort of familial approval for my love of the beast because I don’t.  I claim it as my heritage after all but I’ll just say it anyway for clarity, I…love…pork.

I love pork for its possibilities, its versatility, and most importantly, it’s flavor. From snout to hocks or bacon to ham there are more uses for the pig then any other animal I know and one of my favorite uses is as a seasoning.  My definition and what I mean by seasoning is not simply tossing a couple of strips of bacon in with the green beans and  calling it a day.  No, the pork isn’t there for a cameo but instead has an important supporting role, one in which it could be nominated for an award.

Don’t get me wrong I enjoy a good pork dinner, something like Edna Lewis’s Boiled Pork (think Pot eu Feu) really floats my boat but as I try to reduce the amount of animal protein I consume I often look to the example of Italian ragus or Asian dishes where animal protein, quite literally, plays second fiddle to the grains or noodles on the platter. The pork is there to enhance and flavor the dish. Sure this is done for economy, just like adding bread or oats to meatloaf, and who doesn’t like save a few bucks or at the very least feed more mouths for the same price. Not only that but if you buy less quantity then you can afford better quality, at least this has always been my way of thinking.

When it comes to pork quality matters. If you buy pork that is enhanced with sodium triphosphate, a common practice at big box stores, it won’t caramelize very well and honestly the pork tastes bland. It is done to help the meat retain moisture but they add it because the producers have made pork to lean. If you buy pork with a little higher fat content you don’t need the moisture retainer. Not only that but when pork is raised in a more sustainable fashion it just taste better. It taste better because of what the animals eat.  It is about the animals diet after all. I am all about how my food taste and if sustainability happens to be a byproduct then, wonderful. I mean when I bite into good pork it immediately transports me to my grandparents farm, sitting outside under a shade tree eating a farm dinner on a beautiful summer’s eve and it reminds me exactly how pork is supposed to taste.

Over the years I have had different fascinations with different types of cured pork. I mean the list of possibilities is big, you have bacon, ham, Tasso, Serrano, prosciutto, pancetta, guanciale all on top of any number of sausages. All used as seasonings and all just a few of the options that can confront you. The wonderful thing is there are many books that will teach you how to cure many of these products at home (Michael Ruhlman’s Charcuterie comes to mind) and many of the processes are surprisingly simple. In fact no special equipment is required other then a good sharp knife(which I don’t consider special equipment).

Polenta with Peas and Sausage (serves 6)

one recipe of Carlo Middione’s Polenta Facile

10 ounces pork tenderloin, sirloin or loin

4 to 5 ounces pancetta

2 teaspoons red wine vinegar

a scrape or two of whole nutmeg

a handful of  parsley leaves

3 cloves garlic

2 tablespoons tomato paste

1 teaspoon dried thyme

1/2 teaspoon dried rosemary

1 bay leaf

kosher salt

fresh ground pepper

1 garlic clove, minced

1/2 cup carrots, small dice

1/2 cup onion, small dice

1/2 cup white wine

2 cups pork stock or chicken stock

1 1/2 cups fresh peas or frozen

chopped chives and parsley

1. Lay your pork out onto a large cutting board. Cut the pork and pancetta into thin strips then into cubes. Spread the pork out so it is flat instead of in one big pile. It’s ok if it isn’t in one single layer you just don’t want a big pile. Place the palm of you hand, as shown in the picture, across the blade of the knife making sure to keep your fingers up and you hand flat. This will keep you from cutting your hand if the knife slips. So fingers up! What you are doing is creating a hinge of sorts because you want to keep the tip of the knife on the board and in doing so it lets you apply more cutting force. Run the knife through the pork several times and until you have minced it to a coarse mince.

2. Add the garlic cloves, parsley, a teaspoon of salt, a few grinds of pepper and the nutmeg. Mince the seasonings into the pork until you have a fine mince. Add the red wine vinegar and knead it into the sausage. Ball up the sausage, put it in a bowl and let it get funky in the fridge for an hour or two.

3. Start the polenta. I let my polenta cook for almost three hours. I was using an heirloom corn I grew last year called Henry Moore. It took a long time to cook but it was creamy beyond my wildest expectations. So take your time with the polenta, cook any bitterness out of it and let it do its thing.

4. When the polenta is close to being finished start the sauce by placing a large 12 inch saute pan over medium high heat. When it is hot add a glug or two of oil to coat the bottom of the pan. Brown the sausage. Once the sausage is brown remove it to a plate. Be careful not to burn the fond on the bottom of the pan. Add the onions and carrots and cook them gently until they just begin to wilt.

5. Add the tomato paste, dried thyme, rosemary, garlic and bay leaf. Stir until fragrant then add the white wine. Let the wine burn off the alcohol and then add the stock. Season and taste. Bring it to a boil and reduce it by half. Taste again and adjust the seasoning.

6. Add the sausage and peas. Heat until the peas are warmed through. Taste and adjust the seasoning. Add a tablespoon of chopped chives and parsley. Stir.

7. Spread the polenta on a platter, top with the peas and sausage, and serve.

Seasoning with Pork: Polenta with Peas and Pork Sausage

Aside
Chicken/Poultry, Cooking School, Dinner, Kitchen Tips, Main Dishes, Noodles/pasta

The Unctuous Possibilities of Pan Juices

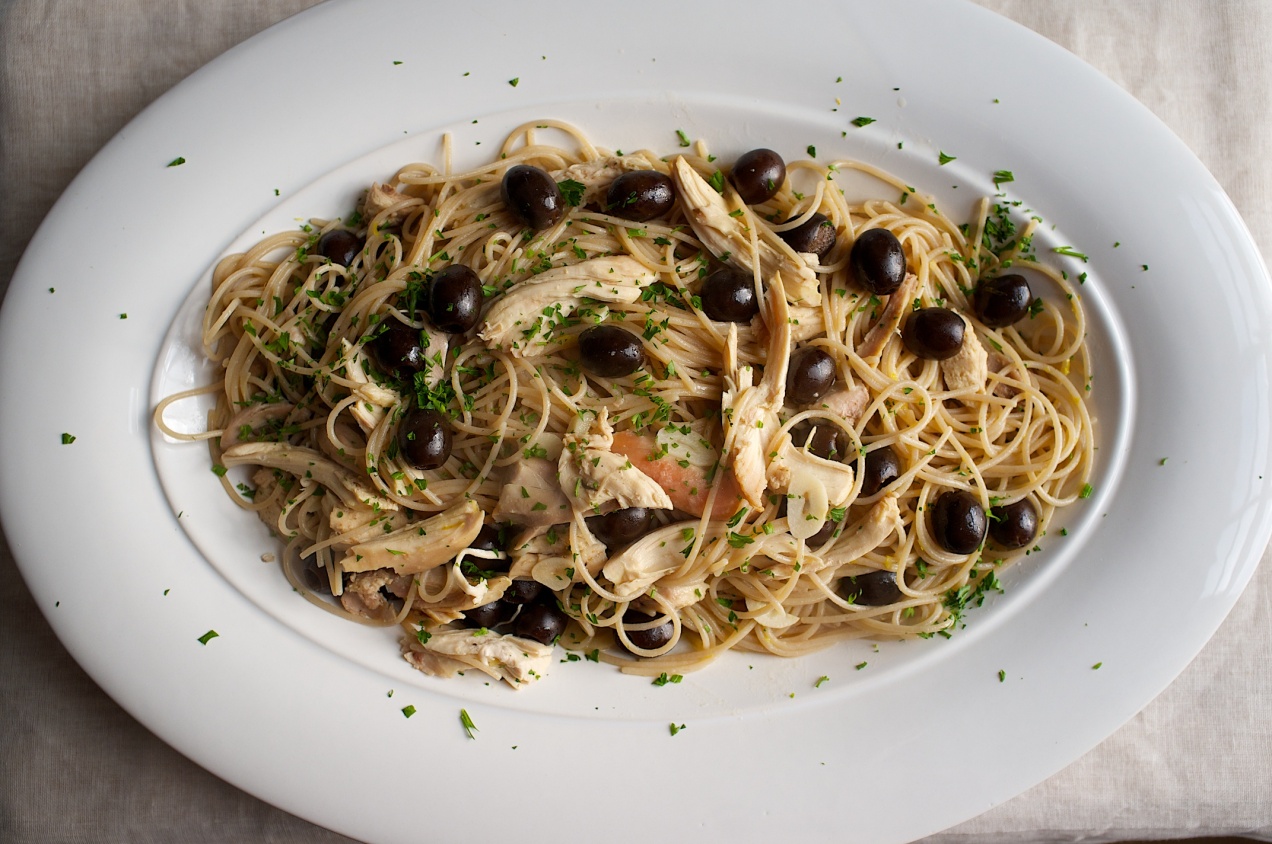
Spaghetti with Chicken, Black Olives, Lemon and Au JusWe all know gravy or pan sauce in large quantities might be good for our soul but it isn’t so good for our heart health. After all we are doing nothing more then adding flour or cornstarch to the fat in the bottom of a roasting or sauté pan to thicken it and adding back some stock, wine, or cream for volume. So we have deemed it less healthy which to me means it is an occasional treat and as such we reserve serving gravy for holiday feasts or occasional celebrations, and rightly so.

So why then when I look into the chicken-less roasting pan that held tonights dinner only a short time ago and I see those beautiful glistening juices that are on the edge of coagulating do I feel like I am throwing the baby out with the bathwater. Don’t get me wrong I am no health nut. In fact I have this beautiful physique that could make me the poster child for a Bittman campaign on obesity. I am sure it goes back to my waste not want not way of thinking. Nevertheless all this made me think. pan jelly

When I make my own stock I always cool it down, put it in the fridge and then the next day I lift the disc of fat off the top. I know the stock is pretty fat free, although I haven’t calculated it and I have know idea how to do so, but it has to be pretty lean and I also know it has very little salt because I didn’t add any. So looking at it in this light I started refrigerating the roasting pan and the next day I remove all the fat cap and what is left is the reduced intensely rich jelly. I use a rubber spatula and scrap all the jelly up and into a small Ball jar. I have already made a plan for its use, did so before I even roasted the pork, beef or chicken, so I know when I store it in the fridge it will be used up in a day or two. I could freeze it but I don’t like to collect things like this and my motto is use it or loose it.

The jelly is infinitely better then bouillon cubes or stock base and can be used in all sorts of ways. Sometimes I like the jelly to have lots of debris(meat bits and spices) and other times I don’t but it is easy to heat and strain, if you need too, just before you want to use it. While you don’t have too I often try to keep in mind the flavors of what I roasted with the flavors of what I am going to make with the pan juices just to make sure they coincide.

Pan juice possibilities:

  • Of course it is always good to use the pan juices in soups.  Added to the broth it can give a flat soup the kick it needs.
  • Pasta or noodles of all kinds.
  • For chicken pan juices:  Make a simple fresh lemon juice and olive oil vinaigrette with salt and lots of fresh ground pepper, take a couple big hand fulls of baby Bibb lettuces  and toss it with the dressing.  Just before serving heat the pan juices and drizzle over the salad for a “healthier” wilted salad.
  • For beef:  You could make Grits and debris.  Make a bowl of grits, pour on the warm pan juices and top with a fried egg.
  • For pork:  Ramen noodles.

Pasta with Chicken, Black Olives and Lemon

(serves 4)

12 or 16 ounce box of spaghetti noodles

extra virgin olive oil

half a can of black olives, drained

1 1/2 cups cooked chicken meat

4 cloves of garlic, trimmed, peeled and slivered

1 1/2 teaspoons lemon zest

1/4 cup dry white wine

1 tablespoon fresh lemon juice

2/3 cup chicken stock

2 to 3 tablespoons pan juices

1 tablespoon parsley, minced

parmesan cheese

1. Place a large pot filled with 4 quarts of salted water over high heat.

2. While you are waiting for the water to come to a boil place a sauté pan over medium heat.  Add a good glug or two of extra virgin olive oil.  Add the garlic and let it gently cook until it just begins to turn golden, be careful because browned garlic can be very bitter.  Add the white wine and let the alcohol burn off.  Now add the lemon juice, stock and pan juices.  Bring them to a boil and season with salt and pepper.  Taste and adjust the seasoning.  Reduce the heat and let the liquid reduce.

3. When the water is at a roiling boil add the spaghetti.  Cook according to the directions on the box, I am guessing 10 minutes or so.  Once the pasta is just tender remove a cup of pasta water and reserve it, drain the pasta and immediately add it to the pan along with the chicken, olives and lemon zest.  Season the pasta with salt and fresh ground pepper.  Taste and make the necessary adjustments.  If it is to dry add a little bit of pasta water.  This is the kind of pasta that should have a broth.  Toss to combine and once the chicken is hot add the parsley toss again and serve with lots of parmesan.

Standard
Beef/Veal, Main Dishes, Salad

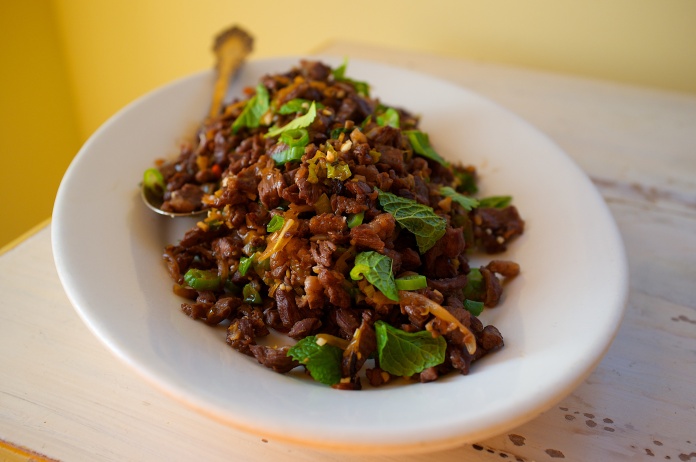
Laotian Beef Salad (Larb)

Laotian Beef SaladI really enjoy making and eating the foods of Southeast Asia.  I make trips to the Asian grocery and buy up all kinds of different produce that aren’t found in my garden or at the local grocer.  I don’t really drive but an extra five minutes to get there, the groceries cost less which makes up for the extra in gas and I usually find some gem of a new product that I have never eaten, cooked with or sometimes never even seen.  It is always an adventure.  This time I happened in a day or two before the Chinese New Year and in honor of the holiday they gave Lynnie a box of the funkiest most savory cookies ever.  I couldn’t eat them but she loved them and this from the little girl who finds Chinese food sour.

I did something different here, something I wouldn’t  normally do.  Usually I would get the pan smoking hot and sear the protein but I didn’t get the wok hot enough and when meat hit metal it cooled down right away.  It became a happy mistake.  Instead of panicking I just let it sit.  I watched as all the beef juice bubbled up around the meat and then slowly subsided until it was gone.  Then the skirt steak caramelized really well and the fond, the sticky delicious stuff on the bottom of the pan, added tons of beefy flavor to the final dish.

It’s a great dish to serve with rice and a couple of nice vegetables.

Serves 4

canola oil

1 pound 2 ounces skirt steak, sliced then minced

6 garlic cloves, minced (about 2 tablespoons)

1 1/2 tablespoons lemon grass, minced

1/2 cup shallots, julienned

3 red Thai bird chile, minced

1 tablespoon fish sauce

1 tablespoon soy sauce

2 tablespoons water

1/3 cup mint leaves, torn

1/3 cup cilantro leaves, torn

1/3 cup green onion, thinly sliced

1/4 cup peanuts, smashed

1. Heat a large wok or skillet over medium high heat.  Add a tablespoon of oil to the pan and when it is warm add the minced skirt steak, garlic, lemon grass and shallot.  It should cool the pan down and as it cooks liquid should release from the protein.  Let it gently bubble while you occasionally stir.  As the juice begins to evaporate stop stirring.  Patiently wait for the meat to brown and the fond to build on the bottom of the wok or pan.

2. Add the fish sauce, soy and water.  Stir the larb to combine and until almost all the liquid is absorbed.  Using a spoon taste the larb and add a little salt if necessary.  Stir then remove the pan from the heat.

3. Once the steak isn’t so hot but still warm stir in half the chili, mint, cilantro and green onion.  Plate up the salad and then top with the remaining herbs and the peanuts.  Serve.

Standard
Dinner, Main Dishes, Memoir, Seafood

Dear Mr. Pepin,

I made a recipe of yours last night. It wasn’t the first time I have made this recipe, in fact, I have made it several times but it has been far to long since it has graced our table, rest assured, this will not happen again. Just in case I haven’t been clear it was beyond delicious as always.

I remember the night I watched you make the gratin on TV. It must have been about three in the morning or somewhere around there. I was still working in the restaurant business and it had been a long night on the line. Now I was home, my wife fast asleep in bed, and I out in the living room and on the couch with a beer in my hand winding down. I was flipping through a food magazine and doing the same with the channels on TV.

Jacques Pepin's Shrimp Gratin

Jacques Pepin’s Shrimp Gratin

At the time I had not seen but a couple shows in any of your many series because our local PBS station didn’t carry them or they were on at times when I wasn’t around. But here you were in the wee hours of the morning in front of the camera, your heavy French accent, broad smile, all as unmistakeable as the sparkle in your eyes. You caught my attention right away.

I watched as you peeled shrimp and even went so far as to show me how to pinch the tails between my thumb and forefinger, then wiggle, and finally you gently pulled and I watched as all the tail meat slipped out of its casing without any waste. Then you sliced a handful of the freshest white mushrooms with such speed and accuracy it could have been a magic trick. You wasted no time doing the same with a couple of green onions. Continue reading

Standard
Grains/Legumes, Meatless Monday, Noodles/pasta, Vegan, Vegetarian

The Poor Wretches Pasta


Street walkers pasta and now poor wretches pasta.  Leave it to the Italians to come up with an interesting name for their local eats.  This is Sicilian by birth.  The pine nuts and currants aren’t traditional but I like what they bring to this dish.

Eggplants are abundant at the moment.  You could take the time to make eggplant parm, moussaka or some other multi-step dish or you could keep it simple and make this.  It is simple but that doesn’t mean it isn’t flavorful.  I have made it twice already and probably will make it again.  I am not doing so because I have eggplants, and lots of them, but because I like it that much.

Makes 4 to 6 servings

good quality olive oil

2 or 3 eggplant, depending on size, peeled and cubed into 1 inch pieces, about 5 cups

2 cups tomato sauce

2 teaspoons red pepper flakes

3 tablespoons currants

2 tablespoons pine nuts

1/2 cup fresh bread crumbs

16 oz. penne pasta

kosher salt and fresh ground pepper

1. Add 1 1/2 tablespoons of olive oil to a small saute pan.  Once it is hot add the bread crumbs and pine nuts.  Season them with salt and pepper and cook them until they are browned.  Add the currants and toss a few times.  Empty the pan into a small bowl  and let the topping cool.

2. About one hour before you start cooking put the eggplant cubes into a colander.  Season the cubes with a fair amount of salt and either place the colander in the sink to drain or in a large bowl.

3.  Place a large pot of generously salted water over high heat.

4.  While the water is coming to a boil place a 14 inch saute pan over high heat and add 1/3 cup of olive oil.  Once it is shimmering but not smoking add the eggplant.  It might splatter a little if there is a lot of water clinging to the pieces so be careful.  Brown the eggplant.

5. Add the red pepper flakes, a little more oil if the pan looks dry,  and then the tomato sauce.  Reduce the heat and simmer the sauce.

6. Add the pasta to the big pot of boiling water and cook the pasta according to the cooking time listed on the box.  Once they are done, add a 1/2 to 1 cup of the starchy pasta cooking liquid to the sauce depending on how reduced it has become.

7. Strain the noodles and add them to the sauce.  Toss to combine and coat the noodles.  Pour the pan out into a large bowl and top with the bread-crumb-currant-pine-nut topping and serve.

Standard
Seafood, Soup

New England Clam Chowder

A good bowl of creamy chowder has always been one of my favorites. Even when I was a little kid I would gobble the stuff up.  As I have become more refined (defined: I have stopped eating with my hands and slurping my food) I don’t care so much for the clam shack version that is thick and goopey, although I give you directions for thickening the soup with flour.

This is the real deal and anyone who says,  “but it doesn’t have whole clams in it,” eats more with their eyes then there mouth.  I have yet to find a shell-with-clam in chowder that is any better then clams from a can.  Prove me wrong is my challenge because I would love to be.  After all I like the idea of being out claming then coming in and cooking up a pot of chowder on a blustery noreaster New England eve.

Makes 8 six ounce servings

2 eight oz. bottles Bar Harbor clam juice

2 six oz. cans Bar Harbor clams, chop them if they are whole, juice drained and reserved

4 oz. bacon, diced

1 tablespoon unsalted butter

2 cups yellow onion, small dice

1 cup celery, washed, trimmed and small dice

1 tablespoon garlic, peeled and minced

1 1/2 teaspoons dried thyme

1/8 teaspoon fennel seed, ground

2 bay leaves

2 tablespoon all purpose flour (optional, depends on if you want thick chowder or not)

2 cups yukon gold potatoes, peeled and 1/2 inch dice

16 oz half and half

salt and fresh ground white pepper

1 1/2 tablespoon chives, minced

1 tablespoon flat leaf parsley, minced

1. Place a 3 1/2 quart heavy bottomed saucepan over medium heat and add the bacon. Let the bacon render its fat (you should have about two tablespoons of fat in the pan) and saute it until it becomes crispy, not crunchy, and starts to brown.

2. Add the butter, onions and celery. Saute the vegetables until they are tender but do not brown them. Add the garlic, thyme and fennel. Saute until the spices become fragrant, not even a minute.

3. If you want thicker chowder add the flour and stir it around letting it absorb the fat. Once the flour starts to smell the slightest bit nutty add the clam juice and the reserved clam juice. It is important to cook the flour taste out of the flour so be patient and make sure you cook it long enough.

4. Add the half and half. Bring the liquid to a boil and add the potatoes. Bring it back to a boil and then reduce the heat to the lowest simmer setting you stove has. Taste the soup to see how salty the clam juice is, adjust the seasoning by adding more salt if necessary. Add a few grinds of white pepper. Cover the pot and let it simmer for 30 minutes or until the potatoes are cooked through.

5. Add the clams, turn off the heat and let the chowder sit, covered, for one hour to let the flavors meld.

6. Before serving add the parsley and chives. Adjust the seasoning and reheat the chowder till hot. Serve.

Old Bay Oyster Crackers (can be made a day in advance)

2 tablespoons vegetable oil

1 tablespoon Old Bay Seasoning

a two finger pinch of fine sea salt

5 cups oyster crackers

1. Preheat the oven to 350 degrees.

2. Combine the oil, seasoning and salt in a mixing bowl.

3. Add the crackers and toss to coat them well with the oil.

4. Spread then out on a baking sheet and bake them for 10 minutes or until they start to take on a little color. Cool.

Standard

The tiny bright green stars of okra and the fresh lima beans, so tender the veins show through their thin skins, are nestled into a bed of bi-color sweet corn just shaved off the cob. Together they simmer in a liquid that is mostly melted butter, seasoned quietly with salt and black pepper.

Succotash is a poor man’s dish, made popular during the Great Depression. Somehow I never feel poor when eating it — but then, I feel that way about all soul food.

While succotash is comfort food, not all comfort food is soul food. I can find comfort in foie gras, but foie gras is not soul food. Succotash is.

At the back of the stove, the chicken thighs simmer away. Their crispy brown skin breaks the bubbling surface of pan gravy made with peppers, onions, and celery. There is a reason they call this mix of vegetables the trinity. It goes beyond the Southern flavor they bring to the dish — something distinct, even ethereal.

I am feeling sad. Sylvia Woods, of Sylvia’s Soul Food fame, has passed away. Over the years, her collard greens recipe became my recipe, her Northern-style cornbread a family favorite at Thanksgiving. It was with her recipe in hand one sultry Friday afternoon some years ago that I lost my red velvet cake virginity.

I pick up the paring knife used to peel the potatoes. It is dirty with powdery white potato starch. Fishing for one of the larger chunks of potato, I stick it into the boiling water, find one, and poke it with the knife, which slips to the center of the potato like it is room temperature butter.

Carrying the potato pot to the sink, I pour it into the strainer. Hot starchy steam rushes up and around my face before disappearing upward toward the ceiling. I let the potatoes sit in the strainer to steam out excess moisture and turn to the stove to stir the succotash.

The oven timer goes off.

I grab a kitchen towel to use as a hot pad and remove the black skillet cornbread from the oven. I can smell the thin, crispy bacon fat-and-cornmeal crust that forms when the batter hits the hot skillet, hiding now under the tender yellow interior. I set the skillet on top of the stove and cover it with the dish towel.

I like this point in the meal preparation.  The point where everything is coming together and there is a final rush to get everything done at the same time so all the food comes to the table hot.

I rice the potatoes.

It isn’t a coincidence the corn, okra, and lima beans are all at their peak out in the garden today.  At least that is what I am telling myself.

I always add the butter first to the riced potatoes so the fat gets absorbed by the starch.  Then I add the heavy cream, salt and pepper.
I like that soul food is about coming together not just as a family but as a community, even more so then it is about eating.  Not that the food isn’t important– it is about the value of sharing, too — but even the food shouldn’t trump the socialization that happens around it.

I taste the potatoes.  They are just the right texture and need no further seasoning, cream or butter.  I scoop them into a serving bowl, and do the same with the succotash, and put the smothered chicken on a platter with its gravy ladled over the top.

It is always lively at our table.  This evening, it might even be more so.

For the spice mix:

2 tablespoons paprika
1 teaspoon garlic powder
1/2 teaspoon black pepper

For the chicken:
6 to 8 bone-in skin-on chicken thighs
2 cups yellow onions, julienned
3/4 cups green bell peppers, julienned
3/4 cups celery, julienned
water
kosher salt
fresh ground black pepper
1/4 cup green onions, chopped
2 1/2 tablespoons flour
vegetable oil
2 garlic cloves, peeled and minced

1.    Combine all the spice ingredients in a small bowl. Season the chicken thighs on all sides with salt and then with the spice mixture. You may or may not have extra spice depending on how heavy your hand is and whether or not you season 6 or 8 thighs.
2.    Place a heavy, large sauté pan over medium high heat. Add enough oil to the pan to easily coat the bottom completely. When it is hot add the thighs skin side down and brown them deeply. Once they are brown do the same to the other side.
3.    Remove the thighs to a plate. Add the onions, bell pepper and celery to the pan. Season them with salt and pepper. If the pan is to hot turn down the heat and cook down the vegetables until they are brown and soft. Add the flour and sauté everything for a bit longer to cook out the flour flavor.
4.    Add the garlic cloves and give the veggies a stir. Add the chicken thighs back to the pan and add enough water to cover the thighs by three quarters. The crispy tops should just be peeking out of the gravy. Add all but a tablespoon of the green onions to the sauce.
5.    When the gravy comes to a boil reduce the heat and simmer until the chicken is cooked through and tender, this should take about thirty minutes. Season the gravy, stir and taste.
6.    If the gravy is reducing to fast and getting to thick add more water and stir.

Chicken/Poultry, Main Dishes

Smothered Chicken

Image