One-pots, Recipes, Seafood, Short Time, Soup, Uncategorized

The Wonder Of Store-Bought Crackers

I have a deep affinity for crackers.  Not gourmet varieties, or even homemade, but good old plain Jane everyday crackers, be it Captain’s wafers, or saltines, and especially any kind that comes two-to-a-pack.  

I don’t think anyone needs a reason to like crackers  but my fondness, I am certain, begins with my childhood memory of inexpensive family restaurants and sit down pizza joints that bring cracker baskets to the table instead of bread.   I love the cracker basket and who in their right mind doesn’t?  They hold something for everyone after all.  Remember those crunchy breadsticky thingys, the sesame rounds, or the oblong townhouse crackers shaped like flattened capsules all wrapped up, by twos,  in cellophane.

Wandering along my merry way as we do in life,  I eat crackers.  I eat crackers without much thought.  I eat Club crackers wrapped in thinly sliced bacon and then baked, I learn it is okay to drink a martini with saltines topped with pickled bologna and American cheese because they are a match made in heaven,  I will never forget having Georgia cracker salad and realizing it is nothing more than a tomato, mayo, whitebread sandwich on steroids, and my favorite, I use all kinds of crushed crackers as croutons for my salad.  To this day every time I walk past a stick of butter I can’t help but want to drag a saltine down the length of the stick before popping it into my mouth, the perforations at the edges of the cracker leaving the soft butter to look like a perfectly raked zen garden. Continue reading

Standard
Appetizers/Starters, Gluten-free, Main Dishes, Moderate, Pork, Recipes, Sandwiches/Snacks, Snacks/Appetizers

Memphis Style Barbecue Nachos

Memphis style pulled pork nachos

Great barbecue is about the cut of meat, the smoke, the rub, and the sauce. But just because sauce is only one part of the equation, doesn’t mean it shouldn’t be excellent. In fact, barbecue sauce should be so delicious that you can use it for much more than simply dipping or brushing. Continue reading

Standard
Chicken/Poultry, Dinner, dog-eared, Gluten-free, Main Dishes, Medium Time, Moderate, One-pots, Recipes

Poulet á l’ Estragon (Chicken Tarragon)

_TJH7671

Spring always seems rushed. It’s as if we spend months climbing a mountain called winter, and when we finally reach the peak, we’re so grateful that we run as fast as we can down the other side — past spring and directly into summer. It’s even true for the vegetables we’re attracted to — the fleeting cool weather crops that are harvested and eaten before spring has truly begun. Continue reading

Standard
Chicken and Poultry, Dinner, dog-eared, Fancy, Gluten-free, Main Dishes, Medium Time, Moderate, Recipes

The New Steak (+ a Recipe for Duck Teriyaki)

DSCF3286

A whole roast duck is as satisfying to eat as it is pretty on the table; while foie gras is a rich man’s food and confit is pure comfort, a delicious seared and crispy-skinned duck breast is one of the real luxuries of eating.

Duck is versatile, but quirky to cook. And when something is unusual, people tend to keep it at an arm’s distance in a that’s my crazy uncle sort of way. But I’m here to say that it is simple to prepare; no matter which cut you’re preparing, cooking duck comes down to two things: rendering off the fat, and getting the skin crispy. Continue reading

Standard
Dinner, dog-eared, Gluten-free, Long Time, Main Dishes, Moderate, Pork, Recipes

Chinese Style Sticky Ribs

Chef Leichte spun on the balls of his feet. A millisecond ago he was heading forward, and I was following him. Now we are face to face, and he pokes my chest with his finger. “Commit!” he says in a raised voice, his chef’s toque rising from his head and towering above me like the leaning Tower of Pisa. “Quit asking all these questions and cook! Commit to the recipe; if it fails, we will fix it, but realize you will probably learn more from your mistakes than if I coddle you through the process.” Continue reading

Tips for Reading Recipes (& Chinese Style Honey Hoisin Sticky Ribs)

Aside
Beef, Beef/Veal, Dinner, dog-eared, Easy, Gluten-free, Main Dishes, Recipes, Stocks & Basics, Uncategorized

While it might not be haute cuisine, chopped meat is surely economical, flavorful, and versatile. From meatballs to croquettes to tacos, it can do it all and can do it with ease. It is an uncomplicated ingredient, often interchangeable, and more often than not is a beacon signaling out comfort food to anyone within range.

Take for example chopped steak: it is nothing new. Salisbury steak for instance has been around since 1897. Named after a doctor, Dr. Salisbury, who created it. Salisbury was also a believer in a low-carb diet, fancy that. Continue reading

Recipe Reclamation: Bringing Back Chopped Steak

Aside
Braised, Medium Time, Moderate, Recipes, Side Dishes, Vegetables

The Virtues of Routine and Braised Cabbage

I like repetition. It guides me from one task to another. Like how in the morning I’ll make my wife’s coffee exactly the same way and take it to her while she is getting ready for work before making my own. Then I’ll pack the kids’ school lunches, followed by preparing breakfast, and every Tuesday, I go to the grocery store immediately after the kids get on the school bus.

I follow a routine when I go to the grocery, too. The automatic doors swoosh open like the welcoming arms of an old friend as I enter, and I wonder who the first person I’ll see will be. A stranger? A familiar face? What will they look like and will they be smiling? Which fruits and vegetables are right up front this week and who made the covers of the gossip rags at the checkout line? All pressing questions, I know.

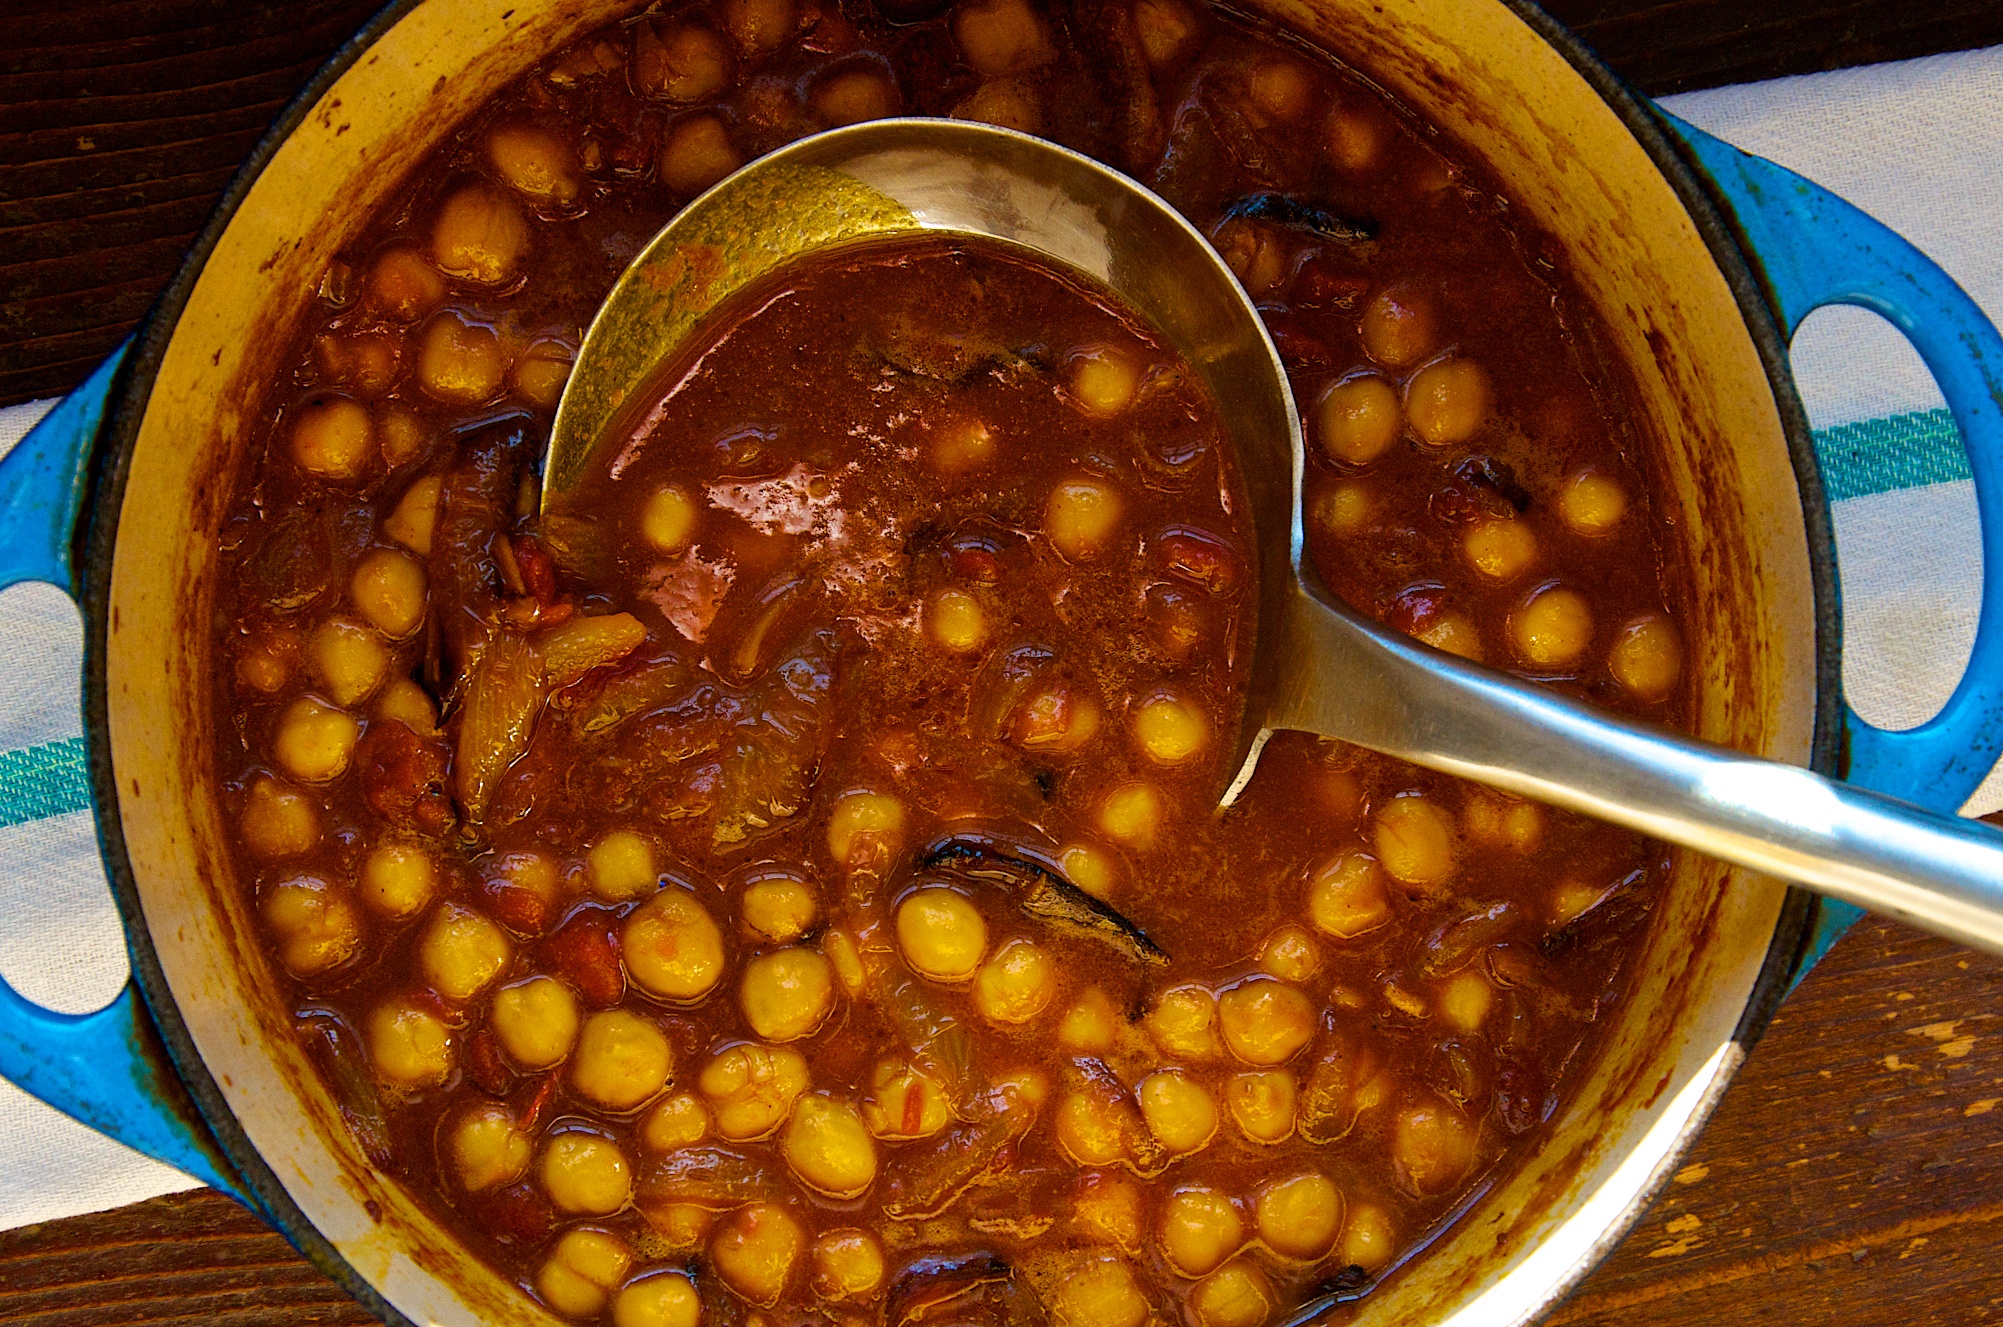
But the other day I broke routine, for an observation. As usual, the endcap to the vegetable aisle was full of cabbage — red cabbage, green cabbage, some Napa and even Savoy. What occurred to me was that this endcap is always full, always a mountain in fact, of cabbage. It wasn’t just replenished either — they don’t restock until 9:30. I am nosy too, and often leer into peoples’ carts just to see what they are eating and, I can assure you, I don’t often see cabbage tucked into carts, other than those few days cabbage gets its due during the corned beef holidays. So why is this end cap continually dedicated to an Everest of cabbage? Are cabbage eaters late night shoppers? Is it for looks much in the same way as a mannequin in a window at Saks? Who, besides me, buys cabbage?

Yes, I eat cabbage and I am proud of it. So much so that I could write a poem, Mon Petite Chou, and it would be an ode to the poorest of poor man’s food. That is what it is though isn’t it: poor man’s food? Maybe this is why it is shunned, that to buy it means you are nearly destitute, for why else would you eat it? I used to feel this way, and never really encountered cabbage other than as a creamy coleslaw side to an all-you-can-eat catfish dinner — and even then I usually stayed closer to the hush puppies and fries.

That is, until Paula Wolfert’s book The Cooking of Southwest France introduced me to the possibilities. And there are many when it comes to cabbage — braised, steamed, creamed, and stir-fried. Cabbage, now, has become a part of my routine.

Tips for Choosing, Storing, and Preparing Cabbage

Pick a hefty cabbage.
I grow a lot of cabbage and I am always amazed at how solid cabbages can be, like a bowling ball. So when I do buy them at the store I look for very solid cabbages that feel heavy.

Look for purple leaves
Typically, the grocer cuts off the outer leaves and trims the stems. As the cabbage ages, they trim them up so to keep them looking pretty. You know you have a fresh cabbage when the leafy outer purple green leaves are still there.

Keep it cool
Cabbages can last a long time in the fridge. Make sure the outside leaves are free of moisture and wrap the cabbage in plastic wrap, then store the cabbage in the crisper. I like cabbage because it stores well, so I use up all the perishable veggies early in the week saving the sturdy ones, cabbage, for the end of the week.

©Tom Hirschfeld 2016 all rights reserved

©Tom Hirschfeld 2016 all rights reserved

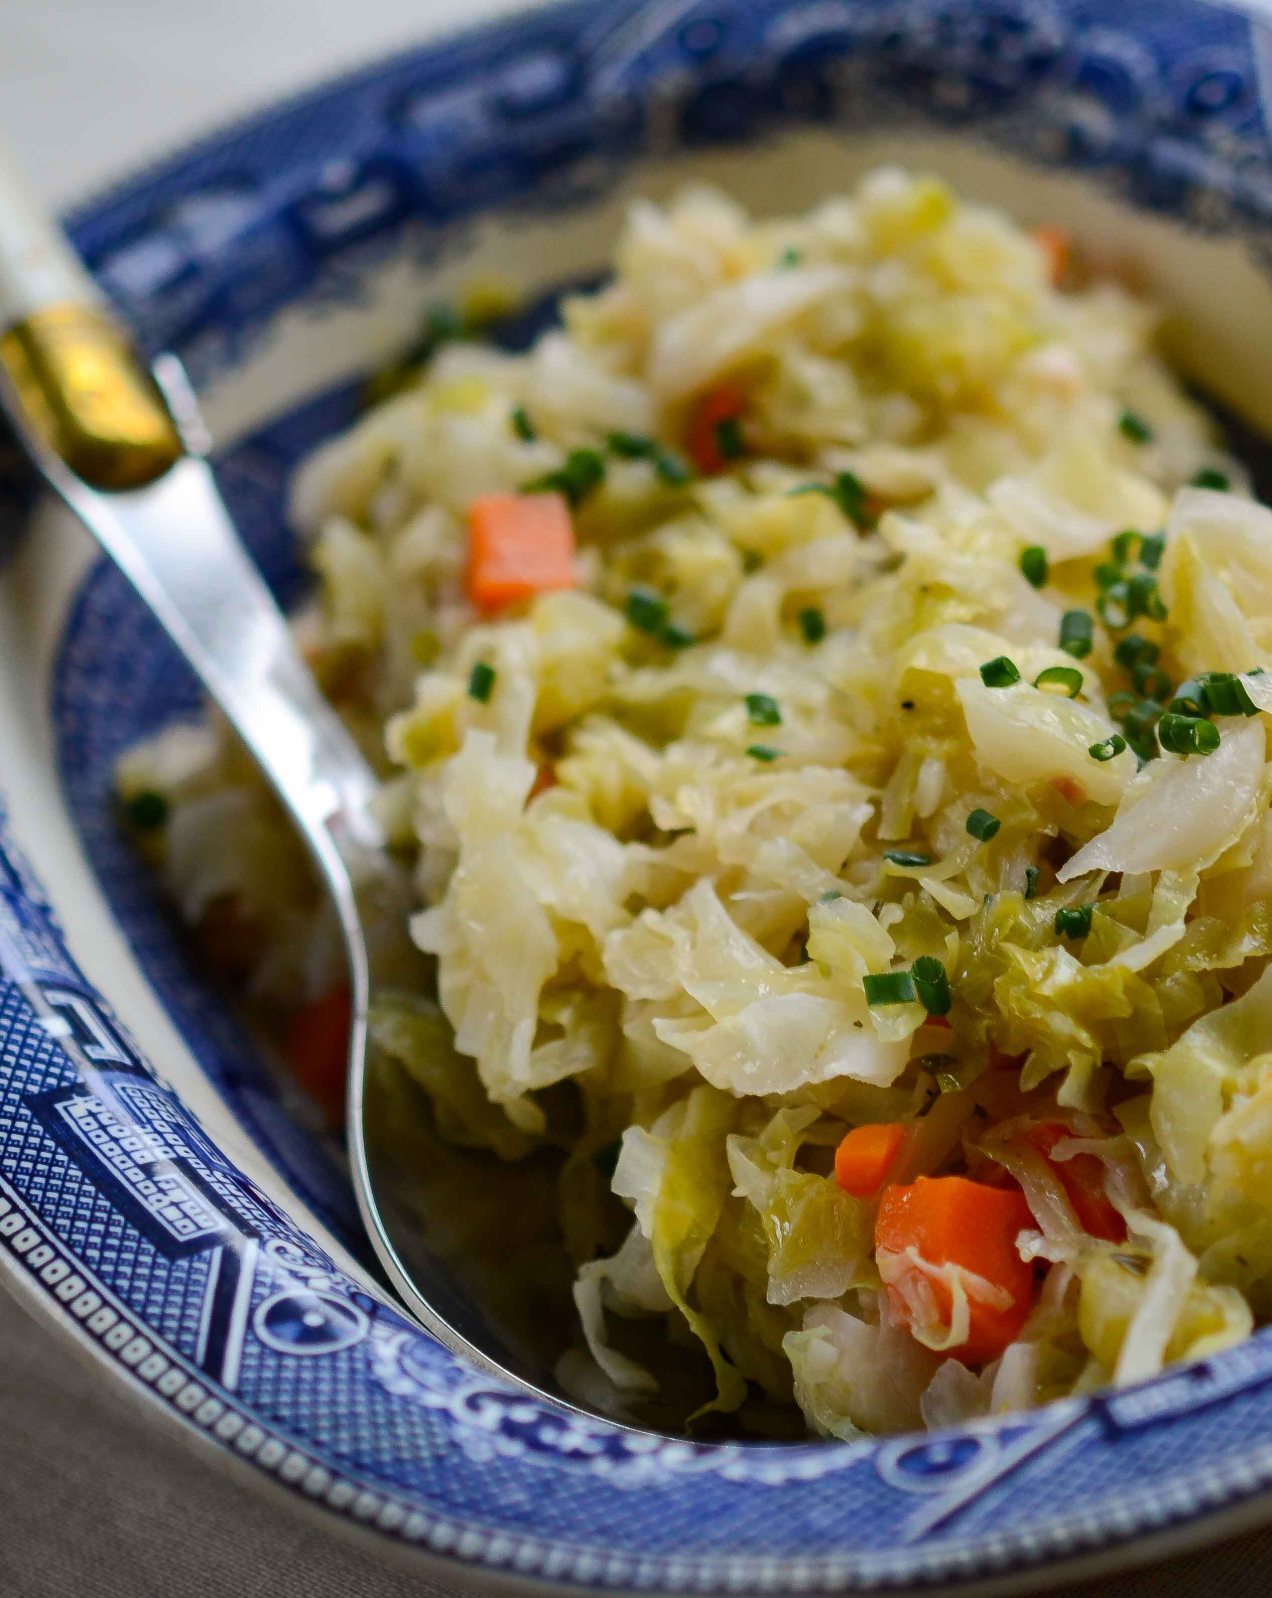
Simple Braised Cabbage

Serves 6

3 ounces pancetta, small dice
2 tablespoons unsalted butter
1 cup yellow onion, small dice
1/3 cup celery, small dice
2 teaspoons garlic, minced
1/2 cup carrots, peeled, small dice
6 to 8 cups Savoy cabbage, julienned
2 bay leaves
Scrape or two fresh nutmeg
1 tablespoon flat leaf parsley, minced
1 1/2 teaspoon fresh thyme, minced

  1. Place a 3 1/2-quart Dutch oven with a lid over medium heat. Add the pancetta and render its fat. You want a gentle render here. You aren’t trying to crisp the pancetta, just render.
  2. Add the butter and, once it has melted, add the onion, celery, garlic, and carrots. Sweat the vegetables until they are tender, don’t let them brown. Add the cabbage, bay leaves, and season with salt and pepper. Turn the cabbage to coat the leaves in the fat. Add a quarter cup of water and put the lid on the pot. Reduce the heat to low. Cook the cabbage until tender, about 25 to 30 minutes. Add a scrape or two of nutmeg, the parsley, and thyme. Stir to combine, then serve.
Standard
Beef, Gluten-free, Grill, Grilling, Kitchen Tips, Recipes

Grilling: Tips, Skirt Steak and more…

Skirt Steak with Greek Salsa

I use a pair of kitchen tongs and quickly flip a steak, pull back to let my hand cool for a split second before diving in again behind the safety of the tongs to flip another. The hair on my forearm recoils from the heat. Even with a long pair of kitchen tongs I can’t bear the sting of the glowing coals like I used too.

I have lost my commercial kitchen hands. The hands that could take the heat without flinching, the same hands that could grab thermonuclear plates, or could move steaks around on a grill without ever noticing the heat. The heat abused hands that were once this line cooks badge of honor.

The wind shifts, a wisp of white smoke blows back. My eyes catch a little before I can turn and shut them. The smoke underneath my eyelids stings and my eyes begin to water. Continue reading

Standard
Beef, features, Main Dishes, Moderate, Recipes, Sponsored

Meatball Po' BoyI was given an assignment and just like in high school I have blown it off.  I procrastinated.  In all actuality if this was school, the PR company my teacher, well, I failed with a big fat F.

Because my parents taught me right from wrong, I am going to complete my homework and turn it in.   It is the right thing to do.  I expect no mercy from the teacher.  None.

I crack open a bottle of wine and pour a glass.  What, that is what I would have done in high school,  just kidding mom and dad.  I never would have done that in high school.  I was more a Jack Daniels and Coke kid.  Did I just say that out loud? Continue reading

The Troublemaker Blend 6

Aside
Condiments, Gluten-free, Grilling, Recipes, Vegan, Vegetarian

Using Herbs with Abandon

Italian Salsa VerdeIf I didn’t already have a list of reasons I need lots of herbs in my life, Italian Salsa Verde (green sauce) alone would be enough to convince me. It’s delicious on almost anything. Take my dinner tonight: salsa verde is outstanding on steak and takes long-cooked kale up a notch. And when I got a little on my baked potato with sour cream, it was no longer a plain old baked potato. It was sublime. Continue reading

Standard

Lentil Patties with Red Onions

Everyday my diet pushes further in a vegetarian/vegan direction.  I don’t know if it is because I am older,  my tastes changing, or maybe I am I just tired of all the same foods I have spent life eating.

If I really think about it, which I am prone to do, I don’t think I eat this way to be healthy.  While health is a byproduct and one I will take, I think it is because I am a lover of food.  As one whose tastebuds have been around the block a few times I am always looking for the new and exciting to try.  As my tastebuds gain experience it also becomes harder to get excited about food.

It might be connected to my garden too.  I have been lucky enough to have a garden of some sort for well over 15 years now.  With each passing year I get more excited about the growing season.  It gets harder and harder to wait for the first produce.  The other thing I know is the diversity of vegetables I grow has increased the diversity of my diet.  For whatever reason and it does not matter to me, I have developed a fondness for vegan food.

I make these lentil patties often with my lentil patty tikka masala recipe.  Today I cooked the lentils in cashew cream and added lemon juice and thyme.

Cost to make this dinner: under $15.oo

Get the lentil patty tikka masala recipe here.

For the Lentils(serves 4)

1 cup dried Lentil du Puy, rinsed and picked over for stones

1/2 yellow onion, small dice

1 tablespoon fresh grated ginger

1 tablespoon cilantro, minced

2 teaspoons garam masala

1/4 cup flour, I used millet flour

1 egg

3/4 teaspoons kosher salt


1. Place the lentils into a 3 quart pot and cover with water by two or more inches. Add the minced onion. Place the pot over medium heat. Slowly bring the lentils to a boil then reduce the heat to a simmer and cook the lentils until tender adding a pinch or two of salt in the last 10 minutes of cooking. This should take approximately 30 minutes.

2. Drain the lentils. Let them cool but puree them in a food processor while they are still warm. They will be easier to handle when warm.

3. Add the remaining lentil cake ingredients and pulse the cakes a few more times until the rest of the ingredients are combined into the mix. Taste the lentil puree then season the puree with kosher salt and a few grinds of pepper. Taste again and adjust the seasoning.

4. Let the cakes sit for a few minutes to hydrate the flour. Take a tablespoon of the mix and make a ball. Is it really wet or is it too stiff? You want the mix to hold its shape but not be overly stiff otherwise they can be dry when cooked. It should just hold its shape. Add more flour a tablespoon at a time if you need to letting the additional flour hydrate before testing. Divide the lentils into eight balls.

5. Add enough oil to cover the bottom of a heavy bottomed sauté pan by an 1/8 inch. Heat the oil over medium high heat. Test the oil by dropping a pinch of lentil to the pan. It should begin to sizzle right away but not violently sizzle and pop.

6. When the oil is ready take each lentil ball and smash it down gently forming it into 1/2 inch thick cakes and add them to the oil. Let each side brown nicely and then remove them to a tray lined with a brown bag to soak up the oil. Keep the cakes warm, either in a low, 200 degree oven or in a warm place on the stove.

For the onions:

1 large red onion, cut into four 1/2 inch slices the onion wheels left in one piece do not separate into rings

vegetable oil

For the sweet potato fries:

4 large sweet potatoes, peeled and cut into 1/4 to 1/2 inch julienne slices

oil

kosher salt and fresh ground pepper

  1. Heat the oven to 425˚ F.
  2. While the oven is heating place a saute pan over medium heat.  When the pan is warm add a couple of glugs of oil.  Add the slices of onion and saute them until they have browned.  Remove from the heat.
  3. Toss the sweet potatoes with oil.  Season them with plenty of salt and pepper and toss them again to mix in the seasoning.  Lay the fries out onto a baking rack set over a baking sheet.  This will allow the heat to cook the fries from all sides(do this step or you will have limp fries). Bake the fries until they begin to brown and blister, about 20 minutes. Remove one of the largest fries and test it to see if it is tender on the inside.  Be careful sweet potatoes burn easily so keep an eye on them.  Warm the onions in the oven.
  4. Top the patties with the onion rings, serve with fries and curry ketchup!
Grains and Legumes, Medium Time, Moderate, Pantry meals, Recipes, Vegetarian

Lentil Cakes, Red Onions and Sweet Potato Fries

Image
Easy, Grains and Legumes, Medium Time, Pantry meals, Recipes, Vegetables, Vegetarian

Chickpeas in a Spicy Tomato Gravy

Khatte Channe

A wonderful blend of deeply caramelized onions, spicy tomato broth and creamy chickpeas.  Khatte Channe, as it is know in India, is traditionally served with a flatbread but as it is cooked in this recipe it has lots of sauce so it makes sense to serve it with simple steamed rice and some sort of green vegetable.

I don’t like to use a lot of canned goods but beans are one that I rely on.  They are no fuss, no standing over the stove stirring or adding liquid because they are already cooked.  In fact I think this dish benefits from canned because the peas stand out by not absorbing all the gravy flavors that long cooking would have infused in them .

There is some extra expense in buying spices for the dish but if you have an ethnic grocery nearby, either Asian or Indian, you should be able to find the ingredients.  Buy the smallest amount they sell and if you like the spices and find yourself using them to make other dishes then buy bigger quantities.

The thing I really like about this dish and these kind of bean dishes is even though it is of Indian descent it still feels familiar, I think of it as soul food.  It is warm with a hint of spice and very much like bean dishes from Central America and Mexico.  The dish is comfortable.

Cost to make this meal:

  • three 14oz. cans organic garbanzo beans $1.49 each or $4.47
  • 2 large onions .74 cents
  • one 14 ounce can crushed tomatoes .99 cents
  • at my local Indian grocery an 8 ounce bag costs $3.oo dollars or 2 teaspoons .12 cents
  • 1 head of garlic .99 cents 4 cloves about . 50 cents
  • fresh ginger 3.99 per pound 2 ounces at .48 cents
  • 48 oz vegetable oil  $2.99 or 3 tablespoons at .10 cents
  • cumin seeds vary in price greatly depending on where you purchase them  1 teaspoon at .25 cents
  • my recipe calls for tamarind but substitute a 2 tablespoon of vinegar to give the dish its sourness

Total cost range is from  $7.65 to  $9.00 and if you are only serving 4 you should have a couple of lunches.

This recipe is adapted from Julie Sahni’s Classic Indian Cooking.  If you enjoy Indian food her books are a must for you shelf.

Makes 8 to 10 servings

3 (14.5 oz.) cans chickpeas/garbanzos (drained and liquid reserved)

2 tablespoons tamarind paste mixed with half a cup of water (or substitute 2 tablespoon of vinegar with no water)

3 vegetable oil

2 cups yellow onions, peeled and thinly sliced

2 tablespoons garlic, peeled and minced

1 teaspoon turmeric

1/2 teaspoon cayenne pepper

1 (14.5 ounce) can crushed tomatoes

1 tablespoon fresh ginger, peeled and minced finely

2 teaspoons curry powder

1 teaspoon ground cumin, toasted

kosher salt and fresh ground pepper

1. Place a 3 1/2 quart heavy bottomed pot over medium heat.  Add 3 tablespoons of oil to the pot and then the onions.  Season the onions with salt.  Cook the onions, patiently, until they begin to brown and become deeply colored. Stir them often enough that the onions on top brown at the same pace as those on bottom.   Don’t do this to fast you want melted gooey onions not seared.  Take your time it takes a while.

2. Once the onions are browned to your liking add the garlic.  Once you smell the garlic add the turmeric and cayenne pepper.  Give it a stir then add the tamarind,  tomatoes and ginger.  Reduce the heat and let the tomatoes simmer.

3. Add 1 cup of  the reserved bean liquid along with the cumin and curry powder.  Bring the liquid back to a boil reduce the heat and add the beans.

4. Cook the rice.  

5. By the time you finish the rice the beans will be warmed through and the flavors will have come together nicely.  Taste the peas and adjust the seasoning.  Serve over the rice.

Standard
Medium Time, Moderate, Recipes, Side Dishes, Vegetables

Potato Cake

Potato CakeWhat thrills me the most about potato cakes like this is the crispy top and creamy interior.  If you use good potatoes the flavor is unbeatable and if you are creative you can even layer the interior with things like roasted garlic, wilted onions, green onions or even chopped frozen broccoli that has been thawed and drained of excess moisture.

Yukon Golds

Yukon Golds

There are few products that I recommend, or in this case don’t recommend, and those are conventional potatoes and canned tomatoes.  I don’t like conventional potatoes because they spray them with an anti-sprouting spray which means they have a longer shelf life.  I don’t know if the spray is good for you or not but I want potatoes that aren’t far from the harvest because I want fresh potatoes.  They taste better and I know they do, it’s that simple.  Organic potatoes can’t lollygag around and therfore are generally fresh.

The two types of potato most readily available at most groceries that would work for this dish are Russet Burbanks(Idaho) or Yukon Golds.  Both brown up nicely and both create a creamy interior.

As for tomatoes, I don’t like canned tomatoes because the acid leaches out the chemical from the liner of the can.  I only by tomatoes in glass or those nifty carton type boxes.

Cost to make the potatoes:

  • one bag of organic russet potatoes $3.49 about 10 per bag or $1.75 
  • unsalted butter .10 cents
  • canola oil  and salt .10 cents

Total cost to make this dish: $1.95

Serves 4 as a side dish

5 good sized russet potatoes, scrubbed under cold water with a brush

1 tablespoon butter, room temperature

1 tablespoon canola oil

kosher salt

white pepper if you have it

1. Smear the bottom of a 10 inch non-stick skillet with soften butter.  Make sure to spread it evenly across the bottom.  Drizzle the oil into the pan too.

2. Slice the potatoes into very thin slices, a 1/16 of an inch would be great but no more then an 1/8 inch.

3. Starting in the middle of the pan spiral the potatoes by fanning them.  They should overlap about half the potato before them, if that makes since or you should cover the potato before the one you are putting into the pan by half by the one you are putting into the pan.

4. Lightly season each layer of potato with a pinch of salt.  Once the first layer is down you can layer the rest of the potatoes into the pan without detail to fanning them.

5. Heat the oven to 350˚ F.  Place the pan over medium heat to begin browning the bottom layer.  This always takes longer then I expect. I also have a baking stone that has a permanent spot in my oven so I also know then the pan goes into the oven it will continue to brown the potatoes.

6.  Once the bottom is browned nicely cover the pan and slide it into the oven.  Bake until the potatoes in the middle are tender.  Depending on how many layers you created anywhere from 25 to 35 minutes.

7. Remove the pan from the oven with a oven mitt or towel.  Place a pizza tray or the bottom of a sheet tray across the top of the pan.  In one swift motion invert the pan and tray.  Place the tray into the oven and let the cake bake another 5 to 10 minutes to crisp the top.  Serve.

Standard
Chicken and Poultry, Easy, Recipes, Short Time

Turkey Burgers with Lemon Parsley Butter

These burgers are great bun or no.  The key here, at least for me, is not to use breast only ground turkey which really dries out but a combination of ground thigh and breast. Read the labels  on the packages carefully.

Lemon parsley butter is a natural for these.  While you make more butter then you need,  through out the week you can easily use it up.  Simply use the compound butter in all sorts of things like sauteed green beans, broccoli or Brussels sprouts.  It is delicious way to finish off veggies and all you have to do is add it at the end of the cooking time, stir it around to just melt it, and voilà,  an extra punch at the table.

Cost to make the burgers:

  • Ground turkey $4.29
  • Curley leaf parsley .69 cents
  • Dried herbs and lemon $1.50
  • Butter $2.99 per pound or 1 stick @.75 cents

Total cost: $7.23

Makes 4 six ounce patties

For the patties:

1 pound 3 ounces ground turkey, a mix of breast and thigh

2 teaspoons curly leaf parsley

2 teaspoons lemon juice

1/2 teaspoon dried thyme

1/2 teaspoon garlic powder

a heavy 1/2 teaspoon salt

canola oil for sautéing

For the butter:

1 stick unsalted butter at room temperature

2 teaspoons fresh lemon juice

2 teaspoons lemon zest

1 tablespoon curly leaf parsley, minced

two finger pinch of salt

1. Combine all the patty ingredients in a mixing bowl.  Using your hands need it all together until it is well mixed.  Let the mixture sit, refrigerated for at least an hour.

2. While the turkey is melding, combine all the butter ingredients and mix well.  Set aside.

3. Form 4 patties of equal size.

4. Heat a heavy bottomed pan over medium high heat.  Add a glug of oil to coat the bottom of the pan.  Add the patties and brown them on each side.  Adjust the heat as necessary so you can brown them but also cook them through without burning them.  Serve topped with a dollop of lemon parsley butter.

Standard
Condiments, Easy, Medium Time, Recipes

Pickled Green Onion Ranch

Pickled Green Onion Ranch

Grilled Pork Steaks with Ranch Dressing is yet another great use for the dressing.

Grilled Pork Steaks with Ranch Dressing is yet another great use for the dressing.

The only way buttermilk will go to waste is if you if you have a lack of ideas for using it and because of this don’t.   It can hang out longer then regular milk because of the live culture but it will eventually go bad.

This dressing alone can be used as a base, minus the green onions,  and  you can make parmesan black peppercorn or fresh herb ranch.  Then there are all the other products too, real Southern cornbread, buttermilk pancakes, bread and of course biscuits.

Buttermilk is full of probiotics.  Rumor has it the beneficial bacteria will help you to maintain a healthy stomach which helps in fighting off other sicknesses.   This, though, is if you drink it or use it uncooked.  The label should read live active culture in order for you to get the benefits.

There is a term in cooking, and at culinary school, that asks for you to cook a liquid or combine ingredients to a thickness that will coat the back of a spoon.  You go about this by dipping the spoon into the liquid and then, while holding it sideways, run your finger across the convex side.  The liquid should hang there for a second or two before closing the gap your finger created.

Cost:

  • 1 head of garlic .42 cents
  • 2 bunches of green onions $1.49
  • 1 quart Organic Valley buttermilk $3.25 or .40 cents per 1/2 cup
  • 30 oz. Hellman’s Real Mayonnaise $5.49 or $1.46 per cup
  • 12 oz. rice vinegar (do not buy seasoned rice vinegar) $1.48 or .25 cents per 1/4 cup

Total cost to make the dressing:  $4.02 for 12 ounces

Makes 1 1/2 cups plus

10 to 12 green onions, trimmed of roots

1 garlic clove, minced

1/2 cup water

1/4 cup rice vinegar

3 tablespoons sugar

1 heaping teaspoon kosher salt

2 teaspoons fresh lemon juice

1/2 cup buttermilk

1 cup mayonnaise

1 1/2 tablespoon pickling liquid

fresh ground black pepper

salt

1. About three inches from the root end cut the green onions.  Reserve the green tops for another use (buttermilk green onion smashed potatoes comes to mind).  Place the green onions and garlic into a small heat proof container.DSCF5970

2. Heat the water, vinegar, salt and sugar in a small sauce pan set over high heat.  Bring it to a boil and let the salt and sugar dissolve.

3. Pour the hot liquid over the green onions and garlic.  Let the onions pickle for at least two hours.

4. Once the green onions are olive drab and soft remove them and the garlic from the liquid.  Mince them fine.

5. Combine the mayo, buttermilk, reserved 1 1/2 tablespoons of pickling liquid and lemon juice in a mixing bowl.  Add the green onions and garlic along with fresh ground black pepper to taste.

Standard
Chicken and Poultry, Medium Time, Moderate, Recipes

Smothered Chicken

foodquarterlyServes 4

Smothered chicken makes for a comforting Sunday dinner.  It’s the kind of dinner that will bring the kids back on Sundays after they have left home to be on their own.  The combination of peppers, onions and celery (known as the trinity in cooking) is very warming and homey.

It is a great dish to serve over boiled rice and if you were to serve green beans and biscuits with it you would, or at least I would, be in heaven.

Cost to make this dinner entree:

  • package of 8 chicken thighs $4.83
  • 1 bunch of celery $1.29
  • 2 onions .74 cents
  • 1 head of garlic .49 cents
  • 1 bell pepper $1.00
  • Loose cost of vegetable oil, spices, salt and flour $1.00
  • Total cost to make the dinner: $9.35

For the spice mix:

2 tablespoons paprika

1 teaspoon garlic powder

1/2 teaspoon black pepper

For the chicken:

6 to 8 bone-in skin-on chicken thighs

2 cups yellow onions, julienned

3/4 cups green bell peppers, julienned

3/4 cups celery, julienned

water

kosher salt

fresh ground black pepper

1/4 cup green onions, chopped

2 1/2 tablespoons flour

vegetable oil

2 garlic cloves, peeled and minced

1. Combine all the spice ingredients in a small bowl. Season the chicken thighs on all sides with salt and then with the spice mixture. You may or may not have extra spice depending on how heavy your hand is and whether or not you season 6 or 8 thighs.

2. Place a heavy, large sauté pan over medium high heat. Add enough oil to the pan to easily coat the bottom completely. When it is hot add the thighs skin side down and brown them deeply. Once they are brown do the same to the other side.

3. Remove the thighs to a plate. Add the onions, bell pepper and celery to the pan. Season them with salt and pepper. If the pan is to hot turn down the heat and cook down the vegetables until they are brown and soft. Add the flour and sauté everything for a bit longer to cook out the flour flavor.

4. Add the garlic cloves and give the veggies a stir. Add the chicken thighs back to the pan and add enough water to cover the thighs by three quarters. The crispy tops should just be peeking out of the gravy. Add all but a tablespoon of the green onions to the sauce.

5. When the gravy comes to a boil reduce the heat and simmer until the chicken is cooked through and tender, this should take about thirty minutes. Season the gravy, stir and taste.

6. If the gravy is reducing to fast and getting to thick add more water and stir.  If you added more water bring the sauce to a boil and serve.

Standard
Bread, Difficult, Long Time, Recipes

Daily Bread

I like this bread because it uses leftovers.  What do I mean by leftovers?  My girls don’t like heels and crusts. Sure I could force them to eat them, could throw them out or I could trim them off and save them for other uses.  I could make bread crumbs or, for instance, I could make this loaf of bread.

It is pretty amazing when you think about it.  Bread never wears out, you can use the same crumbs again and again in this loaf and its structure is always the same.

As long as you dry it properly, use breads without seeds, fruit or nuts, the uses of bread become endless but I really like the fact that I am not wasting anything.

It takes time to learn how to make a good loaf of bread.  The good news is if it doesn’t work out perfectly the loaf is more then likely still really delicious and good to eat.  So jump in and start practicing.

Recipe based on a recipe by Peter Reinhart in his book Brother Juniper’s Bread. 

  • King Arthur Bread Flour  $3.98 for a 5 pound bag = 28 cents per cup
  • 1 packet instant dry yeast = 24 cents
  • total cost to make this loaf of bread = $1.00

Makes one 2 pound loaf                                                                                                                    

2 cups dried stale old bread crumbs

2 cups water

1 .25 oz. packet instant dry yeast or 1 tablespoon

1 tablespoon kosher salt

2 1/2 cups bread flour

1. In a large mixing bowl combine the bread crumbs with to cups of water.  Let the bread soak up all the water.  This will take about an hour and you can let it soak for 4 hours.  Make the bread fit your schedule.

2. Sprinkle the yeast over the top and then stir it around and into the damp bread crumbs.  Let is sit for 2 to 5 minutes to hydrate the yeast.  Add the salt and bread flour.

3. Using a heavy duty wooden spoon mix the flour and crumbs until it forms a ball.  Dump the ball onto the counter and start kneading.  Knead the dough until it becomes smooth and elastic.  This will take at least 5 minutes.

4. Form the dough into a ball and put it back into the mixing bowl.  Cover it with a damp towel and set the bowl in a warm draft free place.  The back of the stove is usually good.

5. Set a timer for 1 hour.  At the end of the hour the dough should have doubled in size.  If not let it proof a little longer.  Remove the dough to the counter and knead it to degas it then shape it into a ball.

6. Place the dough into a 8 inch  cake pan that has been oiled and dusted with flour.  To dust the pan smear a small amount of oil onto all interior surfaces of the pan.  Add a tablespoon of flour and shake it around and tilt the pan to get the flour up the sides.  This will keep the bread from sticking to the pan.  Cover the bread and put it back in the warm place you had it.

7. Let the bread rise until it is peaking over the top of the pan by an inch.  This will take 30 to 40 minutes.  About 15 minutes into the final rise turn on the oven to 375˚ F.

8.  You can dust the top of the loaf with flour, cut a slash in it or just put it in the oven and bake it for 50 minutes.  Remove it from the oven then remove it from the pan to a cookie rack.  Let the bread cool completely. Slice and serve.

Standard