Bread, Easy, Meatless Monday, Sandwiches, Stocks & Basics, Uncategorized, Vegetarian

Cheats, Lies, and Hucksters (How to Cook a God Damned Grilled Cheese Sandwich)

As a kid, learning to cook a fried egg and bologna sandwich is like teaching me how to load a gun without establishing any safety guidelines. While the combination of griddled bread, egg yolk, mayonnaise, seared bologna, and American cheese is white trash foie gras, perfecting the fried bologna without having made a grilled cheese, well, it is Picasso without a Blue Period, Miles Davis having composed no song book before Bitches Brew. There is no reference and no history, a drifting ship with no anchor. At the time, I didn’t understand the damage done by using the cliff notes without ever reaching for the novel.

But here we are, in that time of year when we think about grilled cheese. It is the age old discussion, as if we forgot the combination to the safe and it needs to be cracked again, of how to cheat a grilled cheese. As if the answers locked away are new kinds of offerings; in a waffle maker, with an iron, use mayonnaise instead of butter, or turn a toaster on its side.

So I am just going to say it, I am tired of hucksters and cheats. It pains me to be over sold or even worse, blatantly lied too. I am not putting myself on a pedestal, far be it from me to cast stones, I am no practicing perfectionist and neither am I an Elmer Gantry. I have my faults and I try to be honest about them. Even so, when I witness an egregious wrong I can’t keep my mouth shut. After all, I can’t have my children wondering around this world thinking they will be able to succeed without ever learning the fundamentals. It happens everywhere and now, of all arenas, the kitchen is under attack.

Why can’t we just learn to cook a god damned grilled cheese? What are we afraid of, actually learning how to cook? There are so many basics to be learned by placing a sauté pan onto the stove to griddle two pieces of bread with cheese stuck in between and yet at all costs we try to avoid it. I don’t care what kind of cheese is put between the slices of bread, I don’t even care what kind of bread you use but I do care that you know how the different kinds of bread are going to react to the heat, that types of bread with more sugars and fats are going to brown faster then lean breads made with nothing more then water, flour, and yeast. Or that certain kinds of cheese are so stringy when you go to take the first bite every bit of the cheese is going to come along with it.

Cheats and shortcuts are wonderful but only after you know how to cook the original dish in the tried and true fashion, only after you have mastered the grilled cheese is it okay to riff on it. If you ignore, or fail to recognize, the subtle nuances of cooking you can follow a recipe to the T and still have it fail. It is because there are so many variables that can lead you down the path to disappointment that it becomes imperative to learn how to cook, which is wildly different from simply following a recipe.

DSC_1312

Grilled Cheese Sandwich (makes 2 sandwiches)

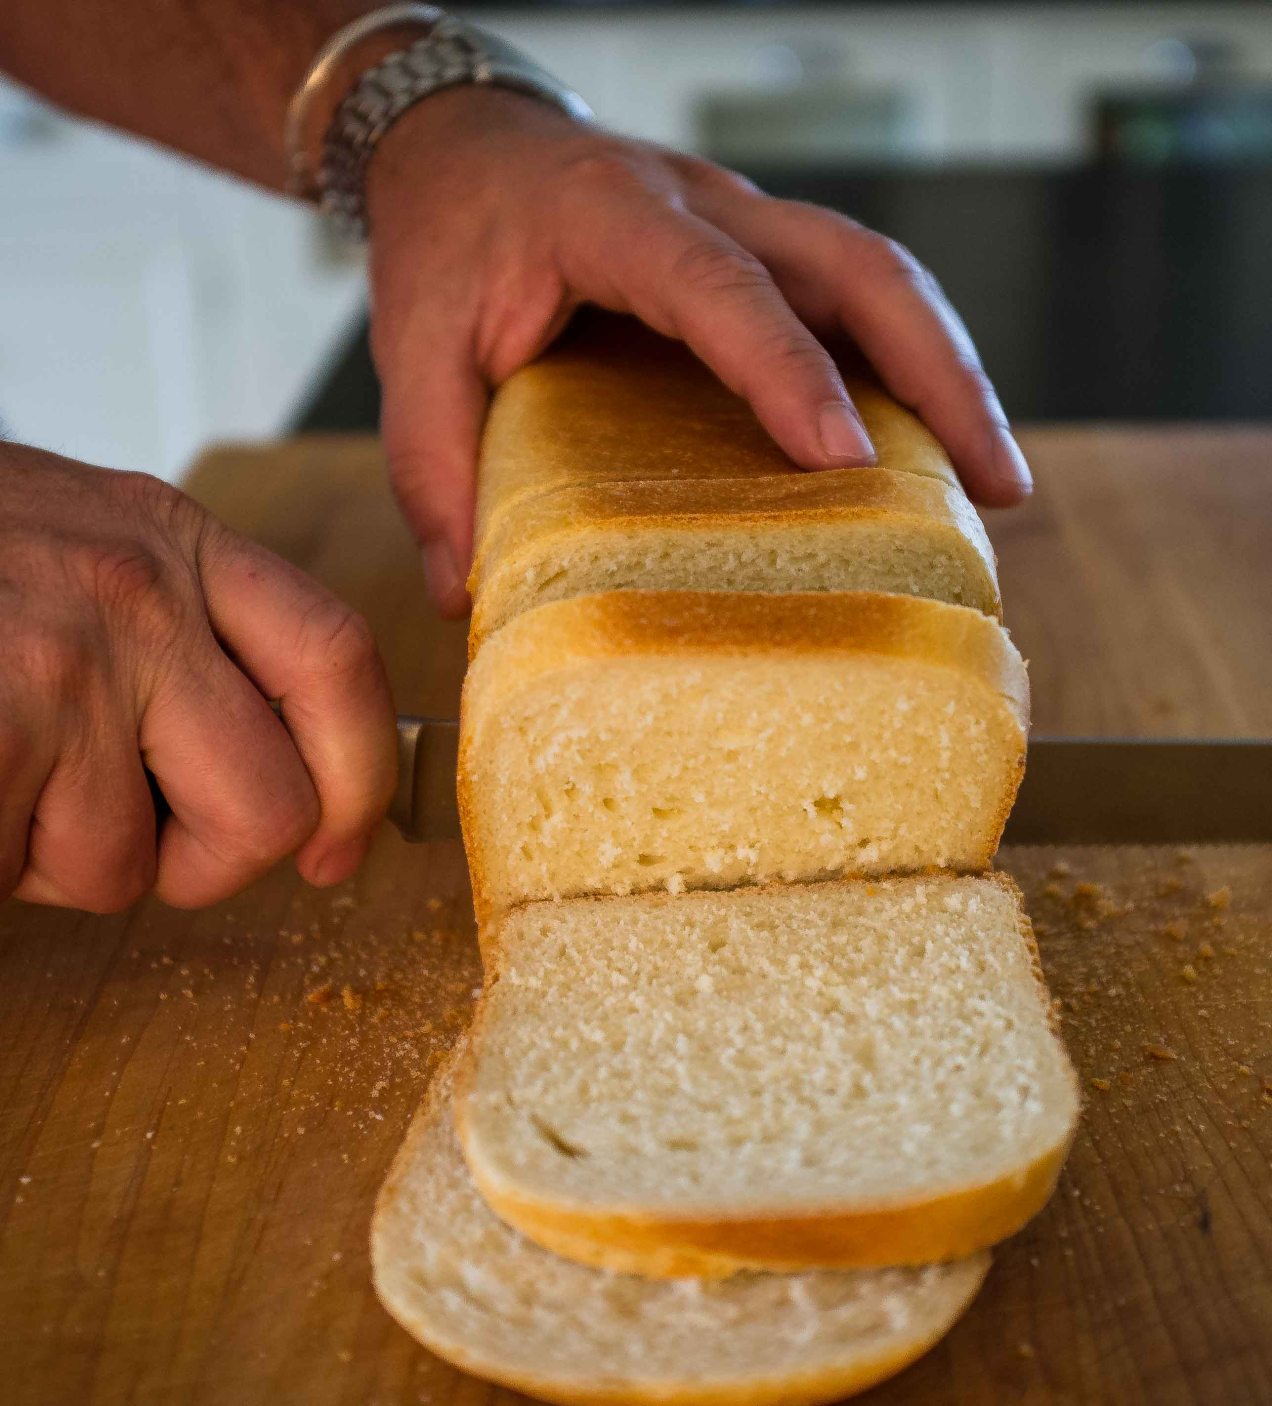
4 slices Pullman bread
1 1/2 cups gruyere cheese, grated
1 1/2 teaspoons prepared horseradish
1 tablespoon green onion, minced
a splash of heavy cream
fresh ground black pepper
unsalted butter, softened

1. Combine the grated gruyere, horseradish, green onions, and a splash cream in a medium sized bowl. Add a grind or two of fresh ground black pepper. Mix everything with a spoon to combine.

2. Place a 12-inch sauté pan over medium heat. Liberally butter one side of each of the pieces of bread making sure to cover the whole surface. Place the bread, buttered side down into the pan. Top each piece with one quarter of the cheese mixture. Turn the heat to medium low.

3. Once the cheese begins to compress and soften check the bottom of the bread. If it is browning to fast turn the heat down. Once the bread is browned and the cheese melted put the sandwiches together. Cut the sandwiches into 4 crusty cheese sticks and serve.


Standard
Eggs/Dairy, Sandwiches, summer, Vegetarian

Pimento Cheese Sandwiches

Is it the heat in August, or the midday cicadas—grinding, grinding, grinding—that reminds me of the time of year?  The horizon, corn pollen and gravel dust, is smudged.  This is the first August I can ever remember going outside after lunch to find it refreshing instead of repressing.  The sun is as bright as on a crisp fall afternoon and the humidity is nowhere to be found—grinding, grinding, grinding.

I like to hear the corn grow and without the humidity there is nothing from which the growing pains can echo.  An ambulance, siren blaring, leaves town.  The sirens grow louder until the emergency vehicle turns north on the state highway.  The sirens begin to fade.

It has been like this all summer and  I am being robbed.  I like the heat.  It is the humidity and heat that makes my vegetables grow.  I have nothing growing in my garden this year.  By rights I should be eating okra.  I should have so much zucchini I have to feed it to the chickens.  I should be looking forward to garden succotash and fried chicken but my lima beans died long ago in the continual down pours of early spring. I should be picking fresh field peas and pole beans but I never even got the baskets down from the cabinet.  I should be cutting sweet corn from the cob and freezing it.

I rock gently in an easy chair on the front porch and eat a pimento cheese sandwich.  From out across the fields I can hear the announcer for the high school football game calling plays.  I think back to all my first days back at school.  I feel the butterflies in my stomach,  another summer grows quite.


Pimento Cheese

(Makes 2 cups)

3 cups cheddar cheese, grated (about an 8oz. block)

2 teaspoons yellow onion, grated on a micro plane

3 tablespoons jarred pimentos plus 1 tablespoon pimento juice

2/3 cup mayonnaise

1 tablespoon Nathan’s mustard

1 tablespoon cider vinegar

1 tablespoon Tabasco sriracha

1 tablespoon ketchup

fresh ground black pepper to taste

  1. Place all the ingredients into a mixing bowl.  Stir gently with a spoon until everything is combined.  Let sit for an hour before serving.  Store in the refrigerator tightly covered.


Standard
Chicken/Poultry, Fat Friday, Main Dishes, pizza

Barbecue Chicken Pizza (+ How You Should Think About Prep)


This recipe is a throwback. It was extremely popular in the 1990s — along with duck confit and tuna steaks, seared rare. I still see it now and again on menus, but it has largely disappeared due to overexposure; we became bored with it simply because it was everywhere.

But, it’s been long enough. Let’s dust off the recipe for barbecue chicken pizza and give it another taste. I can practically make this pizza in my sleep — it was a bar special at a restaurant I worked in, and I made so many of them that I still have dreams about it.

I also realize that I no longer cook like I did at the restaurant. I only have four mouths to feed at home, and the prep for any given dish needs to be relatively quick.

As such, I’m a firm believer in this theory: If you are going to take the time to make one of something, you might as well make two or more. This belief holds water especially when it comes to baked potatoes, doughs, and most of all, whole chickens.

To save time, it also helps to organize and think like a chef — this involves weekly menu planning and daily ingredient prep.These simple steps help me to run an efficient home kitchen, reduce overall waste, and improve time management. Before I adopted this philosophy, I wasted an awful lot of time.

I still cook what I want, but I make those decisions on Monday when I menu plan. Ultimately, I aim to complete the prep work for five meals while cooking the first three dinners of the week. That means that planning ahead can be a lesson in patience: If I want to eat this pizza, I have to wait until the end of the week when most of the prep is done. But once you are in the habit of planning ahead, you’ll find yourself with more time — and better dinners.

Barbecue Chicken Pizza

Author Notes: I make my own pizza dough, and I always make enough for two to three pizzas. I divide the dough into portions after the first rise and freeze what I don’t want to use immediately. When I want to use the frozen dough, I simply thaw it (this counts as the second rise), roll it out, and assemble the pizza. This particular dough is based on Alice Waters’ recipe from “Chez Panisse Pasta, Pizza, and Calzone”. It is the same dough I always use and trust.

Makes one 10 x 12-inch pizza

3/4 cups warm water
2 teaspoons active dry yeast
1/4 cup whole wheat flour
1 3/4 cup bread flour
1 tablespoon whole milk
2 tablespoons olive oil
3/4 teaspoons Kosher salt
2 1/2 to 3 cups mixed onions, sliced
2 cups shredded chicken
1 1/2 cup Gouda (some people like smoked Gouda but I find it too strong)
4 ounces fresh mozzarella
1 to 2 serrano peppers, sliced into thin rounds
1/2 cup Memphis-style barbecue sauce
Olive oil, for sautéing the onions
Kosher salt and fresh ground pepper to taste
1 tablespoon parsley, chopped
1 tablespoon cilantro, chopped
1. Combine the water and yeast in the bowl of a stand mixer or mixing bowl. Let the yeast dissolve, then add the rest of the ingredients. Use the dough attachment on a stand mixer (or a heavy-duty wooden spoon) and mix the dough until smooth; add more flour if the dough seems too wet, but don’t add more than a 1/4 cup at a time. Place the dough on the counter and knead until smooth and elastic. Place the dough into a bowl, cover it with a damp, warm towel, and let it rise for 2 hours, or until it has doubled in size.

2. Punch the dough down and knead it for a minute. Divide the dough in two, place one half in a plastic bag, and freeze it. Place the remaining piece back into the bowl, cover with the damp towel, and let it rise for another hour.

3. While the dough is rising for the second time, place a sauté pan over medium heat. Add a glug or two of olive oil to the pan and then add the onions. Let the onions wilt, get gooey, and caramelize slowly. Remove them from the heat.

4. After the second rise, remove the dough from the bowl and flatten it out into a small disk. Let the dough rest for 10 minutes.

5. Heat your oven to 500° F. This is a good time to use your pizza stone; if you don’t have one, use a sheet tray lined with parchment paper.

6. Roll the dough into a 12- by 10-inch square, place it onto a piece of parchment paper, then put it onto a peel or sheet tray. Pour 1/3 cup of BBQ sauce onto the center of the dough. Working from the middle and, using the back of a spoon, spread it in a spiral motion until the sauce reaches the edges of the dough.

7. Combine the remaining BBQ sauce with the shredded chicken and stir until the chicken is evenly coated.

8. Spread a layer of red onions onto the pizza, followed by the chicken, Gouda, mozzarella, and finally, the serranos. Sprinkle some freshly ground pepper and salt over everything, then slide the pizza onto the stone.

9. Reduce the heat to 450° F. Bake for 15 minutes. Once it has browned to your liking, remove the pizza from the oven and let it cool for 5 minutes before cutting. Top with cilantro and parsley and serve.

Standard
Gluten-free, Holiday, Medium Time, Moderate, Side Dishes, Vegetables, Vegetarian

A Classic Potato Gratin With No Recipe


Have you ever had a friend who knows no strangers? The kind of genuine person to whom everyone in the room gravitates — someone who doesn’t have to work at meeting new people, because somehow it is coded into their DNA for others to like them?

For me a potato gratin is just such a friend. A friend who hangs out with all the cool entrees too: a mustard crusted beef tenderloin  taking a bath in a flavorful sauce or a perfectly roasted chicken with crackly brown skin are its best friends.

But, to its credit, a potato gratin knows enough to complement all the other dishes and, with the exception of a few rules, remains unfussy enough not to need a recipe and somehow is always perfectly put together for any holiday gathering.

How to Make Potato Gratin Without a Recipe

1. Peel your potatoes. For a 10-inch oval gratin pan, I like to use six to eight medium-sized Yukon Gold potatoes — about 2 1/2 pounds. (Don’t worry: If you overdo it, you can snack on leftovers after step 6.)

DSCF0970

2. Slice the potatoes an 1/8-inch thick, ideally on a mandoline right into a heavy bottomed pot. Add a few minced cloves of garlic, about a teaspoon of salt, and roughly equal parts of water and milk to cover the potatoes.

Potato Gratin

3. Bring it to a gentle boil over medium heat and cook the potatoes till just tender but not falling apart, then drain. By cooking the potatoes most of the way through in flavorful liquid, you don’t have to worry about exact quantities of liquid and seasoning later on.

Potato Gratin

4. While the potatoes are cooling, grate approximately 2 1/2 cups of Gruyère or Comté cheese — they are traditional but expensive. Other cheese in the family would be gouda, fontina, or American Gruyère.

Potato Gratin

5. Get out an oval gratin, or any casserole, pie pan or dish you choose. Just take note: with a smaller circumference dish you have more creamy interior and less crunchy top and, obviously, the reverse is true for a larger gratin. Place around half the potatoes into the gratin (they don’t need to look pretty, yet). Season with salt and white pepper. Top with half the cheese and drizzle about 1/2 cup of cream over the top.

Potato Gratin

6. Starting with one slice of potato placed in the middle of the gratin, spiral the potatoes around until you reach the gratin edges. Make it look pretty — it makes a difference.

Potato Gratin

7. Top with the remaining cheese, then drizzle another 1/2 cup or so of cream over the top and around the edges so it gets to the bottom, too.

Potato Gratin

8. Bake at 425˚ F until brown and bubbly, about 30 minutes. Don’t overcook the gratin so it dries out. You want a little cream to remain on the bottom. Serve.

Potato Gratin

Standard
Breakfast, Egg dishes, Main Dishes, Vegetarian

Lacinato Kale and Ricotta Tart

This tart is perfect for breakfast, lunch or dinner and, maybe, all three. Lacinato is also known as Cavelo Nero or dinosaur kale. It is becoming ever more popular not only for its great taste but for its presumed health benefits too. While this has many healthy components they are just a nice side note to the decadence of this wonderful tart.

The crust for this tart uses the idea of a shortbread crust to keep it tender while using whole wheat pastry and buckwheat flours. I like to serve the tart with a fruit salad of grapefruit supremes, toasted crushed hazelnuts and mint.

SERVES 6 TO 8

For the crust::

1 cup whole wheat pastry flour

1/4 cup buckwheat flour

1/4 cup parmesan cheese, grated

1/2 cup unsalted butter, softened

two finger pinch of salt

For the filling:

1 bunch Cavolo nero, chopped, rinsed and dried, 8 loose cups worth

1 cup yellow onion, peeled, small dice

2 teaspoons fresh garlic, minced

3 anchovy filets, minced (obviously omit if you want it to be meatless)

1 1/4 cup whole milk ricotta

3 large eggs

1/2 cup parmesan cheese, grated

1 tablespoon olive oil

1 tablespoon unsalted butter

1/4 cup water

kosher salt and fresh ground pepper

1. Heat the oven to 350 degrees.

2. Place the whole wheat pastry flour, buckwheat, parmesan, butter and salt into a large mixing bowl and stir it with a wooden spoon until it looks like a combination of cous cous and cornmeal. You may need to rub some of the bigger pieces between you hands to break up the butter.

3. Dump the crumbs into an 8 inch tart pan. Starting at the edges press the crumbs into the flutes. Use you index finger as a back stop by placing it at the top of the flute and pushing the flour up to it. Pack the crust tightly and evenly. Once you have finished the crust bake it in the oven for 20 minutes. Remove it from the oven.

4. While the crust is baking heat the olive oil and butter over medium heat in a 12 inch saute pan. Add the onions, anchovies and garlic. Season them with a little salt and fresh ground pepper. Saute them gently without coloring and until they are soft. You may need to adjust the heat and you will want to stir them to keep them from coloring.

5. Once the onions are soft add the Cavolo nero and toss and stir it to coat it with oil. Season again with a little salt and fresh ground pepper. Add the water and cover the pan. Let the Cavolo nero steam until tender but still vibrant in color, about 8 minutes over medium heat.

6. In a large mixing bowl combine the ricotta, parmesan and the eggs. Add a 1/2 teaspoon of salt and a few grinds of pepper and stir to combine.

7. Once the Cavolo nero is tender taste it and adjust the seasoning as necessary. Make sure all the water has simmered away from the Cavolo nero, you don’t want it to be to wet. Let it cool for a couple of minutes and then add it to the ricotta and stir it well to combine.

8. Carefully spoon the filling into the tart and smooth and level it out. Place the tart into the oven and bake it for 50 to 60 minutes or until set and nicely browned.

9. When the top has browned remove the tart from the oven and let it cool to room temperature before cutting. Serve at room temperature.

Standard