Chicken and Poultry, dog-eared, Easy, honest, journalism, Main Dishes

Marie’s Freedom Station and Crispy BBQ Chicken Thighs

Marie’s Freedom Tire Shop

Marie, in her sixties, ran Freedom’s Tire Shop in Freedom Indiana. It had been years since anyone bought tires but they kept coming for the gasoline. The station sat at the edge of town across the street from the only grocery. Marie’s husband had been dead 15 years when I met her in the late 1980’s. Her only source of income had been her husband and his business. When he died she decided she would run the gas station and each day, with walking stick in hand, she would walk to work. She had never had possession of a drivers license nor did she want too. Continue reading

Advertisement
Standard
Barbecue, Chicken and Poultry, dog-eared, Easy, Main Dishes

The Midwest, Barbecue, And Zeb’s All Purpose Mambo Sauce

Midwesterners like pork and we like beef, even chicken but we do not like change.

Well, that’s not exactly true. We understand that change is inevitable, we just don’t like it sneaking up behind us and yelling BOO. We prefer change we don’t see, change that slips on like a comfortable pair of socks that go unnoticed throughout the day, not a constant reminder like a fancy necktie.

Growing up in suburban 1970’s Indianapolis “barbecue” meant baking a chicken and basting it in a bottled sauce.  If there was smoke it was liquid, if there was fire it was a heated oven. This was the logical extension of my mother’s Midwest, the pot-roast, chicken-and-dumplings-tuna casserole Midcentury Midwest. Spice was reserved for vacations south of the Mason Dixon line. But even as we were tucking into ketchup-mild barbecued chicken, tiny outposts of smoke, fire and mostly pig, had long-since migrated north.

Stubbs, you see, is tall. His cowboy hat makes him taller. His hands make him appear well, like a folkloric hero, his hands are big enough to palm a turkey, thick and calloused and more heat resistant than a fireman’s glove.

One was Zeb’s barbecue, a shack I spied from the back window of the station wagon as I was ferried to Saturday morning art lessons. The place billowed smoke. I was sure that one Saturday we’d see a line of fire trucks, the red glare of emergency lights, firemen unfurling their hose to do battle with a five alarm, sirens blaring.

But week after week, the cloud of smoke billowed across the avenue without a fire truck in sight. The smoke smelled like Sunday morning bacon — and slow cooked pork. Continue reading

Standard
Chicken and Poultry, Chicken/Poultry, Cooking School

Pressure Cookers + Chicken and Dumplings

Next to farm fresh brown eggs, nothing conjures up an image of the farmhouse kitchen quite like the site of a pressure cooker. It’s Rockwellian in that it brings to mind iconic images of the aproned farmer’s wife peeling home grown carrots at the counter while on the stove behind her sits a huge pot-like contraption whistling and blowing steam through a small whole in its lid.

The image leaves you with a feeling of wholesomeness much like homemade whole wheat bread. It’s as if the pressure cooker does something magical that only the farmer’s wife knows. After all, for some reason, we always equate wholesome home cooking with the country kitchen. Continue reading

Standard
Chicken and Poultry, Cooking School, dog-eared, Gluten-free, Paleo, Soup

Putting the Bullet into Your Bone Broth: Consommé

The Family Soup Pot

©Tom Hirschfeld all rights reserved

If you can fortify coffee by whizzing in butter and making it into an emulsion of sorts, or make fortified wine by upping the alcohol to give it a boost, aging it, and calling it port then why not fortify your bone broth?

Great chefs have known the deliciousness of consommé for centuries.  Now I am not going to repackage it, call it bullet broth or anything stupid.  Consommé is fortified stock that is clarified and enriched by adding lean ground meat, finely chopped vegetables and egg whites then the whole thing is slowly brought to a simmer.  A raft forms when the egg whites cook and it floats to the top clarifying the stock so it becomes crystal clear. It has a lot to do with the albumen in the eggs and ground meat but lets not get bogged down in the science of the thing.

It is refined food.  It adds richness and mouth feel while deepening the flavor beyond anything salt could do for your stock.  It is far more satisfying to sip a cup of consommé on a cold day, on any day for that matter, then it is swill down a jar of bone broth.

It isn’t complicated to make but it does take some attention to detail.  You can’t improve poorly made stock by making it into consommé but you can make well made stock into something really special.  If you were to choose to do so you can make it into a really highly refined soup worthy of holiday dinners by adding garnishes.  The garnish for consommé is often vegetables cut with precision into a small dice, blanched al denté, and added to the broth just before the soup is served.

Whether or not you make your bone broth into consommé isn’t the point but the fact that you are making your stock at home is and you deserve a hearty pat on the back for that alone.  If you are looking for something more refined, or an occasional treat, or you just want to upgrade your holiday menu then consommé is for you.

Chicken Consommé

8 ounces ground chicken breast

1/2 cup yellow onion, minced

1/4 cup celery, small dice

1/4 cup carrot, grated

5 ounces egg whites, about 4 large eggs

1/2 cup tomato, chopped

a sprig or two of chopped parsley, minced

1/4 teaspoon dried thyme

1 bay leaf

1 whole clove

1/4 teaspoon whole black pepper corns

2.5 quarts cold homemade chicken stock ( the link takes you to my recipe for rich roasted beef stock which is a template for any stock, just substitute chicken bones for the beef bones)

1.  Keep everything cold.  The colder the better, just not frozen.

2. Combine all the ingredients except the stock in large heavy bottomed 4 quart pot.  Using a wooden spoon stir everything together for 2 minutes.  You need to stir it well to break up the protein strands.  This is all part of the clarification process.

3. Add the cold stock and stir everything to combine.

4. Place the pot over medium low heat.  Let it come to a soft boil very, very slowly.  Stir often and by often I mean every 15 to 30 seconds otherwise your egg whites could burn at the bottom of the pot.  Not only that by stirring you keep the albumen doing its job of clarifying.

5. As it get close to boiling stop stirring.  If you see strings of egg white and your consommé is starting to look like egg drop soup stop stirring immediately.    The raft  needs to form and as it does it will rise to the top.  Reduce the heat so the consommé does not come to a hard boil.  A hard boil will destroy the raft.

6. Once the raft has stabilized and looks like a dirty egg white omelet us a spoon  and make a vent in the raft.  This is like taking the lid off a boiling pot, it keeps it from coming to a boil or boiling over.

7. Simmer the stock for and hour and a half.  At the end of the simmering time use a ladle and ladle the stock through a fine mesh strainer, or a coffee filter, into a storage container.  Season it to taste with kosher salt.  If you use table or sea salt it could cloud the consommé because of impurities in the sodium.

8. Make into soup, or serve hot in your favorite tea or coffee cup.

Standard

Today was supposed to be a day off from running or lifting but sometimes you just know it’s best to go ahead and put on your favorite running shoes, put your favorite song list on the iPhone, and get it done.  It feels better to do it than not.

My nature is not that of a runner.  It goes against everything I can think of about myself.  But I have been and with consistency.  Some days it is much harder then others but running is always better then not running at all.

Lunch today! Continue reading

Chicken/Poultry, Fish, Gluten-free, Salad, Sandwiches, Snacks/Appetizers

Thai Collard Wraps (day 5 )

Image
Chicken/Poultry, Fat Friday, Main Dishes, pizza

Barbecue Chicken Pizza (+ How You Should Think About Prep)


This recipe is a throwback. It was extremely popular in the 1990s — along with duck confit and tuna steaks, seared rare. I still see it now and again on menus, but it has largely disappeared due to overexposure; we became bored with it simply because it was everywhere.

But, it’s been long enough. Let’s dust off the recipe for barbecue chicken pizza and give it another taste. I can practically make this pizza in my sleep — it was a bar special at a restaurant I worked in, and I made so many of them that I still have dreams about it.

I also realize that I no longer cook like I did at the restaurant. I only have four mouths to feed at home, and the prep for any given dish needs to be relatively quick.

As such, I’m a firm believer in this theory: If you are going to take the time to make one of something, you might as well make two or more. This belief holds water especially when it comes to baked potatoes, doughs, and most of all, whole chickens.

To save time, it also helps to organize and think like a chef — this involves weekly menu planning and daily ingredient prep.These simple steps help me to run an efficient home kitchen, reduce overall waste, and improve time management. Before I adopted this philosophy, I wasted an awful lot of time.

I still cook what I want, but I make those decisions on Monday when I menu plan. Ultimately, I aim to complete the prep work for five meals while cooking the first three dinners of the week. That means that planning ahead can be a lesson in patience: If I want to eat this pizza, I have to wait until the end of the week when most of the prep is done. But once you are in the habit of planning ahead, you’ll find yourself with more time — and better dinners.

Barbecue Chicken Pizza

Author Notes: I make my own pizza dough, and I always make enough for two to three pizzas. I divide the dough into portions after the first rise and freeze what I don’t want to use immediately. When I want to use the frozen dough, I simply thaw it (this counts as the second rise), roll it out, and assemble the pizza. This particular dough is based on Alice Waters’ recipe from “Chez Panisse Pasta, Pizza, and Calzone”. It is the same dough I always use and trust.

Makes one 10 x 12-inch pizza

3/4 cups warm water
2 teaspoons active dry yeast
1/4 cup whole wheat flour
1 3/4 cup bread flour
1 tablespoon whole milk
2 tablespoons olive oil
3/4 teaspoons Kosher salt
2 1/2 to 3 cups mixed onions, sliced
2 cups shredded chicken
1 1/2 cup Gouda (some people like smoked Gouda but I find it too strong)
4 ounces fresh mozzarella
1 to 2 serrano peppers, sliced into thin rounds
1/2 cup Memphis-style barbecue sauce
Olive oil, for sautéing the onions
Kosher salt and fresh ground pepper to taste
1 tablespoon parsley, chopped
1 tablespoon cilantro, chopped
1. Combine the water and yeast in the bowl of a stand mixer or mixing bowl. Let the yeast dissolve, then add the rest of the ingredients. Use the dough attachment on a stand mixer (or a heavy-duty wooden spoon) and mix the dough until smooth; add more flour if the dough seems too wet, but don’t add more than a 1/4 cup at a time. Place the dough on the counter and knead until smooth and elastic. Place the dough into a bowl, cover it with a damp, warm towel, and let it rise for 2 hours, or until it has doubled in size.

2. Punch the dough down and knead it for a minute. Divide the dough in two, place one half in a plastic bag, and freeze it. Place the remaining piece back into the bowl, cover with the damp towel, and let it rise for another hour.

3. While the dough is rising for the second time, place a sauté pan over medium heat. Add a glug or two of olive oil to the pan and then add the onions. Let the onions wilt, get gooey, and caramelize slowly. Remove them from the heat.

4. After the second rise, remove the dough from the bowl and flatten it out into a small disk. Let the dough rest for 10 minutes.

5. Heat your oven to 500° F. This is a good time to use your pizza stone; if you don’t have one, use a sheet tray lined with parchment paper.

6. Roll the dough into a 12- by 10-inch square, place it onto a piece of parchment paper, then put it onto a peel or sheet tray. Pour 1/3 cup of BBQ sauce onto the center of the dough. Working from the middle and, using the back of a spoon, spread it in a spiral motion until the sauce reaches the edges of the dough.

7. Combine the remaining BBQ sauce with the shredded chicken and stir until the chicken is evenly coated.

8. Spread a layer of red onions onto the pizza, followed by the chicken, Gouda, mozzarella, and finally, the serranos. Sprinkle some freshly ground pepper and salt over everything, then slide the pizza onto the stone.

9. Reduce the heat to 450° F. Bake for 15 minutes. Once it has browned to your liking, remove the pizza from the oven and let it cool for 5 minutes before cutting. Top with cilantro and parsley and serve.

Standard
Chicken/Poultry, Dinner, dog-eared, Gluten-free, Main Dishes, Medium Time, Moderate, One-pots, Recipes

Poulet á l’ Estragon (Chicken Tarragon)

_TJH7671

Spring always seems rushed. It’s as if we spend months climbing a mountain called winter, and when we finally reach the peak, we’re so grateful that we run as fast as we can down the other side — past spring and directly into summer. It’s even true for the vegetables we’re attracted to — the fleeting cool weather crops that are harvested and eaten before spring has truly begun. Continue reading

Standard
Chicken and Poultry, Dinner, dog-eared, Gluten-free, Main Dishes, Medium Time, Moderate

Chicken Legs in Tomato Gravy ( + 5 Tips to a Better Braise)


Finally, the long standing blanket of snow has begun to recede and melt back into the dark earth, but not without leaving behind a disheveled landscape — like lifting an area rug you have meant to clean under for the past year. It is ugly outside, and depressing too. It is the worst time of year. The melt-off signals the beginning of the end of winter, but the skeptic in me knows that the weather is more than likely crying wolf. Either way it sets a spark to the natural cycle of things.


A bee flying in the orchard still bare of leaves, lands on my arm, walks around a moment, then looks up at me with sad puppy dog eyes and flies off. A couple of raccoons out during daylight forage the field for last season’s spilt corn. At the wood’s edge an opossum trips on a branch and falls fifty feet before landing with a thud in the remnants of a wet snow bank. I realize it is time to join the others as well — to come out of hibernation, to replenish.

But I have a problem. I am sick of kale. Even my beloved collards put me off. The hell with you turnip and rutabaga, for you’ve left a bitter taste in my mouth. I push bowls of Brussels sprouts away as if I am a child again, and my mother is trying to force feed them to me (she even threatens me with no dessert). I have eaten my greens in all forms, and I can’t stand them anymore. I have hit the winter vegetable wall. With the exception of but a few, the only way vegetables are still palatable is with heavy cream and bits of bacon.

Through it all, somehow potatoes taste good — more then good — amazing. Anything resembling a jar of sunshine helps (like last summer’s canned tomatoes with basil tucked into the red pulp). Going outside helps, too, because the musty smell of thawing earth and the gentle heat of the midday sun gives me hope for what is to come. Luckily, any food on a platter that resembles comfort is still a hit at the table– such as these chicken legs, tenderly covered with a parchment lid and slow cooked in a Dutch oven until they become sticky. A dish that’s good anytime of the year, but especially welcome during the wait until spring.

Tips for Better Braising:

1. Always caramelize the protein. Mind you, many times the vegetables are caramelized too, but not always. The deeper the caramelization, the deeper the flavor of the finished dish. Be mindful of the fond (the brown bits stuck to the bottom of the pan) — don’t let them burn. The ideal braise includes a beautiful fond, which occurs when the bottom of the pot is schmeared with brown bits of cooked-on-goodness that releases into the sauce when you add liquid. For good measure, always use a wooden spoon and scrape along the bottom of the pot to make sure that nothing is left behind.

2. If a recipe calls for vegetables, always add more. If a recipe calls for 1-cup of mirepoix, don’t be afraid to add 2 cups. A braise, as far as I know, has never been hurt by too many vegetables.

3. A parchment lid is one of my favorite kitchen cooking methods. I don’t know the exact science behind it other than that it works (and makes your food better). It allows, at least in my mind, the food that sits atop the liquid to brown and caramelize while preventing the liquid from evaporating.

4. Just because meat is cooked in a liquid doesn’t mean it won’t dry out. Have you ever eaten a piece of pot roast that is so hard to swallow that it gives you the hiccups? It is most likely because the roast was too lean or overcooked. Be mindful of cooking times and fat content.

5. If a braise only calls for a mirepoix to be used in the broth, at the end of the cooking time I will oftentimes remove the meat, degrease the braising liquid, and purée the vegetables to make the sauce creamy without having to add even a touch cream.

Serves 4 or more

For the chicken legs:

olive oil

8 to 10 chicken legs, skin-on

1 cup celery, diced

1 1/2 cup yellow onion, diced

1 1/2 cup carrots, thinly sliced on a bias

12 to 18 garlic cloves, chopped

1 cup dry white wine

2 cups tomato purée

1 cup vegetable broth or water

2 bay leaves

1 1/2 tablespoon rosemary, minced

1 1/2 tablespoon flat leaf parsley, minced

Kosher salt and fresh ground pepper

1. Season the chicken on all sides with salt and pepper. Heat the oven to 375˚ F.

2. Place a large sauté over medium high heat. Add enough olive oil to the pan so that the bottom is just coated. Add the chicken legs and brown them generously on all sides. Adjust the heat as necessary. Add the carrots, celery, and onions to the pan. Season them with salt and pepper. Let the vegetables brown.

3. Once the veggies brown add the garlic and rosemary. Stir the veggies around and once the garlic is fragrant nestle the chicken legs comfortably with the veggies. You want you veggies and chicken spooning. Add the white wine and let it reduce to almost nothing. While the wine is reducing use a wooden spoon to scrape up all the good bits stuck to the bottom of the pan. Add tomato and vegetable broth. Bring the liquid to a boil, cover with a parchment lid, then slide it into the heated oven for 45 minutes to 1 hour.

For the mashed potatoes:

6 to 8 russet potatoes, depending on their size, peeled and cut into 1 inch rounds

6 tablespoons unsalted butter

1/3 cup whole milk, possibly more

kosher salt and fresh ground white pepper

1. While the chicken is in the oven make the mashed potatoes. Place the sliced peeled potatoes into a large pot and add enough cold water to cover them by 4 inches. Add a tablespoon of kosher salt. Place the pot over high heat and bring it to a boil. Once it is boiling reduce the heat to keep the pot from boiling over. After about 15 minutes check the potatoes to see if they are done by inserting a kitchen knife into the middle of one of the larger pieces of potato. If the larger ones are done you are assured the smaller ones will be too. The knife should easily pierce the potato.

2. Drain the potatoes into a colander. Let them steam for a few minutes to rid themselves of excess moisture. Then using a ricer, a mixer or a stand mixer with a paddle attachment either rice, or mix the potatoes till broken down. Add the butter and mix some more. Season the potatoes with a touch of salt and fresh ground white pepper. Add the 1/3 cup of milk. Mix and then taste for seasoning. Adjust the seasoning as necessary and add more milk if the potatoes are too stiff. Be careful as to how liquidy you make the potatoes. Error on the stiff side because the tomato gravy will loosen them up a lot as they co-mingle on the platter.

3. Plate the potatoes onto a large platter. Top the potatoes with the chicken legs then the carrots, onions and celery. Ladle the tomato gravy over all and sprinkle on the parsley. Serve.

Standard
Chicken and Poultry, Chicken/Poultry, Gluten-free, Grill, Grilling, Main Dishes, Medium Time, Moderate

5 Tips for Better Grilled Chicken Breasts

Grilling boneless skinless chicken breast presents a set of problems. I’m a firm believer that leaving the skin on and the bones in your chicken goes a long way to alleviating tough, dried out breast. But it’s an unpopular decision, because of the convenience and the ease with which we can gobble up the boneless skinless kind.

There are ways, however, to defend yourself against dry chicken.

Bigger is not better when it comes to grilling a chicken breast.
They don’t grow them like they used to. Today’s standard meat bird is a hybrid designed to grow big breasts and nice thighs.

The birds of yesteryear, however, were all about the thighs, and the breast was almost non-existent. These days it’s not unusual to find a double lobe breast that weighs in around two pounds — or bigger. Chicken breast can be the size of a turkey breast if you want it to be.

But you can get chicken breasts in any size you want. Restaurants, for example, will often serve two 4- to 6-ounce breasts as a single serving because seeing two on the plate makes you feel as if you’ve gotten your money’s worth. Your butcher should be able to order these small breasts for you. I prefer a single 6-ounce breast per person because it seems like an appropriate portion size — especially if, like me, you like to serve lots of side dishes.

Shape matters as much as the temperature of the grill.
A chicken breast tapers at each end, more so at the tail end than the neck end, which means the tips are either cooked perfectly while the middle is rare to raw, or the tips are burnt to a crisp and the middle is perfectly cooked. It is a lose-lose scenario.

I always buy the breast still connected in double lobes.
It assures pairs of evenly sized paillards, but I always cut them before pounding them out. It is important to note that sometimes in the middle of a double lobe is a piece of cartilage that needs to be removed. Cut along each side of the center line of fat to get it out.

Choose your instruments of destruction.
I have four pictured in the photo below; any will work fine. I prefer the flat side of a meat cleaver because it’s heavy and gets the job done. If you use a mallet, you will have to start in the middle and work your way to the edges in order to end up with an evenly pounded chicken breast. The pan is a last resort, but it is by no means a slacker.

For sanitation and clean-up purposes I like to use multi-layers of plastic wrap. I place a breast to one side then fold the wrap over the top before I get out my daily aggression.

Keep it hot, but not too hot.
I like the grate to be hot but to use coals that are on their way down from their highest heat. You want grill marks that caramelize without blackening. Chicken flesh becomes stringy and chewy if it is left to dry out on the grill, so use your common sense: preheat your oven if you think you might want to finish cooking the chicken at a low temperature.


This slideshow requires JavaScript.

(recipe adapted from the Fog City Diner)

Serves 4

The Adobo Marinade:
  • 3ancho chiles
  • 3guajillo chiles
  • 1/2cup reserved soaking water
  • Juice of one lime
  • Juice of one orange
  • 1/4cup red wine vinegar
  • 1/4cup olive oil
  • 3garlic cloves, minced
  • 1tablespoon oregano
  • 2teaspoons thyme
  • 2teaspoons cumin seed, ground
  • Kosher salt and freshly ground pepper
To finish the dish:

  • 4single lobe chicken breasts
  • 1red onion, thinly sliced
  • 1lime
  • Sour cream
  • Cilantro
  1. Cut the tops off the dried peppers and shake out the seeds into the trash can. Place the peppers into a bowl and cover them with hot water. Let them soak for two hours, making sure they stay submerged. Remove the peppers from the water and place them into the bowl of a food processor. Add a 1/2 cup of the soaking liquid to the bowl. Process until you have a pepper paste. Pass the paste through a strainer set over a bowl. You are removing the skins and seeds. Don’t skip this step or you will be severely disappointed.
  2. Combine 3 tablespoons of the paste with the remaining marinade ingredients and mix to combine. Season it with a healthy pinch of salt and a grind or two of pepper.
  3. The marinade can easily be made a day or two in advance and stored in a jar in the fridge. The leftover pepper paste is great for enchiladas, black bean soup or chili. Store the paste in a jar in the the fridge. It holds for a long time.
  4. Pound out the chicken breasts so they are of an even thickness, then place the chicken into a casserole. Use half the marinade and coat the pieces of chicken. Let them marinate for two hours. Be sure to flip them after an hour.
  5. While the chicken marinates, make the lime pickled onions by tossing the red onion rings with the lime juice. Let them sit for at least 20 minutes.
  6. Remove the chicken from the marinade. Place the marinade into a small sauce pan and heat it over low heat. Heat the marinade to a brisk simmer.
  7. Fire up the grill to medium-high heat. Grill the chicken breast. Cook them till done. Serve on rice, spoon the hot marinade over the chicken, top with sour cream, then pickled onions, and garnish with cilantro.
Standard
Brunch, Chicken and Poultry, Chicken/Poultry, Dinner, dog-eared, Gluten-free, Main Dishes, Medium Time, Moderate

The Art of Honest Fried Chicken (A Lifestyle Choice)

Frying chicken, at its best, is a state of mind formed much in the same way as the quiet back beats of a porch-sitting session with a dear friend. It has a rhythm. It is good company on a sunny summer afternoon. It is pointless to rush. Futile, even. Besides, the comfort of a good friend comes from the effortlessness of meaningful conversation and is further heightened by the knowledge you have nothing you would rather do. Continue reading

Standard
Chicken and Poultry, Dinner, Gluten-free, Main Dishes, Medium Time, Moderate

Island Style Chicken Fricassee

Fricassee en PolloIn the summertime, I want food that is casual, soulful, and unpretentious — food that can double as a family meal and an intimate dinner for entertaining. Any dish that almost needs to be eaten with the hands (but not quite) or that can be scooped-up with röti, flatbread, or tortillas and goes well with ice cold beer is a grand slam. Suffice it to say, Caribbean food does all of these things well. And besides, I love island food.

Julia Child describes a fricassee as a dish somewhere between a sauté and a stew. Because this definition is so broad, it lends itself to a heated discussion over a cook’s creative latitude. Plant this culinary seed in an area with lots of islands and diverse cultural heritage and you end up with a menagerie of spectacular dishes. In the Caribbean alone I can think of several fricassees, like the Cuban classic Ropa Vieja or Jamaican Brown Stewed Chicken, which is more a fricassee then the name suggests.

A good fricassee is a rustic dish. It starts with browning the meat — usually bone-in to add flavor to the dish’s self-created broth — and then following with a heady dose of aromatics typically consisting of onions, peppers, garlic, and herbs. Depending on which island you’re on, a fricassee might either incorporate lots of peppery heat or be mild, but all will have notes of African or Indian flavors.

Fricassee en Pollo

For my tastes, I like to add a tomato product, be it canned or fresh, and some sort of other acid, such as vinegar or wine. In the case of this particular dish, however, I replace the usual vinegar or wine with green olives and capers.

While I have stripped the meat from the bone, it isn’t necessary. Being a rustic dish, it would be perfectly acceptable to leave the cut chicken as is. You could easily add more heat or do as I did and separate a mild portion for the kids before adding some hot peppers to the adult portion. The amount of spicy heat is left up to the discretion of the cook who knows firsthand the preferences of the eaters.

Be it plain or with the addition of saffron and peas (as in my picture), rice is important to a fricassee. Generally speaking fricassees are not one-pot meals, but rather are served with rice, röti, and a vegetable. The rice shouldn’t outshine the main dish: the two should enhance each other in a sort of partnership. In some sense it is like this is like a pasta dish: the fricassee is used as a condiment to the rice in the same way that sauce flavors noodles.

I like dishes that don’t control my schedule. The final big plus to this kind of food is that cooking it in increments can even improve the final product. I rarely go to the kitchen anymore and cook something from start to finish in one session — most days, I just don’t have the time. Often, I find myself with snippets, 10 minutes here or an hour there, which I put to use. I may prep everything in between making the girls’ breakfast and getting them off to camp. After camp drop-off, I might run an errand before heading home to caramelize the meat and sear the veggies. If I have enough time, I’ll add the liquids and let the dish finish until the chicken is tender. Then, it can all go in the fridge until dinner, allowing the meal to be as casual as I like my summers to be.

Fricassee en Pollo (serves 6 to 8)

1 whole 3 pound chicken, cut into 10 pieces

1 tablespoon expeller pressed peanut oil

1/2 cup red bell pepper, small dice

1 cup onion, small dice

3 tablespoons fresh garlic, minced

1 tablespoon dried oregano

1 tablespoon dried thyme

1 tablespoon cumin, crushed

2 teaspoons paprika

2 bay leaves

16 ounces crushed tomatoes

2/3 cups green olives, halved

1/2 tablespoon capers, minced

kosher salt and fresh ground pepper

2 tablespoons hot pepper of your liking, minced

  1. Season the chicken with salt and pepper. Place a large heavy bottomed pot over medium high heat. Add the peanut oil and swirl it around in the pan to coat the bottom. When the oil is hot add the chicken skin side down and brown it deeply on all sides. Adjust the heat as necessary to avoid scorching the oil. Once the chicken is caramelized remove it to a plate.
  2. Add the onions, pepper and garlic to the pan. Sweat the vegetables until they just become tender then add the dried spices. Stir the spices into the vegetables and let them toast until they become fragrant. Add the tomato and a cup of water. Season the sauce with a pinch of salt and a few grinds of pepper reminding yourself that the olives and capers are salty so don’t season with a heavy hand. Taste and make adjustments.
  3. Add the chicken back to the broth and then bring the whole thing to a boil. Reduce the heat to a simmer. Cook until the chicken is just tender. If you plan to strip the meat from the bones remove it and place it on the same plate you used before. While it is cooling let the sauce reduce until it becomes unctuous.
  4. Cook your rice according to the instructions on the bag or box or however it works best for you.
  5. Add the pulled chicken (or chicken pieces) back to the reduced sauce. Add the olives, capers and any hot peppers your might want to add. Taste and add more salt if needed. Warm through and serve with rice.
Standard
Chicken and Poultry, Chicken/Poultry, Easy, Medium Time

A Delicious Roast Chicken for Any Night

I have a simple rule, whenever I figure out what good restaurant cooks like to make at home I follow suit.  It’s because most professional cooks like simple but deeply satisfying meals, roast chicken is one of those, it is a cook’s meal.  When I say simple I don’t mean in flavor and not necessarily in ease of cooking but more that it falls into the category of not being fussy.

And really, that is it isn’t it, that roast chicken is delicious, very satisfying and not at all fussy. Most importantly though it is easy on the cook and that is always something to grasp hold of and learn how to do.    So this is how I do it, I try not to complicate roast chicken, I use only a few dried spices  and I try to follow some simple guidelines I have come to trust over the years.

Roast Chicken Know-How:

  • Season the chicken with salt the day before you want to cook it.  Then set it into a tray with sides.  Place it uncovered into the refrigerator to dry out the skin and soak up the salt.  This drying of the skin makes for a deeply colored crispy skin.  The salt helps keep the chicken moist.
  • Trussing the chicken helps the chicken to cook evenly.  Besides we eat as much with our eyes so why not make it pretty.
  • You can cook the chicken on top of vegetables if you like letting the juices drip down onto them making for a wonderful side dish.  I do this as often as not but I never throw out the pan juices.  The pan juices make a wonderful addition to all sorts of things from pasta to…well, anything.
  • Adjust the top rack of your oven so the top of the bird is 5 to 7 inches from the top of the oven.  If it is to close to the top it will brown the skin well before the meat is cooked.
  • Avoid buying birds that are more the 4 or 5% juices added.  The birds that are 12% are brined and they are very, very salty.
  • Save any and all pan juices.  Use them in a vinaigrette to dress a salad, in pasta or in chicken salad but don’t waste them.

Cost to roast a chicken:  it depends on what kind of chicken and where you buy it but anywhere between 6 and 10 dollars for a 4 pound bird.  It should feed four with the added bonus of making soup from the carcass.

Click here for a pasta recipe using roast chicken leftovers: Chicken, Black Olives and Lemon with Spaghetti

This slideshow requires JavaScript.

To Roast a Chicken:

kosher

1 teaspoon fennel seeds

3/4 teaspoon dried thyme

1 teaspoon paprika

1/4 teaspoon black pepper

1 chicken, about 4 pounds

1. Salt the chicken the day before you want to cook it or at least 4 hours before you want to cook it.  To do this sprinkle salt onto all sides of the bird including inside the cavity.  Place the bird onto a tray with side and put it back into the fridge.

2. Crush the fennel seeds either using the bottom of a heavy pan to grind it or with a mortar and pestle.  Combine the fennel with the rest of the spices and, again, sprinkle the spice rub all over the bird including the cavity.

I like to slice the chicken before serving. I like to slice the breast off the bone so I have a carcass for soup at the end of the night.

I like to slice the chicken before serving. I like to slice the breast off the bone so I have a carcass for soup at the end of the night.

3. Let the bird sit at room temperature for a half an hour or up to an hour.

4. Heat the oven to 400˚ F.  Place the chicken, still on a tray with sides, into the oven and let it roast for 30 minutes.  Bast the chicken with the pan juices.  Bake another 35 minutes.  Check to see  if it is done.  I can usually tell by the legs.  If the meat has pulled away from the knee bones then there is a good chance the rest of the bird is done.  Wiggle a thigh.  If it seems loose then you are probably good to go.  Tilt the bird backwards and see if the juices running out from the cavity are red.  If  all three of these test are passed letting the bird rest will finish the cooking.   Let the bird rest cover with foil for 15 minutes.

5. Carve and serve.

Standard
Chicken/Poultry, Cooking School, Dinner, Kitchen Tips, Main Dishes, Noodles/pasta

The Unctuous Possibilities of Pan Juices

Spaghetti with Chicken, Black Olives, Lemon and Au JusWe all know gravy or pan sauce in large quantities might be good for our soul but it isn’t so good for our heart health. After all we are doing nothing more then adding flour or cornstarch to the fat in the bottom of a roasting or sauté pan to thicken it and adding back some stock, wine, or cream for volume. So we have deemed it less healthy which to me means it is an occasional treat and as such we reserve serving gravy for holiday feasts or occasional celebrations, and rightly so.

So why then when I look into the chicken-less roasting pan that held tonights dinner only a short time ago and I see those beautiful glistening juices that are on the edge of coagulating do I feel like I am throwing the baby out with the bathwater. Don’t get me wrong I am no health nut. In fact I have this beautiful physique that could make me the poster child for a Bittman campaign on obesity. I am sure it goes back to my waste not want not way of thinking. Nevertheless all this made me think. pan jelly

When I make my own stock I always cool it down, put it in the fridge and then the next day I lift the disc of fat off the top. I know the stock is pretty fat free, although I haven’t calculated it and I have know idea how to do so, but it has to be pretty lean and I also know it has very little salt because I didn’t add any. So looking at it in this light I started refrigerating the roasting pan and the next day I remove all the fat cap and what is left is the reduced intensely rich jelly. I use a rubber spatula and scrap all the jelly up and into a small Ball jar. I have already made a plan for its use, did so before I even roasted the pork, beef or chicken, so I know when I store it in the fridge it will be used up in a day or two. I could freeze it but I don’t like to collect things like this and my motto is use it or loose it.

The jelly is infinitely better then bouillon cubes or stock base and can be used in all sorts of ways. Sometimes I like the jelly to have lots of debris(meat bits and spices) and other times I don’t but it is easy to heat and strain, if you need too, just before you want to use it. While you don’t have too I often try to keep in mind the flavors of what I roasted with the flavors of what I am going to make with the pan juices just to make sure they coincide.

Pan juice possibilities:

  • Of course it is always good to use the pan juices in soups.  Added to the broth it can give a flat soup the kick it needs.
  • Pasta or noodles of all kinds.
  • For chicken pan juices:  Make a simple fresh lemon juice and olive oil vinaigrette with salt and lots of fresh ground pepper, take a couple big hand fulls of baby Bibb lettuces  and toss it with the dressing.  Just before serving heat the pan juices and drizzle over the salad for a “healthier” wilted salad.
  • For beef:  You could make Grits and debris.  Make a bowl of grits, pour on the warm pan juices and top with a fried egg.
  • For pork:  Ramen noodles.

Pasta with Chicken, Black Olives and Lemon

(serves 4)

12 or 16 ounce box of spaghetti noodles

extra virgin olive oil

half a can of black olives, drained

1 1/2 cups cooked chicken meat

4 cloves of garlic, trimmed, peeled and slivered

1 1/2 teaspoons lemon zest

1/4 cup dry white wine

1 tablespoon fresh lemon juice

2/3 cup chicken stock

2 to 3 tablespoons pan juices

1 tablespoon parsley, minced

parmesan cheese

1. Place a large pot filled with 4 quarts of salted water over high heat.

2. While you are waiting for the water to come to a boil place a sauté pan over medium heat.  Add a good glug or two of extra virgin olive oil.  Add the garlic and let it gently cook until it just begins to turn golden, be careful because browned garlic can be very bitter.  Add the white wine and let the alcohol burn off.  Now add the lemon juice, stock and pan juices.  Bring them to a boil and season with salt and pepper.  Taste and adjust the seasoning.  Reduce the heat and let the liquid reduce.

3. When the water is at a roiling boil add the spaghetti.  Cook according to the directions on the box, I am guessing 10 minutes or so.  Once the pasta is just tender remove a cup of pasta water and reserve it, drain the pasta and immediately add it to the pan along with the chicken, olives and lemon zest.  Season the pasta with salt and fresh ground pepper.  Taste and make the necessary adjustments.  If it is to dry add a little bit of pasta water.  This is the kind of pasta that should have a broth.  Toss to combine and once the chicken is hot add the parsley toss again and serve with lots of parmesan.

Standard
Chicken and Poultry, Medium Time, Moderate, Recipes

Smothered Chicken

foodquarterlyServes 4

Smothered chicken makes for a comforting Sunday dinner.  It’s the kind of dinner that will bring the kids back on Sundays after they have left home to be on their own.  The combination of peppers, onions and celery (known as the trinity in cooking) is very warming and homey.

It is a great dish to serve over boiled rice and if you were to serve green beans and biscuits with it you would, or at least I would, be in heaven.

Cost to make this dinner entree:

  • package of 8 chicken thighs $4.83
  • 1 bunch of celery $1.29
  • 2 onions .74 cents
  • 1 head of garlic .49 cents
  • 1 bell pepper $1.00
  • Loose cost of vegetable oil, spices, salt and flour $1.00
  • Total cost to make the dinner: $9.35

For the spice mix:

2 tablespoons paprika

1 teaspoon garlic powder

1/2 teaspoon black pepper

For the chicken:

6 to 8 bone-in skin-on chicken thighs

2 cups yellow onions, julienned

3/4 cups green bell peppers, julienned

3/4 cups celery, julienned

water

kosher salt

fresh ground black pepper

1/4 cup green onions, chopped

2 1/2 tablespoons flour

vegetable oil

2 garlic cloves, peeled and minced

1. Combine all the spice ingredients in a small bowl. Season the chicken thighs on all sides with salt and then with the spice mixture. You may or may not have extra spice depending on how heavy your hand is and whether or not you season 6 or 8 thighs.

2. Place a heavy, large sauté pan over medium high heat. Add enough oil to the pan to easily coat the bottom completely. When it is hot add the thighs skin side down and brown them deeply. Once they are brown do the same to the other side.

3. Remove the thighs to a plate. Add the onions, bell pepper and celery to the pan. Season them with salt and pepper. If the pan is to hot turn down the heat and cook down the vegetables until they are brown and soft. Add the flour and sauté everything for a bit longer to cook out the flour flavor.

4. Add the garlic cloves and give the veggies a stir. Add the chicken thighs back to the pan and add enough water to cover the thighs by three quarters. The crispy tops should just be peeking out of the gravy. Add all but a tablespoon of the green onions to the sauce.

5. When the gravy comes to a boil reduce the heat and simmer until the chicken is cooked through and tender, this should take about thirty minutes. Season the gravy, stir and taste.

6. If the gravy is reducing to fast and getting to thick add more water and stir.  If you added more water bring the sauce to a boil and serve.

Standard
Chicken/Poultry, Dinner, Gluten-free, Main Dishes

Sautéed Chicken with Pepperoni and Olives

I can tell you, with great certainty, how good a restaurant is going to be by the temperature of their plates.  If I get a stone cold plate with hot food chances are the dinner will be average.  If I get a cold salad on a warm plate just out of the dish machine, again, I know the rest of my dinner has more of a chance being bad then good.  It tells me whether or not the kitchen cares.

When I worked in commercial kitchens it was a bone of contention with me and those who worked for me.  Your plates needed to be hot for hot food and cold for cold food, period.

There was a time at home, back before we had kids, when I would always warm our plates in the oven.  Probably sounds completely retentive, for all I know it might be, but I have never really given a rats butt what others think.  I did it because my wife and I enjoyed being at the table together, taking our time eating, and having some quality conversation.  Hots plates keeping your food warm is a nice touch.

We had this for dinner the other day, I warmed the plates.

Serves 2

olive oil

2 each 6 ounce boneless skinless chicken breast

1/4 cup pepperoni, 1/4 inch dice

1/4 cup Picholine olives, pitted and halved

1/4 cup tomato, diced

1/2 cup dry white wine

1 tablespoon pine nuts

1 tablespoon currants

2 teaspoons flat leaf parsley, minced

kosher salt and fresh ground pepper

1. Season the chicken on both sides with salt. 

2. Place a heavy bottomed sauté pan over medium high heat.  When the pan is hot but not smoking add enough oil to coat the bottom of the pan.  Gently lay the chicken breast, what would be skin side down, into the pan being careful not to splash hot oil.

3. Brown the chicken on both sides.  Adjust the heat as necessary to keep the oil from burning.  Once both sides have caramelized remove them to a plate or pan and let them rest.  Pour out any excess grease.

4. Meanwhile put the pan back on the heat and add the pepperoni, olives and tomato.  Stir and toss it around until fragrant then add the white wine to deglaze the pan.   Using a wooden spoon scrape up any brown bits from the bottom of the pan.  Once the wine has reduced by half add the pine nuts and currants.

5. Give everything a stir and then place the breast back into the pan.  If the liquid in the pan seems at all dry add a 1/4 cup of water.  Braise the breast until they are cooked through which shouldn’t be long if you browned them well.  Taste and adjust the seasoning, add the parsley and stir to combine. 

6. Place the chicken breast onto warm plates skin side up,  top with the sauce, serve immediately.

Standard
Memoir

The Chicken Massacre at Crooked Creek

Last night’s rain, soaked up by the hot earth, is rising again this morning as steam. As the truck rattles down the long gravel drive and we get close to the orchard, the apple trees emerge from the light fog, the treetops magically floating in a cloud.

Then, through the mist, I begin to see the faint outlines of chicken carcasses strewn about haphazardly–some on their sides, missing wings, their pure white feathers stained red; others with their heads folded under their chests; and some with their chests still heaving, breathing their last. It could be a black-and-white photograph of a Civil War battlefield. Except they’re chickens. My chickens.

My throat drops into my stomach. I stop the truck and put it in park.  I fling the door open and jump out, telling Lynnie, my youngest, to stay put. I walk briskly out to the killing field. I pick up a couple of the dying birds and do the humane thing, wringing their necks and dropping them in a pile.

At first I think it’s a coyote massacre, but I quickly notice that most of the birds have two fang punctures in their skulls, while a few are gutted, their stomachs ripped wide open. I’ve heard that raccoons will bite the heads of chickens and lick away the blood and fluids, which makes the feathers come loose and leaves the chicken bald. When a chicken runs dry, the raccoons leave the carcass and move on. It isn’t hearsay anymore–I’m witnessing this oddity and carnage first-hand.

The sky is still gray and it’s drizzling again. The splashes of blood are diluting and spreading in the rain. As the truck idles in the driveway, I look around the scene again, then the smell of wet dead chicken on my hands and exhaust fumes makes me gag.

I walk back to the truck. I get in, my shirt wet against the seat, and look down at my lap, confused. I left the chickens in their pen this morning because we left early to run a couple of errands. I figured I would let them out when we got back. It seems the raccoon or raccoons ripped the welded wire right off the side of the pen and killed each chicken one at a time. It’s as if they’d been waiting at the woods’ edge, watching me leave, seeing those chickens penned up so they couldn’t run–just like the raccoons wanted. It’s as if they’ve been waiting and watching for months, hoping I would make this mistake.

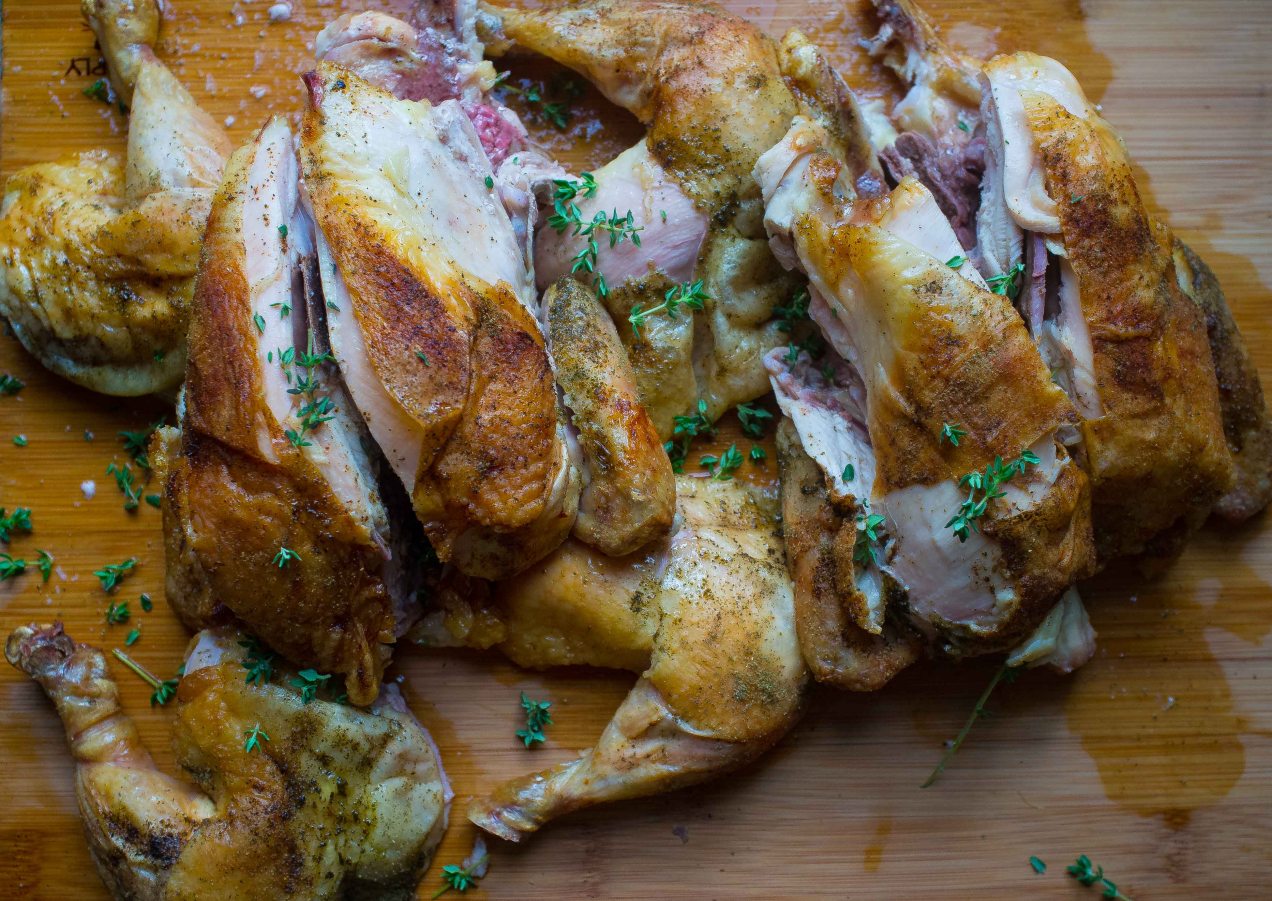
It’s not like the chickens could have run, anyway. They were meat birds, one week away from being processed. They were plump–fat, even–and meat birds aren’t meant to run; they aren’t even meant to reproduce. But I had raised them perfectly–maybe the best flock of meat birds I’ve raised. Now 21 of 25 are laying dead in a field being rained on: a total loss; a tragic waste.

Back at the house, all I can think is how glad I am that I don’t depend on these birds for my food. Of course, I wanted them to be my food, but I can afford to buy chicken at the store because there are people who raise thousands, even millions of them, and they do it cheaply and, for a couple of extra bucks, even organically. My family and I won’t go hungry.

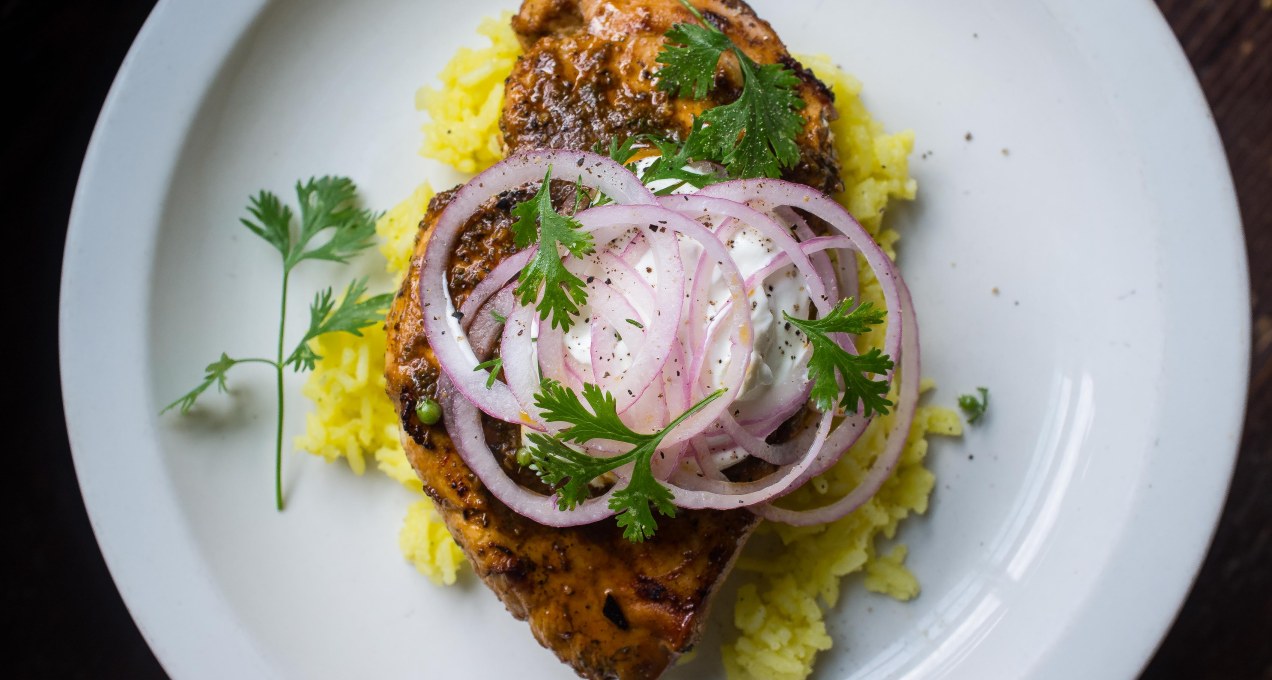
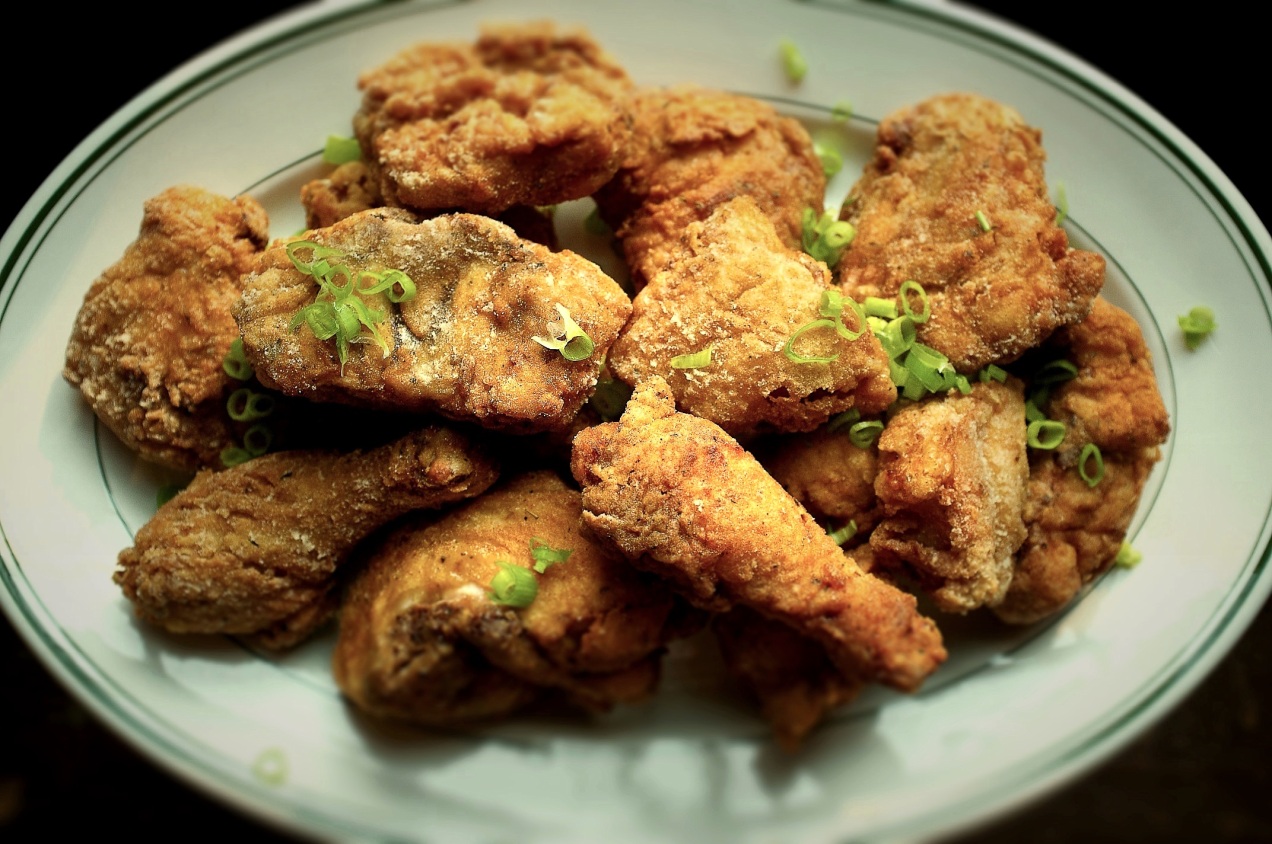
As tragedies will, though, this gets me thinking about how and why I raise these birds. Like wanting to have more eggs than I need, because I don’t find the ones with poop on the shell to be quaint, so I feed the ones with shit on them to the dogs and keep the clean eggs for myself. Isn’t that the idea, to have clean, fresh, great-tasting eggs? And Vivian and Lynnie like chasing the chickens around the yard and hatching the eggs in the spring, and it’s a great experience for them to take care of the hens. They love the looks on people’s faces when they ask, “What are your chickens’ names?” and the girls reply, “Breakfast, Lunch, and Dinner!” And I like that they know where their food comes from. They’ve seen a chicken butchered, watched me do the crappy job of plucking a bird, and they know that it’s a hell of a lot of work for one meal.

Raising organic birds takes time–lots of time–and money. I eat probably the most expensive eggs in the county, and, after the massacre, the most expensive chicken, too. My wife thought I was crazy to get chickens, until she tried the eggs and we breaded and deep-fried our first meat bird. But now I’m wondering if she wasn’t right. Not just because it’s an expensive venture in a bad economy, but because we’ve had some other bad luck lately. It didn’t start out that way–the honeymoon years seemed perfect–but now, four years into it, things are going wrong.

Like the time I was at the kitchen sink and looked out the window just as the big Black Langshan rooster jumped three feet into the air, put its talons out, and grabbed at Viv’s back. Viv fell down, and I dropped the dish towel and sprinted to the back door. Then I heard her scream. It wasn’t the first time I’d heard her scream, but this time she wasn’t crying wolf. She cried out in such a complete panic that I had no doubt she needed help, desperately.

I’m not a violent person, but that changed in an instant. In a fit of blind rage and adrenaline, I tackled the big rooster, grabbed it by the feet, put my foot on its head, and jerked upward. I broke its neck with such force that I pulled the head clear off, but it was still flopping and spewing dust and blood everywhere. I kicked it away like it was a poisonous snake and immediately checked on Vivian, who was huddled in a corner by the chicken shack, covered in dust and shit.

I was shaking. She was crying.

I was livid. She was scared.

But she was more scared than hurt, and she was going to be okay. The rooster had pecked her once in the face about an inch below her left eye, so she was bleeding a little, but her back, because she had on a jacket, was unharmed.

I couldn’t put all the blame on the rooster. The girls aren’t supposed to go into the pen alone. We’ve had talks about it. I’ve told them that, because they are at eye level with each other, a big rooster like Rusty will come after them because he thinks they’re going to get his hens. He’s being protective of his flock and, because they’re his size, he will attack.

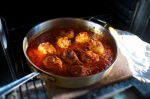
Now, in my kitchen on this wet, bloody morning, I remember pushing the tear-soaked hair away from Vivian’s eyes and tucking it behind her ears, and then, through her tears, between heaving breaths, she giggled a little and asked, “Can we eat him, Dad? Can we eat the rooster?”

I know I’m going to keep raising chickens.
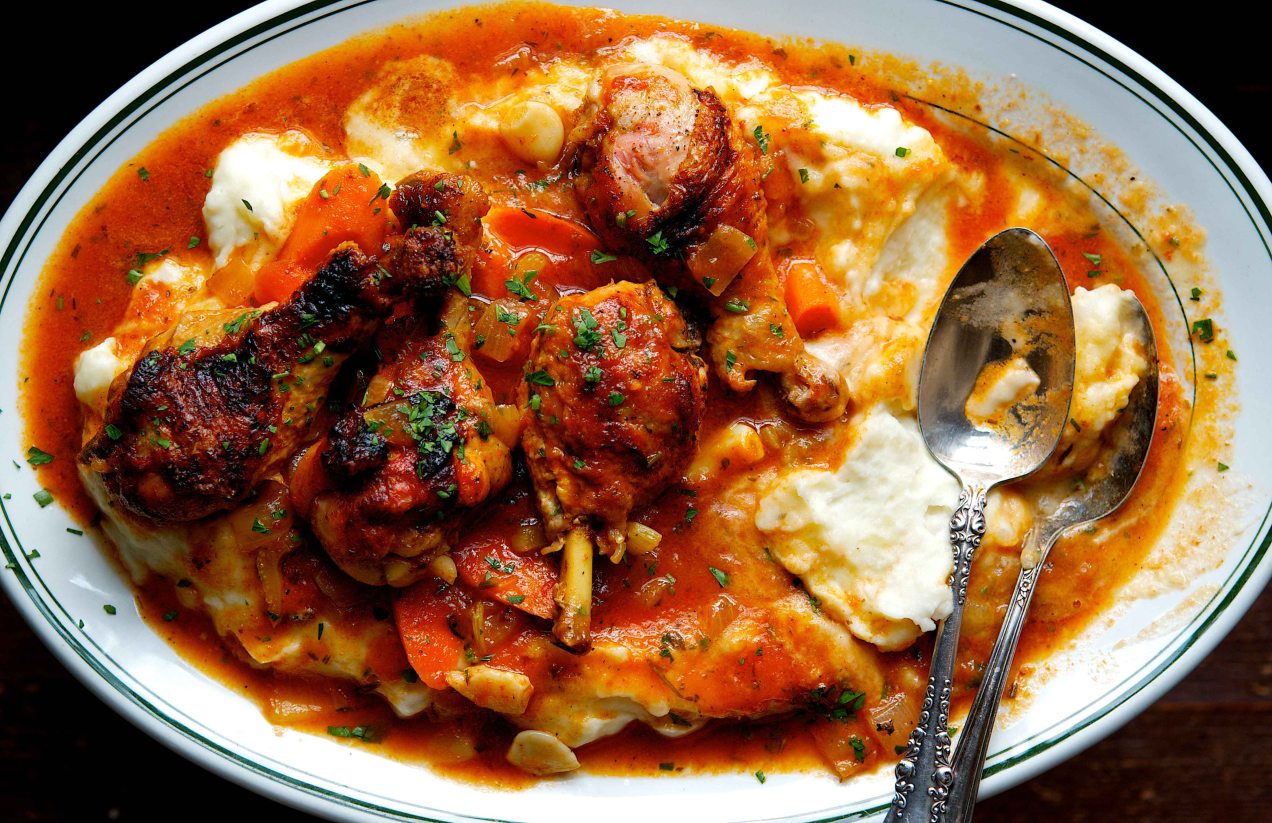
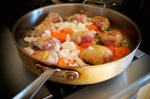
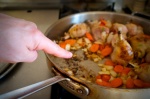
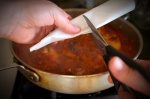
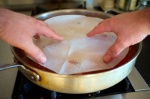
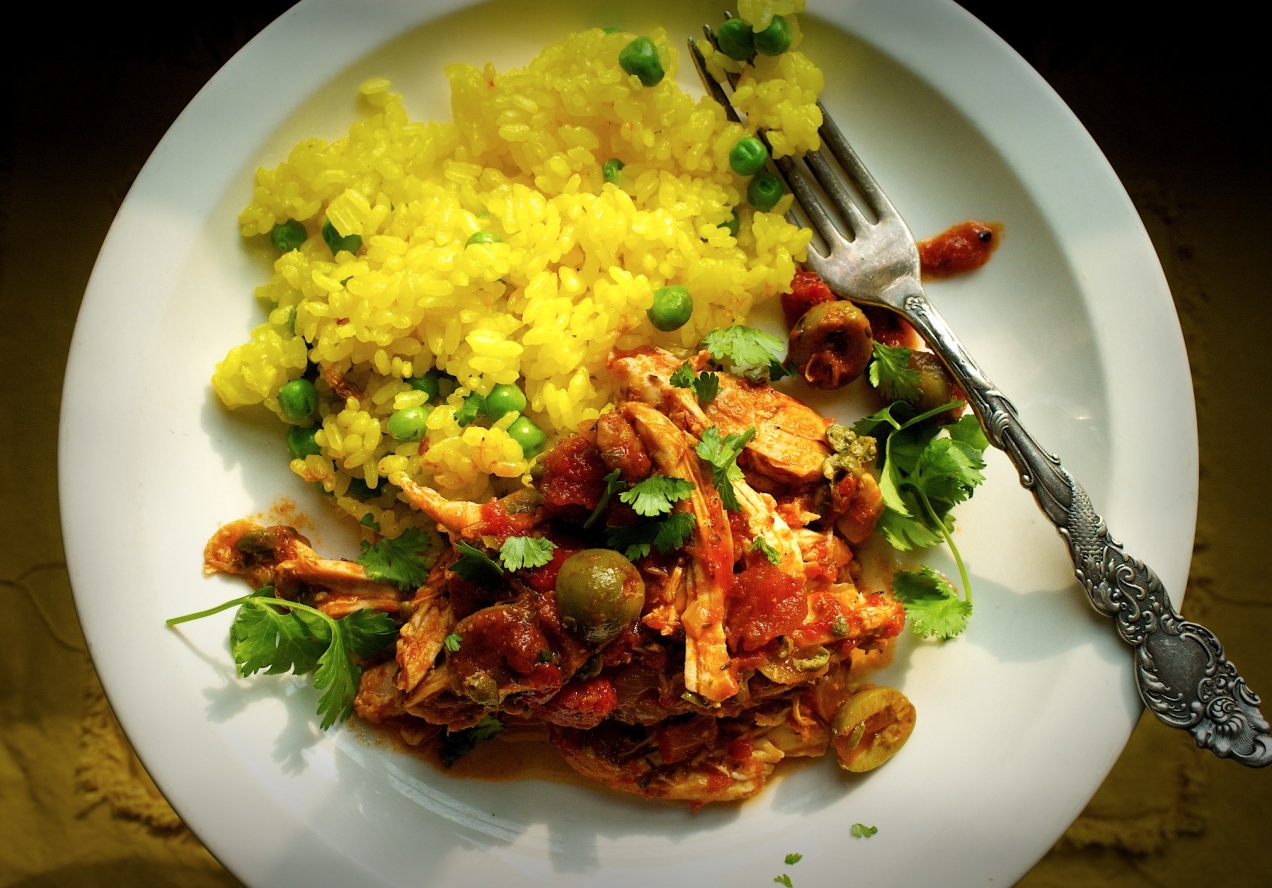
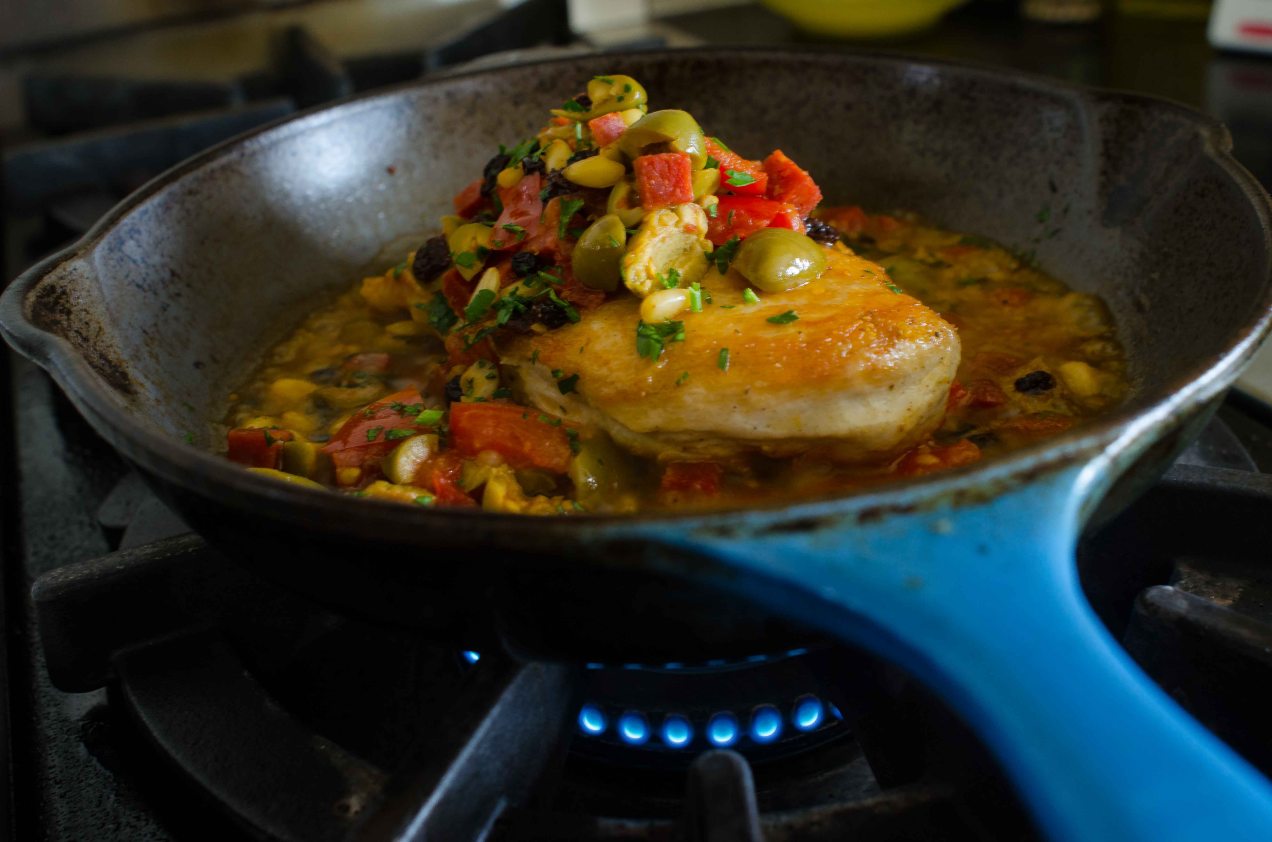
For the Coq au Vin recipe click here

Standard
Memoir

A Hint of Allspice

When I was younger, looking for a cure to the darker moods of the seasonal doldrums, I used to lie with my back on the floor, my butt up against the lounge, and my legs in an L-shape up on the cushion. Using the chair in reverse, basically, I could lay there a long time, staring into nothingness. Well not always nothing–sometimes a spider would crawl across the ceiling and capture my attention.

I didn’t think about time, either, and whether it had any worth. You waste it on stupid things like estimating how many holes are in each ceiling panel and postulating whether every individual panel has the same amount. Sure, I could have gone about it scientifically and actually taken down two panels, counted, and multiplied–but that would have taken away the reason for wasting time by staring at the ceiling.

I’m not gonna lie and pretend things are different just because I’m older, because they aren’t. Now I just find different ways to waste time. Now, I cook. I cook like a grandma with a family reunion just a few short days away.

Even if I’m cooking, I’m not just cooking. Tonight I was somewhere in the Caribbean smelling curry. Goat curry, chicken curry, fish curry–it doesn’t matter, because it’s the spices taking me away, the curry powder with the hint of allspice. Then I realize it’s really the smell of the corner bodega that fed me more nights than not when I lived in Prospect Heights in Brooklyn, off of St. Johns Place.

Suddenly I’m walking that street, stepping on crack vials that pop like popcorn under my Chuck T’s, to get to Grand Army Plaza or Flatbush Ave. or the subway station. The clothes the women wear are the color of azure oceans and golden sunsets–islands they know first-hand–not the dour black turtle necks and sullen black chinos of Manhattan, but much more beautiful and vibrant. The neighborhood might have been down but it wasn’t out. The ladies hanging out on the porch stoops and around the wrought-iron gates are laughing at stories of people and islands their kids will never really know.

Me, my hands are full with an aluminum container heavy with curry chicken, rice and peas, and fried plantains. I walk across the street taking in the jazz notes of the impromptu lives that pass in front of my eyes and into my ears. I sit down on my stoop to eat, wide eyed and smiling. I unwrap the plastic wrap to get at the roti, steamed and kept warm by the food underneath. I peel back the foil and lift the top. It is so full of food it is smashed together and flat like a cake, but the smell is the smell of my neighborhood.

I will know this neighborhood. The slap of the sapphire-blue screen door at the bodega. How the first time I order food at the back counter it is a warm ham sandwich with cheese; how over the months I’ll work my way up to a Cubano and a bag of plantain chips; and by the time I move away I’m eating goat neck curry and sucking the bones like I was raised on the stuff.

I turned down the heat on the stove to simmer. Sometimes it is about hunger and quantity, but tonight it’s about the taste, about how the vibrant spice of curry lightens my dark mood at the very moment when I want to run away and never come back.

Get your Bodega Chicken Curry Recipe here

Standard
Chicken/Poultry, Main Dishes, One-pots

Bodega Chicken Curry

I like to use a wok for these kinds of dishes. Besides everyone should own a good wok. By good I am not talking about those little non-stick thingies hanging from the wall at the five and dime. Those aren’t even big enough to make a half order of fried rice for a toddler.

What I am talking about is wandering down to your local restaurant supply store and heading for their wok section. They have blue carbon steel woks that are cheap, will last forever, are non-stick by nature and come in all sizes. I have seen one big enough that I could take a hot bath in it if I wanted but all we are looking for is a 16 to 18 inch wok. That is the measurement from one side of the rim to the other. It will seem huge but when you go to make fried rice for a family of four it all the sudden won’t seem big enough.

I use a wok for deep frying, making stews like this, fried rice and countless other dishes. It is the shape of the wok that makes it work so well.

In the end you can use a heavy bottomed pot, cast iron pot or enameled Dutch oven to make this. I just happen to like a wok.

I serve this with rice and peas and pot roasted collard greens. Roti is a must.

Serves 4

Island style curry powder:

1 tablespoon each, whole cumin, coriander, black pepper, anise seed, and brown mustard seeds

2 teaspoons whole allspice berries

1 tablespoon ground tumeric

1. Toast all the seeds and berries until fragrant in a skillet placed over medium heat. Remove them from the pan and let the spices cool.

Once cooled place everything including the turmeric into a spice grinder and grind to a fine grind.

For the curry:

peanut or canola oil

8 chicken drumsticks or thighs, skin on or off your call

2 yellow onions, about 3 1/2 cups, julienned

1 1/2 tablespoons fresh ginger, peeled and minced

1/4 cup fresh garlic, peeled, trimmed and sliced thinly

4 to 6 tablespoons curry powder

8 to 10 fingerling potatoes, peeled and chunked

6 to 8 sprigs of thyme

2 cups chicken stock

1 cup water

if you want to add heat add habanero, jalapeno or whatever diced hot pepper you want.

kosher salt and fresh ground black pepper

1. Place a wok or heavy bottomed pot over medium high heat. Add enough oil to coat the pan. Add the drumsticks or thighs and brown them on all sides. Then remove them from the pan to a plate.

2. Add the onions and more oil it needed and cook until the onions begin to soften. Add the ginger, garlic and curry powder (if you want heat add peppers now). Cook until fragrant.

3. Add the stock and water. Add the chicken back to the pot along with the potatoes and thyme. Season with salt and pepper

4. Bring the liquid to a boil and then reduce the heat to a simmer. Cover, stir now and again and simmer until tender. About 30 to 45 minutes. Taste and adjust the seasoning.

5. Serve.

Standard
Chicken/Poultry, Noodles/pasta

Chicken, Basil, and Tomato Sausage with Cavatelli

Chicken and Basil Sausage with Cavatelli

The sausages used in this dish come from the book Charcuterie by Michael Ruhlman and Brian Polcyn and is a book I highly recommend if you want to make sausage and any charcuterie in general.  Pictured at left are trays of home made ricotta cavatelli.

Serves 6

Chicken Basil and Tomato Sausage with Cavatelli

6 sausages, Italian sausages would be great too

olive oil

3 onions, peeled, halved and julienned

9 large garlic cloves, peeled and chopped, about a 1/2 cup

36 ounces strained tomatoes or sauce

1 tablespoon double concentrated tomato paste

kosher salt and fresh ground pepper

1/4 cup cream

a handful of fresh basil

1 1/2 lbs of fresh cavatelli or dried gemelli pasta

lots of grating cheese of your choice, parmesan, romano etc.

1. Place a 4 quart pot over medium high heat and add good glugs of olive oil, a little more than just coating the bottom of the pan. When it is hot add the sausage and sear it until is is deeply browned but take care not to over heat it and split the sausage casings. Remove the sausage to a platter.

2. Add the onions to the pot, season them with salt and pepper, and let them cook until they become tender then add the garlic. Cook the garlic until it becomes fragrant and then add the tomato sauce.

3. Bring the sauce to a boil and then reduce it to a simmer. You will want to stir it occasionally so it doesn’t stick to the bottom and burn. You want the sauce to reduce slowly and the sugars in the tomatoes to break out and concentrate. Season the sauce with salt and pepper and taste. Let the sauce simmer for 1 1/2 to 2 hours. What I call mato gum will form on the sides of the pan and the sauce will be thick. Add the cream to the sauce, stir and raise the heat a little to get the sauce good and hot. Be careful with the sauce though it will burn easily at this point because of the concentrated sugars. You can either add the sausage back to the sauce or you can finish cooking them in a 400 degree oven.

4. Bring a large pot of salted water to a boil and cook the pasta according to the instructions. When it is done, strain it and put it into a large bowl and toss it with the tomato sauce. Plate it, dress it with the basil, sausages, cheese and serve.

Standard
Chicken/Poultry, Soup, Stocks & Basics

Chicken and Rice Soup with Saffron

Good soup is hard to come by but it isn’t hard to make good soup.  It’s only as difficult as you want to make it.

While I know there are all kinds of prepared soups on the shelves of every supermarket I just can’t bring myself to do anything other than make it from scratch.  I beg of you to do the same.  You will be all the better for it and your health will be too.

If you are new to the kitchen it might take you a while to get the prep down.  There is cutting and chopping but as you practice and as your skill level increases your time in the kitchen drops.  Trust me.  I like to spend time in the kitchen some days but not all days.  I want to do things with my kids more than I want to make some three-day dish out of Modern Cuisine but that doesn’t mean I don’t eat flavorful good food

The one thing for which I am grateful is I worked in a from scratch restaurant where not only did you work the line but you did all of your own prep.  I became efficient because the Bob-Knight-of-Chefs boss I had demanded it.  I am eternally grateful to him for his persistence and for making me a better cook.

Makes 6 servings

For the broth:

1 yellow onion, trimmed, peeled and chopped

1 carrot, peeled and sliced

1 celery stalk, washed, trimmed and chopped

4 leg/thigh chicken quarter, skin removed

1 bay leaf

1 teaspoon whole black peppercorns

6 cups water

For the soup:

1/2 cup yellow onion, peeled, trimmed 1/4 inch dice

1 cup carrots, sliced

1/4 cup celery, 1.4 inch dice

1 cup brown basmati rice, cooked

1 tablespoon Italian or curly leaf parsley

1 heafty pinch of saffron

1. Place all the broth ingredients into a three quart heavy bottomed pot and place it over medium high heat.  Bring it to a boil and then reduce the heat to a simmer.  Simmer the broth until the chicken is very tender, the meat should have pulled away from the leg joint bone on its own.  Remove the chicken quarters to a plate and let them cool.  Once they are cool pick the meat from the bones and break it up into spoon size pieces.

2. Strain the both.  You should have anywhere from 4 to 5 cups.  If it is less add some water.

3. Discard the vegetables from the stock.  Clean the pot and pour the strained stock back into the pot.  Add the soup vegetables, saffron a heavy pinch of salt and some pepper to the pot.  Bring the soup to a boil.  Reduce the heat and cook until the vegetables are tender.

4. Once the vegetables are tender add the chicken, cooked rice and parsley.  Make sure everything is good and hot.  Serve.

Standard

The tiny bright green stars of okra and the fresh lima beans, so tender the veins show through their thin skins, are nestled into a bed of bi-color sweet corn just shaved off the cob. Together they simmer in a liquid that is mostly melted butter, seasoned quietly with salt and black pepper.

Succotash is a poor man’s dish, made popular during the Great Depression. Somehow I never feel poor when eating it — but then, I feel that way about all soul food.

While succotash is comfort food, not all comfort food is soul food. I can find comfort in foie gras, but foie gras is not soul food. Succotash is.

At the back of the stove, the chicken thighs simmer away. Their crispy brown skin breaks the bubbling surface of pan gravy made with peppers, onions, and celery. There is a reason they call this mix of vegetables the trinity. It goes beyond the Southern flavor they bring to the dish — something distinct, even ethereal.

I am feeling sad. Sylvia Woods, of Sylvia’s Soul Food fame, has passed away. Over the years, her collard greens recipe became my recipe, her Northern-style cornbread a family favorite at Thanksgiving. It was with her recipe in hand one sultry Friday afternoon some years ago that I lost my red velvet cake virginity.

I pick up the paring knife used to peel the potatoes. It is dirty with powdery white potato starch. Fishing for one of the larger chunks of potato, I stick it into the boiling water, find one, and poke it with the knife, which slips to the center of the potato like it is room temperature butter.

Carrying the potato pot to the sink, I pour it into the strainer. Hot starchy steam rushes up and around my face before disappearing upward toward the ceiling. I let the potatoes sit in the strainer to steam out excess moisture and turn to the stove to stir the succotash.

The oven timer goes off.

I grab a kitchen towel to use as a hot pad and remove the black skillet cornbread from the oven. I can smell the thin, crispy bacon fat-and-cornmeal crust that forms when the batter hits the hot skillet, hiding now under the tender yellow interior. I set the skillet on top of the stove and cover it with the dish towel.

I like this point in the meal preparation.  The point where everything is coming together and there is a final rush to get everything done at the same time so all the food comes to the table hot.

I rice the potatoes.

It isn’t a coincidence the corn, okra, and lima beans are all at their peak out in the garden today.  At least that is what I am telling myself.

I always add the butter first to the riced potatoes so the fat gets absorbed by the starch.  Then I add the heavy cream, salt and pepper.
I like that soul food is about coming together not just as a family but as a community, even more so then it is about eating.  Not that the food isn’t important– it is about the value of sharing, too — but even the food shouldn’t trump the socialization that happens around it.

I taste the potatoes.  They are just the right texture and need no further seasoning, cream or butter.  I scoop them into a serving bowl, and do the same with the succotash, and put the smothered chicken on a platter with its gravy ladled over the top.

It is always lively at our table.  This evening, it might even be more so.

For the spice mix:

2 tablespoons paprika
1 teaspoon garlic powder
1/2 teaspoon black pepper

For the chicken:
6 to 8 bone-in skin-on chicken thighs
2 cups yellow onions, julienned
3/4 cups green bell peppers, julienned
3/4 cups celery, julienned
water
kosher salt
fresh ground black pepper
1/4 cup green onions, chopped
2 1/2 tablespoons flour
vegetable oil
2 garlic cloves, peeled and minced

1.    Combine all the spice ingredients in a small bowl. Season the chicken thighs on all sides with salt and then with the spice mixture. You may or may not have extra spice depending on how heavy your hand is and whether or not you season 6 or 8 thighs.
2.    Place a heavy, large sauté pan over medium high heat. Add enough oil to the pan to easily coat the bottom completely. When it is hot add the thighs skin side down and brown them deeply. Once they are brown do the same to the other side.
3.    Remove the thighs to a plate. Add the onions, bell pepper and celery to the pan. Season them with salt and pepper. If the pan is to hot turn down the heat and cook down the vegetables until they are brown and soft. Add the flour and sauté everything for a bit longer to cook out the flour flavor.
4.    Add the garlic cloves and give the veggies a stir. Add the chicken thighs back to the pan and add enough water to cover the thighs by three quarters. The crispy tops should just be peeking out of the gravy. Add all but a tablespoon of the green onions to the sauce.
5.    When the gravy comes to a boil reduce the heat and simmer until the chicken is cooked through and tender, this should take about thirty minutes. Season the gravy, stir and taste.
6.    If the gravy is reducing to fast and getting to thick add more water and stir.

Chicken/Poultry, Main Dishes

Smothered Chicken

Image