Braised, Medium Time, Moderate, Recipes, Side Dishes, Vegetables

The Virtues of Routine and Braised Cabbage

I like repetition. It guides me from one task to another. Like how in the morning I’ll make my wife’s coffee exactly the same way and take it to her while she is getting ready for work before making my own. Then I’ll pack the kids’ school lunches, followed by preparing breakfast, and every Tuesday, I go to the grocery store immediately after the kids get on the school bus.

I follow a routine when I go to the grocery, too. The automatic doors swoosh open like the welcoming arms of an old friend as I enter, and I wonder who the first person I’ll see will be. A stranger? A familiar face? What will they look like and will they be smiling? Which fruits and vegetables are right up front this week and who made the covers of the gossip rags at the checkout line? All pressing questions, I know.

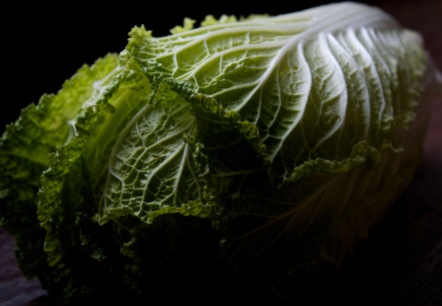
But the other day I broke routine, for an observation. As usual, the endcap to the vegetable aisle was full of cabbage — red cabbage, green cabbage, some Napa and even Savoy. What occurred to me was that this endcap is always full, always a mountain in fact, of cabbage. It wasn’t just replenished either — they don’t restock until 9:30. I am nosy too, and often leer into peoples’ carts just to see what they are eating and, I can assure you, I don’t often see cabbage tucked into carts, other than those few days cabbage gets its due during the corned beef holidays. So why is this end cap continually dedicated to an Everest of cabbage? Are cabbage eaters late night shoppers? Is it for looks much in the same way as a mannequin in a window at Saks? Who, besides me, buys cabbage?

Yes, I eat cabbage and I am proud of it. So much so that I could write a poem, Mon Petite Chou, and it would be an ode to the poorest of poor man’s food. That is what it is though isn’t it: poor man’s food? Maybe this is why it is shunned, that to buy it means you are nearly destitute, for why else would you eat it? I used to feel this way, and never really encountered cabbage other than as a creamy coleslaw side to an all-you-can-eat catfish dinner — and even then I usually stayed closer to the hush puppies and fries.

That is, until Paula Wolfert’s book The Cooking of Southwest France introduced me to the possibilities. And there are many when it comes to cabbage — braised, steamed, creamed, and stir-fried. Cabbage, now, has become a part of my routine.

Tips for Choosing, Storing, and Preparing Cabbage

Pick a hefty cabbage.
I grow a lot of cabbage and I am always amazed at how solid cabbages can be, like a bowling ball. So when I do buy them at the store I look for very solid cabbages that feel heavy.

Look for purple leaves
Typically, the grocer cuts off the outer leaves and trims the stems. As the cabbage ages, they trim them up so to keep them looking pretty. You know you have a fresh cabbage when the leafy outer purple green leaves are still there.

Keep it cool
Cabbages can last a long time in the fridge. Make sure the outside leaves are free of moisture and wrap the cabbage in plastic wrap, then store the cabbage in the crisper. I like cabbage because it stores well, so I use up all the perishable veggies early in the week saving the sturdy ones, cabbage, for the end of the week.

©Tom Hirschfeld 2016 all rights reserved

©Tom Hirschfeld 2016 all rights reserved

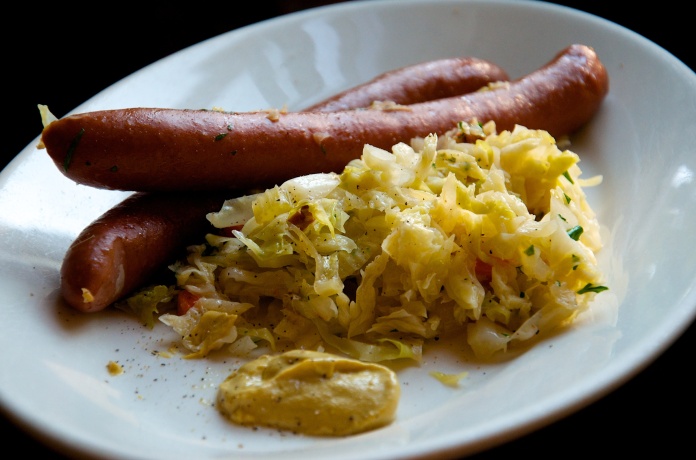
Simple Braised Cabbage

Serves 6

3 ounces pancetta, small dice
2 tablespoons unsalted butter
1 cup yellow onion, small dice
1/3 cup celery, small dice
2 teaspoons garlic, minced
1/2 cup carrots, peeled, small dice
6 to 8 cups Savoy cabbage, julienned
2 bay leaves
Scrape or two fresh nutmeg
1 tablespoon flat leaf parsley, minced
1 1/2 teaspoon fresh thyme, minced

  1. Place a 3 1/2-quart Dutch oven with a lid over medium heat. Add the pancetta and render its fat. You want a gentle render here. You aren’t trying to crisp the pancetta, just render.
  2. Add the butter and, once it has melted, add the onion, celery, garlic, and carrots. Sweat the vegetables until they are tender, don’t let them brown. Add the cabbage, bay leaves, and season with salt and pepper. Turn the cabbage to coat the leaves in the fat. Add a quarter cup of water and put the lid on the pot. Reduce the heat to low. Cook the cabbage until tender, about 25 to 30 minutes. Add a scrape or two of nutmeg, the parsley, and thyme. Stir to combine, then serve.
Standard
Side Dishes, Vegetables

Braised Red Cabbage

Braised red cabbage

This dish will not be the same without the duck fat but that does not mean it won’t be equally as good. Bacon, bacon grease and even butter would all be good choices since I know most people don’t keep duck fat around or have access to it.

If planted midsummer red cabbage will mature just about the time of the first frost. As long as it is harvested before the first hard freeze it will last in storage until about the beginning of the year. Depending of the variety and the conditions under which it is stored it might last a little longer.

Whether you grow it or buy it red cabbage is a great winter vegetable that is under utilized by the home cook. It can easily be whipped into a tasty Asian slaw, turned into a comforting bowl of borscht or a wonderful braised red cabbage. This dish is perfect with pork chops or pork roasts and is also a fine accompaniment to ham or cured and smoked pork chops. Continue reading

Standard
Dinner, Main Dishes, One-pots, Pork

Pork Pazolé

Chili is great, and a favorite, but sometimes it is nice to find an alternative. This is a nice change for sure. The sourness of the tomatillos cuts the richness of the pork while still letting the pork taste rich. The other thing about the tomatillos is the juice from them thickens the broth. The whole thing comes together easily and could even be pulled off on a weeknight by the ambitious.

Serves 4

2 tablespoons lard

2 1/2 lbs. pork shoulder, cut into 1 inch cubes

1 cup yellow onion, small dice

1 lb. tomatillos, paper skins removed

1/4 cup coarsely chopped garlic

2 teaspoons Mexican oregano

1 tablespoon dark chile powder

1 tablespoon tomato paste

one 14.5 ounce can yellow hominy

kosher salt and fresh ground pepper

1/4 cup cilantro, chopped

toppings: more cilantro, shredded cabbage, lime wedges, red onion, sour cream and cheese

1. Preheat the broiler. Place the tomatillos onto a sheet tray with sides, they will exude lots of juice, and broil them until they are charred nicely. Remove them from the oven and turn the oven off.

2. Season the pork with salt and pepper. Heat the lard over medium high heat in a 3 1/2 quart Dutch oven and add the pork. Brown it deeply on all sides taking care not to not to burn the fond forming on the bottom of the pot and reducing the heat if necessary.

3. After the pork has browned remove it from the pot to a plate. Add the onions to the pot and saute them until they start to become tender. Add the garlic, chili powder, tomatillos with all their juice, and the tomato paste. Stir to combine and let the mix become fragrant.

4. Add the pork, and accumulated juices, back to the pot and enough water to come just to the top of the pork. Let the pozole come back to a boil and then reduce the heat to a simmer.

5. Simmer until the pork is tender, about an hour, then add the hominy and the chopped cilantro and cook another 10 minutes. Ladle into bowls and serve with additional toppings and lots of home made corn tortillas.

Standard
Gluten-free, Grains/Legumes, Main Dishes, Meatless Monday, Vegetarian

Pot Roasted Collards and Purple Hull Pea Fritters with Spicy Buttermilk Gravy

Pot Roasted Collard Greens and Purple Hull Pea Fritters

The one thing that stays the same around my kitchen, has been a continuous thread,  is collard greens.

Collard recipes have been prepared in many incarnations but eventually I rendered them all down the most basic of recipes.  I like collards in every fashion imaginable,  and while I can spoon potlikker right out of the pot and onto a slab of buttered cornbread, making me perfectly happy,  I have grown to like my greens best when they are pot roasted.  I used to render bacon, butter or pancetta into the pot first, the fatty crispy strips of cured pork to be fought over at dinner.   Then there came a time when I needed to make the greens vegan. I started using peanut oil and ever since it has become a fast favorite which is strange since we are big pork eaters.

What happens to greens when they are pot roasted is the natural sugars break out and much like caramelizing onions you start to build flavors that just don’t exist when collards have been boiled.  I liken the building of flavors to a fine cigar, great coffee or a complex wine.

As the thick and leathery fall collards,  greens which have taken a frost or two, cook down a toothsome quality develops that is very satisfying to eat.  You also get these rogue bits that didn’t get as much oil as they should and they become crispy and blistered which contributes a nice contrast.  A sure sign that you have roasted your greens right is the smear of brown juice that paints the bottom of the pot when you stir.

We eat greens cooked like this as part of three dinners each week, at least,  and in general Amy and I will fight over the leftovers at breakfast time.

Seves 4

For the fritters:

16 oz. field peas, cooked, either black eyed or you favorite type I used purple hull, two 14 oz. cans, drained  works too

1 cup carrots, grated

1/4 cup rice flour, or all purpose flour

2 teaspoons shallots, minced

2 teaspoons garlic, minced

1 1/2 teaspoons dried thyme

kosher salt

fresh ground pepper

For the collards:

8 to 10 cups collards, cut into 1 inch stirps, rinsed multiple times to get rid of sand and dirt

peanut oil

kosher salt

fresh ground black pepper

For the buttermilk gravy:

1 1/2 cups live culture buttermilk

1 teaspoon creole seasoning

1/2 teaspoon dried thyme

1 1/2 teaspoon shallot, peeled and minced

1 teaspoon garlic, peeled and minced

1.Heat the oven to 325˚ F. Combine all the gravy ingredients in a small bowl and mix to combine.  Set aside to let the flavors build.

2. Place a 6 quart enameled Dutch oven with a lid over medium high heat.  Add some peanut oil to the pot being generous with the peanut oil and making sure you coat the bottom of the pan plus a touch more.  Add half the greens and season them with a two finger sprinkle of salt and a few grinds of pepper.  Turn the green giving them a hot oil bath.  You want the leaves to be coated, not greasy though.  Add the rest of the greens.  Season them with salt and pepper too.  Turn them into the first batch of greens being sure they get an oil coat as well.  Put the lid on the pot, slide it into the oven and roast the collards for 1 hour and 15 minutes making sure to stir the pot at the half way point.

3. Place the cooked peas into the bowl of a food processor.  Pulse to grind the peas.  When it becomes mealy add the rest of the fritter ingredients and pulse until smooth, moist and will hold together.  The key here is to adjust the moisture content.  If it is too wet add rice flour a tablespoon at a time letting the mix rest a bit so the flour can hydrate and thicken the fritter mix.  If it is too dry add water by the tablespoon and do the same.  My way to test patties of all types is to make a patty and then throw it against the side of the mixing bowl.  If it flattens and holds its shape I am happy.

4. Once your consistency is right make 8 equal sized patties.  Place a nonstick pan over medium heat, add oil and fry the fritters until they are brown on both sides. Remove them from the pan to a brown bag lined tray.   Drain the excess grease.  Serve while hot.

Standard