Cooking School, features, Memoir

The Music Lesson

All afternoon and from inside his parent’s house, as Bill and I sit outside in the comfort of  lawn chairs talking, trumpeters one after another run through their scales, do re mi fa sol la ti do, over and over again.  The notes drop from the open windows like fall leaves from the trees.  It could get annoying, it doesn’t, and after a bit the repetition becomes soothing. 

I reach out and flip open the lid on the large orange ice chest.  Into the ice laden water goes my hand and it quickly goes numb.  I fish out a cold beer, pass it to Bill then promptly repeat the fishing expedition for myself.  It is easy to look forward to the time Bill and I spend with each other,  we have known each other a long time, and besides at the very least it is always nothing short of unforgettable.

Like today, my friend and I often sit in lawn chairs out in the grass just a few feet from the back porch of his parents’ house.  Sunglasses shield our eyes from the bright sun until it finally tucks itself behind the steep hill that rises upward at the back of their yard.  Even then the sun won’t actually set for another hour.  So the landscape becomes a black wall of matchstick trees lit by the yellow glow of evening right up until the sky burns out and the back porch light kicks on.  Mostly, Bill and I sit and talk a lot about nothing but we do it well.  Even so we manage to garner a few epiphanies over the years, some shared, some not, this one wasn’t.

As a high schooler I hated running scales while practicing the trumpet.  I thought they were pointless, boring, and stupid.  I should be practicing the music, memorizing it note for note, if I want to play it well.   But sitting here, two or three beers into my thoughts, remembering what an awful trumpet player I really was, all of the sudden, all these years later,  I understood, I got it.

Bill’s dad was a world class trumpet teacher at the university.  He is retired but he still gives lessons to advanced students.  His biggest lesson, the one he repeats over and over again, the one I heard him tell his last student for today,  “if your mind leaves the sound of the horn, obstacles will appear.”

I have heard Bill Sr. say it so many times before but today it hit me differently, it’s exactly what we don’t do when we teach people how to cook.  We give people a recipe, much like a piece of sheet music, and expect the cook to be able to play.  While we know there are those that have the skill set there are many, many more who don’t.  We try to pretend it doesn’t matter, it’s just a recipe after all but it does because the cook never builds the skill set to play at a level satisfactory to their own liking.  Hence obstacles appear which prevent real enjoyment.   I’ll wager it happens in cooking all the time.

And in this is where the conundrum lies.

I count myself lucky in that I honed my kitchens skills for years in a commercial environment.  I can never fully express how much the experience has added to the happiness I feel when I am in the kitchen.   Simple things like cutting onions for onion soup might take me minutes while others are in tears for hours, or maybe because I sautéed boneless skinless chicken breast by the thousands I know when they are just the right color of brown and that anymore coloring will make them chewy and dry and how with the push of my fingertip I can tell when they are no longer pink in the middle but still juicy and edible without fear of food born illness.

I don’t think of anything I do as special but I know sometimes friends look on with amazement and wonder while I look back at them through my own naivety as if everyone knows how to do these things.

So the question for me becomes how do I translate my joy to others, how do I create a  desire in others to build the skill set needed so they can create the kind of food they like to eat, create it with efficient, quality results and excitement.

It is frustrating for me in moments such as this, not because it makes me mad but rather because I love being in the kitchen and  I want people to share in this same joy while being in theirs.

When I started cooking I copied, to the T, recipes of every famous chef and cookbook author whose food I liked.  I cooked from cookbooks day-in and day-out.  Even when I am cooking full time at a restaurant when I come home I turn around and cook at every opportunity.   At first it is hard to build the confidence to cook even with step by step directions at my side but as I progress my fear of cooking without any guidance diminishes.  I am convinced my abilities improve because I learn solid cooking technique until I know how to sauté, braise, roast, grill, and poach.  My knife skills improve and I work on plating.  I want nothing more than to learn to cook.

My style at first is a conglomeration of  all those I mimic until one day my style of cooking just “is”.  It is easy for people to tell whose food they are eating and before long I find myself edging up to the stove and cooking from experience.  I don’t even remember the day it happened because it just did.  

I wasn’t born a chef.  I started out life as a photojournalist and I never thought I would be anything but but when I decide I want to learn to cook I dive in head first, I expect to come out with a filthy apron, I am passionate about it, and I know I won’t stop until I am good at it.


Advertisement
Standard
Beef, Beef/Veal, Dinner, Fancy, Holiday, Medium Time, Moderate

Mustard Crusted Beef Tenderloin with Sauce Robert

Brown the tenderloin first for added flavor before crusting and baking in the oven.

Brown the tenderloin first for added flavor before crusting and baking in the oven.

Through most of the month of December, I spend a lot of my time preparing recipes that taste great but don’t absorb a lot of my time. It’s the holidays after all, and not only do I want to enjoy them but I have other things to do: trim the tree, make cookies, go to the neighbors’ caroling party where they serve the punch that requires a second cup of coffee and a little extra recovery time the next morning. Continue reading

Standard
Beef, Beef/Veal, Dinner, dog-eared, Easy, Gluten-free, Main Dishes, Recipes, Stocks & Basics, Uncategorized

While it might not be haute cuisine, chopped meat is surely economical, flavorful, and versatile. From meatballs to croquettes to tacos, it can do it all and can do it with ease. It is an uncomplicated ingredient, often interchangeable, and more often than not is a beacon signaling out comfort food to anyone within range.

Take for example chopped steak: it is nothing new. Salisbury steak for instance has been around since 1897. Named after a doctor, Dr. Salisbury, who created it. Salisbury was also a believer in a low-carb diet, fancy that. Continue reading

Recipe Reclamation: Bringing Back Chopped Steak

Aside

tuna and spinach parmentier

It is not generally in my nature to go out of my way to make a shepherd’s pie from scratch. Instead of cooking all the individual components — breaking them down only to put them back together — it always seems like a job best done by leftovers. I don’t mean to pick on shepherd’s pie alone — this goes for most meat and potato casseroles. And while not meat and potatoes, it reminds me of the time I looked at a recipe for turkey tetrazzini and the first step in the instructions was: Roast a turkey. Continue reading

Dinner, dog-eared, Gluten-free, Medium Time, Moderate, Pork

Pork Confit Parmentier (or “Sorta” Shepard’s Pie)

Image
Chicken and Poultry, Chicken/Poultry, Gluten-free, Grill, Grilling, Main Dishes, Medium Time, Moderate

5 Tips for Better Grilled Chicken Breasts

Grilling boneless skinless chicken breast presents a set of problems. I’m a firm believer that leaving the skin on and the bones in your chicken goes a long way to alleviating tough, dried out breast. But it’s an unpopular decision, because of the convenience and the ease with which we can gobble up the boneless skinless kind.

There are ways, however, to defend yourself against dry chicken.

Bigger is not better when it comes to grilling a chicken breast.
They don’t grow them like they used to. Today’s standard meat bird is a hybrid designed to grow big breasts and nice thighs.

The birds of yesteryear, however, were all about the thighs, and the breast was almost non-existent. These days it’s not unusual to find a double lobe breast that weighs in around two pounds — or bigger. Chicken breast can be the size of a turkey breast if you want it to be.

But you can get chicken breasts in any size you want. Restaurants, for example, will often serve two 4- to 6-ounce breasts as a single serving because seeing two on the plate makes you feel as if you’ve gotten your money’s worth. Your butcher should be able to order these small breasts for you. I prefer a single 6-ounce breast per person because it seems like an appropriate portion size — especially if, like me, you like to serve lots of side dishes.

Shape matters as much as the temperature of the grill.
A chicken breast tapers at each end, more so at the tail end than the neck end, which means the tips are either cooked perfectly while the middle is rare to raw, or the tips are burnt to a crisp and the middle is perfectly cooked. It is a lose-lose scenario.

I always buy the breast still connected in double lobes.
It assures pairs of evenly sized paillards, but I always cut them before pounding them out. It is important to note that sometimes in the middle of a double lobe is a piece of cartilage that needs to be removed. Cut along each side of the center line of fat to get it out.

Choose your instruments of destruction.
I have four pictured in the photo below; any will work fine. I prefer the flat side of a meat cleaver because it’s heavy and gets the job done. If you use a mallet, you will have to start in the middle and work your way to the edges in order to end up with an evenly pounded chicken breast. The pan is a last resort, but it is by no means a slacker.

For sanitation and clean-up purposes I like to use multi-layers of plastic wrap. I place a breast to one side then fold the wrap over the top before I get out my daily aggression.

Keep it hot, but not too hot.
I like the grate to be hot but to use coals that are on their way down from their highest heat. You want grill marks that caramelize without blackening. Chicken flesh becomes stringy and chewy if it is left to dry out on the grill, so use your common sense: preheat your oven if you think you might want to finish cooking the chicken at a low temperature.


This slideshow requires JavaScript.

(recipe adapted from the Fog City Diner)

Serves 4

The Adobo Marinade:
  • 3ancho chiles
  • 3guajillo chiles
  • 1/2cup reserved soaking water
  • Juice of one lime
  • Juice of one orange
  • 1/4cup red wine vinegar
  • 1/4cup olive oil
  • 3garlic cloves, minced
  • 1tablespoon oregano
  • 2teaspoons thyme
  • 2teaspoons cumin seed, ground
  • Kosher salt and freshly ground pepper
To finish the dish:

  • 4single lobe chicken breasts
  • 1red onion, thinly sliced
  • 1lime
  • Sour cream
  • Cilantro
  1. Cut the tops off the dried peppers and shake out the seeds into the trash can. Place the peppers into a bowl and cover them with hot water. Let them soak for two hours, making sure they stay submerged. Remove the peppers from the water and place them into the bowl of a food processor. Add a 1/2 cup of the soaking liquid to the bowl. Process until you have a pepper paste. Pass the paste through a strainer set over a bowl. You are removing the skins and seeds. Don’t skip this step or you will be severely disappointed.
  2. Combine 3 tablespoons of the paste with the remaining marinade ingredients and mix to combine. Season it with a healthy pinch of salt and a grind or two of pepper.
  3. The marinade can easily be made a day or two in advance and stored in a jar in the fridge. The leftover pepper paste is great for enchiladas, black bean soup or chili. Store the paste in a jar in the the fridge. It holds for a long time.
  4. Pound out the chicken breasts so they are of an even thickness, then place the chicken into a casserole. Use half the marinade and coat the pieces of chicken. Let them marinate for two hours. Be sure to flip them after an hour.
  5. While the chicken marinates, make the lime pickled onions by tossing the red onion rings with the lime juice. Let them sit for at least 20 minutes.
  6. Remove the chicken from the marinade. Place the marinade into a small sauce pan and heat it over low heat. Heat the marinade to a brisk simmer.
  7. Fire up the grill to medium-high heat. Grill the chicken breast. Cook them till done. Serve on rice, spoon the hot marinade over the chicken, top with sour cream, then pickled onions, and garnish with cilantro.
Standard
Condiments, Grill, Grilling, Meatless Monday, Salad, Vegetables, Vegetarian

Everything but the Hamburger, Special Sauce Included

DSCF0022

Sadly, as I sit at the bus stop watching my daughters play, I have to tell myself: summer is so last season.

All summer I have been grilling vegetables for salads. Mostly zucchini and summer squash; I char it deeply and then chop it and toss it with basil, lemon juice, and olive oil, in sort of a grilled chopped salad. It captures all the flavors of early summer one could want. But at some point, either the zucchini or I tire and the dish no longer appears on the table. At least not until next summer, when the annual craving for these flavors peaks again. Continue reading

Standard
Appetizers/Starters, dog-eared, Easy, Gluten-free, Grill, Grilling, Meatless Monday, Snacks/Appetizers, Vegetables

Taco Night on the Grill


I can’t get enough of taco night. Neither can my wife Amy or my daughters. We love it, and especially me, because I can do everything — with the exception of chopping with a knife or the food processor — on the grill. It makes for easy clean-up, and who isn’t for easy clean-up?

I cut my teeth on Tex-Mex in Austin, Texas circa 1984 (does Instagram have a filter for that?). At this point in my life I hadn’t eaten that much Mexican food. For the most part it didn’t exist in Indiana outside of Chi Chi’s and my inner punk rocker wouldn’t allow me to set foot inside any place that colorful or where the waitstaff could happily sing Happy Birthday table side.

Nevertheless, when I would slide into a booth at one of the many hole-in-the-wall eateries (many of them were Spanish-speaking only), I would order as many kinds of salsa as I could point to on the menu. I didn’t know this many kinds of salsa existed, or for that matter soft shell tacos, or the food love of my life, tamales.

As I ate my way around both sides of Highway 35, little did I realize I was becoming an addict, to Texas country music, chili, and to Austin itself. It was hard to come home, and once I was back in Indiana it didn’t take long before I began jonesing for Texas Hill Country, salsa included.

All About Grilled Salsa

The grill is a great way to make an old salsa recipe feel new.
I couldn’t even guess how many varieties of salsa there are in the world, but I do know I haven’t found one yet that can’t be made on the grill. I like a fresh raw salsa as much as the next person, but sometimes I like to shift the flavor and it is an easy thing to do on the grill.

Chile oils on your hands are not your friend.
Be careful with hot chile peppers. I used to go at them in the manly man way and just tough it out, but the night I rubbed my eyes after working with Thai birds I thought a different approach might be appropriate. If you choose to go with bare naked hands in handling them, just realize you will quickly find out just how many places on your body you actually touch and how many places are very sensitive to capsaicin oils.

Get in touch with your inner caveman or woman.
I used to put my peppers and tomatoes on the grill grate and then one day I just decided to plop them right on the coals. It sears them very quickly while leaving the interior raw — the best of both worlds. You can roast whole heads of garlic too, but they need to be left to the side of the coals so they cook and soften slowly or you will burn the cloves which makes them bitter.

Liquidy or dry, it all depends on your tomato variety.
A lot of fresh tomatoes have a high liquid content. If you use too many tomatoes, your salsa will be watery, which isn’t always a bad thing. If you want a thicker salsa, it is a good idea to use plum or San Marzano tomatoes.

The finishing touches matter.
To the finished salsa I always like to add a drizzle of olive oil for mouthfeel and a splash of acid, be it lime, red wine vinegar, or whatever. Make sure you season your salsa with salt and black pepper.

Corn tortillas or flour both can be warmed on the grill, and should be.
I prefer corn tortillas over flour and my preference for cooking corn tortillas is right on the grill. They puff up and blacken in spots and become yummo-licous. Just make sure after searing them to wrap them in foil so they stay soft and don’t dry out.

Choose your toppings accordingly.
Almost every person I have ever met who hails from Central America prefers green cabbage, sliced razor thin, to lettuce for their tacos. It gets even better when you dress the cabbage with a touch of red wine vinegar and olive oil. You probably won’t find a lot of sour cream or cheese on the table either. I tend to go for authentic Mexican but I like Tex-Mex too. If you want to go for healthy, grill up a bunch of vegetables to use for toppings and forgo the dairy altogether.

Grilled Salsa

Makes 1 to 1 1/2 cups

Depending on the kind and size of tomatoes you use, this salsa can be liquidy or firm. You will have to judge. Roma tomatoes have little liquid and work well for a chunkier salsa.

  • 1small head of garlic
  • 3 or 4roma tomatoes
  • 1 or 2heirloom variety tomatoes (Box Car Willies or Wisconsin 55 are good)
  • 1poblano pepper or 3 jalapeños or your choice
  • 3 to 4half-inch-thick slices of red onion, left intact
  • Kosher salt and freshly ground pepper
  • Handful of cilantro
  • Splash of red wine vinegar
  • Drizzle of olive oil
  1. Fire up your charcoal grill. Let the coals get blazing hot.
  2. Wash the vegetables.
  3. Place the garlic off to the side of the coals where it will brown the paper skins but not burn the cloves. The garlic will take the longest to cook of everything. Let it get good and brown on all sides.
  4. Now place the tomatoes and peppers right on the coals. Let them blister and blacken. Remove them to a tray. Let the juices collect in the tray.
  5. Place the grill grate on the grill and grill the onions until they are caramelized and soft.
  6. If you plan to grill more stuff, like a nice skirt steak, you will probably need to add a few more coals to the fire. You be the judge.
  7. Peel the pepper, being carful not to spill or lose any pepper juices. I remove the seeds and, obviously, the stems. Put peeled peppers, tomatoes, onion, and peeled roasted garlic cloves into the bowl of a food processor. Add the tomato and pepper juices that collected in the bottom of the tray.
  8. Add a two-finger pinch of salt, some pepper, half the cilantro, the red wine vinegar, and olive oil. Pulse the processor until the salsa reaches your desired consistency. I like this particular salsa smoother than most but still chunky. Taste the salsa and adjust the seasoning as necessary.
  9. Pour into a serving bowl, garnish with cilantro, and serve
Standard
Beef, Gluten-free, Grill, Grilling, Kitchen Tips, Recipes

Grilling: Tips, Skirt Steak and more…

Skirt Steak with Greek Salsa

I use a pair of kitchen tongs and quickly flip a steak, pull back to let my hand cool for a split second before diving in again behind the safety of the tongs to flip another. The hair on my forearm recoils from the heat. Even with a long pair of kitchen tongs I can’t bear the sting of the glowing coals like I used too.

I have lost my commercial kitchen hands. The hands that could take the heat without flinching, the same hands that could grab thermonuclear plates, or could move steaks around on a grill without ever noticing the heat. The heat abused hands that were once this line cooks badge of honor.

The wind shifts, a wisp of white smoke blows back. My eyes catch a little before I can turn and shut them. The smoke underneath my eyelids stings and my eyes begin to water. Continue reading

Standard
Chicken/Poultry, Grilling, Main Dishes, Moderate

Kebabs Come of Age

Burmese-style wings with Shallot, Lime and Cilantro Salsa

Inside the house a Frank Sinatra record blares loudly from the phonograph, a big stereophonic console meant to look like a fancy sideboard. The family room windows of the atomic ranch-style house are open wide. The music makes its way through the open windows to the patio, soft enough to be background music for the adults socializing on the small concrete patio.

There are tall, slender glass pitchers of Tom Collins set on a picnic table bar next to a faux gold ice bucket, highball glasses, and an assortment of potluck appetizers. The parents sip cocktails and have lively chats. Their laughter can be heard four houses down at the babysitter’s, where all the children are being housed for the evening. Tiki torches release black citronella smoke meant to keep mosquitoes at bay, and in the belly of the kettle-shaped grill the coals glow the color of the suburban sunset. Continue reading

Standard
Dinner, Fat Friday, Fish, Gluten-free, Main Dishes, Seafood

Pan Fried Trout with Prosciutto, Crispy Sage and Pine Nuts

There is something special about trout that goes beyond just eating. They are one of only fish that have a whole culture built around them. They are a freshwater game fish, they are skittish and will jump at their own shadow. They only thrive in cold water and need lots of oxygen provided by a stiff current. When they feed they feed only on what is abundant at the moment. Wild trout make for difficult prey.

In the high altitude lakes of the Grand Tetons you are likely to catch cutthroats the size of your hand while watching the sunrise in, hands down, one of the most beautiful places in the world. When you get back to camp you cook them up for breakfast with pancakes and eggs.

On the other hand you might spend the afternoon in the Catskills on the banks of the Beaverkill reading Hemingway or Fitzgerald. Legendary fisherman like Lee Wulff and Lefty Kreh coming to mind as you are thinking about the evening fish and having high hopes for a Green Drake hatch. You might even doze off for an hour.

Then just as the evening hours begin you pull on your waders and out into the rushing stream you go. It doesn’t seem like hard work from the shore but standing in rushing water up to your midsection takes effort. You wrestle the current to get to the spot you want. You look down at the water to see if there are any bugs floating by that might give you an indication of what the fish are eating tonight. You light a cigar and smile.

You see the transparent wings of a pale evening dun float by. You reach into your fly box and pull out a number 20. The fly you saw go by didn’t seem any bigger. You tie the fly to the tippet. You drop the fly into the water and strip out some line.

You draw back the rod in a gentle sweep and the fly draws past your ear and then you rocket it forward aiming upstream of an eddie that lies just behind a big rock. You watch as the fly floats downstream, you gather excess line, and as it passes the eddie you hope you hear and see a strike as a rainbow trout breaks the surface grabbing your fly. If you had a good night and matched the hatch you will be in camp cooking up a couple of nice rainbows for supper but only after a nice Scotch.

Serves 2

2 trout, boneless 12 to 16 oz.

4 pieces prosciutto, thinly sliced

a handful of sage leaves

1/4 cup grape seed oil

1 tablespoon of butter

1/4 cup pine nuts

kosher salt and fresh ground white pepper

cornmeal for dredging

1. Season the inside of the trout with salt and pepper. Carefully lay out two pieces of prosciutto letting the long side overlap by 1/4 inch. Lay a trout across the short sides of the prosciutto and wrap it in the prosciutto.

2. Heat a 14 inch skillet over medium high heat. Dredge the trout in cornmeal and shake off any excess. Add the oil to the pan. Sprinkle in the half of the sage leaves and let them deep fry. when they have crisped remove them from the pan.

3. Gently lay the trout into the pan, reduce the heat to medium and cook until the pancetta is crisp and caramelized, about 5 minutes. Gently turn the fish cooking the other side. It will take about ten minutes total for the fish to cook through so be patient and adjust the heat as necessary.

4. When the fish are done remove them to their plates. Drain the oil and put the pan back on the heat. Add the butter, the pine nuts and the remaining sage leaves. When the nuts have toasted spoon some of the pine nut sage butter over the top of the fish. Serve

Standard
Chicken/Poultry, Dinner, Gluten-free, Grains/Legumes, Main Dishes, One-pots

Chicken, Sausage and Red Pepper Paella

chicken sausauge and rd pepper paella_1
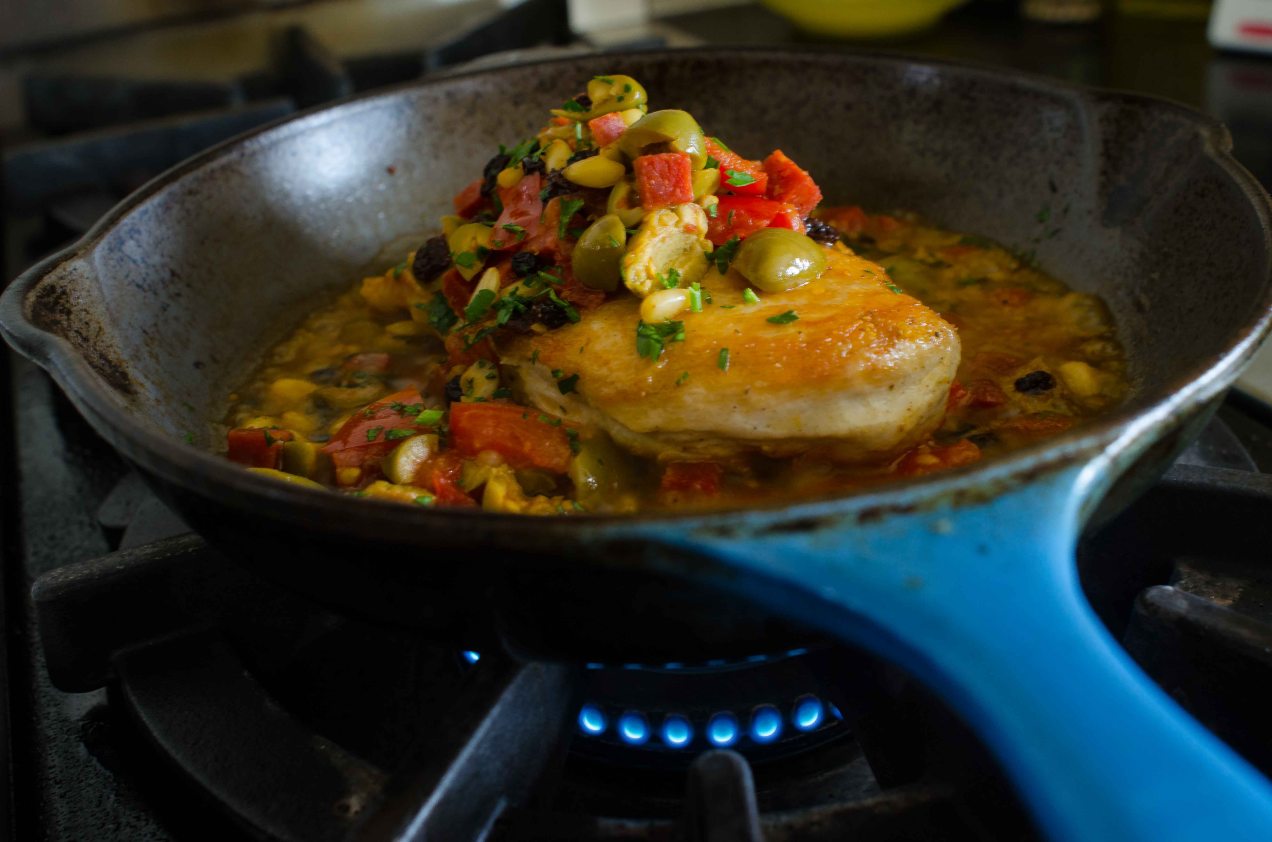
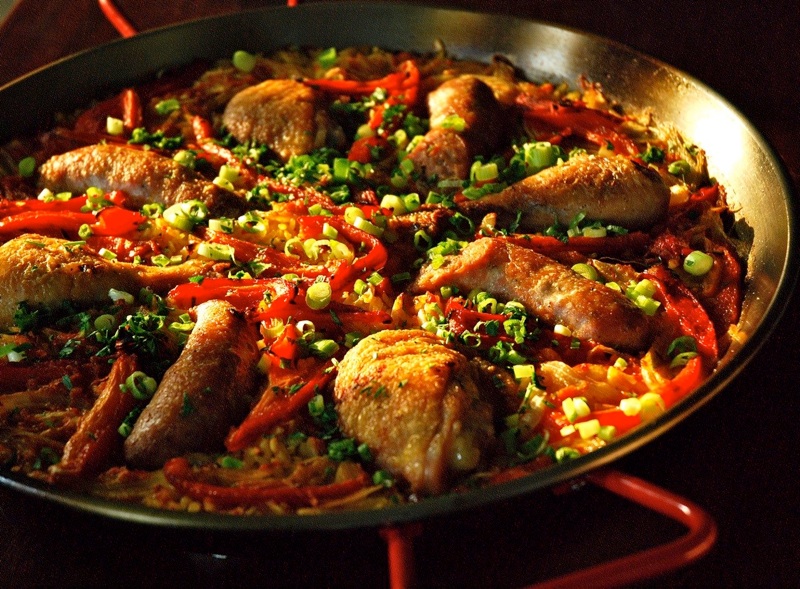
Paella to me is the ultimate one pot meal. It also is the time of year where I am not ready for a stew but want something more substantial than the usual summer fare. Paella is a great answer. Although paella is considered Spanish I think this one is more Mediterranean. I use Italian sausages but fresh chorizo would be good, the important part is that the sausage isn’t dry cured or it would just be drier in this case. I also use arborio rice, but you could use the Spanish version of this as well.

SERVES 4-6

2 bell peppers

1/4 cup extra virgin olive oil

2 chicken legs, seasoned with salt and pepper

2 Italian sausages

2 chicken thighs, seasoned with salt and pepper

1 onion, julienned

1 fennel bulb, tops trimmed, core removed and sliced very thinly

1/4 cup garlic, peeled and thinly sliced

2 bay leaves

3 1/2 cups warm water

pinch of saffron, crumbled

3 Roma tomatoes, cut in half from top to bottom, and grated, large whole of a box grater, leaving the skin behind

1/4 cup dry white wine

2 cups arborio rice

1 1/2 teaspoon aleppo pepper

1 tablespoon flat leaf parsley, minced

2 tablespoons green onions, sliced into thin rings

kosher salt and fresh ground pepper

  1. Sometime during the day or when ever you have time, turn a gas burner to high. If you don’t have a gas burner turn your oven to broil and place a rack at the highest level you can. Char the peppers, top, bottom and all on sides. The idea is to char or blacken the skin without cooking the pepper through.
  2. Place the peppers into a container with a lid. Set aside for at least 20 minutes. Crumble the saffron into the warm water.
  3. If you roasted them properly the skins will easily peel right off with out running them under water.
  4. Peel, seed and core the peppers and then julienne them into thick strips.
  5. Preheat the oven to 400 degrees. Place a 16 inch paella pan or a 14 inch saute pan over medium high heat. Add the olive oil and once it is hot add the chicken, skin side down, and then the sausages. Brown them thoroughly and then remove them to a plate. You do not want them to cook all the way through. They will finish cooking in the oven so you just want to brown them.
  6. Turn the heat to medium and add the onion and fennel. Season them with healthy pinch of salt and pepper. Cook until they start to soften. Add the garlic, aleppo pepper and bay leaves, once fragrant add the white wine and grated tomatoes and cook for a minute or two letting the alcohol burn off. Add the saffron water and rice. Season again with a healthy pinch salt and pepper. Gently shake the pan to level out the rice. Place the chicken into the pan and arrange the red peppers around the chicken.
  7. Bring to a boil, place the pan into the oven and set the timer for 15 minutes. Cut the sausages in half. Once the timer goes off add the sausages and place the pan back into the oven. Set the timer for 10 minutes.
  8. Once the timer goes off remove the pan from the oven and place a clean towel over the top. Let the dish rest for five minutes, remove the towel and garnish with parsley and green onions, then serve.
Standard
Side Dishes, Vegetables

Braised Red Cabbage

Braised red cabbage

This dish will not be the same without the duck fat but that does not mean it won’t be equally as good. Bacon, bacon grease and even butter would all be good choices since I know most people don’t keep duck fat around or have access to it.

If planted midsummer red cabbage will mature just about the time of the first frost. As long as it is harvested before the first hard freeze it will last in storage until about the beginning of the year. Depending of the variety and the conditions under which it is stored it might last a little longer.

Whether you grow it or buy it red cabbage is a great winter vegetable that is under utilized by the home cook. It can easily be whipped into a tasty Asian slaw, turned into a comforting bowl of borscht or a wonderful braised red cabbage. This dish is perfect with pork chops or pork roasts and is also a fine accompaniment to ham or cured and smoked pork chops. Continue reading

Standard
Dinner, Main Dishes, One-pots, Pork

Pork Pazolé

Chili is great, and a favorite, but sometimes it is nice to find an alternative. This is a nice change for sure. The sourness of the tomatillos cuts the richness of the pork while still letting the pork taste rich. The other thing about the tomatillos is the juice from them thickens the broth. The whole thing comes together easily and could even be pulled off on a weeknight by the ambitious.

Serves 4

2 tablespoons lard

2 1/2 lbs. pork shoulder, cut into 1 inch cubes

1 cup yellow onion, small dice

1 lb. tomatillos, paper skins removed

1/4 cup coarsely chopped garlic

2 teaspoons Mexican oregano

1 tablespoon dark chile powder

1 tablespoon tomato paste

one 14.5 ounce can yellow hominy

kosher salt and fresh ground pepper

1/4 cup cilantro, chopped

toppings: more cilantro, shredded cabbage, lime wedges, red onion, sour cream and cheese

1. Preheat the broiler. Place the tomatillos onto a sheet tray with sides, they will exude lots of juice, and broil them until they are charred nicely. Remove them from the oven and turn the oven off.

2. Season the pork with salt and pepper. Heat the lard over medium high heat in a 3 1/2 quart Dutch oven and add the pork. Brown it deeply on all sides taking care not to not to burn the fond forming on the bottom of the pot and reducing the heat if necessary.

3. After the pork has browned remove it from the pot to a plate. Add the onions to the pot and saute them until they start to become tender. Add the garlic, chili powder, tomatillos with all their juice, and the tomato paste. Stir to combine and let the mix become fragrant.

4. Add the pork, and accumulated juices, back to the pot and enough water to come just to the top of the pork. Let the pozole come back to a boil and then reduce the heat to a simmer.

5. Simmer until the pork is tender, about an hour, then add the hominy and the chopped cilantro and cook another 10 minutes. Ladle into bowls and serve with additional toppings and lots of home made corn tortillas.

Standard
Grains/Legumes, Main Dishes, Noodles/pasta, Seafood

Tuna with White Beans and Spaghetti

White beans and tuna have always been combined in salads and pasta and have long been purveyor’s of pantry dinners in Italy. I have taken up the habit of pantry pasta myself and while I don’t keep many canned goods I do keep tomato sauce, tuna in olive oil, dried beans and pasta on hand.

The cheese rind is imperative here. It is to the broth what bones are to stock. Besides you know it makes you mad to have to pay for this usually unusable part. So here is your opportunity. I Always try to have at least one cheese rind on hand and just store it in the fridge amongst the other cheeses.

This is not a skillet pasta but a long simmering sauce because it takes some time to build the flavors in the beans. As with all beans everyone has their own method to their bean madness. I have tried many and the one I use yields a tender beans with tooth. That is not to say it is crunchy or undercooked but what it means is it holds its shape while being tenders. I want to know I am eating a bean when I bite into one.

I also don’t make home made pasta for this dish because this is one time were store bought spaghetti noodles are the right choice.

I served this with a green side vegetable and after the pasta served a salad, as the Italians would.

Serves 6 to 8

2 heads of garlic, the top 1/4 inch of which has been sliced off

1/2 pound white beans

4 whole cloves of garlic, peeled and trimmed

10 sun dried tomatoes (dried, not in olive oil)

water

1/2 cup yellow onion, small dice

1/4 cup carrot, small dice

1/4 cup celery, small dice

1 1/2 teaspoons fennel seed, ground

1/4 to 1/2 teaspoon red pepper flakes

2 bay leaves

1/2 cup strained tomatoes or tomato sauce

1 each 2 x 2 inch parmesan cheese rind

olive oil

kosher salt and fresh ground pepper

1/3 cup bread crumbs, toasted in olive oil then seasoned with salt and pepper then mixed

with 1 tablespoon of minced parsley

12 oz. tuna in olive oil

1 pound spaghetti, cooked according to the instructions on the box

  1. Preheat the oven to 300˚F. Place the heads of garlic in a small ovenproof dish and drizzle each with olive oil then season them with salt and pepper.
  2. Cover the dish with foil and bake the garlic for 1 hour. At the end of the hour make sure they have taken on alight tobacco color and are tender. Cook them another 15 minutes if you need to. Once they are done remove them from the oven and set them aside.
  3. Place the beans, garlic cloves and the sun dried tomatoes into a sauce pan and cover by at least 2 inches of water. Place the pan over high heat and bring it to a boil and let it boil for 2 minutes. Cover and remove the pan from the heat and let it sit covered for two hours or longer.
  4. At the end of two hours drain the beans. Rinse out the pot. Remove the sun dried tomatoes and chop them. Place the pot over medium heat and add a good 2 tablespoons of olive oil. When it is hot add the onion, carrots and celery and let them saute until they begin to become tender. Add the fennel, bay leaves and red pepper and saute until fragrant. Add the beans, sun dried tomatoes and garlic back into the pot. Cover the beans with water by 1 inch. Add the tomato sauce and cheese rind.
  5. Bring the pot to a boil then reduce the heat so the liquid is at a lazy bubble. Season them with pepper. Stir occasionally to keep anything from sticking to the bottom of the pot.
  6. Near the end of the cooking season the beans with salt to taste and take the roasted garlic and squeeze out the garlic paste then add the paste to the beans. Stir it all in and taste. Adjust the seasoning.
  7. When the beans are tender cook the pasta. Once the pasta is done drain it and immediately toss the pasta with some of the oil from the tuna. Toss the beans and pasta together.
  8. Put the pasta into a serving bowl, top with tuna crumbles and then the bread crumbs. Serve immediately.
Standard
Grains/Legumes, Side Dishes, Vegetarian

Farro and Roasted Garlic Pilaf

Farro and Roasted Garlic PilafThe term farro can be very confusing. If you look it up you will see no one really wants to pin the tail on the donkey, and as such, all the authors of the articles seem to want to avoid naming a specific grain as farro.

People really want spelt to be farro but I can say spelt is not farro. Spelt is much larger and has a sweeter flavor to me. What I have found is farro can come in different sizes, roasted, and for lack of a better term, par cooked or pearled which means it cooks quicker.

In this recipe I use piccolo farro from Anson Mills. It is easy to cook, is extremely delicious and quite honestly I have become enamored with it as well. I think I can say with all clarity it should be spelled Pharroh because it is the food of gods. It feels nourishing to eat and is such a refreshing change, or I should say replacement, from rice or potatoes.

I always cook extra and use the grain, plain, when baking bread and I plan to save the cooking water next time and use it as well.

Serves 4 to 6

1 cup farro piccola

2 heads of garlic

1 stick unsalted butter

1 tablespoon marjoram

kosher salt

fresh ground pepper

1. Preheat the oven to 325˚F. Slice the heads of garlic across the top at a point where you will remove enough to expose as many cloves as possible but not so much that you loose a lot of the head. Usually I slice off about the top third of the head. Place the heads in a small ovenproof gratin or some other dish. Smear the heads with 1/2 teaspoon of butter and then salt and pepper them. Cover tightly with foil and bake the garlic for one hour. At the end of the hour remove the foil and bake another fifteen minutes to brown up the cloves.

2. Using a strainer rinse the farro under cold water. Place the farro into a 3 quart heavy bottomed sauce pan with a lid. Cover the farro with cold water to cover by two to three inches and add a two finger pinch of salt.

3. Place the pan over high heat and bring it to a boil. Turn off the heat and cover the pan. Let the farro sit in the pan for an hour to two or until the grains have popped.

4. Use a large strainer or colander and drain the farro.

5. Wipe out the pan and put the pan back on the stove over medium low heat. Add the remaining stick of butter. Let it melt gently and then add the drained cooked farro, marjoram and squeeze the roasted garlic into the pot. Stir in the creamy soft garlic smearing it into the farro. Season the pilaf with salt and pepper to taste.

6. Once it is hot, bowl it up, and serve.

Standard
Grains/Legumes, Side Dishes, Vegetarian

Wild Rice and Barley Pilaf

Wild Rice and Barley PilafThis is so good for you you won’t even know it taste really delicious. Seriously good eats and a great side dish for roast birds of any kind and I’ll even throw salmon onto that list.

Yes, I know it uses two sauce pans but, please, neither grain leaves behind a sticky mess. You could almost just wipe the pan with a towel after emptying it of the grains. Don’t get any ideas I said almost.

Makes 6 to 8 servings

3/4 cup wild rice

3/4 cup pearl barley

1/2 cup yellow onion, small dice

1/4 cup flat leaf parsley, minced

3 to 4 tablespoons unsalted butter

kosher salt and fresh ground black pepper

1. Put the grains into two different sauce pans. Add water to cover by 2 inches and add a two finger pinch of salt to both pots.

2. Bring the water to a boil then reduce the heat to a gentle but continuous bubble. Cook both grains until they are tender. The barley should take about 30 minutes and the rice maybe 40. The rice will just begin to open up its pod.

3. Drain both grains. The dish can be done up to a day in advance at this point.

4. Put the larger of the two sauce pans over medium heat and add the butter. Once it has melted add the chopped onion and sweat it until it is tender. Add both grains and season everything with salt and pepper. I like lots of pepper but season to your liking. Heat everything until hot, taste, and if it needs more add more butter or even a dash of water. Stir in the parsley, plate it and serve immediately.

Standard
Chicken/Poultry, Dinner, Gluten-free, Main Dishes

Sautéed Chicken with Pepperoni and Olives

I can tell you, with great certainty, how good a restaurant is going to be by the temperature of their plates.  If I get a stone cold plate with hot food chances are the dinner will be average.  If I get a cold salad on a warm plate just out of the dish machine, again, I know the rest of my dinner has more of a chance being bad then good.  It tells me whether or not the kitchen cares.

When I worked in commercial kitchens it was a bone of contention with me and those who worked for me.  Your plates needed to be hot for hot food and cold for cold food, period.

There was a time at home, back before we had kids, when I would always warm our plates in the oven.  Probably sounds completely retentive, for all I know it might be, but I have never really given a rats butt what others think.  I did it because my wife and I enjoyed being at the table together, taking our time eating, and having some quality conversation.  Hots plates keeping your food warm is a nice touch.

We had this for dinner the other day, I warmed the plates.

Serves 2

olive oil

2 each 6 ounce boneless skinless chicken breast

1/4 cup pepperoni, 1/4 inch dice

1/4 cup Picholine olives, pitted and halved

1/4 cup tomato, diced

1/2 cup dry white wine

1 tablespoon pine nuts

1 tablespoon currants

2 teaspoons flat leaf parsley, minced

kosher salt and fresh ground pepper

1. Season the chicken on both sides with salt. 

2. Place a heavy bottomed sauté pan over medium high heat.  When the pan is hot but not smoking add enough oil to coat the bottom of the pan.  Gently lay the chicken breast, what would be skin side down, into the pan being careful not to splash hot oil.

3. Brown the chicken on both sides.  Adjust the heat as necessary to keep the oil from burning.  Once both sides have caramelized remove them to a plate or pan and let them rest.  Pour out any excess grease.

4. Meanwhile put the pan back on the heat and add the pepperoni, olives and tomato.  Stir and toss it around until fragrant then add the white wine to deglaze the pan.   Using a wooden spoon scrape up any brown bits from the bottom of the pan.  Once the wine has reduced by half add the pine nuts and currants.

5. Give everything a stir and then place the breast back into the pan.  If the liquid in the pan seems at all dry add a 1/4 cup of water.  Braise the breast until they are cooked through which shouldn’t be long if you browned them well.  Taste and adjust the seasoning, add the parsley and stir to combine. 

6. Place the chicken breast onto warm plates skin side up,  top with the sauce, serve immediately.

Standard
Gluten-free, One-pots, Seafood, Soup, Stocks & Basics

Manhattan Clam Chowder

Manhattan Clam ChowderI don’t know why I haven’t made this lately. I developed this recipe for a fish and seafood class I used to teach at the local culinary school. It might seem bell-less and whistle-less but don’t let it fool you. It is a workhorse soup that is deeply satisfying in a working class bar sorta way. It can easily be whipped up right out of the pantry. Take note not to get carried away with the horseradish. It is subtle in the amount given, just enough to be a mysterious secret ingredient, but if you add more it takes over.

Makes 8 six ounce servings

2 eight oz. bottles Bar Harbor clam juice

2 six oz. cans Bar Harbor clams, drained, chopped and juice reserved

4 ounces bacon, diced

1 1/2 cup yellow onion, peeled and small dice

1/2 cup leek, white part only, small dice

1 cup celery, rinsed and small dice

2 teaspoons garlic, minced

1/8 heaping teaspoon celery seed

1/2 teaspoon dried oregano

1 teaspoon dried thyme

1/2 teaspoon red pepper flakes

2 cups yukon gold potatoes, peeled and 1/2 inch dice

28 ounces Pomi brand chopped tomatoes

1/2 to 3/4 teaspoon prepared horseradish

1. Place a 3 1/2 quart heavy bottomed pot over medium heat. Add the bacon and render the fat until it is crisp tender, not crunchy.

2. Add the onion, celery and leek. Saute the vegetables until they are tender but not browned.

3. Add the garlic, celery seed, oregano, thyme and red pepper flakes. Saute until they become fragrant. A minute or so.

4. Add the clam juice and reserved juice. While you are waiting for the broth to come to a boil taste it and, depending on how salty the clam juice is, season it with salt and fresh ground black pepper.

5. Once the broth is boiling add the potatoes, bring back to a boil, then reduce the heat to a simmer. Simmer for about 15 minutes then add the tomatoes and clams, bring to a boil again then reduce the heat, taste and adjust the seasoning, then simmer until the potatoes are done, about 20 minutes.

6. Just before serving add the horseradish making sure to thoroughly stir it in.

Standard
Main Dishes, Offal, Wild Game

Venison Liver with Pickled Green Onions, Bacon and Peas and Carrots

Venison Liver

I know a lot of people hunt for trophy deer, the bucks with the big racks.  I don’t.  I am always looking for a yearling.  A small deer that is tender and mild in flavor.  For me it is the difference between lamb and mutton.  I have eaten mutton but would always choose lamb over mutton if given the choice.

When I do kill a deer the first part of the animal I eat is the liver.  It is so, so good.  Something about it does it for me, it feels nourishing to eat this part of the animal when it is at its freshest.

Serves 4

For the pickled onions:

1 bunch scallions, roots trimmed and whites cut into 2 1/2 inch lengths. You want twelve pieces.

1/2 cup water

1/4 cup rice vinegar, do not use the seasoned kind

3 tablespoons sugar

1 teaspoon salt

For the liver:

4 pieces venison, or other,  liver, cut 1/2 inch thick, the are small but very rich, you can up the amount if needed

4 pieces speck or good smoked bacon

Kosher salt and fresh ground pepper

1/2 cup flour, for dredging

safflower oil

1/2 cup mayonnaise

1/4 cup buttermilk

1 teaspoon Dijon mustard

2 teaspoons pickled onion liquid

1/4 cup unsalted butter

1/2 cup carrot, small dice

1/2 cup onion, small dice

1 1/2 cup fresh peas

1. Place the scallions, in a single layer, in a small heat proof container. In a saucepan bring the water, vinegar, sugar and salt to a boil. Pour over the scallions and set aside to cool. This can be done up to a day in advance.

2. Season the venison with salt and set on a rack over a sheet tray with sides. This will catch the juices.

3. Combine the mayonnaise, buttermilk, mustard and pickling juice in a mixing bowl and whisk to combine. Season with salt and pepper.

4. Reserve 8 of the pickled scallion batons and chop, should have 4, the rest and combine with the dressing.

5. Preheat the oven to 250 degrees. Place a heavy bottomed skillet over medium heat and add the bacon. As the fat starts to render turn up the heat. Cook until nicely crisp. Remove the bacon and the pan from the heat. Place the bacon on a paper towel lined oven proof plate or tray.

6. In another pot add the butter, onion and carrots. When the onions start to wilt add kosher salt and pepper. Then add 2 cups of water. Let the carrots cook until tender.

7. Place the plate with the bacon into the oven. Season the liver with pepper, remember you already salted them. Dredge the liver pieces through the flour and shake off any excess. Place the bacon pan back on the stove over medium high heat. Add 2 tablespoons of safflower oil.

8. When the oil is hot, gently place the liver into the pan.

9. Place the peas into the carrot and onion pot and turn the heat to medium high.

10. Once the venison pieces are nicely browned turn them. Be careful not to over cook the liver. Cook medium rare to medium at most.

11. To plate. Place a smear of the sauce onto a plate. Using a slotted spoon place a nice helping of peas next to it. Place a piece of venison liver onto the sauce. Top with bacon and garnish with pickled spring onions.

Standard
Fish, Main Dishes, Seafood

Hachis Parmentier

Hachis Parmentier

One of the things I like best about the French dish Hachis Pamentier is the looseness of the recipe.  Unlike Shepard’s Pie which connotates lamb as the central ingredient Hachis Parmentier quite often simply lists chopped meat and then leaves it to your discretion. So anything on hand, usually cooked, usually leftovers which is generally combined with Sauce Lyonnaise..  Then add potatoes, again, mashed, leftover bakers or boiled, pretty much anything you can crush with a fork.

In my book anything Lyonnaise is good and more likely great.  The reality, though,  of most classic French sauces is,  who has demi-glace on hand and who is going to make it for this dish?   Not many home cooks do, nor should they.  So if you take the base ingredients of the sauce minus the demi-glace you have a vinegar based dressing.  In other words something to cut into the richness of the meat and potatoes and a simple balsamic dressing does this just fine.

The reason I chose salmon for this version is it doesn’t need to be cooked before hand.  You can put it right into the ring molds raw to be cooked in the oven.  Salmon has enough natural collagen that it will bind on its own, no mayonnaise, no egg, no nothing.

What I have tried to do here, and I think with great success, is make a family style dish into something worthy of a fancy sit down dinner and even the main course to a dinner party.  You can make the individual servings ahead of time (hint: my ring molds are water chestnut cans with both ends removed, cheap and simple) by putting the molds onto a parchment lined sheet tray, then layering them with the ingredients, covering them and storing them in the fridge.

On the other hand, you needn’t invite anyone for dinner to make this dish it is just as delicious for two as ten and if you want family style just chuck the whole ring mold idea and use a large gratin.

Serves 4

1 pound salmon, skin removed and cubed into 1/4 inch chunks

1/2 cup celery, finely minced

1 teaspoon capers, minced

1/2 teaspoon lemon zest, finely zested

1 teaspoon dill, minced

1 teaspoon chives, minced

1/2 cup comte or Gruyère cheese, grated

3 potatoes, sliced into 1/8 inch or thinner rounds

1 cup milk

1 teaspoon garlic, minced

water

kosher salt and fresh ground pepper

a handful of arugula leaves, rinsed and dried

1/2 teaspoon Dijon

1 teaspoon balsamic vinegar

1 1/2 tablespoons olive oil

1. Place the potatoes, garlic and milk into a medium size pot.  Add enough water to cover the potatoes by an inch.  Add a teaspoon of salt and a few grinds of pepper.  Place the pot over medium heat and slowly bring it to a boil.  Cook the potatoes until just tender, being especially careful not to cook them to mush but if you do don’t get you undies in a bundle they will still cook and taste the same.  Drain the potatoes.

2. If you plan to cook the dish now heat the oven to 375˚ F.

3. Place the salmon, celery, capers, lemon zest, dill and chives into a mixing bowl.  Add 3/4 teaspoon of salt and some fresh ground white pepper and mix the salmon being sure to incorporate all the ingredients and evenly distribute them throughout.

4. Place a piece of parchment paper onto a sheet tray.  Place four ring molds onto the tray.  Lightly butter the interior walls of the molds and then divide the salmon mixture into four equal portions and pat firmly/gently it into the molds.

5. Taste a potato testing for salt content.  Take the potato slices and fan them into the top of each mold making two to three layers.  If the potatoes were salty enough when you tasted them then don’t season them anymore but if the need it season each layer with a pinch of salt and pepper.  Top with a little cheese and a spritz of olive oil.  Bake in the heated oven for 25 to 30 minutes.

6. While the salmon is baking combine the mustard and balsamic adding a pinch of salt and a grind or two of pepper.  Then add the oil and mix to combine.

7. When the salmon is done remove it from the oven.  Using a spatula and a dry towel remove each mold to a plate placing it in the center.  Using a paring knife run it around the edges to loosen the salmon.  Gently hold down on the potatoes with a spoon  as you lift the mold.

8. Toss the arugula with the dressing and top each hachis parmentier with a bit of greens.  Serve with a crisp fruity white wine.

Standard
dog-eared, Holiday, Memoir, Seafood

Dear Mr. Pépin

Shrimp Gratin

Dear Mr. Pépin,

I made a recipe of yours last night. It wasn’t the first time I have made this recipe, in fact, I have made it several times but it has been far to long since it has graced our table, rest assured, this will not happen again. Just in case I haven’t been clear it was beyond delicious as always.

I remember the night I watched you make the gratin on TV. It must have been about three in the morning or somewhere around there. I was still working in the restaurant business and it had been a long night on the line. Now I was home, my wife fast asleep in bed, and I out in the living room and on the couch with a beer in my hand winding down. I was flipping through a food magazine and doing the same with the channels on TV.

At the time I had not seen but a couple shows in any of your many series because our local PBS station didn’t carry them or they were on at times when I wasn’t around. But here you were in the wee hours of the morning in front of the camera, your heavy French accent, broad smile, all as unmistakeable as the sparkle in your eyes. You caught my attention right away.

I watched as you peeled shrimp and even went so far as to show me how to pinch the tails between my thumb and forefinger, then wiggle, and finally you gently pulled and I watched as all the tail meat slipped out of its casing without any waste. Then you sliced a handful of the freshest white mushrooms with such speed and accuracy it could have been a magic trick. You wasted no time doing the same with a couple of green onions.

All the while you were discussing and telling the audience why you were doing things the way you did them. Like the time I watched you make cauliflower soup and you used the entire cauliflower not just the white florets. You told us how the leaves were full of flavor and nutrients and how in France it would have been a crime to throw them out.

What I watched that night was not the norm. I had seen enough food TV to know. There were no bams, no yelling at young chefs until they cried or some person telling me I can’t cook at home because I am not as skilled as they, no, I didn’t even see someone saying organic, local or sustainable because you didn’t need to say the words to teach them.

No, it was someone doing the hard job of quietly, but realistically, teaching people how to cook and be successful in their own home kitchens. What I saw before my very eyes was a man passionate about food, the table and living. Someone helping people to use and understand simple, easily obtainable fresh ingredients that would deliver great taste at dinner time. It was someone extremely talented in the kitchen, who understands how food works and who has spent years building on techniques he was taught as a child. A person who understands if people are successful in the kitchen they will continue to cook, maybe even start to like, enjoy and use these skills the rest of their life.

You are and will continue to be a wonderful role model and I want to say thank you.

Sincerely,

Tom

Makes 4 servings

1 pound of raw shrimp, 26-30 size is great, peeled and deveined

2 cloves of garlic, minced finely. You want it to cook so really mince it.

2 green onions, chopped

1 cup white or cremini mushrooms, wiped of dirt, and julienned

3/4 scant cup bread crumbs

1/2 cup parmesan, grated

4 tablespoons unsalted butter, melted and cooled

kosher salt and fresh ground white pepper

1/4 cup dry white wine

1. Heat you oven to 400˚F.

2. Place bread crumbs and the parmesan into a bowl. Add 2 tablespoons of melted butter and season the mix with salt and pepper. Mix everything really well to distribute the butter this will help a great deal in getting the top to brown evenly.

3. Put the shrimp into another mixing bowl and add green onions, mushrooms and garlic. Toss to combine, season with salt and pepper then combine this mixture with half the breadcrumbs. Sprinkle with the white wine and toss again.

4. Fan the shrimp out in individual gratins or one large gratin or casserole. Top with the remaining breadcrumbs.

5. Bake for 10 to 15 minutes or until the top is brown and the shrimp are cooked through. If you have over lapped the shrimp a great deal it might take longer to cook and you may need to back the oven down to 375˚F so the topping doesn’t brown to quickly. Serve.

Standard
Desserts/Sweets

Madeira Tart

Madeira Tart

This is a tart with an agenda. Its roots are old fashioned and small town but don’t let that fool you. It is as luscious and silky as Scarlett Johansson sauntering the red carpet. It is as lascivious as True Blood and as beaten-up as Mickey Rourke on a bad day.

There are tarts and then there are tarts. The best are the kind that even your mama would like. Never suspecting or questioning what makes up its character but just enjoying it for what it is because it is so good. All the while, later, you know you are going to lick your fork like…well, lets just say it is a tart that likes to please and it will.

Truly, it is like fine champagne on a Sunday afternoon. The basis of this tart has been around for a long time, the old fashioned egg custard pie, you know the one with nutmeg that has shown up at every family reunion since people started having reunions.

Well, take that base and an idea from Alice Waters and her Marsala cream pots, add in the videos on the FOOD52 site from Shuna Lydon about cooling your custard and then use duck eggs(again Waters idea) which make for an even silkier tart and what you come up with is nothing less than sexy. Never fear, I have written the recipe to use chicken eggs but if you ever come across fresh duck eggs by all means use them to make a custard.

SERVES 8

For the crust::

1 cup all purpose flour

1/4 cup semolina flour

1/4 cup sugar

1/2 cup unsalted butter, softened

2 finger pinch of salt

For the custard::

1 1/2 cup whole milk

1/2 cup sugar

1/2 teaspoon salt

2 tablespoons madeira

4 large eggs, or 3 duck eggs

For the custard:

1. Place the milk into a sauce pan and scald it over medium high heat. Remove the pan from the burner. In a mixing bowl whisk together the eggs, sugar, madeira and salt. Temper the eggs by whisking in a 1/2 cup of warm milk and then add the rest while whisking. Cover the bowl and place the custard base into the fridge. You want it to be cold. It can sit in the fridge overnight which is probably best but at least let it get to 35 or so degrees. You could do this in an ice bath if you are in a hurry.

To finish the tart:

1. Heat the oven to 350 degrees. In a large mixing bowl and using a large wooden spoon mix all the crust ingredients smashing the butter into the mixture with the back of the spoon until you have a cornmeal and cous cous looking crumble. You can use your hands rubbing them together with the mixture between them to make some of the bigger chunks smaller.

2. Place an 8 inch tart pan onto a sheet tray. This will make it easier to move around and get out of the oven. Dump the crumbles into the tart pan. Press the dough up the sides, packing it tightly as you go, and then work toward the center until you have a crust. Bake the crust for 20 minutes. Remove it from the oven.

3. Turn the oven up to 400 degrees. Strain the chilled custard through a fine mesh strainer to remove any albumen pieces. Pour the custard into the tart till it is half full. Place the tart into the oven and then finish filling the tart. You will probably have about a 1/2 cup of base left. I made a little extra so you wouldn’t come up short in case your tart pan was a little bigger.

4. Back the tart for 15 minutes and then reduce the heat to 350 degrees and bake it for another 20 to 30 minutes or until set. Depending on how cold you custard is will lengthen or shorten the baking time. If you give the sheet tray a gentle but sharp shake the tart should jiggle like jello if it is done. If it creates waves that look like you dropped a pebble into still water continue cooking.

5. When the tart is done remove it from the oven and let it cool completely. Cut and serve.

Standard
Gluten-free, Grains/Legumes, Main Dishes, Meatless Monday, Vegetarian

Pot Roasted Collards and Purple Hull Pea Fritters with Spicy Buttermilk Gravy

Pot Roasted Collard Greens and Purple Hull Pea Fritters

The one thing that stays the same around my kitchen, has been a continuous thread,  is collard greens.

Collard recipes have been prepared in many incarnations but eventually I rendered them all down the most basic of recipes.  I like collards in every fashion imaginable,  and while I can spoon potlikker right out of the pot and onto a slab of buttered cornbread, making me perfectly happy,  I have grown to like my greens best when they are pot roasted.  I used to render bacon, butter or pancetta into the pot first, the fatty crispy strips of cured pork to be fought over at dinner.   Then there came a time when I needed to make the greens vegan. I started using peanut oil and ever since it has become a fast favorite which is strange since we are big pork eaters.

What happens to greens when they are pot roasted is the natural sugars break out and much like caramelizing onions you start to build flavors that just don’t exist when collards have been boiled.  I liken the building of flavors to a fine cigar, great coffee or a complex wine.

As the thick and leathery fall collards,  greens which have taken a frost or two, cook down a toothsome quality develops that is very satisfying to eat.  You also get these rogue bits that didn’t get as much oil as they should and they become crispy and blistered which contributes a nice contrast.  A sure sign that you have roasted your greens right is the smear of brown juice that paints the bottom of the pot when you stir.

We eat greens cooked like this as part of three dinners each week, at least,  and in general Amy and I will fight over the leftovers at breakfast time.

Seves 4

For the fritters:

16 oz. field peas, cooked, either black eyed or you favorite type I used purple hull, two 14 oz. cans, drained  works too

1 cup carrots, grated

1/4 cup rice flour, or all purpose flour

2 teaspoons shallots, minced

2 teaspoons garlic, minced

1 1/2 teaspoons dried thyme

kosher salt

fresh ground pepper

For the collards:

8 to 10 cups collards, cut into 1 inch stirps, rinsed multiple times to get rid of sand and dirt

peanut oil

kosher salt

fresh ground black pepper

For the buttermilk gravy:

1 1/2 cups live culture buttermilk

1 teaspoon creole seasoning

1/2 teaspoon dried thyme

1 1/2 teaspoon shallot, peeled and minced

1 teaspoon garlic, peeled and minced

1.Heat the oven to 325˚ F. Combine all the gravy ingredients in a small bowl and mix to combine.  Set aside to let the flavors build.

2. Place a 6 quart enameled Dutch oven with a lid over medium high heat.  Add some peanut oil to the pot being generous with the peanut oil and making sure you coat the bottom of the pan plus a touch more.  Add half the greens and season them with a two finger sprinkle of salt and a few grinds of pepper.  Turn the green giving them a hot oil bath.  You want the leaves to be coated, not greasy though.  Add the rest of the greens.  Season them with salt and pepper too.  Turn them into the first batch of greens being sure they get an oil coat as well.  Put the lid on the pot, slide it into the oven and roast the collards for 1 hour and 15 minutes making sure to stir the pot at the half way point.

3. Place the cooked peas into the bowl of a food processor.  Pulse to grind the peas.  When it becomes mealy add the rest of the fritter ingredients and pulse until smooth, moist and will hold together.  The key here is to adjust the moisture content.  If it is too wet add rice flour a tablespoon at a time letting the mix rest a bit so the flour can hydrate and thicken the fritter mix.  If it is too dry add water by the tablespoon and do the same.  My way to test patties of all types is to make a patty and then throw it against the side of the mixing bowl.  If it flattens and holds its shape I am happy.

4. Once your consistency is right make 8 equal sized patties.  Place a nonstick pan over medium heat, add oil and fry the fritters until they are brown on both sides. Remove them from the pan to a brown bag lined tray.   Drain the excess grease.  Serve while hot.

Standard
Soup, Stocks & Basics

Three Onion Chowder

Three Onion Chowder with Parsleyed Oyster Crackers

I really like chowders and really like French onion soup. I don’t like pasty chowders so I didn’t thicken it except for the starch released from the potatoes. One tip I learned from Jasper White’s 50 Chowders is to let the chowder rest covered for thirty minutes. It is really does make a difference by allowing the flavors to come together.

SERVES 4 TO 6

For the Soup:

3 ounces pancetta, 1/4 inch dice

2 cups yellow onion, peeled and julienned

2 leeks, rinsed, white parts only, sliced into half moons

4 shallots, peeled and sliced

1/3 cup celery, 1/4 inch dice

1 1/2 tablespoon fresh garlic, minced

1 teaspoon fresh thyme, minced

1 bay leaf

2 cups chicken stock

2 cups half and half

3 russet potatoes, peeled and cut into 1/2 dice

1 tablespoon Italian parsley, minced

1 tablespoon fresh chives, chopped

Kosher salt and fresh ground pepper

Parsleyed Oyster Crackers:

1 tablespoon unsalted butter

1 cup oyster crackers

1 tablespoon Italian parsley, minced

Fine sea salt and fresh ground pepper

1. In a 3 quart Dutch oven or sauce pan add the butter and pancetta and place it over medium heat to render the pancetta. Once some of the fat has been released add the onions, shallot and celery. Saute until they are just becoming golden. You don’t want them to brown too much or the soup will be brown. Add the leeks, garlic and thyme. Cook until the leeks are just becoming soft. Add the bay leaf and chicken stock. Bring it to a boil and add the half and half and the potatoes. Bring the soup back to a boil and then immediately turn off the heat and cover the pot. Allow it to rest for at least thirty minutes.

2. Heat a small saute pan over medium high heat. Add the butter and once it has stopped bubbling but is not brown, add the oyster crackers and toss the crackers to coat with the butter. Season with salt and pepper. Stir in the parsley and toss the crackers gently in order to coat all the crackers with the parsley. Pour out onto a baking sheet and let cool.

3. To finish the soup reheat it but don’t let it boil. Taste a potato to check and see if it is done and adjust the seasoning if necessary. If the potatoes are not done then cook over low heat for 15 minutes. Stir in the parsley and chives and then ladle into cups or bowls. Top with a few oyster crackers and serve.

Standard
Grilling, Main Dishes, Pork

Pork Ribs in Adobo

Pork Ribs in Adobo

In looking for a new rib recipe for the grill,  Pork in Adobo kept coming across the radar. Knowing that Filipino food is considered, by some, to be the soul food of the Pacific it became interesting.

Looking at the ingredients it was apparent, or seemed so, that this was a dish influenced by an outside culture. Just as Spam is a huge part of Hawaiian culture this looked to have some of the earmark influences of the American military. Upon a little research though you will learn that this method, adobo or to stew in vinegar, is indigenous to the Philippines.

Many of the recipes for this dish all look very similar. It is one of those dishes that doesn’t sway much from the original except for little tweaks by the individual cooks who want to alter the flavor to their liking, just as was done here.

While the ribs take time to complete the time is mostly spent unattended. It really is a simple dish that comes together easily.  You can make you next cook-out amazingly simple as can be if you do this in advance.

Thai sticky rice and wok seared bok choy with oyster sauce are great with these ribs. If you want to be adventurous try replacing the ribs in this dish with fresh pork belly.

Serves 6

2 pork spare rib racks

1 1/2 cups unfiltered apple cider vinegar

4 tablespoons soy sauce

1 tablespoon kosher salt

5 bay leaves

1 tablespoon whole black peppercorns

20 garlic cloves, smashed and peeled

1. Place all the ingredients in a non reactive pan, large ziploc or, as I did, in a food saver vacuum bag. If you use a large pan you will need to turn the ribs every now and again making sure the ribs get a good even soak. If you get most of the air out of the ziploc you won’t need to flip the ribs but you get the idea, they need to be marinated evenly.  Place the ribs in the fridge, covered if you use the pan, and let them marinate over night.

2. The next day remove the ribs from the fridge and if you are using a pan to marinate you are ready to go. Heat he oven to 225˚F.  If you used the plastic bags remove the ribs, saving the marinade and put the ribs in a large casserole and pour the marinade over them. Cook the ribs, covered,  for 2 1/2 to 3 hours. They should be tender but not falling off the bone. Remove them from the oven and let them cool. You can refrigerate them, covered, until needed. The recipe can be done up to a day in advance at this point.

3. Heat you grill for direct heat grilling. If you are ready to serve the ribs remove them from the marinade. Strain the marinade into a small sauce pan.  Place the pan over medium heat.  Bring to a boil and let the marinade reduce by half.

4. Brush off any peppercorns stuck to the ribs and any bay leaves as well. Brush the ribs with some of the marinade and continue to brush with the marinade throughout the grilling. Be sure to save a good amount of the marinade to use as a dipping sauce too. Grill the ribs until seared, crispy, lightly charred and hot, remember they are already cooked so grilling won’t take long.  Cut the ribs into rib-lets and serve.

Standard
Memoir

A Hint of Allspice

When I was younger, looking for a cure to the darker moods of the seasonal doldrums, I used to lie with my back on the floor, my butt up against the lounge, and my legs in an L-shape up on the cushion. Using the chair in reverse, basically, I could lay there a long time, staring into nothingness. Well not always nothing–sometimes a spider would crawl across the ceiling and capture my attention.

I didn’t think about time, either, and whether it had any worth. You waste it on stupid things like estimating how many holes are in each ceiling panel and postulating whether every individual panel has the same amount. Sure, I could have gone about it scientifically and actually taken down two panels, counted, and multiplied–but that would have taken away the reason for wasting time by staring at the ceiling.

I’m not gonna lie and pretend things are different just because I’m older, because they aren’t. Now I just find different ways to waste time. Now, I cook. I cook like a grandma with a family reunion just a few short days away.

Even if I’m cooking, I’m not just cooking. Tonight I was somewhere in the Caribbean smelling curry. Goat curry, chicken curry, fish curry–it doesn’t matter, because it’s the spices taking me away, the curry powder with the hint of allspice. Then I realize it’s really the smell of the corner bodega that fed me more nights than not when I lived in Prospect Heights in Brooklyn, off of St. Johns Place.

Suddenly I’m walking that street, stepping on crack vials that pop like popcorn under my Chuck T’s, to get to Grand Army Plaza or Flatbush Ave. or the subway station. The clothes the women wear are the color of azure oceans and golden sunsets–islands they know first-hand–not the dour black turtle necks and sullen black chinos of Manhattan, but much more beautiful and vibrant. The neighborhood might have been down but it wasn’t out. The ladies hanging out on the porch stoops and around the wrought-iron gates are laughing at stories of people and islands their kids will never really know.

Me, my hands are full with an aluminum container heavy with curry chicken, rice and peas, and fried plantains. I walk across the street taking in the jazz notes of the impromptu lives that pass in front of my eyes and into my ears. I sit down on my stoop to eat, wide eyed and smiling. I unwrap the plastic wrap to get at the roti, steamed and kept warm by the food underneath. I peel back the foil and lift the top. It is so full of food it is smashed together and flat like a cake, but the smell is the smell of my neighborhood.

I will know this neighborhood. The slap of the sapphire-blue screen door at the bodega. How the first time I order food at the back counter it is a warm ham sandwich with cheese; how over the months I’ll work my way up to a Cubano and a bag of plantain chips; and by the time I move away I’m eating goat neck curry and sucking the bones like I was raised on the stuff.

I turned down the heat on the stove to simmer. Sometimes it is about hunger and quantity, but tonight it’s about the taste, about how the vibrant spice of curry lightens my dark mood at the very moment when I want to run away and never come back.

Get your Bodega Chicken Curry Recipe here

Standard
Memoir

The Whimsical Mistress

I am a flatlander.

You see in Indiana the northern two thirds of the state is flat, while the southern third becomes the foothills to the Appalachians. It all happened when the glaciers rolled through, which was sort of like pushing a sofa on a Persian rug. The rug in front of the sofa bunches up while everything behind becomes flat. The verity of this occurrence is the hills of southern Indiana are beautifully Rubenesque.


It’s an affair really. And not in a Victorian sense either, because it is more gaudy than that.
    
It is when I smell the musky fall dirt of the southern hills, corseted with orange and yellow leaves and the hickories and sycamores that once held them — now bare-shouldered — become the steel boning that holds the hollers to their unique hourglass shape, that  I become incorrigible. All because this voluptuous landscape is the Indiana home to the American persimmon, Eve’s apple to me, a temptress of pudding, pie, bread and fudge.

Oh the persimmon has her foreign counterparts, Hachiya and Fuyu, and of course they are succulent, trim, and have that hot little accent, but the American persimmon is one of a kind, sort of the saw blade painted with a kountry landscape, kitsch, and probably more closely related to running off with the circus than a fine dining car on the Orient Express.


It’s not like there aren’t persimmon trees in other parts of the state. My neighbor has a beauty, in fact I covet it. It is tall and gorgeous, maybe one of the largest I have seen,  but it isn’t the same. In southern Indiana it is the culture that goes along with the persimmon. It’s the paw paws, maple syrup, grits, ham and beans, and fried biscuits with apple butter. It’s possum and sweet potato dinners and wood-burning stoves. It’s all the things I hated about Indiana growing up but am intensely intrigued by now, albeit in a driving by a fatal crash sort of way.
    
All fatality aside, a good persimmon dessert will leave you in a drool sleep on the couch dreaming the dream of possum and raccoons. Of beating them to the little tannic and orange fires of Zeus, a rare true berry, pulpy and sweet when they finally become ripe enough to eat rather then their typical docket of pucker and gag.

The persimmon likes to flimflam you. It may look ripe and mushy, but when you bite into one it grabs you by the uvula and pulls. It doesn’t let go either, truthfully, it holds on like a spring leech after a bloodless winter. 
    
It is an accomplishment worthy of a diploma, this gathering of the ripe fruits,  because somehow the animals know too, just like they know the night the sweet corn is ready, and if you went out to that persimmon tree on that night, the night they know, you might find it is like a barrel full of monkeys. A tree full of nocturnal varmints having a hoedown, all drunk and giddy on your persimmons.
    
You are thinking of fighting them for it, a barroom brawl, but instead you turn and walk back home, you walk back home because you realize she is a good mistress, the persimmon, and is not exclusive but whimsical, indeed, the very trait that keeps you coming back to her.

Standard
Side Dishes, Vegetables

Fried Green Tomatoes

More often then not, actually to many times to count, I have seen fried green tomatoes served one way, sliced, Cajun spiced and dredged almost always in cornmeal.

Then last year Amy and I went to The Publican restaurant in Chicago.  It is an everything pig restaurant.  Crispy pigs ears, everything fried in lard, boudin blanc  and, well, you get the picture.

It is great restaurant so it isn’t surprising they have amazing side dishes too.  The one that caught my attention was the fried green tomatoes.  I almost didn’t order it but,  then as I often do,  at the last minute I went back to it and did.  I was very, very happy I did.   It was simply the most delicious version of fried green tomatoes I have ever eaten.

This was a midwinter outing.  So green tomatoes at home were out, at least until summer, but I was impressed enough I looked for the recipe online and was surprised to find nothing, well,  not nothing there were zillions of fried green tomato recipes cooked like I mentioned earlier.

Nevertheless this dish resonated with me.  I made it once earlier this summer and it wasn’t to my standards.  It was really good but it just didn’t work like I wanted from a technical standpoint.  Now it is late fall and I have come back to it and this time it came out great.

It is so good for several reasons.  The tomatoes are cut into wedges which keeps them a little firmer when cooked, not tough, and you get more tomato jelly with the wedge shape then if you had a slice.  Also oatmeal and pig are like bread and butter, they just go together, and it feels good to have these two flavors co-mingling and you can accomplish this without buying buckets of lard.

It is time to share this recipe.  I hope you enjoy it.

Note: I made this gluten-free and egg free.  If you don’t need to be gluten-free or egg free then substitute in all-purpose flour for the Cup4Cup and instead of using the egg replacer use three egg whites beaten to stiff peaks.

Makes 4 servings

7 to 10 green tomatoes, about the size of a small tangerine, cut into 4 or 6 wedges

1/3 cup quick cooking oats, not instant oats

1/3 cup quick cooking oats, coarsely ground

1/2 cup Cup4Cup flour (or all-purpose flour)

1 tablespoon paprika

1 1/2 teaspoon ground garlic

2 tablespoons egg replacer mixed in a large bowl with 1/4 cup water (or 3 egg whites whipped to medium peaks, also in a large bowl)

1 teaspoon salt

1/2 teaspooon black pepper

 peanut oil for frying

1 thick slice pancetta or bacon

1. Combine the oats, flour, paprika, garlic powder salt and pepper in a large mixing bowl.

2. Heat the oven to 250˚ F.  Pour enough peanut oil into a 6 inch deep cast iron Dutch oven to come 1/3 the way up the sides of the pan.  Add the pancetta to the oil.  Place it over medium high heat and heat the oil to 375˚ F. on a fry thermometer.  Make sure to remove the pancetta when it is crispy and has rendered its fat to the oil and make sure you, as the cook, eat the pancetta because it is within the rights of every good cook to eat the best bits while standing at the stove and if the peanut gallery doesn’t like it tell them to learn how to cook.

3. When the oil is just about to temperature toss half the tomatoes with the flour mix making sure to coat the tomatoes well.  Place them into the bowl with the egg replacer or egg whites and toss them to coat.  Put them back into the flour mix and coat them well.  Remove them to a cookie cooling rack.  Repeat this step with the remaining tomatoes.

4.  If the oil is to temperature carefully add  half , or less, of the tomatoes to the oil making sure not to crowd them.  When they start to take on color and brown remove them from the hot oil, sprinkle them with salt,  and place them onto the cookie rack.  Add the rest of the uncooked tomatoes to the pot then slide the fried tomatoes into the oven to keep them warm.

5. Serve with you favorite tartar sauce, aioli, or hot sauce

Standard
Chicken/Poultry, Noodles/pasta

Chicken, Basil, and Tomato Sausage with Cavatelli

Chicken and Basil Sausage with Cavatelli

The sausages used in this dish come from the book Charcuterie by Michael Ruhlman and Brian Polcyn and is a book I highly recommend if you want to make sausage and any charcuterie in general.  Pictured at left are trays of home made ricotta cavatelli.

Serves 6

Chicken Basil and Tomato Sausage with Cavatelli

6 sausages, Italian sausages would be great too

olive oil

3 onions, peeled, halved and julienned

9 large garlic cloves, peeled and chopped, about a 1/2 cup

36 ounces strained tomatoes or sauce

1 tablespoon double concentrated tomato paste

kosher salt and fresh ground pepper

1/4 cup cream

a handful of fresh basil

1 1/2 lbs of fresh cavatelli or dried gemelli pasta

lots of grating cheese of your choice, parmesan, romano etc.

1. Place a 4 quart pot over medium high heat and add good glugs of olive oil, a little more than just coating the bottom of the pan. When it is hot add the sausage and sear it until is is deeply browned but take care not to over heat it and split the sausage casings. Remove the sausage to a platter.

2. Add the onions to the pot, season them with salt and pepper, and let them cook until they become tender then add the garlic. Cook the garlic until it becomes fragrant and then add the tomato sauce.

3. Bring the sauce to a boil and then reduce it to a simmer. You will want to stir it occasionally so it doesn’t stick to the bottom and burn. You want the sauce to reduce slowly and the sugars in the tomatoes to break out and concentrate. Season the sauce with salt and pepper and taste. Let the sauce simmer for 1 1/2 to 2 hours. What I call mato gum will form on the sides of the pan and the sauce will be thick. Add the cream to the sauce, stir and raise the heat a little to get the sauce good and hot. Be careful with the sauce though it will burn easily at this point because of the concentrated sugars. You can either add the sausage back to the sauce or you can finish cooking them in a 400 degree oven.

4. Bring a large pot of salted water to a boil and cook the pasta according to the instructions. When it is done, strain it and put it into a large bowl and toss it with the tomato sauce. Plate it, dress it with the basil, sausages, cheese and serve.

Standard
Main Dishes, Noodles/pasta

Cheese Lasagne

While this technically is vegetarian I don’t think I would call it that. Vegetarian leads me to think there are some vegetables involved. I will call it meatless though.

This lasagna takes me straight back to my childhood. It reminds me of everything I loved about baked pasta growing up and guess what, it is a favorite of my kids too.

It really comes together easy since you use the no boil pasta sheets. I like to make the sauce but if you have a favorite great quality variety in a jar that you want to use, well, just go for it. You could easily make this in advance and cover it and keep it in the fridge for a day. You can go straight from fridge to oven just add another 15 to 20 minutes to the initial bake time.

Serves 6 to 8

extra virgin olive oil

1 onion, peeled and chopped

3 cloves garlic, minced

2 teaspoons pomegranate molasses

one 28oz. box pomi strained tomatoes

one 28oz. box pomi chopped tomatoes

1/4 teaspoons fennel seed, ground

2 teaspoons oregano

2 tablespoons flat leaf parsley, minced

2 tablespoons tomato paste

1 pound no boil whole wheat lasagna noodles

12 ounces low moisture mozzarella , grated

12 ounces fresh mozzarella, sliced into eight rounds

1 pound cottage cheese, drained in a strainer

2 eggs

1 cup parmesan cheese, grated

kosher salt and fresh ground pepper

1. Place a 3 1/2 quart heavy bottomed sauce pan over medium heat. Add enough oil to coat the bottom of the pan liberally. Add the onions and season them with a healthy pinch of salt and fresh ground pepper.

2. Sweat the onions until they are soft. Add the garlic and once it is fragrant add the pomegranate molasses, tomatoes, fennel, oregano, parsley and tomato paste. Season with salt and pepper. Bring to a boil then reduce the heat to a simmer.

3. Occasionally stir the sauce to keep it from sticking. Taste the sauce and if you think you need to add a teaspoon of sugar.

4. While the sauce is cooking combine the cottage cheese, eggs and parmesan in a mixing bowl. Season it with pepper and a little salt. Usually parmesan is salty so it shouldn’t need to much. Combine everything well and set aside or refrigerate.

5. Cook the tomato sauce until it has reduced down and has thickened. Taste and adjust the seasoning.

6. If you choose to cook the lasagna now preheat the oven to 375˚ F. If you want to wait to cook it finish up the remaining steps and assemble the final product, cover and store it in the fridge.

7. Drizzle some lines of extra virgin olive oil into a 9 x 13 casserole. Take a spoon and spoon about a half cup of tomato sauce on top of it and spread it around to make a thin coating on the bottom of the pan.

8. Lay out a layer of dried noodles across the bottom of the pan. Spoon some sauce over the dried noodles. This layer should be heavy. Spread it with the back of the spoon to even it up. Sprinkle half the grated mozzarella over the sauce then lay on another layer of noodles.

9. Another coat of tomato sauce on top of the noodles then spread the cottage cheese over the middle layer. Lay out the last layer of noodles and put down a thin coat of sauce, more then a coat of paint, then top with grated mozzarella and finish with the fresh mozzarella rounds.

10. Cover the casserole tightly with foil. Slide it into the oven and bake it for an 45 minutes. Remove the top, turn the heat to 450˚ F and bake another 20 minutes or until the cheese has browned.

11. Remove the lasagna from the oven and let it rest for 10 minutes. This is really important. It lets everything meld real nicely, the noodles absorb juices and it just makes lasagna better. Cut into portions and serve.

Standard
dog-eared, Noodles

Baked Rigatoni with Currants and Pine Nuts

Baked Rigatoni with Currants and Pine Nuts

The most beautiful San Marzano tomatoes have been coming out, by the  bushel,  of the garden.  I have been canning sauce, making paste and oven dried tomatoes like it is my civic duty to waste not one tomato.  I am loving it.

I can’t wait to open a jar of sauce in the middle of winter.  One that has a sprig of basil hidden in the middle of the red liquid like a secret ingredient.  I lift the lid with a bottle opener and it lets out the familiar gasp of home canned goods.  The smell of last summer’s sunshine rises upward to my nose.

I hoard the stuff.  I don’t want to use it now but rather save it for later.  Then I realize how stupid this is.   So I use the left over sauce, the extra that wouldn’t fill a jar and make this dish.  It is very American-Sicilian in my mind but what do I know.  Well, I know it’s good.

Note: I use a box brand in the recipe but by all means if you have a great home canned tomato sauce use it.

Makes a 9 x 13 casserole

1 pound rigatoni, cooked and cooled according to the directions on the box

3 tablespoons olive oil

2 onions, small dice about 2 cups

2 tablespoons garlic, minced

1 tablespoon balsamic vinegar

1 teaspoon pomegranate molasses

2 each 28 oz. box Pomi brand chopped tomatoes

1 pound cottage cheese, drained

2 tablespoons flat leaf parsley, minced

1/3 cup currants

1/4 cup pinenuts

1/2 cup pecorino romano

2 cups or more, mozzarella, grated

1. Heat a 3 1/2 quart heavy bottomed pot over medium heat. Add the olive oil and onions and let them sweat until they are soft and become golden around the edges.

2. Add the garlic and when it becomes fragrant add the balsamic and pomegranate syrup. Season with salt and pepper and let the liquid reduce some and then add the chopped tomatoes.

Reduce the sauce to a simmer and let the tomato become thick. It will take about an hour or so. Add the currents to the sauce about 15 minutes before you have finished cooking the sauce so the begin to soften and release some of their flavor.

3. Combine the cooked rigatoni with the cottage cheese, parsley and pecorino cheeses. I usually do this right in the pasta cooking pot after I have drained all the water from the pasta.

4. Now add the tomato sauce and mix to combine.

5. Using a little olive oil oil a 9 x 13 casserole and then pour the noodles into the dish. Top with the mozzarella and bake in a preheated 375˚ F oven for 35 to 40 minutes or until the cheese is browned nicely. About 10 minutes before it is done sprinkle the pine nuts across the top so they brown up nicely. Don’t do this any earlier or the nuts will burn.

6. Let the casserole rest for 5 to 10 minutes and then serve.

Standard
Beef/Veal, Soups, Stocks & Basics

French Onion Soup

A French onion soup recipe isn’t exactly uncommon. I am not even going to say this one is the best as in best ever French onion soup because that would be like saying my religion is the best, or the only, which is just not true.

Onions slowly brown and take time to get cararmelized

So why publish or blog this recipe? Well because it is a really solid recipe and I want to talk about technique. In other words even if you already have an onion soup in your repertoire and have no intention of ever making a different one maybe you might pick up a little tidbit of information that you might want to apply to your already fantastic recipe.

There is nothing complicated about this recipe so if you have never made French onion and think you might want to, well, here ya go.

I did use rendered bacon fat in the recipe and here is why. I wanted to replicate some of the richness that I find in the ramen noodles recipe from the Momofuku cookbook. The smokey onion-y goodness of the fat is unbeatable. If you take offense to bacon fat then oil or butter would work just fine.

I use fontina cheese here. It is not the traditional comte or gruyere. Use what you like. I like all three but one is easier on the pocket book but that is your call.

Check your broiler and make sure it works before you start the recipe.

Makes 6 servings

1 1/2 tablespoon bacon grease, butter or vegetable oil

7 cups yellow onions, trimmed and cut into 1/4 inch slices

1/4 cup garlic, peeled, trimmed and sliced thinly

1 cup red wine

4 cups richly flavored stock

1 tablespoon dried thyme

kosher salt and fresh ground pepper

1/2 pound Fontina, grated

4 to 6 toast rounds, or as I did, I griddled an English muffin half in rendered pork fat

1. Place one of your soup crocks on a sheet tray and put it in the oven. Try to adjust the oven rack so the top of the crock is about 5 to 8 inches from the broiler. Remove the tray.

2. Place a heavy bottomed large pot, the wider the pot the better the onions will cook, over medium heat and add the fat.

3. Once the fat has melted add the onions. Season them with about a 1/2 teaspoon of salt and, I like lots, fresh ground black pepper.

4. Walk away from the pan and do something else in the kitchen. Don’t stir them until all the onions have wilted down. The more you stir them the longer they will take to color. Don’t up the heat either you don’t want them seared brown but gently browned. So if your pan is not so heavy bottomed you may need to turn the heat down. Cooking the onions to the right color and consistency will take at least a half hour maybe even an hour. Drink a glass of wine, listen to some music and call it happy hour. Get your zen on and be the turtle, slow and steady. The hare’s onion soup sucks don’t go there.

5. Cook the onions until they soften, have gone from amber to brown and you notice brown bits of onion on the bottom of the pan. Those brown bits are flavor be careful not to burn them, turn the heat down if you need to. Add the garlic and thyme and cook until the garlic becomes fragrant.  About a minute.

6. Add the cup of wine to deglaze the pan and reduce it by half.

7. Add the stock and bring the pot to a boil. You can turn up the heat if you need but then reduce the heat and simmer the soup to bring all the flavors together, twenty minutes or so.

8. Grab a tasting spoon and take a taste. Adjust the seasoning as necessary.

9. Preheat your broiler. Bowl up the number of bowls you need. Place them on a sheet tray. It is much easier to grab one tray then to try to grab 4 or 6 crocks with gooey cheese on top. Get the sheet tray out.

10. Top each crock with a toast round or English muffin, then pile on the cheese and bake under the broiler till everything is gooey and golden brown. Remove them from the oven and wait at least 5 minutes before digging in- these things are thermonuclear.

Standard
Desserts/Sweets, dog-eared, Fancy

Meyer Lemon Tart

Meyer Lemon Tart

Meyer Lemon Tart

I have been making lemon bars for many years now from a recipe by John Taylor also known as Hoppin’ John.  A while back I thought it would make a great tart, and guess what, it does. If you like Low Country cooking you should search out his cookbook Charleston, Beaufort & Savannah: Dining at Home in the Lowcountry. It seems like a good time to share this recipe.

SERVES 6 TO 8

For the crust::

1/4 cup sugar

1 cup all purpose flour

1/4 cup semolina flour

1/8 teaspoon salt

1/2 cup unsalted butter, room temperature

For the custard:

2 to 3 Meyer Lemons, zested first then squeezed for 1/3 cup juice

5 large egg yolks

3/4 cups sugar

1/2 cup ussalted butter, room temperature and cubed

zest from two Meyer lemons

powdered sugar, for dusting the tart

1. Heat the oven to 325 degrees. In the bowl of a mixer, or in a bowl and mixing with a wooden spoon, cream the butter with sugar and salt. Add the flours and mix well. The shortbread crust will look crumbly and like cous cous or cornmeal. Turn the dough out into an 8 inch tart pan and press it evenly into the pan starting with the sides and working toward the center. Place your index finger over the top of the flutes and push the crust upward using you index finger as a back stop.

2. Slide that tart shell into the oven and bake it for 20 minutes.

3. While the tart is in the oven combine the eggs, sugar, zest, 1/3 cup Meyer lemon juice in a heat proof mixing bowl and whisk to combine the ingredients.

4. Place the mixing bowl over low heat, if you are worried about this you can most certainly use a double boiler, and whisk the custard until it starts to thicken. It takes about 13 minutes on low so it will take longer in a double boiler. Once it is very thick, like warm pudding and leaving ribbons as you whisk, remove it from the heat and whisk in the butter.

5. When the tart crust is done remove it from the oven and add the lemon curd. Bake the tart another 10 minutes or until set.

6. Remove the tart from the oven and let it cool completely. Once cool sprinkle it with powdered sugar just before serving, slice and serve.

Standard

Bacon Fried Rabbit

The difference between Edna Lewis’ book The Taste of Country Cooking and countless other cookbooks is she truly celebrates food. Not only is it a celebration but it is the gospel of farm to table eating, a hymn of fresh, great tasting, whole food that should be sung loudly as the new testament of eating seasonally. In short, it just might save your soul and at the very least it is extremely soul satisfying.

What drew me in the first time I opened the book was a breakfast menu that simply read Fall Breakfast and the second item listed in the menu was smothered rabbit. As if this wasn’t enough the first time I made Miss Lewis’s pear preserves I became teary eyed because it reminded me of the taste of a long-forgotten-that-was-now-brought-to-mind memory of my grandmother and the pear preserves she made.

When you realize this was published in 1976 it becomes apparent this is a last bastion to how rural America once ate. It isn’t the French influenced food made in a California restaurant kitchen that now stands as the talisman of sustainable eating, but rather, it is 100% American food made with ingredients had on hand and in season. It was written at a time when women wanted out of the kitchen instead of in and the burger joint was still a treat but unfortunately fast becoming a standard.

The book is not a retrospective of days past and food that is dated by out of style trends but it is a classic that is as current and in touch today, maybe even more so,  as it was when written.

Miss Lewis does nothing short of pen a rural American classic that treats food with respect and knowledge of how to use the ingredients at hand and get the most out of them. There is nothing fussy about her food and there needn’t be because its simplicity and freshness is what makes it delicious.

In short if you care about sustainable local food you should get yourself a copy. It will fast become your how to manual.

This recipe is based loosely on Miss Lewis’s fried chicken recipe.

Bacon Fried Rabbit

Serves 4

2 fryer rabbits, cut into 6 to 8 pieces

1 piece of slab bacon, cut about 1/4 inch thick

2 cups flour, seasoned with 2 teaspoons black pepper, 1 teaspoon each of thyme and paprika, and 1 teaspoon of salt

buttermilk

peanut oil

kosher salt

1. Season the rabbit with salt and set it aside to let the salt dissolve into the meat.

2. In a large cast iron Dutch oven add enough oil to come up the side by no more than a third. Add the bacon.

3. Turn the heat to medium high and place your fry thermometer into the oil. Place the seasoned flour into a plastic bag with the rabbit. Toss the rabbit around to give it a good coating. Remove the pieces from the flour and let them soak a in the buttermilk. Remove each piece and let the excess drip off. Put the pieces back into the flour for their final coat. Don’t do this to far in advance or the coating gets brittle when fried.

4. When the temperature gets to 350F˚ remove the bacon if it is crispy and start frying the rabbit until golden brown and delicious. If you need to do this in batches do. Don’t over crowd the pot or you will have a greasy mess. So to do this heat the oven to 250˚F. As the rabbit pieces come out of the grease place them on a sheet tray fitted with a wire rack and keep them in the oven till all are done.

5. Serve.

WebRep
currentVote
noRating
noWeight
cookbooks you should own, foodquarterly recipes, The Library, Wild Game

Edna Lewis: The Taste of Country Cooking

Image