Beef, Beef/Veal, Easy, Gluten-free, Grill, Grilling, Sandwiches

Building a Better Burger

If you think about it, a hamburger is nothing more than a sausage without a casing. Once you accept this notion, you open yourself up to endless burger possibilities! I mean really, there are as many burger recipes as there are cooks. Everyone has their own little tweaks and a go-to recipe.

With that being said, I am not going to sit here and try to convince you this is a recipe for the best hamburger in the world — even though it is — because someone will undoubtedly draw a line in the sand, slap me with gloves in hand, and challenge me to a duel. It’s inevitable. Continue reading

Standard
Gluten-free, Grains/Legumes, Kitchen Tips, One-pots, Stocks & Basics, Vegetarian

A Simple Pot Of Beans (And Tips For Pressure Cooking Them)

©Tom Hirschfeld 2016 all rights reserved

©Tom Hirschfeld 2016 all rights reserved

Just about anything can be cooked in a pressure cooker. It does lots of things well. Stews, roasts, soups and one pots all come to the table hot and delicious. Even so, what really keeps the pressure cooker on the stove top is the basics. A pressure cooker cooks beans, grains, rice, and stocks effortlessly and it cooks them perfect every time. A pressure cooker is a natural in the kitchen. Not only that, as everybody knows, the pressure cooker saves time and when it comes to cooking beans it saves lots of time.

Bean Myths

We live in a world of bean myths. A world where bits of anecdotal information is passed from one generation of cooks to another. Dried beans carry suitcases full of informational baggage around with each and every pound. But what is truth and what is fiction and how should it all be sorted out?

Dried beans

There are a lot of choices when it comes to the kinds of beans you choose to cook. There are all the traditional beans -‑ black, pinto, garbanzo, navy, and kidney but there are also limitless kinds of heirloom beans with fancy names like Tiger Eye, Eye of the Goat, and Snowcap. There are even more.

When combined with a grain, more often then not rice, beans make a complete protein. This makes beans one of the least expensive healthy foods to put onto the stove. Combine them with a few spices and herbs and it becomes a flavorful dish the whole family will love.

To buy the best beans frequent a grocery that has a high turnover of dried beans. The newer the bean the better it cooks. Beans that have been around for a long time might not ever soften no matter how long you cook them. It pays to pay a little extra for good quality beans.

There are other legumes too. Split peas, lentils, and field peas cook up just as wonderfully in a pressure cooker as any of their cousins mentioned above. These legumes don’t need any kind of soak either, they can go right into the pot and cook in no time at all.

To Soak or Not to Soak?

This is a personal question. It is up to the cook whether or not to soak the beans overnight. In pressure cooker you do not need to soak the beans but there may be reasons why you want to.

One reason would be how are the beans going to be used. If they are to be pureed soaking isn’t necessary but if they are to be left whole a pressure cooker often splits beans leaving them cracked. If this is important then soak the beans.

Under pressure dried beans are cooked in minutes. Not something that can happen when they are cooked traditionally. The question becomes one of digestibility. If the beans are soaked a good deal of the gas causing chemical, phytic acid, is leached out into the soaking water which is discarded and fresh water is then added for cooking. If gastrointestinal issues are a factor presoaking is mandatory.

So while you can eliminate the soaking water when pressure cooking here is another reason it might not be a good idea. Almost any presoaked bean cooks in 10 to 14 minutes in a pressure cooker. That is what is amazing. Cooked delicious beans in such a short amount of time!

A Quick Soak

If you should forget to soak you beans you can still get a pot of beans to the table with a quick soak. Simply put the amount of beans you want to cook into the pressure cooker and for every 1 cup of beans add 4 cups of water. Bring the water to a boil and lock on the pressure cooker lid. Bring to pressure and set a timer for 2 minutes. When the timer sound turn off the heat and let the beans sit for 20 minutes or until the pressure has released. Drain the soaking liquid and proceed.

Salt

There is an old wives tale about salt and beans. It says that salting beans extends their cooking time and makes the beans tough. It does not. Salting beans is paramount to great tasting beans. It is best to salt them during the soak time. About 2 teaspoons of salt per 4 cups of water is sufficient.

Foaming

Foaming is always a concern when using a pressure cooker. Foam carries particulate which can lodge and clog the pressure valves. It is best to add a tablespoon of oil or fat to the cooking liquid. This will help to prevent foaming. It is also best to use a natural or cold water release beans for the same reasons.

When To Add Acids

Tomato sauce and vinegars are often added to beans for flavor. The acids in these products can cause the beans to toughen and take longer to cook. It all depends on how much you add. A can of tomato sauce is going to affect the cooking time, a tablespoon probably not. Nevertheless, it is always best to add any of these products toward the end of the cooking time.

Baking Soda

There is no good reason to add baking soda to beans.


A Simple Pot Of Beans
2 cups pinto beans, rinsed and picked over for debris soaked in 8 cups of salted water for 4 hours to overnight
1 small yellow onion, peeled, small dice (about 3/4 cup)
3 garlic cloves, minced (about 1 TB.)
1 tsp. kosher salt
1 bay leaf
[1/2] tsp. fresh ground black pepper

  1. Drain the beans into a colander and strain. Rinse the beans.
  2. Place the beans into a 6 quart (5.51l) or larger pressure cooker. Add enough water to cover the beans by about 1-inch (2.5cm) about 5 or 6 cups.
  3. Add onion, cloves, garlic, salt, bay leaf, and pepper to the pot. Bring the water to a boil over medium high heat (traditional)/high(electric).
  4. Lock on the lid, bring the pressure to level 2(traditional)/high (electric). Set a timer for 10 to 12 minutes.
  5. After the time sounds either perform a natural or quick release. Serve or cool and refrigerate beans until needed.
Standard
pro tip, Vegetables

Hydrating Droopy Vegetables

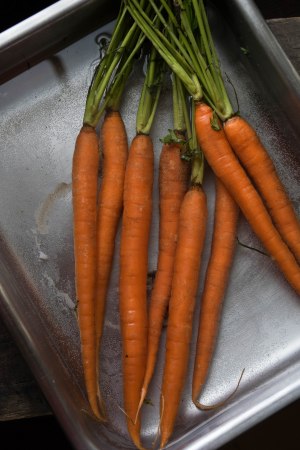
DSC_0686While it is not ever my first choice, hydrating droopy vegetables is worth the effort if your vegetables aren’t too far gone.  I am not talking about trying to save rancid moldy vegetables but rather the carrots I bought yesterday that were crisp, fresh and gorgeous but somehow, within a 24 hour span in the fridge, have gone wilty, maybe even beyond wilty but nowhere near rotten.

It pains me to throw out food.  Generally I would make a stock with vegetables like this just to use them up but I was really counting on this particular gorgeous bunch carrots for dinner.  I wanted to roast them in a high heat oven, taste their sugary goodness alongside a perfect roast chicken, but not now.  At the end of an hour in a hot oven they would be nothing but mush. Continue reading

Standard
Dinner, dog-eared, Easy, Main Dishes, Seafood, Short Time

Greek Style Shrimp in Tomato Sauce (+ 10 Tips to Better Sautéing)

Greek Style Shrimp There is something wonderful about a one-pan sauté. Sure, a quick dinner and easy clean-up would be enough to pass muster for most, but what I love is how wonderfully delicious dinner becomes as you build flavors in the pan. Starting at the bottom of the pan, there is an order to how things go; it is not a dump-it-and-go process. Continue reading

Standard
Desserts

Shoofly Pie, with or without gluten

Shoofly Pie

In the dessert world, there is a whole mess of what I like to call pantry pies: pecan, pumpkin, the chess family, derby, custards (like sugar cream), and last but not least, shoofly (or its aliases: shoo-fly, molasses, sorghum, or Montgomery). All of them are good with coffee, exceptional for breakfast, and of course, we all know that they are standards at the Thanksgiving table. 

The least known of this group is the shoofly. While most have heard of it, few, I will wager, have eaten it. Maybe it’s all the molasses, which can be overwhelming, or maybe it’s because it isn’t much known outside of Pennsylvania Dutch country and a few select pockets of the South. Continue reading

Standard
Braised, Medium Time, Moderate, Recipes, Side Dishes, Vegetables

The Virtues of Routine and Braised Cabbage

I like repetition. It guides me from one task to another. Like how in the morning I’ll make my wife’s coffee exactly the same way and take it to her while she is getting ready for work before making my own. Then I’ll pack the kids’ school lunches, followed by preparing breakfast, and every Tuesday, I go to the grocery store immediately after the kids get on the school bus.

I follow a routine when I go to the grocery, too. The automatic doors swoosh open like the welcoming arms of an old friend as I enter, and I wonder who the first person I’ll see will be. A stranger? A familiar face? What will they look like and will they be smiling? Which fruits and vegetables are right up front this week and who made the covers of the gossip rags at the checkout line? All pressing questions, I know.

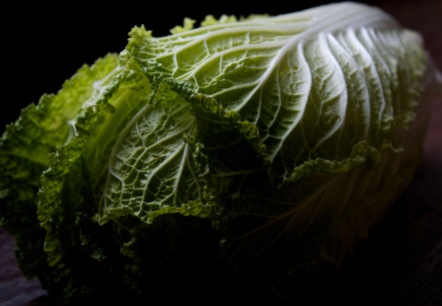
But the other day I broke routine, for an observation. As usual, the endcap to the vegetable aisle was full of cabbage — red cabbage, green cabbage, some Napa and even Savoy. What occurred to me was that this endcap is always full, always a mountain in fact, of cabbage. It wasn’t just replenished either — they don’t restock until 9:30. I am nosy too, and often leer into peoples’ carts just to see what they are eating and, I can assure you, I don’t often see cabbage tucked into carts, other than those few days cabbage gets its due during the corned beef holidays. So why is this end cap continually dedicated to an Everest of cabbage? Are cabbage eaters late night shoppers? Is it for looks much in the same way as a mannequin in a window at Saks? Who, besides me, buys cabbage?

Yes, I eat cabbage and I am proud of it. So much so that I could write a poem, Mon Petite Chou, and it would be an ode to the poorest of poor man’s food. That is what it is though isn’t it: poor man’s food? Maybe this is why it is shunned, that to buy it means you are nearly destitute, for why else would you eat it? I used to feel this way, and never really encountered cabbage other than as a creamy coleslaw side to an all-you-can-eat catfish dinner — and even then I usually stayed closer to the hush puppies and fries.

That is, until Paula Wolfert’s book The Cooking of Southwest France introduced me to the possibilities. And there are many when it comes to cabbage — braised, steamed, creamed, and stir-fried. Cabbage, now, has become a part of my routine.

Tips for Choosing, Storing, and Preparing Cabbage

Pick a hefty cabbage.
I grow a lot of cabbage and I am always amazed at how solid cabbages can be, like a bowling ball. So when I do buy them at the store I look for very solid cabbages that feel heavy.

Look for purple leaves
Typically, the grocer cuts off the outer leaves and trims the stems. As the cabbage ages, they trim them up so to keep them looking pretty. You know you have a fresh cabbage when the leafy outer purple green leaves are still there.

Keep it cool
Cabbages can last a long time in the fridge. Make sure the outside leaves are free of moisture and wrap the cabbage in plastic wrap, then store the cabbage in the crisper. I like cabbage because it stores well, so I use up all the perishable veggies early in the week saving the sturdy ones, cabbage, for the end of the week.

©Tom Hirschfeld 2016 all rights reserved

©Tom Hirschfeld 2016 all rights reserved

Simple Braised Cabbage

Serves 6

3 ounces pancetta, small dice
2 tablespoons unsalted butter
1 cup yellow onion, small dice
1/3 cup celery, small dice
2 teaspoons garlic, minced
1/2 cup carrots, peeled, small dice
6 to 8 cups Savoy cabbage, julienned
2 bay leaves
Scrape or two fresh nutmeg
1 tablespoon flat leaf parsley, minced
1 1/2 teaspoon fresh thyme, minced

  1. Place a 3 1/2-quart Dutch oven with a lid over medium heat. Add the pancetta and render its fat. You want a gentle render here. You aren’t trying to crisp the pancetta, just render.
  2. Add the butter and, once it has melted, add the onion, celery, garlic, and carrots. Sweat the vegetables until they are tender, don’t let them brown. Add the cabbage, bay leaves, and season with salt and pepper. Turn the cabbage to coat the leaves in the fat. Add a quarter cup of water and put the lid on the pot. Reduce the heat to low. Cook the cabbage until tender, about 25 to 30 minutes. Add a scrape or two of nutmeg, the parsley, and thyme. Stir to combine, then serve.
Standard
Kitchen Tips

Non-Slip Drawer Liners

Non-Slip Drawer Liner

Sure, I know, every chef says you should just wet a kitchen towel and put it under your cutting board, or bowl or whatever you don’t want to slide around.  Well that is easy to say when you have an industrial laundry service and who wants a wet towel sitting under their cutting board anyway.  If it’s a wood cutting board it will warp and then weaken the glue joints.  So here is your new best friend, non-slip drawer lining.

Ever make Hollandaise sauce?  Need an extra hand while whisking the butter into the eggs but no one is around?  Put that non-slip liner under the bowl and you can go hands free.  Why not just get the mixing bowls with the rubber bottoms?  Well, sometimes I have good reason to put my mixing bowls right on the stove over low heat, or I need to make an ad hoc double boiler so the rubber bottom is out of the question for me.

Got a Kitchen Aid stand mixer that likes to walk across the counter.  Keep it from wandering with the non-slip liner.

Keep your couch from dancing around the wood floor every time someone sits down.

Got any other non-slip liner tips?  Post them here.

You can wash the liners by placing them flat in the sink and spraying them off with the sink sprayer or by using a soft sponge.  Hang them over the sink divider to drip dry.

Standard