Chicken and Poultry, Medium Time, Moderate, Recipes

Smothered Chicken

foodquarterlyServes 4

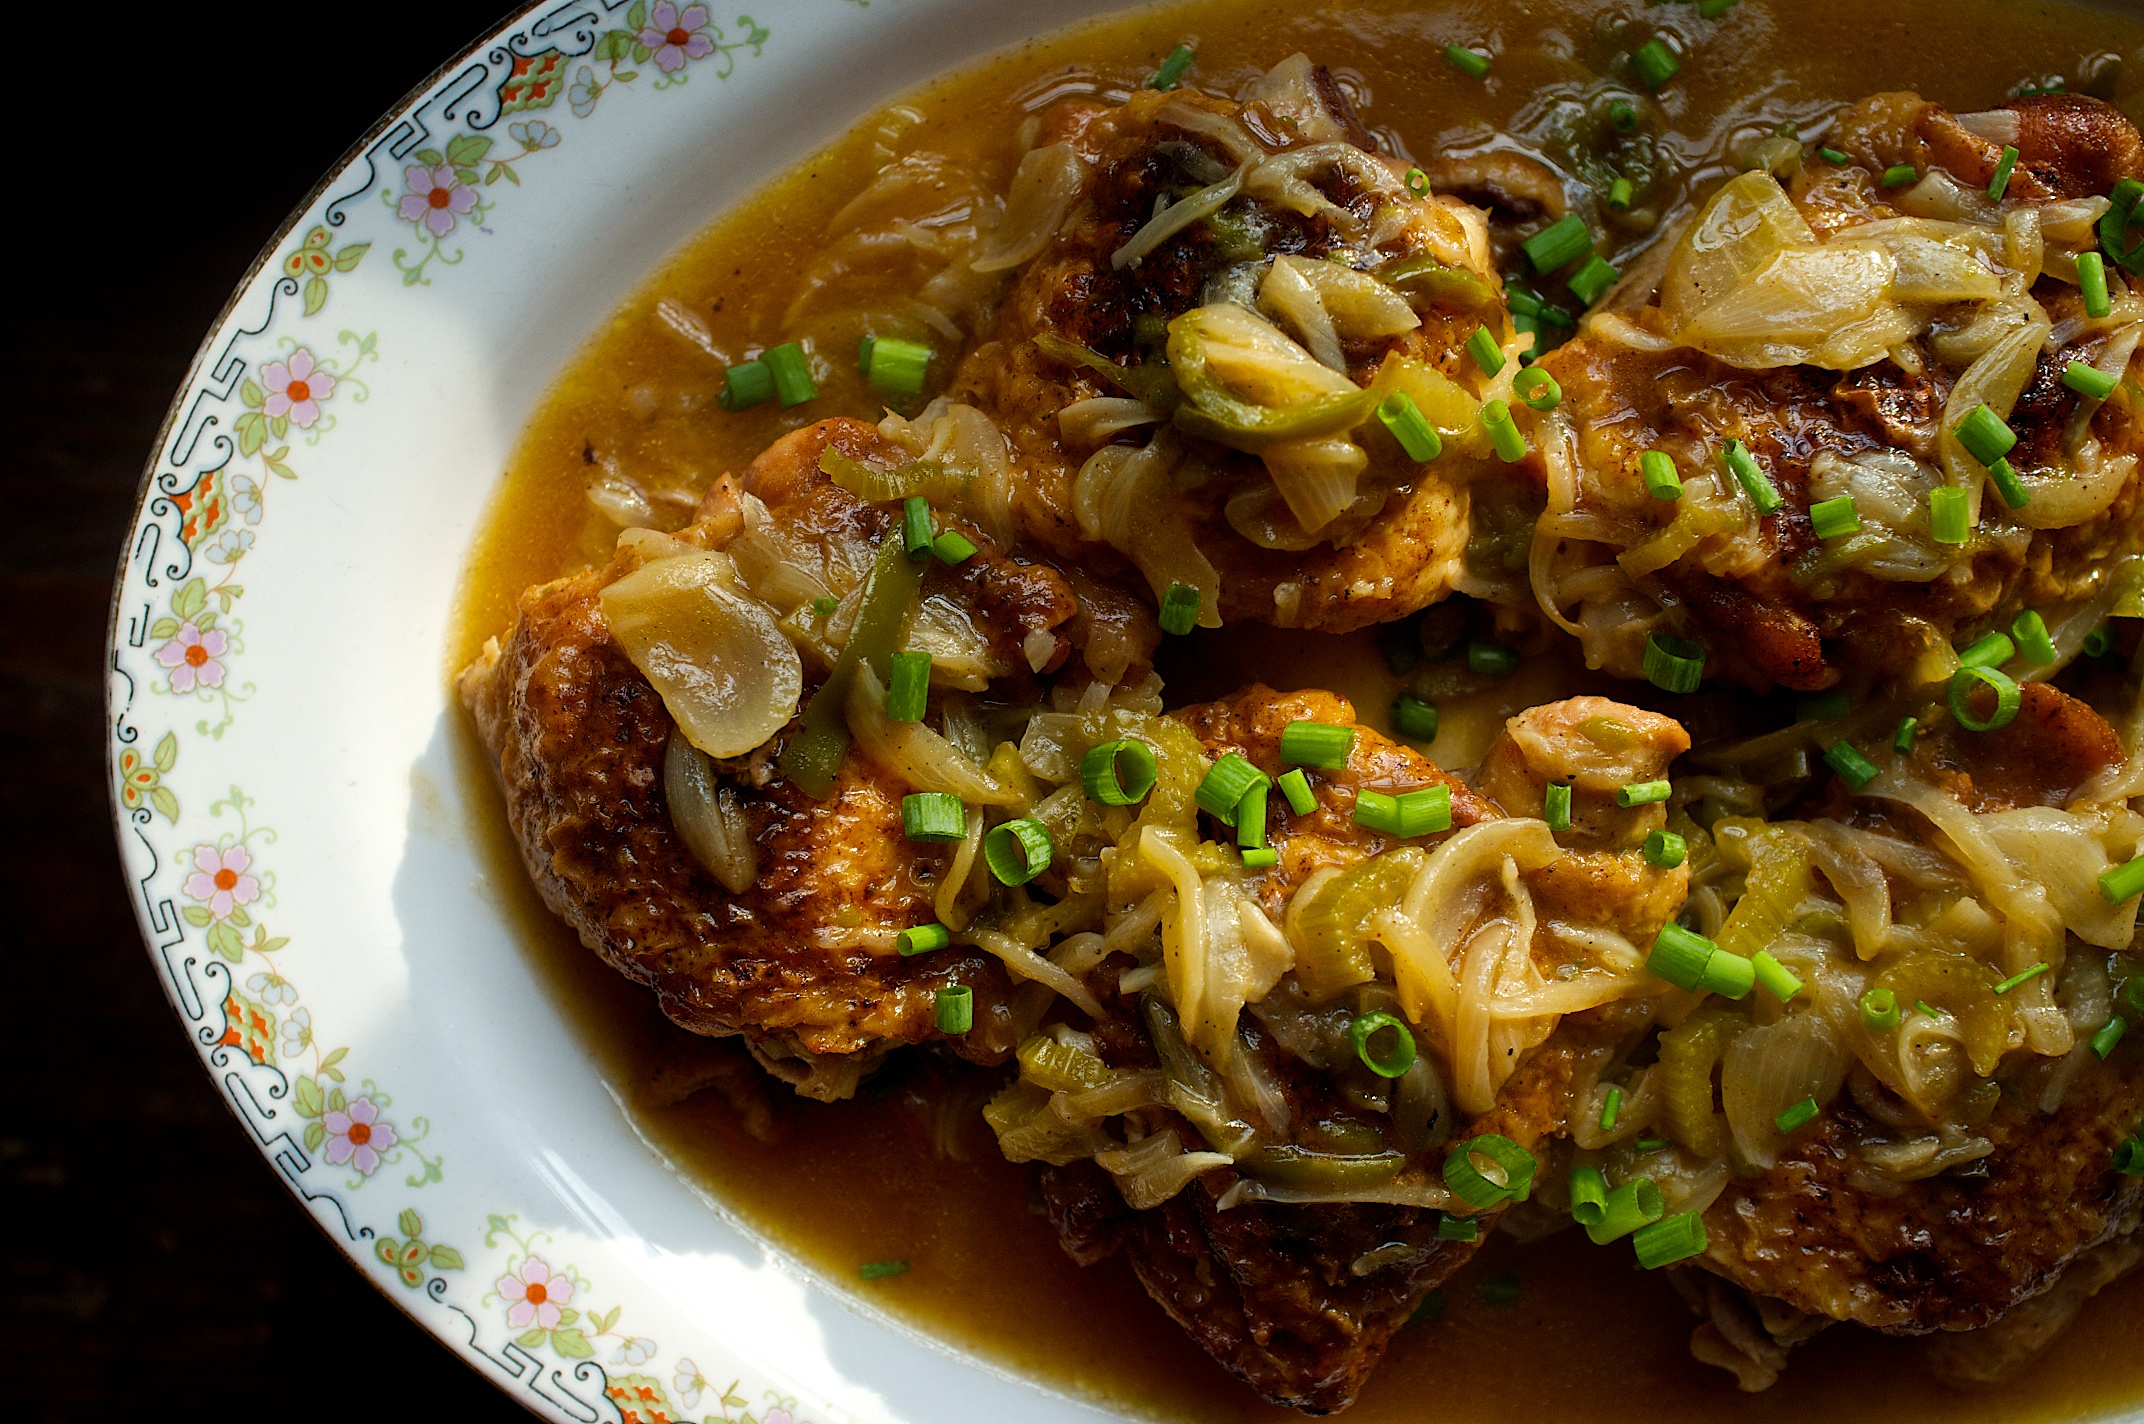
Smothered chicken makes for a comforting Sunday dinner.  It’s the kind of dinner that will bring the kids back on Sundays after they have left home to be on their own.  The combination of peppers, onions and celery (known as the trinity in cooking) is very warming and homey.

It is a great dish to serve over boiled rice and if you were to serve green beans and biscuits with it you would, or at least I would, be in heaven.

Cost to make this dinner entree:

  • package of 8 chicken thighs $4.83
  • 1 bunch of celery $1.29
  • 2 onions .74 cents
  • 1 head of garlic .49 cents
  • 1 bell pepper $1.00
  • Loose cost of vegetable oil, spices, salt and flour $1.00
  • Total cost to make the dinner: $9.35

For the spice mix:

2 tablespoons paprika

1 teaspoon garlic powder

1/2 teaspoon black pepper

For the chicken:

6 to 8 bone-in skin-on chicken thighs

2 cups yellow onions, julienned

3/4 cups green bell peppers, julienned

3/4 cups celery, julienned

water

kosher salt

fresh ground black pepper

1/4 cup green onions, chopped

2 1/2 tablespoons flour

vegetable oil

2 garlic cloves, peeled and minced

1. Combine all the spice ingredients in a small bowl. Season the chicken thighs on all sides with salt and then with the spice mixture. You may or may not have extra spice depending on how heavy your hand is and whether or not you season 6 or 8 thighs.

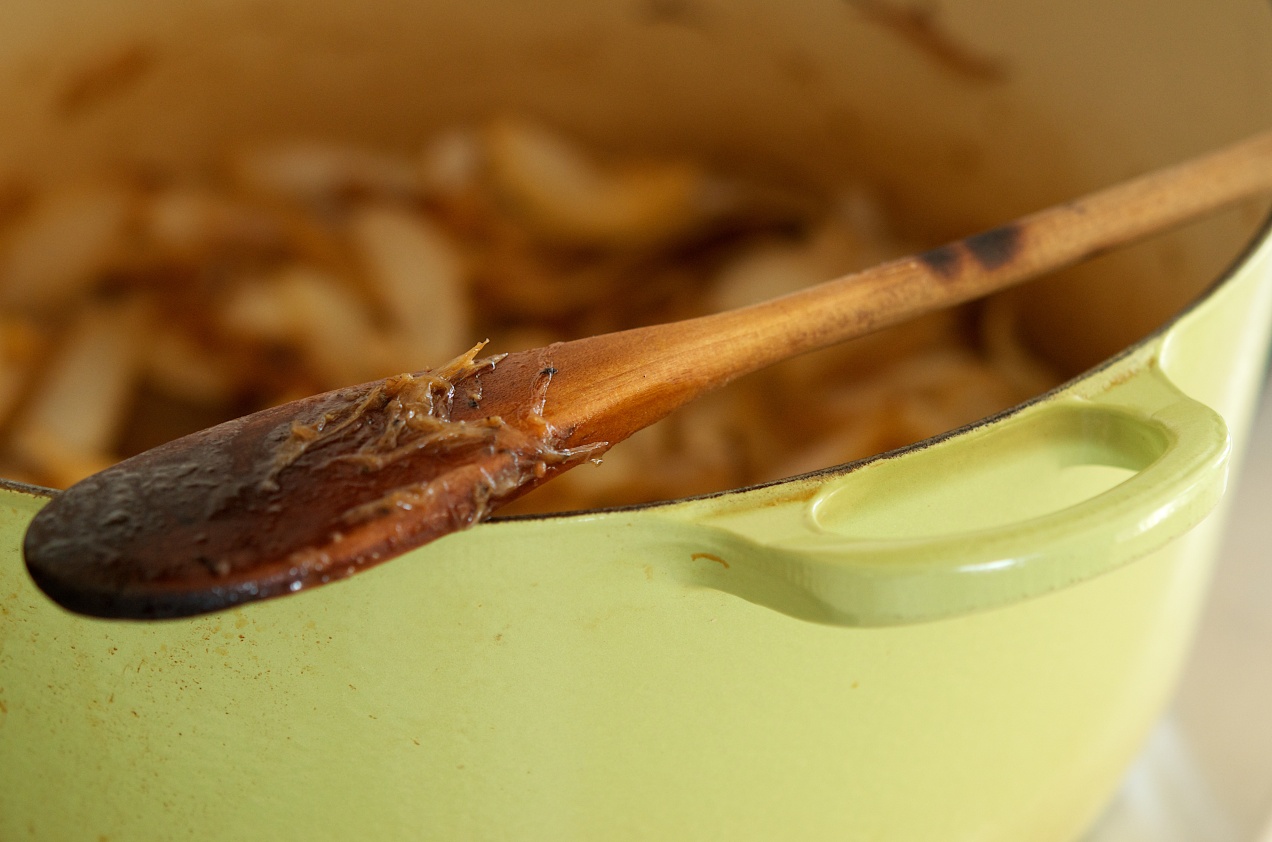
2. Place a heavy, large sauté pan over medium high heat. Add enough oil to the pan to easily coat the bottom completely. When it is hot add the thighs skin side down and brown them deeply. Once they are brown do the same to the other side.

3. Remove the thighs to a plate. Add the onions, bell pepper and celery to the pan. Season them with salt and pepper. If the pan is to hot turn down the heat and cook down the vegetables until they are brown and soft. Add the flour and sauté everything for a bit longer to cook out the flour flavor.

4. Add the garlic cloves and give the veggies a stir. Add the chicken thighs back to the pan and add enough water to cover the thighs by three quarters. The crispy tops should just be peeking out of the gravy. Add all but a tablespoon of the green onions to the sauce.

5. When the gravy comes to a boil reduce the heat and simmer until the chicken is cooked through and tender, this should take about thirty minutes. Season the gravy, stir and taste.

6. If the gravy is reducing to fast and getting to thick add more water and stir.  If you added more water bring the sauce to a boil and serve.

Advertisement
Standard
Grains/Legumes, Main Dishes, Noodles/pasta, Seafood

Tuna with White Beans and Spaghetti

White beans and tuna have always been combined in salads and pasta and have long been purveyor’s of pantry dinners in Italy. I have taken up the habit of pantry pasta myself and while I don’t keep many canned goods I do keep tomato sauce, tuna in olive oil, dried beans and pasta on hand.

The cheese rind is imperative here. It is to the broth what bones are to stock. Besides you know it makes you mad to have to pay for this usually unusable part. So here is your opportunity. I Always try to have at least one cheese rind on hand and just store it in the fridge amongst the other cheeses.

This is not a skillet pasta but a long simmering sauce because it takes some time to build the flavors in the beans. As with all beans everyone has their own method to their bean madness. I have tried many and the one I use yields a tender beans with tooth. That is not to say it is crunchy or undercooked but what it means is it holds its shape while being tenders. I want to know I am eating a bean when I bite into one.

I also don’t make home made pasta for this dish because this is one time were store bought spaghetti noodles are the right choice.

I served this with a green side vegetable and after the pasta served a salad, as the Italians would.

Serves 6 to 8

2 heads of garlic, the top 1/4 inch of which has been sliced off

1/2 pound white beans

4 whole cloves of garlic, peeled and trimmed

10 sun dried tomatoes (dried, not in olive oil)

water

1/2 cup yellow onion, small dice

1/4 cup carrot, small dice

1/4 cup celery, small dice

1 1/2 teaspoons fennel seed, ground

1/4 to 1/2 teaspoon red pepper flakes

2 bay leaves

1/2 cup strained tomatoes or tomato sauce

1 each 2 x 2 inch parmesan cheese rind

olive oil

kosher salt and fresh ground pepper

1/3 cup bread crumbs, toasted in olive oil then seasoned with salt and pepper then mixed

with 1 tablespoon of minced parsley

12 oz. tuna in olive oil

1 pound spaghetti, cooked according to the instructions on the box

  1. Preheat the oven to 300˚F. Place the heads of garlic in a small ovenproof dish and drizzle each with olive oil then season them with salt and pepper.
  2. Cover the dish with foil and bake the garlic for 1 hour. At the end of the hour make sure they have taken on alight tobacco color and are tender. Cook them another 15 minutes if you need to. Once they are done remove them from the oven and set them aside.
  3. Place the beans, garlic cloves and the sun dried tomatoes into a sauce pan and cover by at least 2 inches of water. Place the pan over high heat and bring it to a boil and let it boil for 2 minutes. Cover and remove the pan from the heat and let it sit covered for two hours or longer.
  4. At the end of two hours drain the beans. Rinse out the pot. Remove the sun dried tomatoes and chop them. Place the pot over medium heat and add a good 2 tablespoons of olive oil. When it is hot add the onion, carrots and celery and let them saute until they begin to become tender. Add the fennel, bay leaves and red pepper and saute until fragrant. Add the beans, sun dried tomatoes and garlic back into the pot. Cover the beans with water by 1 inch. Add the tomato sauce and cheese rind.
  5. Bring the pot to a boil then reduce the heat so the liquid is at a lazy bubble. Season them with pepper. Stir occasionally to keep anything from sticking to the bottom of the pot.
  6. Near the end of the cooking season the beans with salt to taste and take the roasted garlic and squeeze out the garlic paste then add the paste to the beans. Stir it all in and taste. Adjust the seasoning.
  7. When the beans are tender cook the pasta. Once the pasta is done drain it and immediately toss the pasta with some of the oil from the tuna. Toss the beans and pasta together.
  8. Put the pasta into a serving bowl, top with tuna crumbles and then the bread crumbs. Serve immediately.
Standard
Grains/Legumes, Side Dishes, Vegetarian

Farro and Roasted Garlic Pilaf

Farro and Roasted Garlic PilafThe term farro can be very confusing. If you look it up you will see no one really wants to pin the tail on the donkey, and as such, all the authors of the articles seem to want to avoid naming a specific grain as farro.

People really want spelt to be farro but I can say spelt is not farro. Spelt is much larger and has a sweeter flavor to me. What I have found is farro can come in different sizes, roasted, and for lack of a better term, par cooked or pearled which means it cooks quicker.

In this recipe I use piccolo farro from Anson Mills. It is easy to cook, is extremely delicious and quite honestly I have become enamored with it as well. I think I can say with all clarity it should be spelled Pharroh because it is the food of gods. It feels nourishing to eat and is such a refreshing change, or I should say replacement, from rice or potatoes.

I always cook extra and use the grain, plain, when baking bread and I plan to save the cooking water next time and use it as well.

Serves 4 to 6

1 cup farro piccola

2 heads of garlic

1 stick unsalted butter

1 tablespoon marjoram

kosher salt

fresh ground pepper

1. Preheat the oven to 325˚F. Slice the heads of garlic across the top at a point where you will remove enough to expose as many cloves as possible but not so much that you loose a lot of the head. Usually I slice off about the top third of the head. Place the heads in a small ovenproof gratin or some other dish. Smear the heads with 1/2 teaspoon of butter and then salt and pepper them. Cover tightly with foil and bake the garlic for one hour. At the end of the hour remove the foil and bake another fifteen minutes to brown up the cloves.

2. Using a strainer rinse the farro under cold water. Place the farro into a 3 quart heavy bottomed sauce pan with a lid. Cover the farro with cold water to cover by two to three inches and add a two finger pinch of salt.

3. Place the pan over high heat and bring it to a boil. Turn off the heat and cover the pan. Let the farro sit in the pan for an hour to two or until the grains have popped.

4. Use a large strainer or colander and drain the farro.

5. Wipe out the pan and put the pan back on the stove over medium low heat. Add the remaining stick of butter. Let it melt gently and then add the drained cooked farro, marjoram and squeeze the roasted garlic into the pot. Stir in the creamy soft garlic smearing it into the farro. Season the pilaf with salt and pepper to taste.

6. Once it is hot, bowl it up, and serve.

Standard
Gluten-free, Grains/Legumes, Main Dishes, Meatless Monday, Vegetarian

Pot Roasted Collards and Purple Hull Pea Fritters with Spicy Buttermilk Gravy

Pot Roasted Collard Greens and Purple Hull Pea Fritters

The one thing that stays the same around my kitchen, has been a continuous thread,  is collard greens.

Collard recipes have been prepared in many incarnations but eventually I rendered them all down the most basic of recipes.  I like collards in every fashion imaginable,  and while I can spoon potlikker right out of the pot and onto a slab of buttered cornbread, making me perfectly happy,  I have grown to like my greens best when they are pot roasted.  I used to render bacon, butter or pancetta into the pot first, the fatty crispy strips of cured pork to be fought over at dinner.   Then there came a time when I needed to make the greens vegan. I started using peanut oil and ever since it has become a fast favorite which is strange since we are big pork eaters.

What happens to greens when they are pot roasted is the natural sugars break out and much like caramelizing onions you start to build flavors that just don’t exist when collards have been boiled.  I liken the building of flavors to a fine cigar, great coffee or a complex wine.

As the thick and leathery fall collards,  greens which have taken a frost or two, cook down a toothsome quality develops that is very satisfying to eat.  You also get these rogue bits that didn’t get as much oil as they should and they become crispy and blistered which contributes a nice contrast.  A sure sign that you have roasted your greens right is the smear of brown juice that paints the bottom of the pot when you stir.

We eat greens cooked like this as part of three dinners each week, at least,  and in general Amy and I will fight over the leftovers at breakfast time.

Seves 4

For the fritters:

16 oz. field peas, cooked, either black eyed or you favorite type I used purple hull, two 14 oz. cans, drained  works too

1 cup carrots, grated

1/4 cup rice flour, or all purpose flour

2 teaspoons shallots, minced

2 teaspoons garlic, minced

1 1/2 teaspoons dried thyme

kosher salt

fresh ground pepper

For the collards:

8 to 10 cups collards, cut into 1 inch stirps, rinsed multiple times to get rid of sand and dirt

peanut oil

kosher salt

fresh ground black pepper

For the buttermilk gravy:

1 1/2 cups live culture buttermilk

1 teaspoon creole seasoning

1/2 teaspoon dried thyme

1 1/2 teaspoon shallot, peeled and minced

1 teaspoon garlic, peeled and minced

1.Heat the oven to 325˚ F. Combine all the gravy ingredients in a small bowl and mix to combine.  Set aside to let the flavors build.

2. Place a 6 quart enameled Dutch oven with a lid over medium high heat.  Add some peanut oil to the pot being generous with the peanut oil and making sure you coat the bottom of the pan plus a touch more.  Add half the greens and season them with a two finger sprinkle of salt and a few grinds of pepper.  Turn the green giving them a hot oil bath.  You want the leaves to be coated, not greasy though.  Add the rest of the greens.  Season them with salt and pepper too.  Turn them into the first batch of greens being sure they get an oil coat as well.  Put the lid on the pot, slide it into the oven and roast the collards for 1 hour and 15 minutes making sure to stir the pot at the half way point.

3. Place the cooked peas into the bowl of a food processor.  Pulse to grind the peas.  When it becomes mealy add the rest of the fritter ingredients and pulse until smooth, moist and will hold together.  The key here is to adjust the moisture content.  If it is too wet add rice flour a tablespoon at a time letting the mix rest a bit so the flour can hydrate and thicken the fritter mix.  If it is too dry add water by the tablespoon and do the same.  My way to test patties of all types is to make a patty and then throw it against the side of the mixing bowl.  If it flattens and holds its shape I am happy.

4. Once your consistency is right make 8 equal sized patties.  Place a nonstick pan over medium heat, add oil and fry the fritters until they are brown on both sides. Remove them from the pan to a brown bag lined tray.   Drain the excess grease.  Serve while hot.

Standard
Grains/Legumes, Snacks/Appetizers, Vegan, Vegetarian

Texas Caviar

The first time I had Texas caviar I was in Santa Fe.  There I think they called it Cowgirl Caviar but that might have been the name of the restaurant.  I remember lots of pictures of cowgirls.  Maybe the name of the restaurant was called Cowgirl Hall of Fame.  That seems more right to me.

Anyway.  Texas Caviar was made famous by Helen Corbitt the food director in the 1950’s for Neiman Marcus in Dallas.  Many recipes call for Italian dressing.  No.  Do not do it.  I am sorry but bottled dressings suck.  Period.  This is supposed to be fresh and vibrant and everything added is meant to highlight the creamy texture of the legumes, not hide it.

Serves 6 to 8

2 ea. 15 oz cans black eyed peas, drained and rinsed

2 tablespoons red onion, minced

2 tablespoons celery, minced

1/3 cup cilantro, minced

1 tablespoon green onions, minced

1 garlic clove, minced finely

1/3 cup red wine vinegar

1/8 cup extra virgin olive oil

1/8 cup neutral flavored oil, i.e., canola, grape seed

1 to 2 dried cayennes or chile tepins cut into thin strips with scissors

kosher salt and fresh ground black pepper

corn chips

1. Combine all the ingredients into a bowl and mix to combine. Season with salt and lots of black pepper. Taste and adjust the seasoning as necessary. This gets better as it sits, 24 hours is optimal, but will also gain more Scoville heat units so keep that in mind when you decide the amount of red pepper you want to use.

Standard
Salad, Vegetarian

Olive Salad Taverna

Olive Salad Taverna

While having never been to Greece this seems as though it would be something that you might eat at a small taverna on the Mediterranean Sea. It is sort of an “a la grecque” dish which if done right is always good to have on hand and usually are even better the second day or, at the very least, after a couple hour marinade. I think this would be good followed by some sort of Mediterranean fish dish. If you want to make this a very filling salad add some feta and a couple of pitas and you will have a meal.

SERVES 4

1 cup mixed olives

1 cup garbanzos, cooked, or rinsed canned

2 teaspoons preserved lemon, finely minced

2 teaspoons shallot, finely minced

1 garlic clove, finely minced

1 teaspoon fresh savory or thyme, minced, Richard Olney used savory with olives and I think it works really well

1/2 teaspoon chile flakes

2 tablespoons red wine vinegar

1 teaspoon pomegranate molasses

1/4 cup extra virgin olive oil

kosher salt and fresh ground black pepper

1 head butter leaf lettuce

hunks of feta and pita, optional

1. In a mixing bowl combine everything up to the olive oil. Mix everything to combine. Season it with black pepper and then add the olive oil. Stir to coat and then let the salad rest for at least 1 hour and you can even refrigerate it over night.

2. Before serving rinse the butter leaf and then using a salad spinner dry the lettuce. Place two or three leaves on each plate. Stir the salad to redistribute everything. Taste and if it needs salt add some. Divide the garbanzo/olive mixture evenly between the plates. Using a spoon drizzle some of the juice over the greens. Serve.

Standard
Side Dishes, Vegetables

Fried Green Tomatoes

More often then not, actually to many times to count, I have seen fried green tomatoes served one way, sliced, Cajun spiced and dredged almost always in cornmeal.

Then last year Amy and I went to The Publican restaurant in Chicago.  It is an everything pig restaurant.  Crispy pigs ears, everything fried in lard, boudin blanc  and, well, you get the picture.

It is great restaurant so it isn’t surprising they have amazing side dishes too.  The one that caught my attention was the fried green tomatoes.  I almost didn’t order it but,  then as I often do,  at the last minute I went back to it and did.  I was very, very happy I did.   It was simply the most delicious version of fried green tomatoes I have ever eaten.

This was a midwinter outing.  So green tomatoes at home were out, at least until summer, but I was impressed enough I looked for the recipe online and was surprised to find nothing, well,  not nothing there were zillions of fried green tomato recipes cooked like I mentioned earlier.

Nevertheless this dish resonated with me.  I made it once earlier this summer and it wasn’t to my standards.  It was really good but it just didn’t work like I wanted from a technical standpoint.  Now it is late fall and I have come back to it and this time it came out great.

It is so good for several reasons.  The tomatoes are cut into wedges which keeps them a little firmer when cooked, not tough, and you get more tomato jelly with the wedge shape then if you had a slice.  Also oatmeal and pig are like bread and butter, they just go together, and it feels good to have these two flavors co-mingling and you can accomplish this without buying buckets of lard.

It is time to share this recipe.  I hope you enjoy it.

Note: I made this gluten-free and egg free.  If you don’t need to be gluten-free or egg free then substitute in all-purpose flour for the Cup4Cup and instead of using the egg replacer use three egg whites beaten to stiff peaks.

Makes 4 servings

7 to 10 green tomatoes, about the size of a small tangerine, cut into 4 or 6 wedges

1/3 cup quick cooking oats, not instant oats

1/3 cup quick cooking oats, coarsely ground

1/2 cup Cup4Cup flour (or all-purpose flour)

1 tablespoon paprika

1 1/2 teaspoon ground garlic

2 tablespoons egg replacer mixed in a large bowl with 1/4 cup water (or 3 egg whites whipped to medium peaks, also in a large bowl)

1 teaspoon salt

1/2 teaspooon black pepper

 peanut oil for frying

1 thick slice pancetta or bacon

1. Combine the oats, flour, paprika, garlic powder salt and pepper in a large mixing bowl.

2. Heat the oven to 250˚ F.  Pour enough peanut oil into a 6 inch deep cast iron Dutch oven to come 1/3 the way up the sides of the pan.  Add the pancetta to the oil.  Place it over medium high heat and heat the oil to 375˚ F. on a fry thermometer.  Make sure to remove the pancetta when it is crispy and has rendered its fat to the oil and make sure you, as the cook, eat the pancetta because it is within the rights of every good cook to eat the best bits while standing at the stove and if the peanut gallery doesn’t like it tell them to learn how to cook.

3. When the oil is just about to temperature toss half the tomatoes with the flour mix making sure to coat the tomatoes well.  Place them into the bowl with the egg replacer or egg whites and toss them to coat.  Put them back into the flour mix and coat them well.  Remove them to a cookie cooling rack.  Repeat this step with the remaining tomatoes.

4.  If the oil is to temperature carefully add  half , or less, of the tomatoes to the oil making sure not to crowd them.  When they start to take on color and brown remove them from the hot oil, sprinkle them with salt,  and place them onto the cookie rack.  Add the rest of the uncooked tomatoes to the pot then slide the fried tomatoes into the oven to keep them warm.

5. Serve with you favorite tartar sauce, aioli, or hot sauce

Standard
Vegetables

Oven Roasted Plum Tomatoes in Olive Oil

I make these tomatoes often, mostly at the end of garden season,  and have done so ever since I opened the cover of the French Laundry cookbook and found Chef Thomas Keller’s recipe.  You can use a recipe other than Keller’s recipe but at least do as Keller does and make sure you season the tomatoes with salt and pepper before roasting them and make sure you cook them over a long period of time in a low heat oven.

I say this for a simple reason.  If they aren’t seasoned before you cook them they just aren’t very good and why go to the trouble if they aren’t going to be good, you won’t eat them and they will just sit in the fridge taking up space.  Season them agressively and you will be happy.

One thing to make note of.  I don’t peel the tomatoes until I use them.  The skin, I think, holds them together while in the jar but is really easy to peel off before you use them.

If you try them on a thin crust homemade pizza some Friday night don’t blame me when pizza is never again the same.

20110915-DSCF2320Recipe adapted from The French Laundry Cookbook

Makes 1 quart

30 to 36 Roma or San Marzano tomatoes, perfectly ripe, stemmed and halved

kosher or sea salt

fresh ground black pepper

a handful of fresh savory or thyme sprigs

extra virgin olive oil

1. Heat the oven to 275˚F. 

2. Spread to tomato halves out onto a half sheet tray lined with foil.  Season the tomatoes evenly with salt and fresh ground pepper.  Spread the savory or thyme out over the tomatoes.  Place the sheet tray into the oven.

3. Bake the tomatoes for 3 hours or until they have shrunk but still tender.  It may take longer then three hours depending on how juicy the tomatoes are to begin with.

4.  Remove the tomatoes from the oven and let them cool.

5. Once they have cooled pack them into a 1 quart jar, or a smaller jar if need be, and then use a spatula to get all the oil, accumulated juices and herbs off the tray and into the jar.  Top the jar off with olive oil to cover.

6. Store in the fridge but remember pull them out about an hour before you need them so the oil warms and you can easily remove the tomatoes without breaking them.

Standard
dog-eared, Noodles

Baked Rigatoni with Currants and Pine Nuts

Baked Rigatoni with Currants and Pine Nuts

The most beautiful San Marzano tomatoes have been coming out, by the  bushel,  of the garden.  I have been canning sauce, making paste and oven dried tomatoes like it is my civic duty to waste not one tomato.  I am loving it.

I can’t wait to open a jar of sauce in the middle of winter.  One that has a sprig of basil hidden in the middle of the red liquid like a secret ingredient.  I lift the lid with a bottle opener and it lets out the familiar gasp of home canned goods.  The smell of last summer’s sunshine rises upward to my nose.

I hoard the stuff.  I don’t want to use it now but rather save it for later.  Then I realize how stupid this is.   So I use the left over sauce, the extra that wouldn’t fill a jar and make this dish.  It is very American-Sicilian in my mind but what do I know.  Well, I know it’s good.

Note: I use a box brand in the recipe but by all means if you have a great home canned tomato sauce use it.

Makes a 9 x 13 casserole

1 pound rigatoni, cooked and cooled according to the directions on the box

3 tablespoons olive oil

2 onions, small dice about 2 cups

2 tablespoons garlic, minced

1 tablespoon balsamic vinegar

1 teaspoon pomegranate molasses

2 each 28 oz. box Pomi brand chopped tomatoes

1 pound cottage cheese, drained

2 tablespoons flat leaf parsley, minced

1/3 cup currants

1/4 cup pinenuts

1/2 cup pecorino romano

2 cups or more, mozzarella, grated

1. Heat a 3 1/2 quart heavy bottomed pot over medium heat. Add the olive oil and onions and let them sweat until they are soft and become golden around the edges.

2. Add the garlic and when it becomes fragrant add the balsamic and pomegranate syrup. Season with salt and pepper and let the liquid reduce some and then add the chopped tomatoes.

Reduce the sauce to a simmer and let the tomato become thick. It will take about an hour or so. Add the currents to the sauce about 15 minutes before you have finished cooking the sauce so the begin to soften and release some of their flavor.

3. Combine the cooked rigatoni with the cottage cheese, parsley and pecorino cheeses. I usually do this right in the pasta cooking pot after I have drained all the water from the pasta.

4. Now add the tomato sauce and mix to combine.

5. Using a little olive oil oil a 9 x 13 casserole and then pour the noodles into the dish. Top with the mozzarella and bake in a preheated 375˚ F oven for 35 to 40 minutes or until the cheese is browned nicely. About 10 minutes before it is done sprinkle the pine nuts across the top so they brown up nicely. Don’t do this any earlier or the nuts will burn.

6. Let the casserole rest for 5 to 10 minutes and then serve.

Standard