Bread, Dinner, Grains/Legumes, Morning, Noon, Vegetarian

Farmhouse Whole Wheat

There are so many different kinds of bread. You could make sourdough where you feed a starter flour to grow it and keep it alive, you can retard loaves in the refrigerator overnight, there are paté fermentes, bigas and all kinds of other preferments and sure it is great to have knowledge of all these breads but at the same time it is nice to have a tried and true everyday bread. A bread with some shelf life, a bread that little kids like and one that is good with which to make a variety of sandwiches.

For me this is that loaf. It debunked the idea that my two girls would only eat white bread. They love it. It fits into my notion that I won’t make bread that isn’t at least 75 percent whole wheat. It makes two loaves that will be around just long enough that you won’t need to throw it out because it is old.

Be sure to buy a fine grind whole wheat flour and make sure to buy it at a store with high turnover of its whole wheat. Countless times I have brought a bag home only to open it and it is rancid. Whole wheat flour should smell like a wheat field not rancid oil or some other off smell.

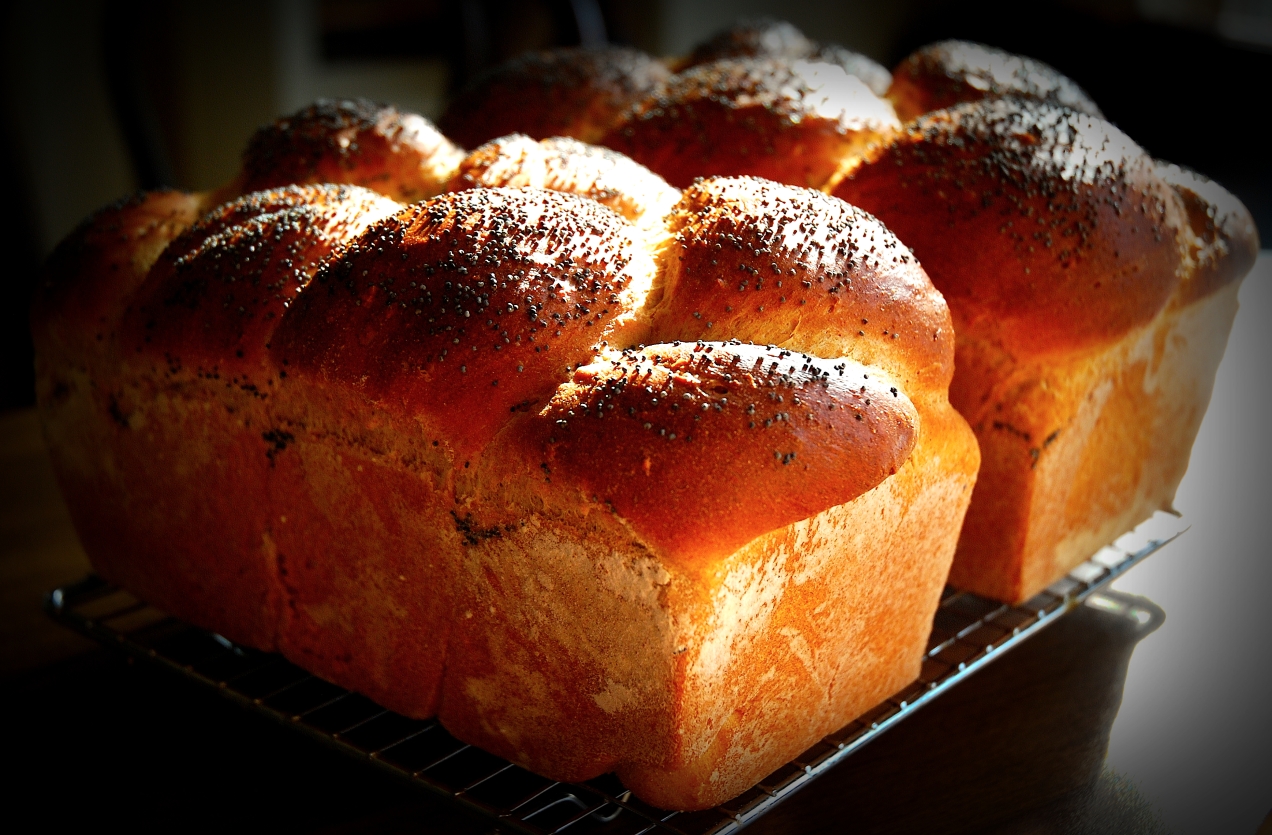
I like to braid this loaf for two reasons. One it looks pretty and two, when I make this loaf on a Sunday it is nice to bake it about two hour before dinner, remove it from the oven to cool a little, then serve it warm and let people tear off a hunk. It will tear at the braids like dinner rolls would. Continue reading

Advertisement
Standard
Chicken/Poultry, Dinner, Gluten-free, Main Dishes

Sautéed Chicken with Pepperoni and Olives

I can tell you, with great certainty, how good a restaurant is going to be by the temperature of their plates.  If I get a stone cold plate with hot food chances are the dinner will be average.  If I get a cold salad on a warm plate just out of the dish machine, again, I know the rest of my dinner has more of a chance being bad then good.  It tells me whether or not the kitchen cares.

When I worked in commercial kitchens it was a bone of contention with me and those who worked for me.  Your plates needed to be hot for hot food and cold for cold food, period.

There was a time at home, back before we had kids, when I would always warm our plates in the oven.  Probably sounds completely retentive, for all I know it might be, but I have never really given a rats butt what others think.  I did it because my wife and I enjoyed being at the table together, taking our time eating, and having some quality conversation.  Hots plates keeping your food warm is a nice touch.

We had this for dinner the other day, I warmed the plates.

Serves 2

olive oil

2 each 6 ounce boneless skinless chicken breast

1/4 cup pepperoni, 1/4 inch dice

1/4 cup Picholine olives, pitted and halved

1/4 cup tomato, diced

1/2 cup dry white wine

1 tablespoon pine nuts

1 tablespoon currants

2 teaspoons flat leaf parsley, minced

kosher salt and fresh ground pepper

1. Season the chicken on both sides with salt. 

2. Place a heavy bottomed sauté pan over medium high heat.  When the pan is hot but not smoking add enough oil to coat the bottom of the pan.  Gently lay the chicken breast, what would be skin side down, into the pan being careful not to splash hot oil.

3. Brown the chicken on both sides.  Adjust the heat as necessary to keep the oil from burning.  Once both sides have caramelized remove them to a plate or pan and let them rest.  Pour out any excess grease.

4. Meanwhile put the pan back on the heat and add the pepperoni, olives and tomato.  Stir and toss it around until fragrant then add the white wine to deglaze the pan.   Using a wooden spoon scrape up any brown bits from the bottom of the pan.  Once the wine has reduced by half add the pine nuts and currants.

5. Give everything a stir and then place the breast back into the pan.  If the liquid in the pan seems at all dry add a 1/4 cup of water.  Braise the breast until they are cooked through which shouldn’t be long if you browned them well.  Taste and adjust the seasoning, add the parsley and stir to combine. 

6. Place the chicken breast onto warm plates skin side up,  top with the sauce, serve immediately.

Standard
Cookies, Desserts, Snacks/Appetizers, Vegetarian

Depression Cookies

Sugar cookies

Yes, I could imagine a cookie just like this being created during the Great Depression.  The nutmeg lends itself to the past and makes the cookie feel like something a grandmother would make for her grandchildren on a Sunday afternoon.  She might also make it when she notices her grandchildren are a little sad.  Whatever the reason they are a cure for depression.  They will bring you out of your funk with a heavy dose of the warm and fuzzies.

MAKES 2 DOZEN

1 cup sugar

3/4 teaspoons nutmeg

1 vanilla bean, split and seeds scraped

2 cup all purpose flour

1/2 teaspoon baking powder

1/2 teaspoon Kosher salt; if you sub table salt cut it to 1/4 teaspoon

12 tablespoons unsalted butter

4 tablespoons vegetable shortening

1 tablespoon honey, something with citrus notes is good

1 large egg

1/2 cup sugar for rolling the cookies

1. Make sure you have an oven rack placed dead in the middle of your oven. Preheat the oven to 375 degrees. In a mixing bowl combine the flour, baking powder and salt. Stir it with the measuring spoon to mix.

2. Place the sugar, nutmeg and vanilla seeds into the bowl of a mixer and mix for two minutes to distibute. Turn off the mixer and add the butter and shortening. I use cold, when I squeeze it it just gives, butter because I personally think it creams better. You do not want this to look granular and you don’t want the fat to break out and look similar to cottage cheese either. It should look like ice cream just scooped from the container. Start out on low speed and when the butter starts to cream gradually increase the speed to medium and cream for about 2 minutes total.

3. Scrape down the sides with a spatula. Add the egg and mix to combine. Add the honey and mix briefly.

4. Adding the flour in thirds, to keep it from flying out of the mixing bowl, mix at low speed and mix until all is incorporated. Scrape down the sides of the bowl if necessary.

5. Place the remaining half cup of sugar into a seperate bowl. Line two 12 x 17 baking sheet pans with parchment paper.

6. Using a tablespoon or a number 40 scoop, scoop out some dough. Using your hands roll it into a ball and then roll it around in the sugar until coated. Place it onto the baking sheet. Repeat until you have 12 cookies on the tray. Using a fork, flatten the cookies to about a 1/2 inch thickness.

7. Place tray into the oven and set the timer for 10 minutes. While they are cooking roll and coat the remaining twelve cookies. When the timer goes off check the cookies. They should be browning at the edges but still light in the middle. If they’re not, leave them in the oven for another few minutes. Remove them and let them cool for 3-5 minutes before changing them to a cooling rack to finish cooling. Place the other tray of cookies into the oven and repeat this step.

Standard
Grains/Legumes, Snacks/Appetizers, Vegan, Vegetarian

Texas Caviar

The first time I had Texas caviar I was in Santa Fe.  There I think they called it Cowgirl Caviar but that might have been the name of the restaurant.  I remember lots of pictures of cowgirls.  Maybe the name of the restaurant was called Cowgirl Hall of Fame.  That seems more right to me.

Anyway.  Texas Caviar was made famous by Helen Corbitt the food director in the 1950’s for Neiman Marcus in Dallas.  Many recipes call for Italian dressing.  No.  Do not do it.  I am sorry but bottled dressings suck.  Period.  This is supposed to be fresh and vibrant and everything added is meant to highlight the creamy texture of the legumes, not hide it.

Serves 6 to 8

2 ea. 15 oz cans black eyed peas, drained and rinsed

2 tablespoons red onion, minced

2 tablespoons celery, minced

1/3 cup cilantro, minced

1 tablespoon green onions, minced

1 garlic clove, minced finely

1/3 cup red wine vinegar

1/8 cup extra virgin olive oil

1/8 cup neutral flavored oil, i.e., canola, grape seed

1 to 2 dried cayennes or chile tepins cut into thin strips with scissors

kosher salt and fresh ground black pepper

corn chips

1. Combine all the ingredients into a bowl and mix to combine. Season with salt and lots of black pepper. Taste and adjust the seasoning as necessary. This gets better as it sits, 24 hours is optimal, but will also gain more Scoville heat units so keep that in mind when you decide the amount of red pepper you want to use.

Standard
Chicken/Poultry, Main Dishes, One-pots

Bodega Chicken Curry

I like to use a wok for these kinds of dishes. Besides everyone should own a good wok. By good I am not talking about those little non-stick thingies hanging from the wall at the five and dime. Those aren’t even big enough to make a half order of fried rice for a toddler.

What I am talking about is wandering down to your local restaurant supply store and heading for their wok section. They have blue carbon steel woks that are cheap, will last forever, are non-stick by nature and come in all sizes. I have seen one big enough that I could take a hot bath in it if I wanted but all we are looking for is a 16 to 18 inch wok. That is the measurement from one side of the rim to the other. It will seem huge but when you go to make fried rice for a family of four it all the sudden won’t seem big enough.

I use a wok for deep frying, making stews like this, fried rice and countless other dishes. It is the shape of the wok that makes it work so well.

In the end you can use a heavy bottomed pot, cast iron pot or enameled Dutch oven to make this. I just happen to like a wok.

I serve this with rice and peas and pot roasted collard greens. Roti is a must.

Serves 4

Island style curry powder:

1 tablespoon each, whole cumin, coriander, black pepper, anise seed, and brown mustard seeds

2 teaspoons whole allspice berries

1 tablespoon ground tumeric

1. Toast all the seeds and berries until fragrant in a skillet placed over medium heat. Remove them from the pan and let the spices cool.

Once cooled place everything including the turmeric into a spice grinder and grind to a fine grind.

For the curry:

peanut or canola oil

8 chicken drumsticks or thighs, skin on or off your call

2 yellow onions, about 3 1/2 cups, julienned

1 1/2 tablespoons fresh ginger, peeled and minced

1/4 cup fresh garlic, peeled, trimmed and sliced thinly

4 to 6 tablespoons curry powder

8 to 10 fingerling potatoes, peeled and chunked

6 to 8 sprigs of thyme

2 cups chicken stock

1 cup water

if you want to add heat add habanero, jalapeno or whatever diced hot pepper you want.

kosher salt and fresh ground black pepper

1. Place a wok or heavy bottomed pot over medium high heat. Add enough oil to coat the pan. Add the drumsticks or thighs and brown them on all sides. Then remove them from the pan to a plate.

2. Add the onions and more oil it needed and cook until the onions begin to soften. Add the ginger, garlic and curry powder (if you want heat add peppers now). Cook until fragrant.

3. Add the stock and water. Add the chicken back to the pot along with the potatoes and thyme. Season with salt and pepper

4. Bring the liquid to a boil and then reduce the heat to a simmer. Cover, stir now and again and simmer until tender. About 30 to 45 minutes. Taste and adjust the seasoning.

5. Serve.

Standard