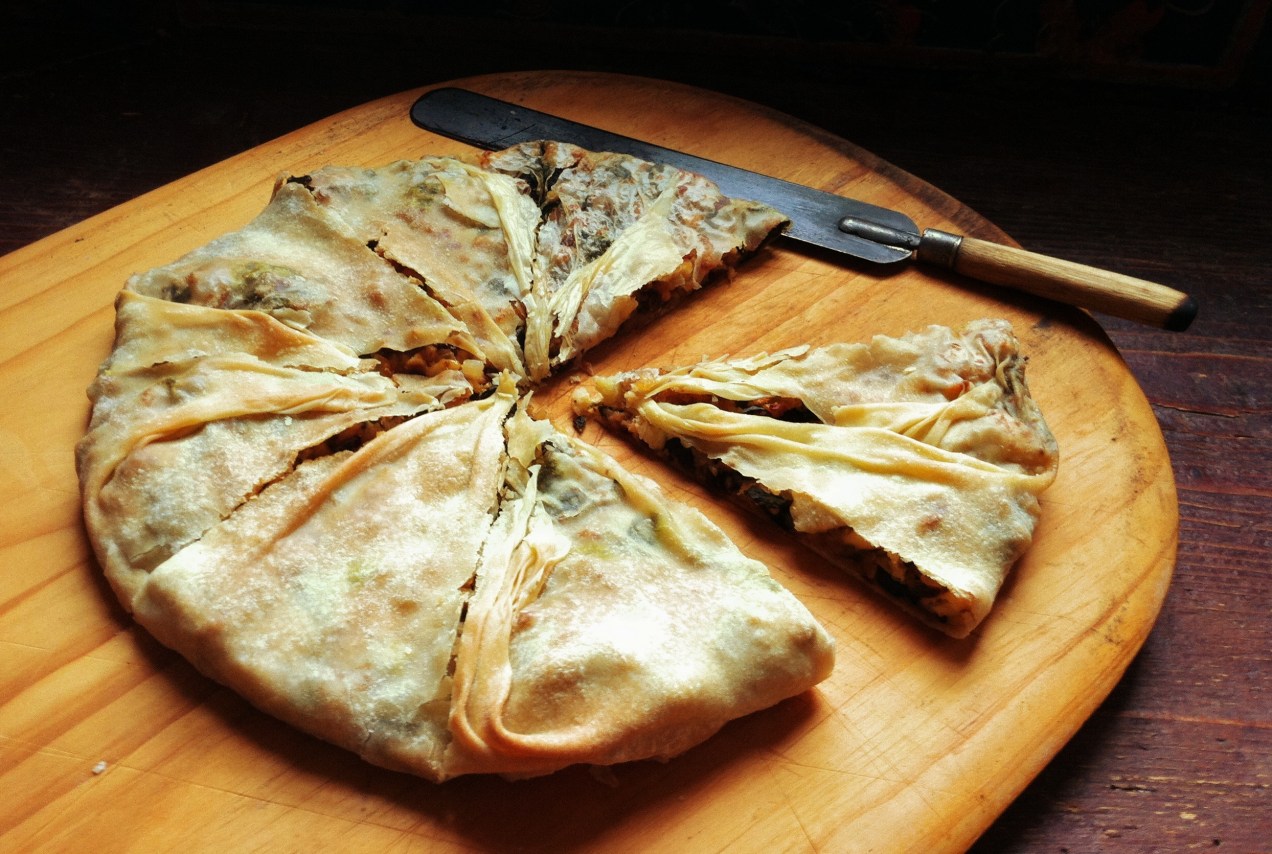
Spinach and Feta Pie
Most people, it seems, remember the first time they ate spinach pie. Chances are you were at an ethnic restaurant, maybe on your first food adventure to a Greek establishment, feeling continental and worldly. Maybe you where in college and eating at the local hippie restaurant where they also introduced you to North African Peanut Stew with Tofu, bags of tamari pepitas and herbal tea.
The joint smelled of clove cigarettes, Turkish coffee and sweat. Hank Williams and Lefty Frizzell tunes rained down from the speakers above and mingled with the smell of patchouli making you think it was the birth of cool. There are newspapers hanging on bamboo racks, a clothesline drying out today’s laundry, for anyone to pick up and read. People played checkers and chess and snacked on millet muffins.
It was a health food restaurant without a non-smoking section. In the kitchen Moosewood cookbooks lined the shelf above the stove. The food was vegetarian except on Sunday morning when all of campus lined up for a killer breakfast that included sausage and bacon. Sunday being the only day the restaurant actually made money.
Just sitting in the pine high-backs with a good cup of your daily grind and a used but unopened copy of The Sheltering Sky, lying face up on the table, made you feel smart. Lots of broody wannabes wrapped in black with their berets mimicking Kerouac, but really, all of them a breed of Caulfield. Each with tattered composition notebooks lying open to the first page waiting for that initial first stroke of the pen.
It was an ocean of intellectual doldrums, bitter hopes and angst filled dreams. Everyone who came here was looking for more than a good meal. They had either lost the wind in their sails or were looking for an intellectual soul mate with which to share their troubled waters, if not their sheets.
And, yet, you came back. Somehow at this place in time, the angst ridden shirt feels comfortable, it fits and you fit or maybe the spinach pie, really, was just that good.
Serves 4 as part of a larger meal
For the strudel dough:
1 1/4 cup all purpose flour dough
1 tablespoon plus 2 teaspoons safflower oil
5 to 7 tablespoons cold water
♣
For the filling:
2 tablespoons olive oil
2 cups yellow onion, small dice
1 1/2 tablespoons garlic, minced
two 1 x 4 inch pieces of orange zist
1 teaspoon finely grated orange zest
10 oz. baby spinach, washed
1 cup fresh bread crumbs
1/2 cup crumbled feta cheese
1/2 to 1 teaspoon red pepper flakes
2 tablespoons currants
kosher salt and fresh ground black pepper
1. Place the flour, safflower oil and water into the bowl of a mixer and using the paddle attachment mix the ingredients until they become well combined and elastic.
2. Turn the dough out and need it till it is satiny smooth. Wrap in plastic wrap and let it rest for 1 hour. You can make the dough up to a day in advance and store it, wrapped, in the fridge. Just be sure to let it come to room temperature before shaping the dough.
3. Place a large saute pan over medium high heat and add the olive oil. Add the orange zest strips and let them bubble away for a few minutes. Remove the strips.
4. Add the onions and cook them until they just start to turn golden at the edges. Season them lightly with salt and pepper, remember feta is salty. Add the garlic and chili flakes and stir until fragrant.
5. Add the spinach and turn it with tongs in the pan to coat it with oil and to wilt it. Once it is mostly wilted turn it out into a clean kitchen towel that is set in a colander. Pull the edges of the towel together then place your tongs around the towel, like a hair pin, and use the tongs to twist the towel into a ball around the spinach and squeeze out the moisture.
6. Place the pan back over the heat and add a more olive oil. Add the bread crumbs and brown them. Add the grated zest and the cooked spinach to the pan and mix to combine. Remove from the heat and cool. Once cool add the feta and currants. Taste and adjust the seasoning as necessary.
7. Preheat the oven to 375 ˚F.
8. A large 18 x 24 wood cutting board works great for this but the corner of a counter or table will do as well. Cover the cutting board with a large, non terry cloth, towel or apron. Dust it with flour.
9. Flatten the dough into an 8 inch disk and dust it with flour. Work it out with you hands into a larger disk. 12 to 14 inches round. Now, hook an edge of the dough onto a corner of the board. Using the backs of your hands, tucked under the dough, start stretching and pulling, gently, the underside of the side of the dough towards the empty corners of the board. If you get a whole just pinch the dough back together and continue. You can stretch the thicker edges from time to time with your hands. Keep stretching from the underside of the dough with the backs of you hands until the dough is transparant and eggshell thin and is 18 x 18 inches.
10. Sprinkle the dough with a little bit of olive oil and using a pastry brush gently and lightly coat the dough with the oil.
11. Lift the dough into a 12 inch non-stick saute pan leaving the edges of the dough to hang over the sides. Trim off the thick edges of the dough with scissors.
13. Place the filling ingredients into the center of the dough. Grab the edges of the dough and bring then to the center of the pan. Pinch the center and twist the dough. Pinch of the dough ball in the center.
14. Bake in the preheated oven for 45 minutes or until brown and crusty. Remove from the oven and let the pie rest for 20 minutes. Cut into wedges and serve.