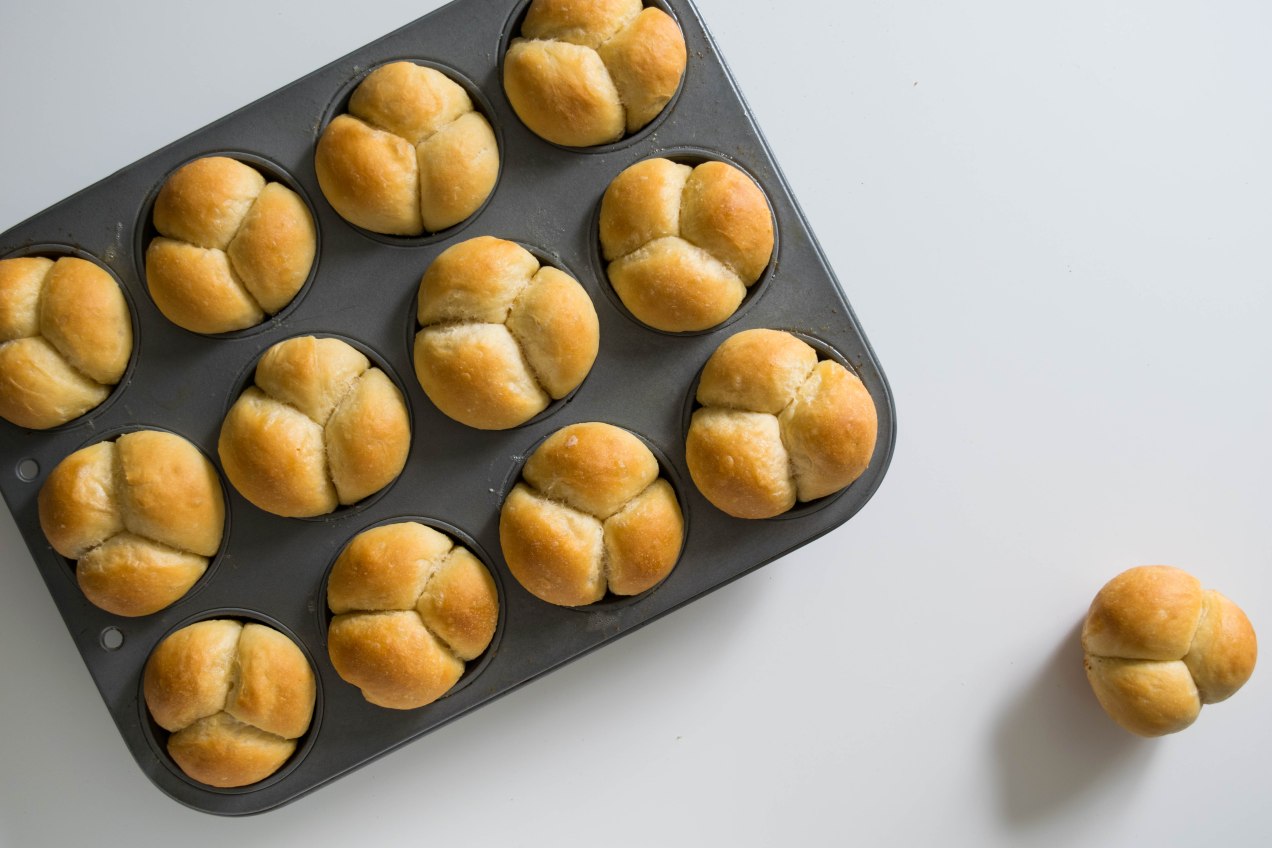
Bread, Breakfast, Sandwiches, Vegetarian

Peanut Butter, Butter, and Lingonberry Jam Sandwiches

I went to my regular restaurant, the one I favor over all others. I ordered my favorite dish only to be disappointed. It lead me to wonder why it wasn’t as good as usual. In my head I worried the quality of the restaurant was slipping, are they ordering a lower quality product that isn’t as flavorful? To be fair I stopped and thought it might be me, maybe my taste buds were off that night. It happens.

I think a lot about taste, not so much about the five taste receptors; bitter, sour, sweet, salty, and umami but more about the law of diminishing returns. Take for instance today, I am making a tomato soup that clearly states in its recipe title it’s the only recipe I will ever need. I hope it’s that good and it may well be delicious but I also know after I eat it 5 or 6 times I will more then likely move on to another recipe for tomato soup, say, the world’s best tomato soup. Knowing my taste buds become familiar with tastes, if the food on the plate in front of me becomes to familiar at some point it is less likely to excite me. I also know there are people who don’t care. They eat simply to survive, their interest lies elsewhere, or they want the familiar. I don’t.

How many times have you eaten a peanut butter and jelly sandwich? Are you ever excited to eat them anymore? As a kid I could eat them breakfast lunch and dinner if my mother would have let me but they began to wear thin and I started to eat ham sandwiches or turkey, sometimes a grilled cheese. As an adult there are times I get a kick out of eating a PBJ but they never seem to match the intensity and joy of eating them as a child. I compare it to going back to the neighborhood sledding hill as an adult only to find what at one time seemed like the Rocky mountains now looks more like a speed bump. Childhood can make experiences larger then life.

Peanut  Butter, Butter, and Lingonberry Jam Sandwiches

While I am and always have been enamored with simple foods that use honest ingredients it doesn’t mean I don’t stray from time to time. My cooking has become more about good technique and nurturing rather then showmanship. In a way simple food is like going back to my childhood experiences without fear of being disappointed.

1 brioche hamburger bun or 2 slices of brioche, toasted almost burnt

1 1/2 tablespoons Skippy Natural Peanut Butter

2 unsalted butter pats, about 2 teaspoons at room temperature

1 tablespoon lingonberry jam or red currant jam

Maldon Sea Salt (this is a big flaky sea salt meant for finishing dishes)

  1. When the bread has cooled enough not to melt the peanut butter spread the peanut butter evenly across the bottom bun.  On the top bun smear the butter and top it with the lignonberry jam.
  2. Sprinkle the peanut butter with Maldon salt to taste.  Smush the top bun onto the bottom and serve.


Advertisement
Standard
Bread, Easy, Meatless Monday, Sandwiches, Stocks & Basics, Uncategorized, Vegetarian

Cheats, Lies, and Hucksters (How to Cook a God Damned Grilled Cheese Sandwich)

As a kid, learning to cook a fried egg and bologna sandwich is like teaching me how to load a gun without establishing any safety guidelines. While the combination of griddled bread, egg yolk, mayonnaise, seared bologna, and American cheese is white trash foie gras, perfecting the fried bologna without having made a grilled cheese, well, it is Picasso without a Blue Period, Miles Davis having composed no song book before Bitches Brew. There is no reference and no history, a drifting ship with no anchor. At the time, I didn’t understand the damage done by using the cliff notes without ever reaching for the novel.

But here we are, in that time of year when we think about grilled cheese. It is the age old discussion, as if we forgot the combination to the safe and it needs to be cracked again, of how to cheat a grilled cheese. As if the answers locked away are new kinds of offerings; in a waffle maker, with an iron, use mayonnaise instead of butter, or turn a toaster on its side.

So I am just going to say it, I am tired of hucksters and cheats. It pains me to be over sold or even worse, blatantly lied too. I am not putting myself on a pedestal, far be it from me to cast stones, I am no practicing perfectionist and neither am I an Elmer Gantry. I have my faults and I try to be honest about them. Even so, when I witness an egregious wrong I can’t keep my mouth shut. After all, I can’t have my children wondering around this world thinking they will be able to succeed without ever learning the fundamentals. It happens everywhere and now, of all arenas, the kitchen is under attack.

Why can’t we just learn to cook a god damned grilled cheese? What are we afraid of, actually learning how to cook? There are so many basics to be learned by placing a sauté pan onto the stove to griddle two pieces of bread with cheese stuck in between and yet at all costs we try to avoid it. I don’t care what kind of cheese is put between the slices of bread, I don’t even care what kind of bread you use but I do care that you know how the different kinds of bread are going to react to the heat, that types of bread with more sugars and fats are going to brown faster then lean breads made with nothing more then water, flour, and yeast. Or that certain kinds of cheese are so stringy when you go to take the first bite every bit of the cheese is going to come along with it.

Cheats and shortcuts are wonderful but only after you know how to cook the original dish in the tried and true fashion, only after you have mastered the grilled cheese is it okay to riff on it. If you ignore, or fail to recognize, the subtle nuances of cooking you can follow a recipe to the T and still have it fail. It is because there are so many variables that can lead you down the path to disappointment that it becomes imperative to learn how to cook, which is wildly different from simply following a recipe.

DSC_1312

Grilled Cheese Sandwich (makes 2 sandwiches)

4 slices Pullman bread
1 1/2 cups gruyere cheese, grated
1 1/2 teaspoons prepared horseradish
1 tablespoon green onion, minced
a splash of heavy cream
fresh ground black pepper
unsalted butter, softened

1. Combine the grated gruyere, horseradish, green onions, and a splash cream in a medium sized bowl. Add a grind or two of fresh ground black pepper. Mix everything with a spoon to combine.

2. Place a 12-inch sauté pan over medium heat. Liberally butter one side of each of the pieces of bread making sure to cover the whole surface. Place the bread, buttered side down into the pan. Top each piece with one quarter of the cheese mixture. Turn the heat to medium low.

3. Once the cheese begins to compress and soften check the bottom of the bread. If it is browning to fast turn the heat down. Once the bread is browned and the cheese melted put the sandwiches together. Cut the sandwiches into 4 crusty cheese sticks and serve.


Standard
best in the world, Bread, Easy, Sandwiches, Seafood

Pan Bagnat – Summer’s Best Sandwich

DSC_0785In a sense, to smush, press, or mash a sandwich could feel redundant but it’s not.  It is a tool employed to make certain kinds of sandwiches better.  Case in point, a Cuban, panini, a shooter’s sandwich, and pan bagnat.

I love all these sandwiches.  Classics, each and everyone.

In the heat of summer, I rely on the pan bagnat, which when translated means bathed bread.  It is a vegetable based sandwich from the south of France, it is light and I find it refreshing.  Often the ingredients list is patterned after a Salad Nicoise subbing in anchovies for the tuna.  For me I like to use omega-3 oil rich sardines but use whatever tinned fish you fancy.

The sandwich is built in layers, wrapped tightly in plastic wrap, and then some sort of weight is put on top of it.  At my house the sandwich gets sandwiched between sheet trays and the milk and juice jugs set on top compress it.  Because the sandwich is lightly salted and weighted after a couple of hours under pressure a lot of liquid is released only to be soaked back up by the bread.

And that’s the genius of this sandwich.  In my experience it never gets soggy but instead it becomes meltingly tender, the juices mingle, and in the end this makes for a perfect sandwich on a hot summer day.

Pan Bagnat (makes 1 sandwich)

a 6-inch (15.25cm) piece of French baguette

1 tin skinless, bonleless, sardines in oil

1 small cucumber, peeled

1 medium sized tomato, sliced

5 or 6 thinly sliced red onion rings, skin removed

8 picholine olives or olive of you choice

salsa verde

mayonnaise

kosher salt

fresh ground black pepper

  1. Slice the baguette in half lengthwise.  On one piece of the bread coat the interior with mayonnaise.  On the other spread out a tablespoon or two of salsa verde.
  2. Using the peeler, peel thin strips of cucumber, 10 or more of them.  Lay them in an even layer across the salsa verde side.  Give the cucumbers a sprinkle of salt.
  3. Top the cucumber with the sardines, on top of the sardines lay out the tomatoes.  Season the tomatoes with a sprinkle of salt and fresh ground black pepper.
  4. Top the tomato with red onion.  Place the olives onto the mayonnaise so they stick.
  5. Place the olive/mayonnaise bread on top of the sandwich.  Wrap it tightly with plastic wrap and then either place a brick on top, a sheet tray with weight, something heavy.  Let the sandwich remain weighted for at least three hours to overnight.
  6. To serve remove the plastic wrap, slice on the diagonal, and serve with a glass of chilled dry white wine.


Standard


I often wonder what makes a recipe so good it goes viral. I am sure it’s lots of factors. Sometimes it’s the recipe itself, other times it is what the author expresses in words through their post, and sometimes it is simply because the author is very famous. This recipe, originally posted on the blog My New Roots, has shown up on lots of other sites and was even a Genius Recipe on Food 52, and rightly so.  At the very least it has gone viral in my circles.

There are lots of things to like about this bread, like stacking it with thinly sliced crisp cucumbers, topped with oily mackerel, shallots, and parsley like in the picture above.  I also like it with thick cut bacon and peas shoots, or simply toasted and topped with butter and lingonberry jam.  It is delicious bread.  I even bake it on my Big Green Egg to give it a more authentic, and Danish, baked-in-the-dying-embers of a wood fired oven flavor.

My only problem is if I make the loaf of bread following the original recipe it comes up short. I heard the same words of disappointment from others who tried it too. The bread can be fussy, difficult to cut, crumbles, and becomes dry.  Many I know have given up making it.

DSC_0426

One of my favorite ways to top this bread is with thin slices of cucmber, mackeral, parsley, and shallot.

I am sure the loaf bakes up perfect and to the satisfaction of many people every time. It doesn’t for me, but I understand when it comes to cooking and baking there are so many variables that to place fault elsewhere is simply not taking responsibility for ones own abilities. After all, it is up to the cook to get what they want from a recipe.  It is why you need to know how to cook rather then simply follow directions.  Just like different musicians playing the same piece of sheet music. The song sounds very different depending on the players abilities.  It is only because there are so many things about this loaf of bread I like that I stuck with it, experimented with it, until I got the loaf of bread I wanted, until I heard the song I wanted to hear.

I didn’t change much, although I used pumpkin seeds instead of sunflower and ground psyllium instead of seeds and I ground a portion of the oats and pumpkin seeds to create a finer crumb in the end product.  And while I use coconut oil in some recipes I didn’t use it here nor did I use maple syrup but instead brown rice syrup was substituted.   For me all these small touches made for a more manageable loaf in the end.

The fact is, made from the original recipe this loaf of bread is delicious, the taste is very satisfying, nutty, feels good to eat, and it is nourishing.  I simply made adjustments which gave me the product  I wanted to eat.  Rest assured though,  for those on a restricted diet, and those that aren’t, this seed bread is an important find.  It’s worth practicing to get it right.

_TJH0960

Seed bread packed into a pate mold and waiting to be wrapped up for a rest before baking. Notice the parchment handles.

Seed Bread

This recipe creates a less delicate loaf.

Seed and Grain Bread (adapted from My New Roots)

1 cup unsalted pumpkin seeds (1/2 cup coarsely ground)
1/2 cup golden flax meal, ground
1/2 cup walnuts
1 1/2 cups rolled oats ( I generally grind 1/2 cup coarsely in a coffee grinder )
2 tablespoons chia seeds
3 tablespoons powdered psyllium
1 teaspoon kosher salt
1 tablespoons brown rice syrup or whatever syrup you have and want to use
3 tablespoons spectrum vegetable shortening (it’s palm oil and non-hydrogentated) or unsalted butter
1 1/2 cups hot water

1. Combine all the ingredients in a bowl. Using your hands work the mass until the shortening or butter and the other ingredients are evenly distributed.
2. Line a pate mold, or small loaf pan, with parchment. To remove air bubbles, literally, pack the dough into a 3 x 4 x 10 pate mold. Wrap the whole thing in plastic wrap and let it sit for 1 to 2 hours.
3, Heat the oven to 350˚F. Remove the plastic wrap, place the loaf pan onto a baking sheet and bake the bread for 25 minutes.
4. At the end of the baking time remove the tray from the oven and using excess parchment paper as handle lift the loaf from the pan. Place the loaf, with the parchment still under it, back onto the sheet tray and bake the bread for another 20 minutes.
5. When the timer sounds, roll the loaf so that a new side is flush with the sheet tray. Bake another twenty minutes. Do this until all four sides have been baked against the sheet tray.
6. Remove from the oven and let the bread cool completely before cutting.
7. The bread is best toasted. Store in the fridge wrapped in plastic wrap.

Note: recently I baked a loaf on my Big Green Egg. It is a fantastic way to bake this loaf. Much like it might be baked in a shop in Europe using the dying embers of a wood fired oven.

Bread, dog-eared, Gluten-free, Grains/Legumes, Medium Time, Moderate, Sandwiches, Vegetarian

A Life-Changing Loaf of Bread (Redux)

Image
Bread, Dinner, Grains and Legumes, Thanksgiving, Vegetarian

Dinner Rolls and a Bonus Southern White Loaf

I have been, and will continue to be a believer in simple good recipes that follow great technique.  I often feel as though complicated directions and hard to find ingredients set us up for disappointment and failure. Don’t get me wrong.  I understand the law of diminishing return.  That today’s worlds best recipe will be boring tomorrow.

We need to search out new tastes, techniques and flavors but it is also important to return to the classics.  For me, I also like to share my childhood favorites with my children.  These rolls are a part of me.  They connect me to my past, and by sharing them, they connect me to my children. Continue reading

Standard
Bread, dog-eared, Gluten-free

Biscuits with Ramp and Giblet Gravy

Biscuits and Gravy

There are foods in each state that should be considered regional treasures.  In Indiana the two that readily come to mind are breaded pork tenderloins as big as your head and biscuits and gravy.  Here in my home state I have had lots of variations on both dishes.  When it comes to biscuits and gravy though the variations only vary in what goes under the creamy sausage and peppery gravy.  You can count on the gravy staying the same.

Now I have traveled.  On my travels I have eaten in many mom and pop diners, hole in the walls, and everywhere in between and I have had subtle variations on the gravy.  In New Mexico for example they use chilis.  Still the base is a cream gravy.

There is a place on the outskirts of Nashville, TN called the Loveless Cafe and Hotel.  I am sure it started as a mom and pop place but as it caught on, they make their own sausage, jams and biscuits by hand, with the Nashville stars it became busy.  By the time I enjoyed a breakfast  there the only star you might see was in one of the multitude of photographs on the wall.

Nevertheless the breakfast were good,  a nice mix of rural Tennessee, and it didn’t take two seconds for me to know what I was ordering.  They offered four different kinds of gravy for your biscuits and the one that caught my desire was the giblet gravy.  It must run in my veins because I can’t not order a dish when it incorporates giblets.

So here is my Ode to Loveless.  It is a spring dish, it  is what we call Sunday brunch and it will channel your inner granny.  You will be all the better for it.

Biscuits with Ramp and Giblet Gravy ( serves 4 )

For the biscuits click here.

For the gravy:

1 quart homemade chicken stock or unsalted store bought

2 tablespoons flour, rice or wheat

2 tablespoons unsalted butter

1 bunch of ramps, white parts only, cleaned and chopped

1 each poultry heart, liver and gizzard, chopped finely

salt

fresh ground black pepper

chives

1. In a 2 quart heavy bottomed sauce pan melt the butter over medium heat.  Once it is melted stir in the flour with a wooden spoon.  Use a wooden spoon sometime metal will react with the pot and you will get a gray gravy.  Constantly stir the flour until it begins to color.  Once it is tan, keep stirring to avoid clumps, add the giblets and ramps.  Stir some more.

2. Add the stock, be careful it will bubble and spit.  Stir the gravy until it comes back to a boil.  Reduce the heat to low and let it simmer until reduced by half.

3. Make the biscuits.

4. Taste the gravy and add salt and pepper to taste and stir to combine.

5. When the biscuits are done and the gravy hot, serve topped with chives.

Standard
Bread, Cooking School, dog-eared, Gluten-free

Saving Grace Biscuits

Saving Grace Biscuits

Back when I thought I could eat gluten I was a biscuit hound.  It was nothing for me to scarf down two or three.  I have been known to forgo the rest of dinner for a good biscuit.  I always considered myself a connoisseur, from angel biscuits to crescents or buttermilk to sweet potato I think I have made them all.  Some of them were more fussy to make then others and all always in need of a light hand and a quick touch to keep them from being tough.

This biscuit is what I call a redneck biscuit and  I call them this with fondness.  They are a working mom’s weeknight biscuit.  They come together quickly and without worry and they lack nothing other then fussiness.  There is nothing in the instructions about overworking the dough, you don’t need to look for a cornmeal texture in the flour, there is nothing about spacing the biscuits perfectly or about flakiness or making sure you cut the edges cleanly for a good rise.  No they are pretty much cream, add the liquid, stir and scoop.Saving Grace Biscuits

They are inspired by Shirley Coriher’s Touch-of-Grace biscuits which I started making just before I found out I couldn’t eat gluten.  They are the kind of biscuits that are gooey in the middle, they aren’t layered but are tender and airy.  They are the kind of biscuit you might find at a really good diner.   You can imagine this old dogs disappointment when I had to stop eating them.  The thing is about 4 months ago I started playing around with and making gluten-free biscuits.  While I found many I liked, I went nuts for none.

Then I got a burr up my craw and decided I wanted to make Shirley’s biscuits but gluten-free.  It wasn’t all that tough, or I should say, maybe I got lucky.  I found a recipe on Bob’s Redmill and, using it as a base and replicating what I knew about Mrs. Coriher’s biscuits, well,  low and behold I struck biscuit gold.

In all honesty I like the flavor of this biscuit better then the original.  The sorghum flour has such a great flavor.  One of the big bonus’s if there are any left, which is a rarity around here, is they hold well into the next day or two.

Saving Grace Biscuits (inspired by Shirley Coriher’s Touch-of-Grace Biscuits)

1 cup white sorghum flour

1/2 cup potato starch

1/2 cup tapioca flour

1 teaspoon sugar

1 1/2 tablespoons baking powder

1 teaspoon kosher salt

1/2 cup unsalted butter

1 1/2 to 1  3/4 cups buttermilk

1. Heat the oven to 450˚F.  

2. In a bowl combine the dry ingredients.

3. Cube the butter and add it to the flour.  Using your hands work it into the flour until there are no big hunks of butter left.

4. Add the buttermilk and stir with a wooden spoon,  The batter will be very loose, it should barely hold its shape before  slowly begins spreading.

5. Liberally butter an eight inch cake pan.  Using a half cup ice cream scoop, scoop up a ball of dough and turn it out into the pan close to the edge.  Continue turning out biscuits working your way around the outside first leaving room for the seventh and final biscuit in the middle.

6. Bake the biscuits for 23 minutes or until browned on top.  When you remove them from the oven they will drop.  That is OK.

7. Serve with lots of butter.

Standard
Bread, Difficult, Long Time, Recipes

Daily Bread

I like this bread because it uses leftovers.  What do I mean by leftovers?  My girls don’t like heels and crusts. Sure I could force them to eat them, could throw them out or I could trim them off and save them for other uses.  I could make bread crumbs or, for instance, I could make this loaf of bread.

It is pretty amazing when you think about it.  Bread never wears out, you can use the same crumbs again and again in this loaf and its structure is always the same.

As long as you dry it properly, use breads without seeds, fruit or nuts, the uses of bread become endless but I really like the fact that I am not wasting anything.

It takes time to learn how to make a good loaf of bread.  The good news is if it doesn’t work out perfectly the loaf is more then likely still really delicious and good to eat.  So jump in and start practicing.

Recipe based on a recipe by Peter Reinhart in his book Brother Juniper’s Bread. 

  • King Arthur Bread Flour  $3.98 for a 5 pound bag = 28 cents per cup
  • 1 packet instant dry yeast = 24 cents
  • total cost to make this loaf of bread = $1.00

Makes one 2 pound loaf                                                                                                                    

2 cups dried stale old bread crumbs

2 cups water

1 .25 oz. packet instant dry yeast or 1 tablespoon

1 tablespoon kosher salt

2 1/2 cups bread flour

1. In a large mixing bowl combine the bread crumbs with to cups of water.  Let the bread soak up all the water.  This will take about an hour and you can let it soak for 4 hours.  Make the bread fit your schedule.

2. Sprinkle the yeast over the top and then stir it around and into the damp bread crumbs.  Let is sit for 2 to 5 minutes to hydrate the yeast.  Add the salt and bread flour.

3. Using a heavy duty wooden spoon mix the flour and crumbs until it forms a ball.  Dump the ball onto the counter and start kneading.  Knead the dough until it becomes smooth and elastic.  This will take at least 5 minutes.

4. Form the dough into a ball and put it back into the mixing bowl.  Cover it with a damp towel and set the bowl in a warm draft free place.  The back of the stove is usually good.

5. Set a timer for 1 hour.  At the end of the hour the dough should have doubled in size.  If not let it proof a little longer.  Remove the dough to the counter and knead it to degas it then shape it into a ball.

6. Place the dough into a 8 inch  cake pan that has been oiled and dusted with flour.  To dust the pan smear a small amount of oil onto all interior surfaces of the pan.  Add a tablespoon of flour and shake it around and tilt the pan to get the flour up the sides.  This will keep the bread from sticking to the pan.  Cover the bread and put it back in the warm place you had it.

7. Let the bread rise until it is peaking over the top of the pan by an inch.  This will take 30 to 40 minutes.  About 15 minutes into the final rise turn on the oven to 375˚ F.

8.  You can dust the top of the loaf with flour, cut a slash in it or just put it in the oven and bake it for 50 minutes.  Remove it from the oven then remove it from the pan to a cookie rack.  Let the bread cool completely. Slice and serve.

Standard
Bread, Dinner, Grains/Legumes, Morning, Noon, Vegetarian

Farmhouse Whole Wheat

There are so many different kinds of bread. You could make sourdough where you feed a starter flour to grow it and keep it alive, you can retard loaves in the refrigerator overnight, there are paté fermentes, bigas and all kinds of other preferments and sure it is great to have knowledge of all these breads but at the same time it is nice to have a tried and true everyday bread. A bread with some shelf life, a bread that little kids like and one that is good with which to make a variety of sandwiches.

For me this is that loaf. It debunked the idea that my two girls would only eat white bread. They love it. It fits into my notion that I won’t make bread that isn’t at least 75 percent whole wheat. It makes two loaves that will be around just long enough that you won’t need to throw it out because it is old.

Be sure to buy a fine grind whole wheat flour and make sure to buy it at a store with high turnover of its whole wheat. Countless times I have brought a bag home only to open it and it is rancid. Whole wheat flour should smell like a wheat field not rancid oil or some other off smell.

I like to braid this loaf for two reasons. One it looks pretty and two, when I make this loaf on a Sunday it is nice to bake it about two hour before dinner, remove it from the oven to cool a little, then serve it warm and let people tear off a hunk. It will tear at the braids like dinner rolls would. Continue reading

Standard
Bread, Dinner, Gluten-free

Yellow Corn Tortillas

Yellow Corn TortillasThese are home made corn tortillas.  A skill every cook should learn and teach their family.  These little disks of goodness have fed countless billions over the centuries.  If you have ever seen someone make these by patting them out into perfect rounds using their hands you will be fascinated and then appalled that these kinds of skills and cultural heritage are being lost to kitchens daily. Continue reading

Standard
Bread

Dinner Rolls

Dinner Rolls

First off don’t ask the host where they bought them. I mean, please, that is like rolling up a wet towel and smacking someone in the ass. It is the exact same insult as asking someone where they bought their meat after they have served you and you have eaten the best steak of your life. People do it to cooks all the time. I want to tell them it was road kill an hour ago. To those that do this do you understand what you are saying. Do I need to explain it is not a compliment to tell someone, “anyone could do what you just did as long as they know the right place to shop.” I know there was a time when this might have been a compliment but I still haven’t figured out when that was .

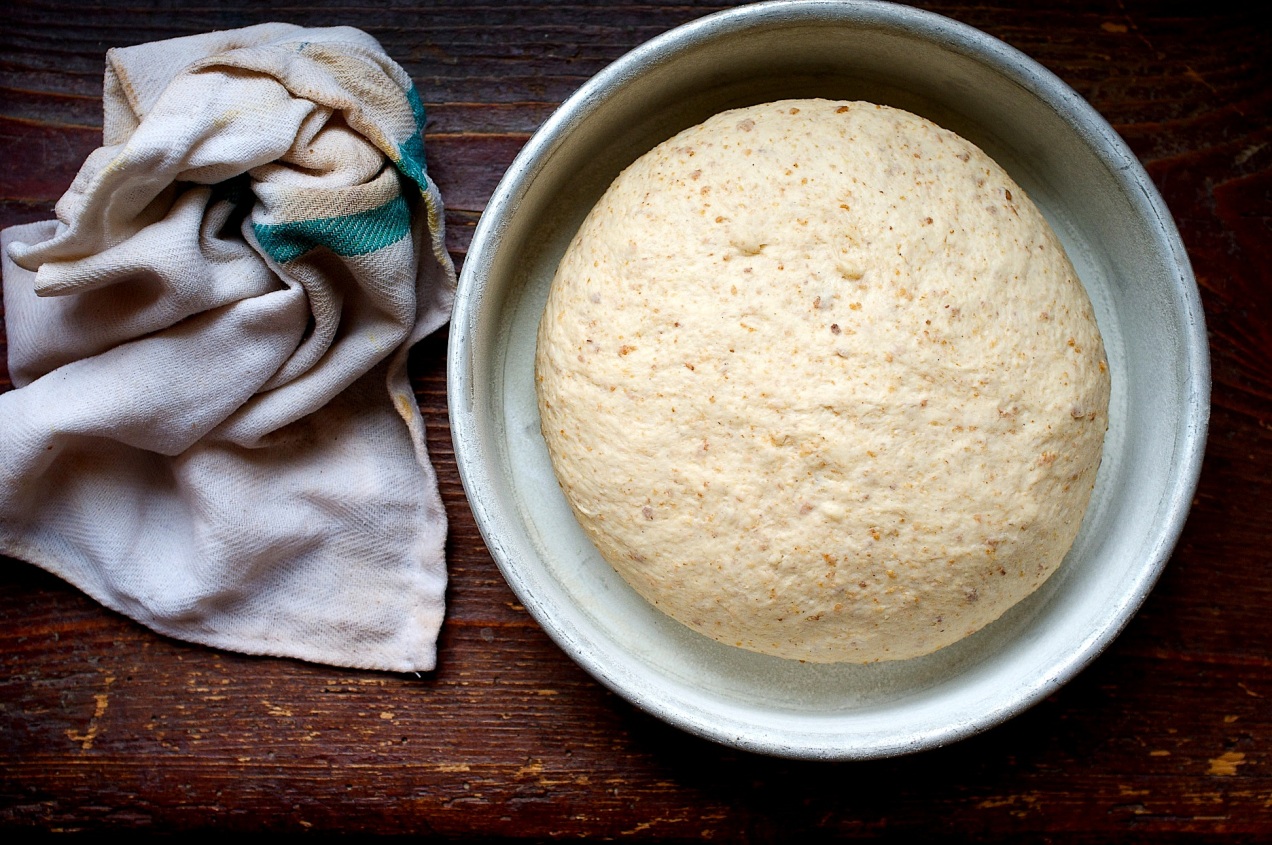
And you say but Tom this is about dinner rolls not steak. Your right. OK. Dinner rolls. There is no such thing as a quick roll. No, be quiet. Let me finish, please, hear me out. My definition and understanding of quick rolls isn’t that they are any easier to make but just means a lack of prior planning. I don’t mean by you but by the person who called it a quick roll. It isn’t any easier to make a quick roll, you still have to mix the dough, let it rise, usually twice, but after the second rise you bake it. What a quick roll lacks is time, not less effort. This is what is important. This is the step that separates the baker from the apprentice, a quick roll from a great roll. After the first rise let the dough rest overnight in the refrigerator. You need to know that the amylase rest overnight in the refrigerator helps to convert more starch to sugar and this step is what gives bread a deeper taste and a beautiful crust color. When bread dough is in the right hands it goes from a bland communion biscuit to manna from heaven.

Southern cooks, for example, have for centuries been more passionate about their bread products than most. Take Edna Lewis’s Yeast Rolls from Sponge Batter in her book A Taste of Country Cooking. It is a potato roll that is made over the course of two days. If you read the recipe it is more than “just a recipe.” This is a total act of submission, not to the dough, and is a huge gesture of respect for her dinner guests and a desire to serve them the best. Look how beautifully she writes her directions, “After setting overnight the sponge will be aromatic and light as sea foam..” Sea foam, what a perfect way to describe a starter, could it be any more visual. You can feel the love Edna Lewis has for her dinner guests in her recipes, without even tasting her food, you know it is going to be spectacular.

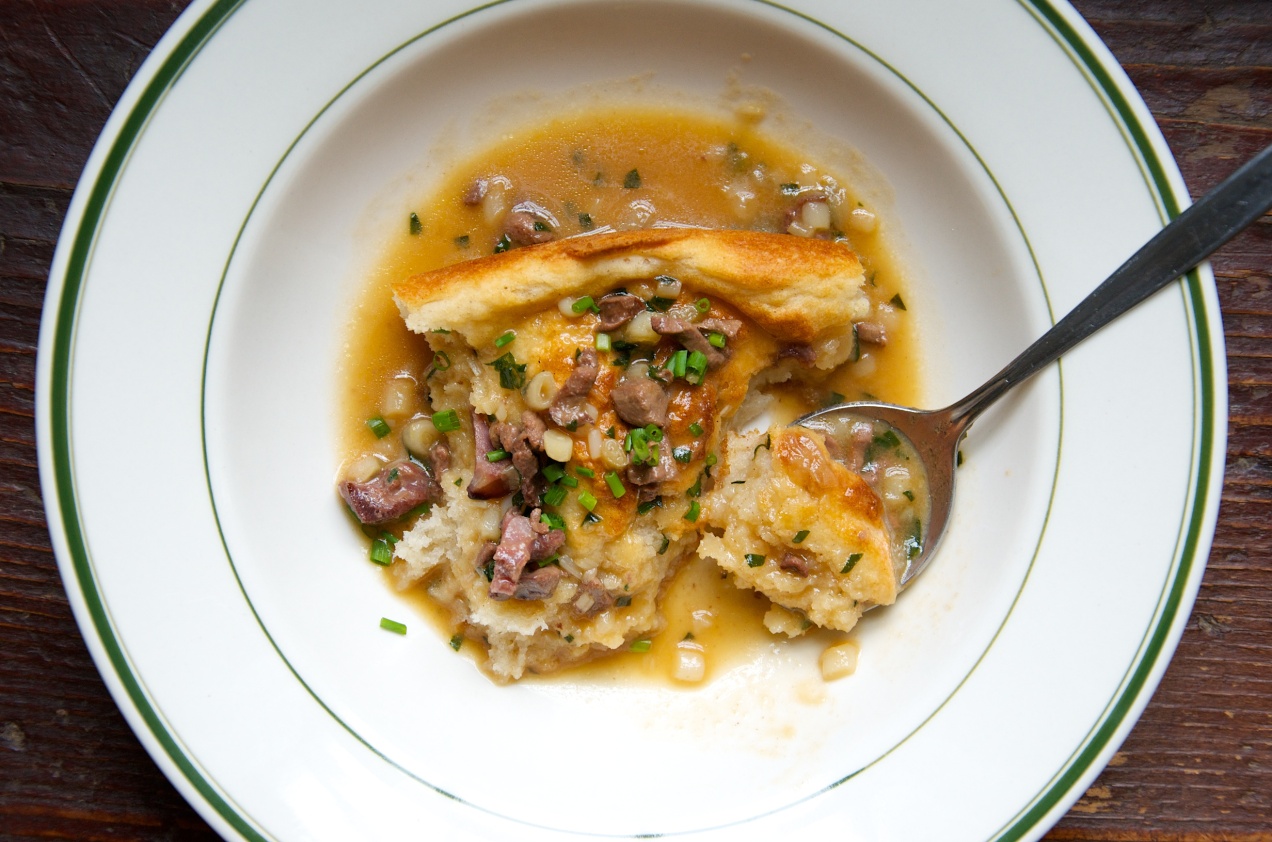
On the other hand, the other day I was looking for a kids show on PBS for Vivian when I came across Cooks Country. I saw Christopher Kimball doing his test kitchen science and talking about rolls with one of the researchers on the show. They did an audience taste test of frozen store bought rolls and they snuck in a homemade roll that fell flat against the store bought. I wanted to know more about the home made roll. Who made it? How was it made? ( actually I was thinking if Kimball’s staff can’t bake a better roll than a store bought roll and this is the best Kimball can do then why on Gods green earth would I want to use his recipes.) Then I thought why would a show like Cooks Country do this? Hasn’t country cooking always stood for home made. Then it dawned on me, the reality is most people don’t care until they are actually eating a really good roll made by someone who cared enough to make it right. I don’t know, maybe I am weird, maybe I care to much, but I guess I look at the world of food and eating a little differently than most people. I guess I look at dinner rolls as part of the foreplay of passionate and great meals. Need I say more, or should I just finish with take your time, there is always room for improvement, it takes practice, and don’t let anyone tell you it is not worth the effort and if they do you might want to divorce them from your guest list.

MAKES 9

1/4 cup water, body temperature

1 teaspoon dry active yeast

2 tablespoons sugar

1 teaspoon kosher salt, heaping, if you use a fine grind salt only use 1/2 teaspoon

3 tablespoons raw wheat germ, toasted in a saute pan until nutty smelling

2 cups unbleached all purpose flour

1 stick of unsalted butter, softened, plus some for brushing the rolls

2 large eggs

1. In the bowl of a mixer add the water and sprinkle in the yeast and let it bloom.

2. Once it has dissolved add the rest of the ingredients adding the butter last. Save the butter wrapper.

3. Using a dough hook mix the dough until it becomes elastic. Sit tight on adding any water the dough looks dry but it takes some time for the butter and eggs to hydrate the flour.

4. It should form a loose ball and pull cleanly away from the sides of the bowl. Remove the dough from the bowl and kneed it a few times until it is smooth and elastic.

5. Grease the inside of the bowl wiping it with the reserved butter wrapper.

6. Place the dough into the bowl and cover the bowl with a warm damp towel or plastic wrap and set it in a warm place. Just above room temp is fine. Set a timer for 1 1/2 to 2 1/2 hours or until the dough has doubled in size.

7. Punch down the dough. Divide it into 9 equal pieces. Using the palm of your hand and rolling in a circular motion roll the pieces of dough into nine balls.

8. Cut a piece of parchment paper to fit into a 9 x 9 inch cake pan and place it on the bottom of the pan. Place the rolls into the pan keeping a little space between them. Cover them loosely with plastic wrap and put them into the fridge.

9. The next day remove them from the fridge and let them slow rise until they get to room temperature or have doubled from the original size from the day before.

10. Preheat the oven to 375 degrees and bake the rolls for 15 minutes and then brush them liberally with butter. bake them another 15 minutes until the tops are golden brown and delicious. Remove them from the oven and let them cool 10 to 15 minutes before serving.

Standard
Bread, Grains/Legumes, Vegetarian

Bona Fide Black Skillet Cornbread

The only thing that might make this cornbread more Southern is using white cornmeal instead of yellow. Most certainly the cornbread debate has set off more feuds than history has recorded. Should it contain sugar or not is usually the big question but why should you have to make a choice. That is not to say this is one of those recipes that is going to combine the best of both worlds because it is not. You shouldn’t mix cornbreads just like you shouldn’t mix liquor. Flat out, it is always a bad idea. You should have two great cornbread recipes, one Northern sweet version and one Southern.

With that in mind you can pretty much bet when the words black skillet come before the word cornbread it is going to be Southern. The title here holds true to that theory. Actually most recipes, such as this one, vary only slightly in ingredients but usually find a fork in the road when they reach the part of the recipe that reads  “technique”.

I use stoneground corn flour because, one, it tastes great and two I like the quality of the crumb in the final product. Some people use cornmeal and let sit overnight in what is called a soaker, meaning the liquid and the meal are mixed and allowed to rest overnight and then you add the soda and baking powder before baking. Kind of defeats the purpose of quick bread which is what cornbread really is. With that in mind, what seems to work well is to let the corn flour soak for twenty minutes while the pan is in the oven heating.

Heating the pan is paramount to getting the full cornbread experience.  Without heating it you will never get the crisp crust that tastes like a cross between deep fried catfish tails and bacon.  What you have never eaten the crispy tails off of deep fat fried catfish?  Why lucky you, you still have some living to do.

To be completely stubborn if you can’t bring yourself to use either  bacon grease or butter you should probably make some other bread because, really, you will be missing the point.  If you sub out the bacon grease for real butter cut down the pan warming time to twelve minutes or the butter will burn.

Makes 8 to 10 servings

4 tablespoons bacon grease

2 cups stone ground yellow corn flour

1 teaspoon sea salt or 1 1/2 teaspoons kosher salt

1/2 teaspoon baking powder

1/2 teaspoon baking soda

1 large egg

2 cups buttermilk

1. Preheat the oven to 425 degrees. Place the bacon grease in a 10 inch cast iron pan.

2. Mix the corn flour, baking soda, baking powder and salt in a mixing bowl.

3. Beat egg and add it to the buttermilk and then add the liquid to the dry ingredients and mix quickly to combine the batter.

4. Place the cast iron pan into the oven and set a time for twenty minutes.

5. Using a dry towel or oven mit remove the pan from the oven and set it on a heat proof surface. Mix the batter with one or two quick spins and gently scrap it into the pan. You may need to use the whisk to pat it down and around so it reaches the edges of the pan. Grind some fresh ground pepper over the top.

6. Place the bread into the oven for 20 minutes or until it just starts to brown. Remove from the oven and cover it with a towel for 5 minutes. Slice and serve with lots of butter.

Standard