I often wonder what makes a recipe so good it goes viral. I am sure it’s lots of factors. Sometimes it’s the recipe itself, other times it is what the author expresses in words through their post, and sometimes it is simply because the author is very famous. This recipe, originally posted on the blog My New Roots, has shown up on lots of other sites and was even a Genius Recipe on Food 52, and rightly so.  At the very least it has gone viral in my circles.

There are lots of things to like about this bread, like stacking it with thinly sliced crisp cucumbers, topped with oily mackerel, shallots, and parsley like in the picture above.  I also like it with thick cut bacon and peas shoots, or simply toasted and topped with butter and lingonberry jam.  It is delicious bread.  I even bake it on my Big Green Egg to give it a more authentic, and Danish, baked-in-the-dying-embers of a wood fired oven flavor.

My only problem is if I make the loaf of bread following the original recipe it comes up short. I heard the same words of disappointment from others who tried it too. The bread can be fussy, difficult to cut, crumbles, and becomes dry.  Many I know have given up making it.

DSC_0426

One of my favorite ways to top this bread is with thin slices of cucmber, mackeral, parsley, and shallot.

I am sure the loaf bakes up perfect and to the satisfaction of many people every time. It doesn’t for me, but I understand when it comes to cooking and baking there are so many variables that to place fault elsewhere is simply not taking responsibility for ones own abilities. After all, it is up to the cook to get what they want from a recipe.  It is why you need to know how to cook rather then simply follow directions.  Just like different musicians playing the same piece of sheet music. The song sounds very different depending on the players abilities.  It is only because there are so many things about this loaf of bread I like that I stuck with it, experimented with it, until I got the loaf of bread I wanted, until I heard the song I wanted to hear.

I didn’t change much, although I used pumpkin seeds instead of sunflower and ground psyllium instead of seeds and I ground a portion of the oats and pumpkin seeds to create a finer crumb in the end product.  And while I use coconut oil in some recipes I didn’t use it here nor did I use maple syrup but instead brown rice syrup was substituted.   For me all these small touches made for a more manageable loaf in the end.

The fact is, made from the original recipe this loaf of bread is delicious, the taste is very satisfying, nutty, feels good to eat, and it is nourishing.  I simply made adjustments which gave me the product  I wanted to eat.  Rest assured though,  for those on a restricted diet, and those that aren’t, this seed bread is an important find.  It’s worth practicing to get it right.

_TJH0960

Seed bread packed into a pate mold and waiting to be wrapped up for a rest before baking. Notice the parchment handles.

Seed Bread

This recipe creates a less delicate loaf.

Seed and Grain Bread (adapted from My New Roots)

1 cup unsalted pumpkin seeds (1/2 cup coarsely ground)
1/2 cup golden flax meal, ground
1/2 cup walnuts
1 1/2 cups rolled oats ( I generally grind 1/2 cup coarsely in a coffee grinder )
2 tablespoons chia seeds
3 tablespoons powdered psyllium
1 teaspoon kosher salt
1 tablespoons brown rice syrup or whatever syrup you have and want to use
3 tablespoons spectrum vegetable shortening (it’s palm oil and non-hydrogentated) or unsalted butter
1 1/2 cups hot water

1. Combine all the ingredients in a bowl. Using your hands work the mass until the shortening or butter and the other ingredients are evenly distributed.
2. Line a pate mold, or small loaf pan, with parchment. To remove air bubbles, literally, pack the dough into a 3 x 4 x 10 pate mold. Wrap the whole thing in plastic wrap and let it sit for 1 to 2 hours.
3, Heat the oven to 350˚F. Remove the plastic wrap, place the loaf pan onto a baking sheet and bake the bread for 25 minutes.
4. At the end of the baking time remove the tray from the oven and using excess parchment paper as handle lift the loaf from the pan. Place the loaf, with the parchment still under it, back onto the sheet tray and bake the bread for another 20 minutes.
5. When the timer sounds, roll the loaf so that a new side is flush with the sheet tray. Bake another twenty minutes. Do this until all four sides have been baked against the sheet tray.
6. Remove from the oven and let the bread cool completely before cutting.
7. The bread is best toasted. Store in the fridge wrapped in plastic wrap.

Note: recently I baked a loaf on my Big Green Egg. It is a fantastic way to bake this loaf. Much like it might be baked in a shop in Europe using the dying embers of a wood fired oven.
Bread, dog-eared, Gluten-free, Grains/Legumes, Medium Time, Moderate, Sandwiches, Vegetarian

A Life-Changing Loaf of Bread (Redux)

Image
Chicken and Poultry, Chicken/Poultry, Cooking School

Pressure Cookers + Chicken and Dumplings

Next to farm fresh brown eggs, nothing conjures up an image of the farmhouse kitchen quite like the site of a pressure cooker. It’s Rockwellian in that it brings to mind iconic images of the aproned farmer’s wife peeling home grown carrots at the counter while on the stove behind her sits a huge pot-like contraption whistling and blowing steam through a small whole in its lid.

The image leaves you with a feeling of wholesomeness much like homemade whole wheat bread. It’s as if the pressure cooker does something magical that only the farmer’s wife knows. After all, for some reason, we always equate wholesome home cooking with the country kitchen. Continue reading

Standard
Chicken and Poultry, Cooking School, dog-eared, Gluten-free, Paleo, Soup

Putting the Bullet into Your Bone Broth: Consommé

The Family Soup Pot

©Tom Hirschfeld all rights reserved

If you can fortify coffee by whizzing in butter and making it into an emulsion of sorts, or make fortified wine by upping the alcohol to give it a boost, aging it, and calling it port then why not fortify your bone broth?

Great chefs have known the deliciousness of consommé for centuries.  Now I am not going to repackage it, call it bullet broth or anything stupid.  Consommé is fortified stock that is clarified and enriched by adding lean ground meat, finely chopped vegetables and egg whites then the whole thing is slowly brought to a simmer.  A raft forms when the egg whites cook and it floats to the top clarifying the stock so it becomes crystal clear. It has a lot to do with the albumen in the eggs and ground meat but lets not get bogged down in the science of the thing.

It is refined food.  It adds richness and mouth feel while deepening the flavor beyond anything salt could do for your stock.  It is far more satisfying to sip a cup of consommé on a cold day, on any day for that matter, then it is swill down a jar of bone broth.

It isn’t complicated to make but it does take some attention to detail.  You can’t improve poorly made stock by making it into consommé but you can make well made stock into something really special.  If you were to choose to do so you can make it into a really highly refined soup worthy of holiday dinners by adding garnishes.  The garnish for consommé is often vegetables cut with precision into a small dice, blanched al denté, and added to the broth just before the soup is served.

Whether or not you make your bone broth into consommé isn’t the point but the fact that you are making your stock at home is and you deserve a hearty pat on the back for that alone.  If you are looking for something more refined, or an occasional treat, or you just want to upgrade your holiday menu then consommé is for you.

Chicken Consommé

8 ounces ground chicken breast

1/2 cup yellow onion, minced

1/4 cup celery, small dice

1/4 cup carrot, grated

5 ounces egg whites, about 4 large eggs

1/2 cup tomato, chopped

a sprig or two of chopped parsley, minced

1/4 teaspoon dried thyme

1 bay leaf

1 whole clove

1/4 teaspoon whole black pepper corns

2.5 quarts cold homemade chicken stock ( the link takes you to my recipe for rich roasted beef stock which is a template for any stock, just substitute chicken bones for the beef bones)

1.  Keep everything cold.  The colder the better, just not frozen.

2. Combine all the ingredients except the stock in large heavy bottomed 4 quart pot.  Using a wooden spoon stir everything together for 2 minutes.  You need to stir it well to break up the protein strands.  This is all part of the clarification process.

3. Add the cold stock and stir everything to combine.

4. Place the pot over medium low heat.  Let it come to a soft boil very, very slowly.  Stir often and by often I mean every 15 to 30 seconds otherwise your egg whites could burn at the bottom of the pot.  Not only that by stirring you keep the albumen doing its job of clarifying.

5. As it get close to boiling stop stirring.  If you see strings of egg white and your consommé is starting to look like egg drop soup stop stirring immediately.    The raft  needs to form and as it does it will rise to the top.  Reduce the heat so the consommé does not come to a hard boil.  A hard boil will destroy the raft.

6. Once the raft has stabilized and looks like a dirty egg white omelet us a spoon  and make a vent in the raft.  This is like taking the lid off a boiling pot, it keeps it from coming to a boil or boiling over.

7. Simmer the stock for and hour and a half.  At the end of the simmering time use a ladle and ladle the stock through a fine mesh strainer, or a coffee filter, into a storage container.  Season it to taste with kosher salt.  If you use table or sea salt it could cloud the consommé because of impurities in the sodium.

8. Make into soup, or serve hot in your favorite tea or coffee cup.

Standard
Appetizers/Starters, Gluten-free, Grains/Legumes, Salad, Side Dishes, Vegetarian

Three Bean Salad, Redux

Three Bean Salad

Now that picnic season is upon us, I get nostalgic over classic summertime fare. There is nothing quite like a family reunion over fried chicken and a potluck dinner, tables threatening to buckle under the weight of all the CorningWare and Pyrex.

Of course, there are the old favorites: green bean casserole, scalloped potatoes, pea salad with bacon and mayonnaise, three bean salad, and most certainly a mustardy potato salad — and, if luck is with me, an old-fashioned custard pie sprinkled with a little nutmeg. I love all these foods — but this year, I want something new. Continue reading

Standard
Dinner, dog-eared, Gluten-free, Long Time, Main Dishes, Moderate, Pork, Recipes

Chinese Style Sticky Ribs

Chef Leichte spun on the balls of his feet. A millisecond ago he was heading forward, and I was following him. Now we are face to face, and he pokes my chest with his finger. “Commit!” he says in a raised voice, his chef’s toque rising from his head and towering above me like the leaning Tower of Pisa. “Quit asking all these questions and cook! Commit to the recipe; if it fails, we will fix it, but realize you will probably learn more from your mistakes than if I coddle you through the process.” Continue reading

Tips for Reading Recipes (& Chinese Style Honey Hoisin Sticky Ribs)

Aside
Brunch, Chicken and Poultry, Chicken/Poultry, Dinner, dog-eared, Gluten-free, Main Dishes, Medium Time, Moderate

The Art of Honest Fried Chicken (A Lifestyle Choice)

Frying chicken, at its best, is a state of mind formed much in the same way as the quiet back beats of a porch-sitting session with a dear friend. It has a rhythm. It is good company on a sunny summer afternoon. It is pointless to rush. Futile, even. Besides, the comfort of a good friend comes from the effortlessness of meaningful conversation and is further heightened by the knowledge you have nothing you would rather do. Continue reading

Standard
Cakes, Desserts

A Drive-in Movie and Candied Lemon Sheet Cake

A lemon cake. That’s what I want. Something to replicate the Lemonheads from the snack bar at the drive-in movie theater. The sour pucker is perfect for the late summer heat. You could say I am fond of lemon. I always have been a borderline addict.

Sunday is family night and we are going to the drive-in again. We will make a picnic of it this time. I pack the 4Runner with food, sleeping bags, a couple of pillows, some lawn chairs, and bug spray. It isn’t a long drive to Mechanicsburg, over one state highway and up another. Other than the Welcome to Mechanicsburg sign, the drive-in theater is the only indication that you’re in a town. All the times I’ve been here, I’m still never sure whether there was ever anything more than the drive-in and one lonesome farmhouse. It’s all surrounded by cornfields — always cornfields.

There are ten or more minivans parked on the gravel road leading to the drive-in and everyone is waiting single file at the tollbooth-style gate. It’s always at this moment, waiting to get in, my elbow resting on the open window of the door, the sting of the hot sun on my already sunburned arm, that I look up at the two story, paneled movie screen and silently reminisce.

I remember the brightly colored muscle cars of the kids whose parents indulged them. My friends and I would wander the lot with sodas in to-go cups full of crushed ice spiked with Old Crow whiskey and bum cigarettes from each other. The noise of the B movies or horror flicks was background color to our youthful attempts at manhood. No one ever watched the movie; mostly we walked around, flirted with girls, and waited for a fight to break out because a fight always broke out.

The line starts to move and inside we follow the other cars, back in to our space, open the hatchback, and get comfortable. The scene could have come from the set of The Bevery Hillbillies: a red pickup truck with a bed full of people sitting in lawn chairs. Kids start playing tag, soccer, and Frisbee in the grass in front of the screen, passing away the time until it’s dark enough and the movie begins.

I set the cooler, which will also be our table, on the grass. The girls are off to look for their friends. Amy unfolds the chairs and we settle in for dinner and a movie. The herb roasted chicken legs, the potato salad, and the slaw are as good as always. Just as the movie starts I get out the pieces of lemon cake. It’s the real star of the show.

Serves 9 to 12

Candied Lemon Slices

  • 13 1/8-inch lemon slices, seeds gently removed
  • 1 cup sugar
  • 1 cup water
  • strips of zest from 2 lemons
Sheet Cake

  • 1 cup Bob’s Red Mill Gluten Free Flour Mix
  • 3/4 cups sugar
  • 1/2 teaspoon xanthan gum
  • 1/2 teaspoon baking soda
  • 2 tablespoons candied zest, minced
  • 1/4 teaspoon kosher salt
  • 2 sticks of unsalted butter, each gently melted in its own bowl and kept warm, plus more for greasing the pan
  • 3 tablespoons powdered dry milk
  • 2 large eggs, room temperature
  • 3/4 cups whole milk, warm
  • 1/2 teaspoon pure lemon extract
  • 1/2 teaspoon pure vanilla extract
  • 8 ounces powdered sugar
  • 3 tablespoons heavy cream
  1. Pour the sugar into a saute pan large enough to hold the lemons in a single layer. Place the lemons and zest in a single layer on top and then add the water. Place the pan over medium heat and bring to a boil. Reduce the heat and simmer.
  2. Simmer the lemon slices until the sugar syrup has reduced by half or more and the pith and rind of the lemon appear transparent. Carefully remove the slices and zest to a piece of parchment being sure not to let the pieces overlap. Let them cool.
  3. Grease a quarter size sheet tray (9 x 13 inches) with butter. To make the cake heat the oven to 375 ˚ F. Combine the flour, dry milk powder, sugar, xanthan gum, baking soda, minced candied zest, and salt. Combine half the melted butter with the eggs, milk, and extracts. While whisking add the dry to the wet ingredients. Pour the batter into the prepared sheet tray. Make sure the batter is evenly distributed so it rises evenly. Bake for 30 to 40 minutes or until a toothpick inserted into the middle of the cake comes out clean.
  4. While the cake is baking, make the icing. Combine the powdered sugar, cream, and remainder of the warm butter in a mixing bowl. Whisk until smooth. Keep the icing luke warm.
  5. When the cake has finished baking remove it from the oven and let it cool right in the sheet pan for 15 minutes. When the timer goes off pour the warm icing over the top and spread it out evenly with a spatula. Lay on the slices of lemon and let the cake cool. Refrigerate or serve cold.
Standard
Desserts/Sweets, dog-eared, Fancy, features, Gluten-free

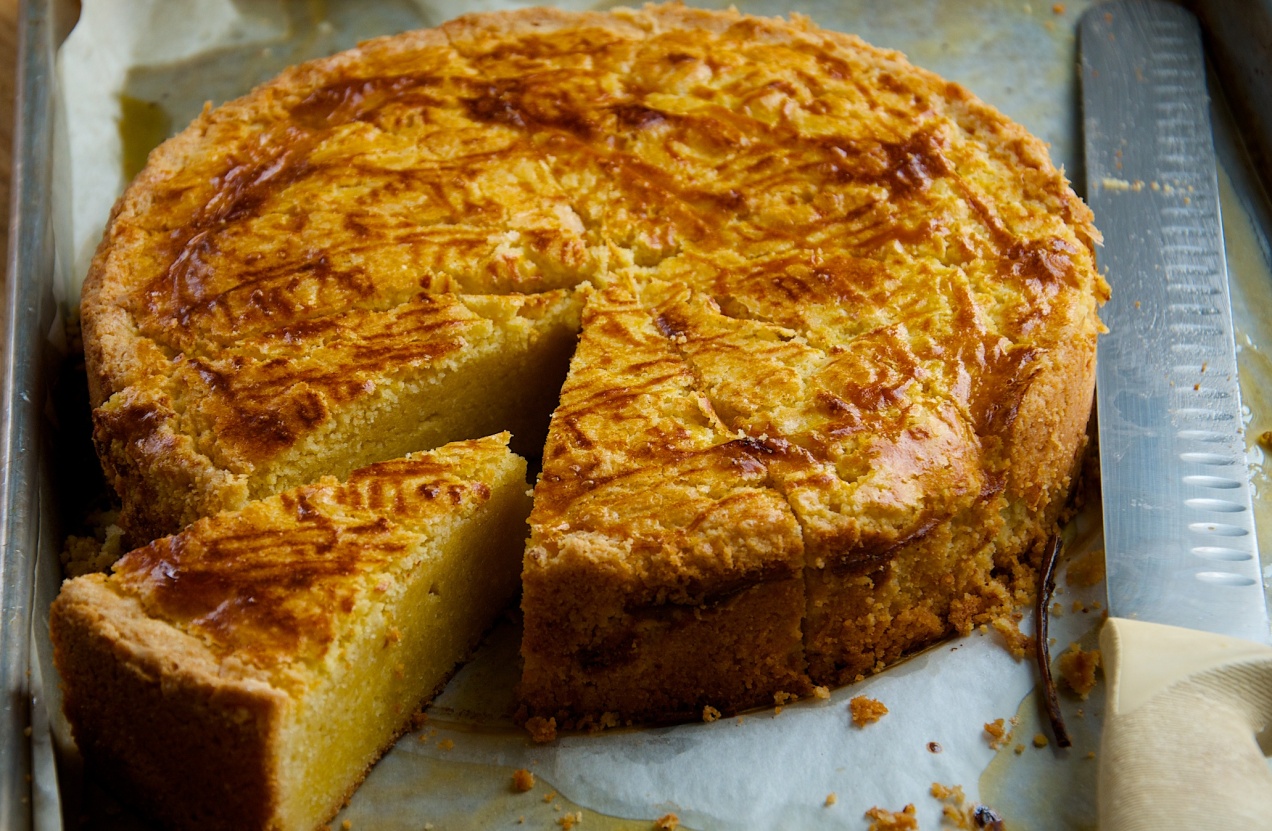
Breton Butter Cake

Breton Butter Cake

This morning little Lynnie keeps yelling and pointing in excitement at the cake I made for last night’s Sunday dinner. She is telling me she wants it for her birthday. The heels on the last three slices of the cake have been nibbled. Last night she kept slipping her little hand in and under the wrap so she could pinch and sneak little pieces off. The edges now look like we have a mouse in the house, and I finally had to move the cake to higher ground.

We had guest last night for dinner and while making dessert yesterday I recalled making a promise this year to make more desserts. I haven’t been. So I started thinking about this commitment while making this cake. I figured I need to sort out my likes and dislikes. Set some parameters and set myself up for success.

Most of the time I don’t want anything sweet. I am not a big sweets person. When I do a simple, small piece of dark chocolate usually suffices. I don’t want anything overly sweet.

Not only that, but as with many chefs I have a certain disdain for making desserts. It’s not that I don’t like to make them but that these grumblings occur because I usually wait till everything else is done before I think to make something. It is like opening the dishwasher to to put in dirties only to find you haven’t yet put up the clean ones. I have no explanation for this other than I think it comes with the toque. It’s why the gods made pastry chefs.

The idea of a dessert that holds the potential of a coffee or tea break snack but can double as an after-dinner treat always appeals to me. I am always out to kill two birds with one stone.

I have made this cake multiple times but I haven’t made it since I became gluten-free, so I figured now would be as good a time as any. Knowing the kind of cake it is — a very buttery shortbread — I figured it would make the conversion without suffering. It did. In all honesty I think I like it better gluten-free. The rice flour really gives it a quintessential butter cake texture in a shortbread way.

There are technical things I like about it too, or maybe I should say, the lack of technical things. It is a put-all-the-ingredients-into-a-bowl, mix, dump and bake affair. Not a lot of extras to clean up.

It holds well too. It is on day three, still on the sheet tray, covered with plastic wrap and pieces keep disappearing.

It is a cake of no regrets and, if this afternoon I do have any, they are gone by the time I have finished my last delicious bite and sip the last sip of coffee from the cup. Again, two birds with one stone.

Breton Butter Cake (Makes 12 pieces)

  • 600grams King Arthur all-purpose gluten-free flour
  • 30grams corn starch (1/4 cup)
  • 395grams sugar (2 cups)
  • 448grams salted butter, yes salted, soft (4 sticks)
  • 140grams egg yolk (7 yolks)
  • 22grams rum (2 tablespoons)
  • 1egg yolk mixed with one tablespoon of milk
  1. Heat the oven to 400 degrees F.
  2. Sift the flour and cornstarch into the bowl of a mixer. Add the sugar and butter. Use a rubber spatula and scrape every bit of butter off the butter wrappers and put it into the bowl too. Then, using the paddle attachment, mix until combined. Add the yolks and rum. Mix till smooth.
  3. Using one of the butter wrappers grease the inside of a 9 inch ring mold that is 2 inches deep or spring form pan. If you use a spring form pan, dust it with flour after greasing and tilt and shift the pan so you get the sides dusted too. Shake out the excess.
  4. Using a spatula, scoop the batter into the mold then spread the batter out evenly. You may need to moisten the spatula with a little water to keep the dough from sticking to it.
  5. Using the tines of a fork make a cross hatch pattern on the surface of the cake. Using a pastry brush gently paint the top of the cake with the yolk and milk wash.
  6. Bake the cake for 45 minutes. Keep an eye on it and if it starts to brown to quickly reduce the heat. The top should brown and it should be firm to the touch. Remove the cake from the oven and let it cool completely before removing the ring.
Standard
Bread, Cooking School, dog-eared, Gluten-free

Saving Grace Biscuits

Saving Grace Biscuits

Back when I thought I could eat gluten I was a biscuit hound.  It was nothing for me to scarf down two or three.  I have been known to forgo the rest of dinner for a good biscuit.  I always considered myself a connoisseur, from angel biscuits to crescents or buttermilk to sweet potato I think I have made them all.  Some of them were more fussy to make then others and all always in need of a light hand and a quick touch to keep them from being tough.

This biscuit is what I call a redneck biscuit and  I call them this with fondness.  They are a working mom’s weeknight biscuit.  They come together quickly and without worry and they lack nothing other then fussiness.  There is nothing in the instructions about overworking the dough, you don’t need to look for a cornmeal texture in the flour, there is nothing about spacing the biscuits perfectly or about flakiness or making sure you cut the edges cleanly for a good rise.  No they are pretty much cream, add the liquid, stir and scoop.Saving Grace Biscuits

They are inspired by Shirley Coriher’s Touch-of-Grace biscuits which I started making just before I found out I couldn’t eat gluten.  They are the kind of biscuits that are gooey in the middle, they aren’t layered but are tender and airy.  They are the kind of biscuit you might find at a really good diner.   You can imagine this old dogs disappointment when I had to stop eating them.  The thing is about 4 months ago I started playing around with and making gluten-free biscuits.  While I found many I liked, I went nuts for none.

Then I got a burr up my craw and decided I wanted to make Shirley’s biscuits but gluten-free.  It wasn’t all that tough, or I should say, maybe I got lucky.  I found a recipe on Bob’s Redmill and, using it as a base and replicating what I knew about Mrs. Coriher’s biscuits, well,  low and behold I struck biscuit gold.

In all honesty I like the flavor of this biscuit better then the original.  The sorghum flour has such a great flavor.  One of the big bonus’s if there are any left, which is a rarity around here, is they hold well into the next day or two.

Saving Grace Biscuits (inspired by Shirley Coriher’s Touch-of-Grace Biscuits)

1 cup white sorghum flour

1/2 cup potato starch

1/2 cup tapioca flour

1 teaspoon sugar

1 1/2 tablespoons baking powder

1 teaspoon kosher salt

1/2 cup unsalted butter

1 1/2 to 1  3/4 cups buttermilk

1. Heat the oven to 450˚F.  

2. In a bowl combine the dry ingredients.

3. Cube the butter and add it to the flour.  Using your hands work it into the flour until there are no big hunks of butter left.

4. Add the buttermilk and stir with a wooden spoon,  The batter will be very loose, it should barely hold its shape before  slowly begins spreading.

5. Liberally butter an eight inch cake pan.  Using a half cup ice cream scoop, scoop up a ball of dough and turn it out into the pan close to the edge.  Continue turning out biscuits working your way around the outside first leaving room for the seventh and final biscuit in the middle.

6. Bake the biscuits for 23 minutes or until browned on top.  When you remove them from the oven they will drop.  That is OK.

7. Serve with lots of butter.

Standard

Smokin’ Black-eyed Sandwich

This is a perfect example of vegetarian food that stands on its own. Not much different than falafel which has stood its ground for years. Your could in fact replace the mayonnaise with a yogurt sauce of your liking.  Something with tomato and cucumber would draw down the heat nicely. It would go well with grilled pitas too so if you wanted to you could take the whole meal and easily give it a Middle Eastern flare. When it is a sandwich like the above I really like it with crunchy shoestring fries and I have even been known to stack the fries right between the bread with the fritter for a nice crunch.

Serves 6

2 each 14 oz. cans black eyed peas, drained

1/2 to 2/3 cup rice flour

1/2 onion minced

2 cloves of garlic, chopped

3/4 teaspoon dried thyme

1/2 teaspoon cayenne pepper

kosher salt and fresh ground pepper

2 carrots, peeled and grated, about 1 cup

lettuce, shaved

vegetable oil

bread, buns or pitas

mayonnaise or you choice of condiment

1. Place the drained peas, 1/2 cup rice flour, onion, garlic, thyme, cayenne and a 1/2 teaspoon of kosher salt and some fresh ground pepper into the bowl of a food processor. I like the mix to maintain some chunkiness but it is important for it to be fairly smooth so it holds together. Add up to 1/3 cup more rice flour as needed. So process until smooth but it doesn’t by any means need to be perfectly smooth. Add the carrots and mix, not process, them in thoroughly with a spatula. I like to let this sit for at least an hour so the rice flour has time to hydrate and thicken the mix so it stays together better. You could even cover it and refrigerate overnight. If it seems loose before you are getting ready to cook it add more rice flour.

2. Heat a large non-stick skillet over medium high heat. Add the oil and let it get hot. Form the mix into 6 balls and then shape them into patties. Fry then until crispy on both sides. Build you sandwiches and serve.

Grains/Legumes, Meatless Monday, Sandwiches, Vegan, Vegetarian

Smokin’ Black-eyed Sandwich

Image
Side Dishes, Vegetables

Fried Green Tomatoes

More often then not, actually to many times to count, I have seen fried green tomatoes served one way, sliced, Cajun spiced and dredged almost always in cornmeal.

Then last year Amy and I went to The Publican restaurant in Chicago.  It is an everything pig restaurant.  Crispy pigs ears, everything fried in lard, boudin blanc  and, well, you get the picture.

It is great restaurant so it isn’t surprising they have amazing side dishes too.  The one that caught my attention was the fried green tomatoes.  I almost didn’t order it but,  then as I often do,  at the last minute I went back to it and did.  I was very, very happy I did.   It was simply the most delicious version of fried green tomatoes I have ever eaten.

This was a midwinter outing.  So green tomatoes at home were out, at least until summer, but I was impressed enough I looked for the recipe online and was surprised to find nothing, well,  not nothing there were zillions of fried green tomato recipes cooked like I mentioned earlier.

Nevertheless this dish resonated with me.  I made it once earlier this summer and it wasn’t to my standards.  It was really good but it just didn’t work like I wanted from a technical standpoint.  Now it is late fall and I have come back to it and this time it came out great.

It is so good for several reasons.  The tomatoes are cut into wedges which keeps them a little firmer when cooked, not tough, and you get more tomato jelly with the wedge shape then if you had a slice.  Also oatmeal and pig are like bread and butter, they just go together, and it feels good to have these two flavors co-mingling and you can accomplish this without buying buckets of lard.

It is time to share this recipe.  I hope you enjoy it.

Note: I made this gluten-free and egg free.  If you don’t need to be gluten-free or egg free then substitute in all-purpose flour for the Cup4Cup and instead of using the egg replacer use three egg whites beaten to stiff peaks.

Makes 4 servings

7 to 10 green tomatoes, about the size of a small tangerine, cut into 4 or 6 wedges

1/3 cup quick cooking oats, not instant oats

1/3 cup quick cooking oats, coarsely ground

1/2 cup Cup4Cup flour (or all-purpose flour)

1 tablespoon paprika

1 1/2 teaspoon ground garlic

2 tablespoons egg replacer mixed in a large bowl with 1/4 cup water (or 3 egg whites whipped to medium peaks, also in a large bowl)

1 teaspoon salt

1/2 teaspooon black pepper

 peanut oil for frying

1 thick slice pancetta or bacon

1. Combine the oats, flour, paprika, garlic powder salt and pepper in a large mixing bowl.

2. Heat the oven to 250˚ F.  Pour enough peanut oil into a 6 inch deep cast iron Dutch oven to come 1/3 the way up the sides of the pan.  Add the pancetta to the oil.  Place it over medium high heat and heat the oil to 375˚ F. on a fry thermometer.  Make sure to remove the pancetta when it is crispy and has rendered its fat to the oil and make sure you, as the cook, eat the pancetta because it is within the rights of every good cook to eat the best bits while standing at the stove and if the peanut gallery doesn’t like it tell them to learn how to cook.

3. When the oil is just about to temperature toss half the tomatoes with the flour mix making sure to coat the tomatoes well.  Place them into the bowl with the egg replacer or egg whites and toss them to coat.  Put them back into the flour mix and coat them well.  Remove them to a cookie cooling rack.  Repeat this step with the remaining tomatoes.

4.  If the oil is to temperature carefully add  half , or less, of the tomatoes to the oil making sure not to crowd them.  When they start to take on color and brown remove them from the hot oil, sprinkle them with salt,  and place them onto the cookie rack.  Add the rest of the uncooked tomatoes to the pot then slide the fried tomatoes into the oven to keep them warm.

5. Serve with you favorite tartar sauce, aioli, or hot sauce

Standard